One manual. Every front.
A field manual for the player who is past the tutorial and wants to know what to do, buy, bring and shoot next: which warbond items to buy and in what order, how the weapons compare, what kills each enemy, and how to play in a squad without getting your friends killed. It is being built from research dossiers, each re-checked by an independent verifier; every number will carry its source and the patch it was checked against, and estimates are tagged so you know what to double-check.
Try
Pick your mission
Buy the right things first
A ranked purchase order for Medals and Super Credits: what to take from the free warbond, which premium warbond to buy first, and what can wait.
Know what kills what
Every enemy's armor and weak points, the least armor penetration that hurts it, and the weapons, stratagems and tactics that bring it down.
Join your first squad
Quickplay and the SOS beacon, what carries over when you join someone else, sharing samples and reinforcements, and the unwritten rules.
Compare the weapons
Every primary, secondary, throwable and support weapon side by side: damage, penetration, fire rate, handling, and what each is best and worst at.
Bring the right loadout
Loadout principles and squad roles, beginner loadouts built from free items, and loadouts by faction and difficulty.
Survive your first missions
The core loop, calling stratagems, the difficulty levels, the currencies, and the ship modules worth buying first.
What lives here
Every tab, grouped the way the sidebar groups them, with its chapter count. The group link in the breadcrumb above each tab's title leads back to its band here.
Start Here
Your first hours, your first squad, and what every currency buys.
Arsenal
What to buy and in what order, and how every weapon compares.
The Enemy
What kills what: armor, weak points and counters for every unit.
Operations
What to bring, where to drop, and the war you are fighting.
Beyond
The tools and people worth following, every patch, and how this was made.
How this site works
Finding your way
- Sidebar: every tab in five groups. The tab you are reading opens its chapters, and the chapter on screen lights up. The menu button hides it on a wide screen and opens it as a drawer on a phone.
- Breadcrumbs: Home, then the group, then the tab, above every title. The group link leads to its band on this page.
- On this page: the rail beside each tab lists its chapters and sections and follows your scroll. On narrower screens it folds into the page header, and on a phone a chapter strip under the top bar opens the list.
- Previous and next: the foot of each tab links its neighbors in reading order, and lists the other tabs that link to it.
Make it yours
- Search: press / anywhere and type. Each result names its kind (tab, chapter, section, step, table row, tip, card, figure) and where it lives; ↑ ↓ and Enter pick one, Esc closes.
- Preferences: the sliders button in the top bar turns motion and the scanlines off, shows honesty tags as labels, dots or not at all, opens every spoiler, sets the text size and hides the reading-progress bar. Your choices stay in this browser.
- Keys: [ and ] step to the previous and next tab, t goes back to the top, Esc closes whatever is open. Every link is a real address, so Back and Forward work and "Copy link" copies the chapter you are reading.
Know what's verified
- approx a rounded or patch-sensitive number. Expect drift between patches.
- community-tested behavior established by player testing rather than official notes.
- unverified flagged during research as thinly sourced. Treat it as a rumor until you confirm it in your game.
- The header of each tab counts its tags and says which patch the tab was checked against; that chip opens the tab's Sources and verification fold. Story spoilers sit behind blurred violet boxes: click or press Enter to reveal, and search never reads them.
The fastest way to use this manual mid-session: keep it open on a second screen, press /, and search the exact thing that is killing you. The answer is usually one jump away.
Basic training01
Getting Started
Your first hours after the tutorial: the loop from Super Destroyer to extraction, calling stratagems on PC, the three rules that keep you alive, and the settings worth changing.
On this page6 chapters
Your first hours: do these, in order
Basic training leaves you with a starter kit, about 1,000 Requisition and the free Helldivers Mobilize! warbond. Set up your keys, take the daily Personal Order, learn on difficulties 1 to 3, and spend each currency on its first job below. Carry anti-tank before you move up to difficulty 4.
- Set up your keys before the next dropPut the stratagem directions where you can reach them on the move, move push-to-talk off Caps Lock, and bind the quick weapon-function keys. All three are in PC settings and controls.
- Take the Personal Order every dayOne task, 15 Medals, a new order every 24 hours, and your squadmates' progress counts toward yours.
- Learn on difficulties 1 to 3, in full operationsLoot is richest there: below difficulty 4 no rare samples compete for the loot spots, so Super Credits and Medal cases turn up more often. Difficulties unlock one at a time: complete an operation at your highest unlocked difficulty to open the next one.
- Spend your first Requisition on an Eagle, then on anti-tankBuy the Eagle Airstrike (4,000 Requisition) once you can afford it, then the EAT-17 Expendable Anti-Tank at level 3 (3,000). The whole shopping list is in Levels and unlocks.
- Spend your first Medals in Helldivers Mobilize!Its Super Credit stacks are the cheapest in the game (500 SC for 22 Medals on pages 1 to 5), and page 3 holds its first booster, Hellpod Space Optimization (15 Medals), one of four boosters in GameRant's S tier (February 5, 2026). Follow the Medal-by-Medal plan, and put your first 1,000 Super Credits into Democratic Detonation, rated S by GamesRadar's warbond list (August 13, 2026) and S+ by a u.gg-based Steam guide (August 19, 2026) community-tested. If your Super Citizen Edition came with a Premium Warbond Token (premium warbonds only), unlock Democratic Detonation with it instead and keep your Super Credits.
- Put your first 300 common samples into four ship modulesDonation Access License, Liquid-Ventilated Cockpit, Targeting Software Upgrade and Exploding Shrapnel need no rare samples and help from the next mission on. The rest of the order is in Ship modules.
- Carry anti-tank from difficulty 3, then move up to 4Automaton tanks join the regular enemy pool at difficulty 3; Chargers, Hulks and Stalkers join at 4, where rare samples start. Bring the EAT-17, or the GR-8 Recoilless Rifle from level 5, before you step up. The three rules explain why.
- Level 10: weapon attachmentsPrimaries level up as you use them and take attachments you buy with Requisition. The AC-8 Autocannon, a flexible answer to medium armor, fabricators and flying enemies, unlocks at level 10.
- Difficulty 6 and up for super samplesThe tier-3 ship modules need them, above all Expanded Weapons Bay: one more use of every Eagle strike per rearm.
- Level 25: exosuits and the FRVThe two Requisition exosuits and the M-102 Gunner FRV unlock at level 25. Arrowhead puts the level by which every weapon, stratagem and piece of gear that matters for a loadout unlocks at about 25; only the TD-220 Bastion tank may come later, at level 30 on the community wiki unverified. The levels after that, up to 300, are prestige.
- Squad upNothing you earn is split in a squad, and every sample the squad extracts is credited to each member in full. Quickplay, SOS calls and the unwritten rules are in the multiplayer checklist.
1.1What basic training leaves you
All of this is yours on your first visit to the ship. Basic training pays 100 XP, exactly what level 2 needs, so every stratagem the wikis place at level 1 or 2 is already open to buy.
- Weapons: the AR-23 Liberator, P-2 Peacemaker, G-12 High Explosive and MG-43 Machine Gun. The G-12 grenade closes bug holes and fabricators; the MG-43 is a support weapon you call down as a stratagem.
- Stratagems: the Orbital Precision Strike and MG-43 Machine Gun, free. Reinforce, Resupply, SOS Beacon and Eagle Rearm come as standard issue and never take one of your 4 slots.
- Armor: the B-01 Tactical set. Its Extra Padding passive raises its armor rating without slowing you down, so it moves like medium armor and takes hits like heavy armor: a sound default on every front.
- Currency and a warbond: about 1,000 Requisition, and Helldivers Mobilize!, the free warbond: 10 pages of gear, with 750 Super Credits to claim along the way.
- A cape and two emotes, all cosmetic. You can replay basic training from the game menu whenever you want a safe place to practice.
The core loop: ship, drop, objective, extraction
Every session runs the same loop: pick a planet at the war table, build a loadout, drop, complete the main objective, extract, then spend what you earned. Objectives pay XP and Requisition even if you never get out; samples count only once they are aboard the shuttle.
- Pick a fightAt the war table on the bridge, choose a planet, a mission and one of 10 difficulties. Play the planets in the current Major Order: when the community wins it, everyone who took part gets its Medals.
- Build your loadoutA primary, a secondary, a throwable, body armor (helmets and capes are cosmetic), 4 stratagems and one booster.
- DropYou can steer your hellpod as it falls: land it on an enemy for a free kill, and away from your squad.
- Do the jobComplete the main objective first, then optional objectives, outposts and points of interest while time allows. A main objective pays 500 Requisition and 100 XP, an optional one 200 Requisition and 50 XP, and destroyed outposts pay 50, 100, 150 and 200 Requisition with 5, 10, 20 and 40 XP, from light to giant. The difficulty bonus multiplies the XP and Requisition.
- ExtractCall the shuttle at the extraction terminal and hold the zone: it arrives 120 seconds later, as long as at least one diver stays within 50 m of the beacon. When the first diver boards, the shuttle lifts off 20 seconds later and reinforcements stop, so board last.
- SpendRequisition and samples at the Ship Management terminal (stratagems and ship modules), Medals and Super Credits at the Acquisition Center (warbonds and the Superstore). What each one should buy first is in Currencies and caps.
2.1Operations and mission timers
An operation is a chain of missions on one planet (1 at difficulties 1-2, 2 at 3-4 and 3 from 5). Finish them all for the full Medal payout: fail one and the rest of the operation fails with it. Operation modifiers, extra rules such as longer call-in times, arrive with difficulty: one from difficulty 5, two from difficulty 8.
- Timers: most missions give you 40 minutes; Evacuate High-Value Assets, Repel Invasion Fleet and Activate TCS+ Station give 20; Eradicate missions and Rapid Acquisition 15; Blitz missions 12.
- When the timer runs out, your Super Destroyer leaves orbit: no more stratagems, no more reinforcements, and an emergency shuttle comes to the extraction zone on its own.
Every mission type and each difficulty's changes are on Missions, Objectives & Difficulty; the extraction rules in full are in Extraction.
2.2What you keep when it goes wrong
- Objectives: the XP and Requisition for every objective you completed are paid whether or not you extract (a few carry objectives pay only if you extract with the item).
- Pickups: Medals, Super Credits and Requisition slips are credited the moment someone picks them up, to every diver in the mission.
- Samples: they count only once they reach the shuttle. A dead diver drops the samples they carried, so pick them up; a diver left behind loses what they hold.
- A wipe: a squad killed with no reinforcements left fails the mission and the operation, unless the main objective was already done, which counts as a success.
Every mission you finish counts toward one Galactic War that the whole community fights together against 3 enemy factions: the Terminids (bugs), the Automatons (bots) and the Illuminate (squids). Major Orders set the community's goals. The story so far is on the war tab, sealed behind spoiler covers.
Three rules that keep you alive
Most early wipes come from three mistakes: letting an enemy call reinforcements, meeting armor with a gun that cannot get through it, and leaving spawners open. Stop the call, carry anti-tank, and close holes and fabricators with explosives.
3.1Rule 1: stop the call for reinforcements
Every front has enemies that summon more of their own, and one call turns a patrol into a siege. The call can be interrupted, so kill the caller first and deal with the rest after.
Kill the bug in the orange cloud
Most small and medium bugs can call a breach: the one that spotted you stands still and releases an orange cloud, and when the call completes a wave bursts out of the ground. Kill it during the call; any gun works, and a Warrior or Brood Commander can still call with its head shot off. If a breach opens anyway, put an Orbital Gatling Barrage or Eagle Airstrike on it and fall back. Breaches and detection
Kill the bot raising a flare
Every light bot carries a red flare that calls a dropship, and the draw is slow enough to interrupt: kill it and the drop never comes. Dropships come from the same direction all mission, so when one does arrive, move away from that side. Air and bot drops
Shoot every Watcher on sight
Only the Watcher, a flying drone that sweeps the ground with a search cone, calls reinforcements, and it brings in Warp Ships. Aim at center mass and kill it the moment you see it: once the "Illuminate Ships Incoming" message appears, the call has already gone out. The horde and its callers
3.2Rule 2: bring something that gets through armor
Every attack has an armor penetration value (AP) and every part of an enemy an armor value (AV). If your AP is higher, you deal full damage; if it is equal, 65%; if it is lower, the shot bounces off and does nothing. Your starter AR-23 Liberator is AP 2 (light): fine against small enemies, useless against a Charger's head, a Hulk's armor or a tank's hull.
- Read the hit markers. A red X means full damage, a white X means 65%, and a ricochet icon means none: switch weapons or aim for a weak spot.
- Know when the armor arrives. Automaton tanks and Scout Striders join the regular enemy pool at difficulty 3; Chargers, Hulks and Stalkers at 4, where a Bile Titan or Factory Strider can already turn up in an Eliminate mission.
- The cheapest answer is the EAT-17 Expendable Anti-Tank (level 3, 3,000 Requisition): AP 6, two launchers per call, and back every 70 seconds. At level 5 the GR-8 Recoilless Rifle gives you a reusable one.
- Every diver carries one answer to armor, even in a squad with a dedicated anti-tank player. The game's tiers: AP2 Light, AP3 Medium, AP4 Heavy and AP5 to AP10 Anti-Tank.
What every weapon penetrates is on How damage works; what every enemy needs is on What Kills What.
3.3Rule 3: close spawners with explosives
Bug holes, Automaton fabricators and grounded Illuminate Warp Ships keep producing enemies until you destroy them, and bullets never do. It takes an explosive hit with a demolition force of 20 or more inside the opening, or 40 or more on a bug hole's rim.
- You already carry one. The starter G-12 High Explosive grenade (demolition 30) closes a bug hole or a fabricator: throw it into the hole or through the fabricator's vent.
- Stratagems work too. The free Orbital Precision Strike (demolition 50) and the Eagle Airstrike (40) destroy bug holes and fabricators from outside when they land on them.
- Later, free up the grenade slot. The GL-21 Grenade Launcher, EAT-17, Recoilless Rifle and Autocannon close spawners as well. Every closer is listed in Special jobs, and every structure's needs in Spawners and structures.
3.4Five habits that save lives
- Dive and go prone when something explodes. Lying down cuts the damage from the outer part of a blast by 90%, and rockets and explosions are the usual killers.
- Stims heal and restore stamina. An empty stamina bar slows your sprint and hurts your aim.
- Reload between fights. A reload throws away the rounds left in the magazine, so reload in a lull, not after every burst.
- Crouch or lie down to shoot. Accuracy runs from worst to best: moving, standing, crouching, prone.
- Stay near your squad. Reinforcements come from one shared pool (5 per diver), and only a living squadmate can call you back in. Patch 7.1.0 balanced enemy spawns across divers who split up, but a diver on their own has nobody to cover them: move in pairs.
The first four are the game's own loading-screen tips, as the community wiki transcribes them (Training Manual Tips).
Calling stratagems on PC
Hold Left Ctrl, type the arrow code, and throw the beacon where the strike or the delivery should land. Learn the codes you use every mission first (Reinforce, Resupply, your Eagle and your support weapon) until your fingers know them, and never throw a strike at your own feet.
- Open the menuHold the stratagem key, Left Ctrl by default. The menu lists your 4 stratagems and the standard-issue ones.
- Enter the codePress the arrows shown, using the direction keys (W A S D by default). A wrong press restarts the code; closing the menu cancels it.
- Throw the beaconIt sticks to whatever it hits, enemies and divers included, and a hellpod follows a beacon stuck to a moving enemy.
- Wait for the call-inA few seconds for most strikes and deliveries, while the beam marks the spot. If it is a strike, get clear.
- Let it rechargeOrbitals return on a timer, Eagles by uses per rearm, support weapons and backpacks on a long timer.
4.1The codes you use every mission
The arrows are the direction keys, in order. Every other code is in the generated tables on the Stratagems tab.
- Reinforce (bring back a fallen squadmate): ↑ ↓ → ← ↑
- Resupply (ammunition, stims and grenades for the squad): ↓ ↓ ↑ →
- SOS Beacon (open your mission to players who answer it; host only): ↑ ↓ → ↑
- Eagle Rearm (send your Eagle home to rearm early): ↑ ↑ ← ↑ →
- Orbital Precision Strike (free): → → ↑
- MG-43 Machine Gun (free): ↓ ← ↓ ↑ →
- Eagle Airstrike: ↑ → ↓ →
- EAT-17 Expendable Anti-Tank: ↓ ↓ ← ↑ →
4.2Cooldowns, uses and your Eagle
- Orbitals come back on a cooldown with no limit on uses, except the Orbital Laser (3 per mission); the free Precision Strike is back in 80 seconds.
- Eagles share one plane with a few uses of each strike. You can call another Eagle strike 15 seconds after the last one; when every use is spent, she rearms, which takes 150 seconds. Call Eagle Rearm in a quiet moment to start that early.
- Support weapons and backpacks mostly take 480 seconds to come back, so after you are reinforced, walk back and pick yours up. The EAT-17 is one exception, back in 70 seconds: call it whenever it is ready.
- Resupply is one squad-wide cooldown of 180 seconds and drops 4 boxes: take one and leave the rest.
Ship modules shorten most of these; which ones is in Ship modules.
4.3W A S D or the arrow keys
By default the code uses the movement keys, so you stop moving while you type it. Two layouts work:
Keep W A S D
Your left hand never moves, and you stand still for the second a code takes. Fine while you learn, and from behind cover.
Arrow keys
Your left hand keeps moving on W A S D while your right leaves the mouse to type the code on the arrows (TheGamer, March 2024) community-tested.
4.4Throw it safely
- Every stratagem can kill a Helldiver. Strikes, barrages and hellpods land on friends as readily as on enemies: friendly fire caused about 11.6% of all Helldiver deaths since launch (official war statistics, September 26, 2026).
- Say it before you throw it, throw it away from your squad, and when enemies are on top of you, dive away instead of calling a strike at your own feet.
- Watch the beams. A beam rising near you marks a strike or a delivery on its way; step away from it until you know which.
The squad side of friendly fire is in Samples, reinforcements and friendly fire.
4.5Practice and hellpod steering
- Stratagem Hero, the arcade cabinet on the ship, drills codes against the clock. It comes with the Super Citizen Edition, but anyone can play it on an owner's ship, and since patch 7.1.0 each Destroyer keeps its own leaderboard.
- Speed is safe: patch 1.003.004 (May 2025) fixed fast inputs being dropped.
- Steer your hellpod with the movement keys while it falls; the Power Steering ship module makes it more responsive.
PC settings and controls
Before your next dive, change three things: put the stratagem directions where you can use them on the move, move push-to-talk off Caps Lock, and bind the quick weapon-function keys. Check every key under Options, Mouse & Keyboard, Change Bindings, where each binding can be set to hold or to press.
5.1Default key bindings
Arrowhead publishes no key list. These defaults come from the community wiki and two or more independent guides; the rows that rest on a single undated guide carry the unverified tag, so check them against your own bindings screen.
| Action | Default | Worth knowing |
|---|---|---|
| Move | W A S D | Also the default stratagem directions |
| Stratagem menu | Left Ctrl (hold) | Hold it, then type the code |
| Sprint | Left Shift (hold) | Can be set to press |
| Dive | Left Alt | Diving flat cuts explosion damage |
| Climb, vault | Space (hold) | An automatic-climb option exists |
| Crouch, prone unverified | C, Z | Both steady your aim |
| Aim over the shoulder | Right mouse (hold) | Shows where the round lands on most weapons |
| First-person sights | Middle mouse | Switches the aim mode while aiming |
| Swap shoulder unverified | Mouse button 4 | For shooting around the other side of cover |
| Reload | R (tap) | Throws away the rounds left in the magazine |
| Weapon functions, ammo check | R (hold) | A wheel: zoom up, flashlight down, fire mode, rate of fire or ammo type left and right |
| Quick weapon functions | unbound | Added in patch 5.0.0: bind them and skip the wheel |
| Weapon slots unverified | 1 primary, 2 secondary, 3 support | Check these on your own bindings screen |
| Grenade | G (quick throw), 4 (equip) | Holding a grenade cooks it |
| Stim | V | Also restores stamina; you can stim a squadmate |
| Melee | F | Staggers fast enemies |
| Ping | Q (tap) | Hold it for the comms wheel; ping a teammate's ping to confirm it |
| Map unverified | Tab | Place markers the squad can follow |
| Interact, pick up | E | Samples, pods, terminals |
| Leave a vehicle or emplacement | E | Its own binding since patch 1.002.101 |
| Push to talk | Caps Lock (hold) | Move it if you also type in chat |
| Text chat | Enter | Cannot be rebound |
| Emote wheel unverified | B | 8 slots since patch 7.0.0 |
5.2Settings worth changing
| Setting | Change it to | Why |
|---|---|---|
| Stratagem directions | The arrow keys, or keep W A S D and stand still | Move while you type a code, or keep one hand position |
| Sprint | Press instead of hold | Less strain on long maps |
| Push to talk | Off Caps Lock (to T, for example) | Otherwise your typed chat comes out in capitals |
| Quick weapon functions | Bind fire mode and ammo type | No hold-R wheel in the middle of a fight |
| Keep weapon customization | On, in the player settings | Keeps your chosen attachments after death; patch 6.3.0 fixed it not saving |
| Upscaling | DLSS 4.5, FSR 4.0.3 (FSR 3.1.5 on older cards) or XeSS 3.0, with Reflex or Anti-Lag 2 | Added with Nixxes in patch 6.2.5 (May 2026) |
| Dynamic resolution | Off, the default since patch 6.2.6 | It caused graphical problems on some cards |
| Field of view | Anywhere from 45 to 90 (vertical) | Wider shows more around you; scopes keep a steady size since patch 5.0.0 |
| Controller on PC | Turn Steam Input off before launching | DualSense haptics need it (Arrowhead's FAQ); gyro aiming likely does too |
5.3Aiming
- Three ways to fire: from the hip (least accurate), over the shoulder while holding aim (the reticle shows where the round lands, ignoring drop), and first person through the weapon's own sight.
- Stance: crouch or lie down to cut recoil and tighten your aim; prone is the steadiest.
- Buffered inputs: a reload pressed while you cannot reload waits up to 1.2 seconds and then happens (patch 6.3.0), and stim presses are buffered the same way (patch 7.0.0).
- Hit markers tell you whether your penetration is enough: see rule 2.
5.4Install, performance and your bindings file
- Install size: about 23 GB since the slim build became the only PC build; the 135 GB on Steam's requirements list is out of date.
- If the game freezes, wait 40 seconds before restarting it, so its hang detection can record the freeze for Arrowhead.
- Gyro aiming lives under Options, Controller, with its own invert setting since patch 1.002.200.
- Back up your bindings. They are stored in
input_settings.configunder your Steam folder'suserdata/<your Steam ID>/553850/remote, and the other settings inuser_settings.configunder%APPDATA%/Arrowhead/Helldivers2. Deleting the input file resets your controls if they ever get corrupted (community wiki; PCGamingWiki).
Glossary
The abbreviations and slang you will meet in the game, in squad chat and across this manual, in alphabetical order.
| Term | Meaning |
|---|---|
| AP | Armor penetration: how much armor an attack gets through. The game's tiers: AP2 Light, AP3 Medium, AP4 Heavy and AP5 to AP10 Anti-Tank. |
| AT | Anti-tank: penetration of 5 and up, and the weapons that carry it, such as the EAT-17, Recoilless Rifle, Quasar Cannon, Spear and Thermite grenade. |
| AV | Armor value: how hard one part of an enemy is, from 0 to 10. AP above it does full damage, equal AP 65%, lower AP nothing. |
| Booster | A bonus for the whole squad. Each diver brings one and duplicates do not stack, so a full squad runs 4 different ones. |
| Bot drop | Automaton reinforcements by dropship, called by a light bot's red flare. |
| Breach | A Terminid reinforcement wave, called by a bug standing in an orange cloud. |
| Bugs, bots, squids | Player nicknames for the Terminids, the Automatons and the Illuminate. |
| Chaff | Small, numerous enemies that any gun kills. |
| D1 to D10 | Difficulty 1 to 10: Trivial, Easy, Medium, Challenging, Hard, Extreme, Suicide Mission, Impossible, Helldive and Super Helldive. |
| DSS | The Democracy Space Station, which the community moves between planets; its actions are paid for with donated samples and Requisition. |
| Eagle | The ship that flies your Eagle strikes: a few uses of each, then a rearm. |
| Extract | Call the shuttle at the end of a mission and board it. Samples count only if they are aboard. |
| Heavies | The armored units that need anti-tank: Chargers, Bile Titans, Hulks, tanks, Harvesters and their kind. |
| Hellpod | The drop pod that carries you, your reinforcements and your deliveries to the ground. You can steer it. |
| MO | Major Order: the community's goal in the Galactic War. It pays Medals to everyone who took part when it is won. |
| Operation | A chain of missions on one planet (1 at difficulties 1-2, 2 at 3-4 and 3 from 5); fail one and the rest fails with it. |
| Orbital | A strike from your Super Destroyer's guns, back after a cooldown; every one but the Orbital Laser (3 per mission) has unlimited uses. |
| PO | Personal Order: your daily task, worth 15 Medals. |
| POI | Point of interest: a spot on the map with loot (Super Credits, Medals, Requisition, samples) or supplies. |
| Req | Requisition Slips, the currency for stratagems. |
| Samples | Common, rare and super samples: picked up on the map, extracted, and spent on ship modules. |
| SC | Super Credits: the premium currency for warbonds and the Superstore, also found in missions. |
| SEAF | Super Earth Armed Forces, Super Earth's own army. Its soldiers fight beside you in some missions, and killing one costs you 25 Requisition. |
| Ship module | A permanent upgrade to your Super Destroyer, bought with samples (and Requisition for the top two tiers). |
| SOS | The SOS Beacon: it opens your mission to other players who answer it. |
| Spawner | Anything that produces enemies until destroyed: bug holes, fabricators, Warp Ships. Close it with explosives. |
| Stim | The healing injector, which also refills stamina; you can use one on a squadmate. |
| Stratagem | A call-in from your Super Destroyer, entered as an arrow code: strikes, weapons, backpacks, sentries and vehicles. |
| Warbond | A book of gear pages bought with Medals; premium ones are unlocked with Super Credits. |
| Weak point | A part of an enemy with lower armor than the rest, or one whose destruction kills it outright. |
Chat lingo, the comms wheel and pings are in Pings, chat and squad lingo.
Squad guide02
Multiplayer & Squads
Your first night in a squad: joining and hosting, crossplay, what carries over, samples and reinforcements, friendly fire, pings, roles and the unwritten rules.
On this page13 chapters
Your first squad: the short version
A squad is up to 4 Helldivers on any mix of PC, PS5 and Xbox Series X/S. Nothing you earn is split, the lives and the Resupply are shared, and friendly fire is always on. Six habits cover most of your first night; the checklist at the end of this tab turns them into a pre-flight list.
- Get in the easy wayAt the War Table, press Quickplay on a busy planet or answer an SOS, at a difficulty you can clear alone or one step above it.
- Take everything: nothing is splitEvery Medal case, Super Credit stack and Requisition slip goes to each diver present, and the squad's extracted samples go to every member in full. Pick up every sample you see, a fallen teammate's included.
- Lives and ammo belong to the squadEach diver adds 5 reinforcements to one shared pool, and one Resupply pod of 4 boxes serves all of you. Take one box, and reinforce a teammate near where they fell.
- Friendly fire is always onSay it before you throw a strike, throw it away from the squad, and never stand behind a teammate's launcher.
- Talk without a microphonePing enemies, samples and objectives, and ping a teammate's ping to answer it. The comms wheel carries Wait, Follow Me, Thanks and Sorry.
- Bring what the squad lacks, and board lastCarry one anti-armor answer whatever your role, bring a booster nobody else has, and do not board the shuttle until everyone who can make it is close.
1.1The squad model
How a squad works underneath: always online, co-op only, and the match runs on the host's machine.
| Rule | Detail | Source |
|---|---|---|
| Squad size | Up to 4 Helldivers per squad; the Xbox store lists online co-op for 2-4 players | Steam |
| Always online | An internet connection is required even when playing solo; progression lives on Arrowhead's servers | arrowhead.zendesk.com |
| Solo play | Possible, but the game is designed as co-op and the harder difficulties are tuned for squads; Arrowhead suggests the SOS Beacon when solo | arrowhead.zendesk.com |
| Co-op only | Online co-op against AI factions; no PvP mode and no local or LAN co-op | Steam |
| Network model | Hybrid: Arrowhead's servers hold profiles; the match runs peer-to-peer with the squad leader as host (technical director, 2024; wiki, 2026) | wiki |
| One shared war | Every platform fights the same Galactic War; crossplay on or off, the war is one server | gamerant.com |
| AFK timer | 15 minutes idle sends a diver back to the title screen (1.000.11, 2024-02-22) | Steam |
| War record | Since launch: 1,050,077,411 missions won and 102,182,874 lost (91% success) (read 2026-09-26) | api.live.prod.thehelldiversgame.com |
Joining and hosting
For your first squads, press Quickplay at the War Table on a busy planet at a difficulty you can already clear, or answer an SOS. Host when you want to pick the planet, mission and difficulty yourself: set your privacy to Public, drop in, and throw the SOS Beacon early. Friend codes and crossplay have their own chapter, Friends and crossplay.
2.1The ways in
Quickplay
At the War Table, pick a planet and a difficulty, then press the Quickplay prompt. You land on another player's ship or straight into a mission under way.
The planet map
The War Table's planet view shows public missions in progress. Pick one to drop into it.
Answer an SOS
SOS missions pulse on the War Table as higher-priority missions; Quickplay and the planet view both reach them.
Invite or join a friend
From the Social menu, Invite brings a friend to your ship and Join takes you to theirs, on any platform.
Host and throw an SOS
Set Matchmaking Privacy to Public, start a mission, and throw the SOS Beacon once you are on the ground.
Find a group outside the game
Arrowhead's official Discord (about 1.32 million members approx) runs a channel for finding squads.
2.2Matchmaking privacy
Set it under Options, Gameplay, Matchmaking Privacy. Public lets strangers in through Quickplay, the planet map and SOS calls; Friends Only is how you play with friends and no strangers. Whatever you choose, throwing an SOS opens your lobby to the public for the rest of that mission.
| Rule | Detail | Source |
|---|---|---|
| Public | Anyone can join through quickplay, the planet map or an SOS | dexerto.com |
| Friends Only | Only in-game friends can join; the usual way to play alone or with friends without randoms | gamesradar.com |
| Invite Only | Only invited players; the right-most lobby option since 1.000.400; since 1.001.201 friends can neither see nor join it | Steam |
| Where to set it | Options > Gameplay > Matchmaking Privacy | gamesradar.com |
| SOS overrides privacy | Throwing an SOS makes the lobby public for the rest of that mission (1.001.202) | Steam |
2.3Quickplay
Quickplay searches open lobbies on the planet and at the difficulty you picked, prefers players near you, and retries by itself. It can put you anywhere from a ship in orbit to a squad already heading for extraction; arriving late is its choice, not yours. If it finds nothing, check that your own privacy is Public and pick a busier planet: the Major Order and campaign planets hold most divers, and the live war maps show where they are.
| Rule | Detail | Source |
|---|---|---|
| What it does | Joins an open public lobby on the planet selected at the War Table, either on a ship or in a mission already under way | screenrant.com |
| Difficulty | Matches the difficulty you selected; since 1.002.200 it no longer drops you into a friend's game at another difficulty on quiet planets | Steam |
| Region | Prefers players from nearby regions since 1.002.101 | Steam |
| Retries | Retries automatically since 1.000.10 | Steam |
| Refilling a slot | A full squad that loses a member can be refilled through quickplay (fixed 1.001.201) | Steam |
| Late landings | Quickplay can drop you near extraction or onto the mission summary (1.001.201 fixed a soft-lock for divers who hot-joined at the summary); arriving late is not the joiner's choice | Steam |
| Empty search | If nothing is found: make sure your own privacy is Public, pick a busier planet (the Major Order planet), or host and throw an SOS | dexerto.com |
From the planet map: Public missions show on the War Table's planet view and can be joined directly; invite-only lobbies are hidden and blocked players cannot be joined there (1.001.201).
2.4The SOS Beacon
The SOS Beacon (↑ ↓ → ↑) is standard issue and free, and only the host can throw it. It makes your mission pulse on other divers' War Tables and keeps searching for the rest of the mission, pausing while the squad is full; it raises the odds of a join but guarantees none. Throw it early, before the fight turns, so answerers have time to arrive community-tested (TheGamer, March 2024). Arrowhead's own advice is to throw it when you play alone and get into trouble.
| Rule | Detail | Source |
|---|---|---|
| Input and cost | ↑ ↓ → ↑; standard issue for every diver, free, one use per mission, supply (blue) permit | wiki |
| Host only | Only the lobby host can throw the SOS Beacon | wiki |
| Effect | The mission shows as a higher-priority, pulsing mission on other divers' War Tables; it raises the odds of joins but guarantees none | wiki |
| Duration | Searches for the rest of the mission; pauses when the squad is full and resumes when someone leaves (1.001.202) | Steam |
| Host migration | Destroyed when the host changes so the new host can decide whether to throw another (1.001.202) | Steam |
| Blocked by | Ion storms and Automaton stratagem jammers, like any stratagem | helldivers.fandom.com |
| Who sees it unverified | A 2024 guide says only divers viewing the same planet at the same difficulty see and answer it | thegamer.com |
| When to throw it | Early, before the fight turns, so answerers have time to drop in (community-tested, TheGamer 2024-03-27); Arrowhead and the in-game tip: throw it when solo and in a pinch | arrowhead.zendesk.com |
2.5What the host controls
The host is the diver whose lobby the squad is in, and the match runs on the host's machine. The host picks the planet, mission and difficulty (only difficulties the host has unlocked), sets the privacy, and is the only diver who can kick, throw the SOS or abandon the mission for everyone. Let the diver with the steadiest connection host, since every client syncs through that machine; this is the Field Manual's reading of the network model, not an Arrowhead statement unverified.
| Rule | Detail | Source |
|---|---|---|
| Who is host | The diver whose lobby the squad is in (the squad leader); the match runs on the host's machine and the others are clients | wiki |
| Mission choice | The host picks planet, operation, mission and difficulty at the War Table; the squad rides on the host's Super Destroyer | screenrant.com |
| Host difficulty | The host can only pick difficulties the host has unlocked; joiners can be of any level | helldivers.fandom.com |
| Host-only powers | Kick (host only since 1.000.302), the SOS Beacon, the lobby's privacy, and Abandon Mission With Squad | Steam |
| Host's ship | Clients can use the host's terminals between missions (1.000.402 fixed the armory terminals for clients); anyone aboard can play Stratagem Hero and each Destroyer keeps its own leaderboard since 7.1.0 | Steam |
| Hellpod skins | The squad's first drop uses the host's hellpod skin; reinforcements use each diver's own (1.001.002) | Steam |
| Who should host unverified | The diver with the steadiest, lowest-latency connection, because every client syncs through the host (Field Manual call from the network model; not stated by Arrowhead) | wiki |
| Client damage | Clients deal the same damage as the host since 6.0.1 (2026-02-03) | Steam |
| High-latency deaths | Known issue on 2026-09-26: a diver with high latency may die after landing on an Automaton fabricator | arrowhead.zendesk.com |
2.6Joining a mission in progress
You pick your loadout while the squad plays, and chat works on that screen, so say your role before you drop in by hellpod. You can join a difficulty you have not unlocked and keep its loot, but pickups made before you arrived went only to the divers who were there.
| Rule | Detail | Source |
|---|---|---|
| Ways in | Quickplay, the planet map, an SOS or a friend's Join can all put you into a mission already running | screenrant.com |
| The flow | Pick a loadout while the squad plays (text chat works there since 1.001.002), then drop in by hellpod | Steam |
| Harder than you | You can join difficulties you have not unlocked yourself and earn their loot | helldivers.fandom.com |
| Recent Players | Hot-joiners appear in Recent Players once they drop (1.000.303, 1.000.400) | Steam |
| Stability | Hot-join crashes were fixed through 2025-26, most recently on Oil Rig missions (7.1.0) | Steam |
Friends, friend codes and crossplay
Leave crossplay on. Friends on your own platform appear by themselves; for a friend on another platform, trade friend codes from the Social menu. Progress does not travel between platforms (cross-progression: none), so each platform keeps its own account.
3.1Add a friend on another platform
- Open the Social menuEsc (Options on PS5), then E (R1) to switch to the Social tab. That is Arrowhead's own path. The sources disagree on a one-key shortcut: 2025 guides give O on PC (R3 on PS5, RS on Xbox) on the ship; Arrowhead's 2024 article says Tab on PC and X on PS5 unverified. Trust the prompt on your screen.
- Generate your friend codeUnder Your Friend Code, press Generate.
- Have your friend search for itThey type the code into the Search bar at the top of their Social menu and send a request; you accept it.
- Invite or joinSelect the friend: Invite brings them to your ship, Join takes you to theirs. On PS5, a Social-menu invite also sends a system invite.
- Keep the good onesAfter a match, the Recent Players tab lists everyone you just played with, hot-joiners included. Send friend requests from there.
Keep the Social tab open until it arrives, cancel a stuck request instead of pressing Decline or Remove Friend (either can block the player), and ask Arrowhead support to clear a block list if it comes to that. These fixes come from the community wiki, not from Arrowhead unverified. The wiki also says to keep crossplay on, but patch 1.002.001 made friend codes work with crossplay off.
The friends rules, graded; the one-key shortcut and the request fixes are the thinly sourced ones.
| Rule | Detail | Source |
|---|---|---|
| Open the Social menu | Esc (Options on PS5), then E (R1) to switch to the Social tab | arrowhead.zendesk.com |
| Social menu shortcut unverified | 2025 guides give O on PC (R3 on PS5, RS on Xbox) on the ship; Arrowhead's 2024 article says Tab on PC and X on PS5 | gamesradar.com |
| Friend codes | Social menu > Your Friend Code > Generate gives an 8-digit code; the friend types it into the Search bar and sends a request you accept | gamesradar.com |
| Same-platform friends | Appear automatically; Steam friends show even if your Steam friends list is not public (1.000.302) | Steam |
| Invite and join | Select a friend: Invite moves them to your ship, Join moves you to theirs | gamespew.com |
| Recent Players | Lists the people you just played with, hot-joiners included; send requests, report or block from it | arrowhead.zendesk.com |
| Friends list limit | The 100-friend display cap added in 1.000.402 (2024-06) was lifted in 1.001.201 (2024-10); no current cap is documented | Steam |
| Request troubleshooting unverified | Keep the Social tab open until the request arrives; cancel stuck requests instead of Decline or Remove Friend (which can block); keep crossplay on; support can clear a block list | wiki |
| PS5 system invites | A Social-menu invite on PS5 also sends a PS5 system invite (6.1.0) | Steam |
| Looking for group | Arrowhead's official Discord (about 1.32 million members on 2026-09-26) has an LFG channel | discord.com |
| Friend codes with crossplay off | Friend-code features work with crossplay disabled since 1.002.001 (2024-12-13) | Steam |
3.2Crossplay and platforms
PC, PS5 and Xbox Series X/S play together and fight the same Galactic War. Crossplay is on by default; switching it off limits you to your own platform, with no finer filter. Guides put the switch under Options, Gameplay; whether Xbox has it in the game or only in the console's settings is disputed unverified.
- What online play costs: none on PC, PS Plus on PS5 and a paid online subscription on Xbox.
- Expect beginners: Helldivers 2 joined the PlayStation Plus Extra and Premium catalog on August 12, 2026, and 22.9 million players have tried it across the three platforms by Sony's latest count approx. Public lobbies are full of new divers; be patient with them.
- A UK friend on PC: Helldivers 2's Steam listing has been unavailable to new buyers in the UK since September 16, 2026; owners still play.
- Voice across platforms: players report in-game voice working between platforms with occasional failures, and many mixed squads use Discord instead unverified.
The crossplay rules and platform requirements; the Xbox switch and cross-platform voice are the open questions.
| Rule | Detail | Source |
|---|---|---|
| Platforms | PC (Steam), PS5 and Xbox Series X/S play together | arrowhead.zendesk.com |
| Toggle | On by default and can be disabled; guides place it at Options > Gameplay > Crossplay; off means you only match your own platform | arrowhead.zendesk.com |
| Xbox toggle location unverified | GameRant (2025-08-28) puts it in the same in-game menu; the wiki (rev. 2026-09-07) says Xbox has no in-game option and uses the console setting | gamerant.com |
| Cross-progression | None: no cross-save, cross-progression or cross-buy and no plans; support will not move items or progress between accounts | arrowhead.zendesk.com |
| PSN account on PC | The Steam version prompts a PSN link on first launch; the 2024 mandate was withdrawn on 2024-05-06, so it is optional; linking does not copy progress | arrowhead.zendesk.com |
| Online subscriptions | PC needs none; PS5 needs PS Plus; Xbox needs an online multiplayer subscription (the store text names Game Pass Core or Ultimate) | arrowhead.zendesk.com |
| Xbox cloud | Cloud playable with Game Pass Essential, Premium or Ultimate; the game must still be bought | xbox.com |
| PS Plus catalog | In the PS Plus Extra/Premium catalog since 2026-08-12: expect many brand-new PS5 divers in public lobbies | blog.playstation.com |
| Steam UK | New UK buyers cannot buy the game on Steam since 2026-09-16; owners still play | videogameschronicle.com |
| Voice across platforms unverified | Players report in-game voice working between platforms with occasional failures; many mixed squads use Discord | gamesradar.com |
| Mixed-platform fixes | 4.1.0 fixed a mixed-platform trio disconnecting when joining a solo host; 5.0.0 fixed a bug when joining a non-host in a cross-play lobby | Steam |
What carries over
Joining someone else's mission costs you nothing. You earn the full mission rewards, every pickup made while you are there, and the squad's whole sample haul. Joining a squad on a harder difficulty gets you its rarer samples and bigger rewards, even before you have unlocked that difficulty yourself.
Mission rewards
Mission XP (tallied at the end, win or lose), the mission's Medals, and the objective rewards: 500 Requisition and 100 XP for the main objective and 200 Requisition and 50 XP for an optional one, before the difficulty bonus lifts the XP and Requisition.
Pickups
Medal cases (1 to 3 Medals), Super Credits (10 a stack, rarely more) and Requisition slips (100 Requisition) go at once to every diver present, extraction or not. A diver who joins later misses what was already picked up.
Samples
Whatever the squad extracts is credited in full to each member, so it never matters who carries them. Rare samples start at difficulty 4 and super samples at 6.
What stays yours: your ship modules, stratagems and cooldowns, and your booster (though its effect covers the whole squad). You can only bring what you own, but you can pick up and use a teammate's dropped support weapon or backpack, a free way to try one before you buy it. What each currency buys is on Currencies and caps.
Difficulty unlocks stay your own: you complete an operation at your highest unlocked difficulty to open the next one. Finishing a harder operation in a friend's lobby reportedly opens only the level after your own highest unverified. Squadmates' progress counts toward your daily Personal Order (15 Medals). A Galactic War Campaign's reward, won when the community wins a majority of the campaign's Major Orders, goes to every diver who logged in during the campaign, squad or not (Rewards for taking part).
Players report that leaving before the mission summary forfeits the mission's XP, Medals and Requisition, while pickups already credited stay unverified. They also report that a diver Quickplay drops in near the end still gets the mission-end rewards unverified. Either way, stay until the summary screen.
Every reward rule with its source: the mission rewards and pickups rest on the wiki's in-game record, while late joiners and early leavers rest on player reports.
| Rule | Detail | Source |
|---|---|---|
| Mission XP | Full: tallied at mission end win or lose, multiplied by the mission's difficulty (+0% to +300%); each diver aboard the shuttle adds 20 XP | wiki |
| Mission Medals | 1-15 by the host's difficulty and the mission's place in the operation (6, 8 and 10 at difficulty 7) | wiki |
| Pickups | Medal cases (1-3), Super Credits (10, rarely 100) and Requisition slips (100, rarely 1,000) go instantly to every diver present; no extraction needed; not credited to divers who join later | wiki |
| Objective Requisition | Main objective 500 and optional 200 (before the difficulty bonus), paid at mission end without extraction; Retrieve Mutant Larva, and on Hive Worlds Recover SSSD and Recover Scientific Specimen, pay only if extracted (their last step is extraction) | wiki |
| Samples | The squad's extracted samples are credited in full to every member (official X post, 2024-05-02) | wiki |
| Harder-difficulty loot | Joining a harder mission earns its rewards, including rare samples (difficulty 4+) and super samples (6+) | wiki |
| Difficulty unlock unverified | Finishing a harder operation (for example in a friend's lobby) unlocks only the level after it, not the levels skipped | helldivers.fandom.com |
| Personal Order | Squadmates' contributions count toward your daily order | wiki |
| Major Orders and campaigns | Campaign rewards go to divers who logged in during the campaign window, and the Control Center shows community success, not your own eligibility; no Arrowhead source states the rule for Major Order Medals | arrowhead.zendesk.com |
| War contribution | Your mission counts for the host's planet and operation | helldivers.fandom.com |
| Late joiners unverified | Players report receiving the mission-end rewards like everyone else even when quickplay drops them in near the end | Steam guide |
| Leaving early unverified | Players report that leaving before the mission summary forfeits the mission-end XP, Medals and Requisition; pickups already credited stay | Steam guide |
| Ship modules | Your modules affect only you; your Resupply boxes fully refill teammates' support weapons if you own Superior Packing Methodology | wiki |
| Loadout ownership | You bring only what you own, but you can pick up and use a teammate's dropped support weapon or backpack | thegamer.com |
Samples, reinforcements and Resupply
Treat lives and ammunition as squad property. The squad shares one reinforcement pool and one Resupply cooldown; each diver carries the samples they pick up, and the squad's extracted total is credited in full to every member. Friendly fire has its own chapter, right after this one.
5.1Samples
Pick up every sample you see, a fallen teammate's included: a dead diver's samples drop where they fell, and the squad's extracted total goes to each of you. Only samples that reach the shuttle count, and once you are aboard they are safe even if you die. On a big haul, spread the samples between divers, or drop them at the extraction zone early (you can visit it before the objective is done). To drop them on purpose: Hold X on PC (D-pad down on a controller) for the drop wheel: samples, backpack or support weapon.
| Rule | Detail | Source |
|---|---|---|
| Carried individually | Each diver carries the samples they pick up | helldivers.fandom.com |
| On death | A dead diver's samples drop where they died and anyone can pick them up; the in-game tip tells you to grab a fallen squadmate's samples | helldivers.fandom.com |
| Drop on purpose | Hold X on PC (D-pad down on a controller) for the drop wheel: samples, backpack or support weapon | thegamer.com |
| Must be extracted | Only samples that reach the shuttle count; divers left behind lose what they carry | wiki |
| Safe once aboard | Samples transfer to the shuttle on boarding, so dying inside drops nothing (1.001.002); the squad keeps samples brought aboard even if the carrier dies afterward | Steam |
| Duplicated | If the squad extracts 10 samples, each diver receives 10 (official X post, 2024-05-02) | wiki |
| Spread or stash | Split large hauls between divers or drop them at the extraction zone early (it can be visited before the objective is done) | helldivers.fandom.com |
| Achievements | "Science is done by quantity" needs 15 common samples carried by you (squadmates' do not count); "Samples are a diver's best friend" counts the squad's 15 rare samples | wiki |
5.2Reinforcements
Each diver adds 5 reinforcements to one shared pool, so a full squad has 20. Once the pool is empty, a new reinforcement arrives every 120 seconds. Any living diver can call one in (↑ ↓ → ← ↑).
Throw the beacon near where your teammate died, unless that spot is overrun, so they can recover their support weapon, backpack and samples; the diver in the pod can steer it onto a big enemy for a free kill, and it squashes teammates too. Reinforcements stop once anyone boards the shuttle and when the mission timer runs out, and jammers and ion storms block them. If the whole squad dies with reinforcements left, everyone drops back together; if it dies with none left before the main objective is done, the mission and its operation fail. Commando missions have their own budget: 12 reinforcements whatever the squad size, collected from pod sites (Operations and Commando missions).
| Rule | Detail | Source |
|---|---|---|
| Pool | 5 per diver per mission, pooled for the squad: 5, 10, 15 or 20 | wiki |
| Increased Reinforcement Budget | +1 per diver (6, 12, 18 or 24); stays if its owner leaves; adds none for a hot-joiner when the pool is empty | wiki |
| Refill timer | Once the pool is empty, 1 reinforcement every 120 s (90 s with Flexible Reinforcement Budget), holding at most 1 | wiki |
| Calling one | Any living diver enters ↑ ↓ → ← ↑ and throws the beacon; solo divers cannot pre-dial it and nobody can pre-throw it to revive themselves | wiki |
| Squad wipe | If every diver dies with reinforcements left, everyone drops back together | wiki |
| Mission failure | The mission and its operation fail if the whole squad dies with none left before the main objective is done; after it is done a wipe still counts as success | wiki |
| Blocked | Stratagem jammers and ion storms block Reinforce; if every diver is dead during an ion storm the mission is abandoned | wiki |
| Disabled | Reinforce stops once any diver boards the extraction shuttle and when the mission timer runs out | wiki |
| Pod as a weapon | The reinforced diver can steer the pod onto a Charger, Bile Titan, tank or fabricator; it squashes allies too | wiki |
| Where to reinforce | Near the fallen diver so they can recover their gear and samples, unless that spot is overrun (community-tested, ScreenRant 2024-02-14) | wiki |
| Commando missions | Start with 0; four Reinforcement Pod sites add 3 each (12 in total whatever the squad size); reinforcement boosters are unavailable; each diver can call the Super Destroyer back once for 60 s | wiki |
| 7.1.0 fix | A rare state where a diver could not be reinforced under poor network conditions is fixed | Steam |
| Hot-join budget unverified | Whether a late joiner adds 5 to the pool is not documented; the 2024 known issue about reinforcement for players joining in progress is absent from the 2026 list | Steam |
| Signal while dead unverified | Dead divers can press the climb key to signal squadmates for a reinforcement (Fandom, rev. 2025-02-19) | helldivers.fandom.com |
| Event pools | Some war events add a community-wide reinforcement counter; in the Battle for Cyberstan (2026-02) every death drew on a galaxy budget | wiki |
5.3Resupply and stims
One Resupply (↓ ↓ ↑ →) serves the whole squad: a pod of 4 boxes, then a 180-second cooldown shared by everyone. Call it where everyone can reach it and take one box each unless the squad agrees otherwise community-tested. A Supply Pack carrier turns one pod box into two refills: grab the box, then top teammates up with Interact.
To stim a wounded teammate, walk up and press Interact at the Stim prompt; it uses one of your own stims. Hellpod Space Optimization, a booster on the free Helldivers Mobilize! warbond, drops every diver in, and back in after a reinforcement, fully stocked.
| Rule | Detail | Source |
|---|---|---|
| Resupply pod | ↓ ↓ ↑ →; 8 s call-in; one pod of 4 boxes; one call per 180 s for the whole squad (162 s with Synthetic Supplementation) | wiki |
| Supply box | Refills a large share of primary, secondary and support ammo plus 2 stims and 2 grenades | wiki |
| Support-weapon refills | Boxes refill support weapons fully only when the diver who called the pod owns Superior Packing Methodology | wiki |
| Supply Pack | Holds 4 boxes; press Interact (E) on a teammate to resupply them; a Resupply box refills you and one pack slot at once | wiki |
| Hellpod Space Optimization | Every diver drops in, and reinforces, fully stocked | wiki |
| Stim a teammate | Walk up to a wounded ally (health in the red, about half or less) and press Interact (E) at the Stim prompt; it uses one of your stims | destructoid.com |
| Stims | Drop in with 2 and carry 4 (6 with the Med-Kit passive); Med-Kit stims last 2 s longer, on teammates too | wiki |
| Expendables | An EAT-17 call drops two launchers, so one can go to a teammate; expendable weapons cannot be reloaded | wiki |
5.4Shared or yours
Shared
- The reinforcement pool.
- The Resupply cooldown.
- The mission timer (40 minutes on most missions): when it ends, stratagems and reinforcements stop for everyone.
- Extraction: one diver within 50 m of the beacon keeps the shuttle coming.
- Mission stratagems such as the Hellbomb and the drills: any diver can call them.
- The SOS Beacon: the host's call.
Per diver
- Orbitals, Eagles, support weapons, backpacks, sentries, emplacements and vehicles, each on its own cooldown.
- Ammunition, stims and grenades, shared only by stimming, the Supply Pack and dropped weapons.
- Ship modules: they upgrade your own stratagems, though your Resupply boxes pass Superior Packing Methodology's fuller support-weapon refills on to teammates.
- Your booster, though its effect covers the whole squad.
Friendly fire
Friendly fire is always on and cannot be turned off. Your bullets, strikes, hellpods and sentries hurt teammates, and a launcher's backblast knocks them down, so say it before you throw a strike, throw it away from the squad, dive flat when your own ordnance lands close, and never stand behind a teammate's launcher.
Arrowhead calls it "an integral part of the Helldivers experience", and the war keeps count: by the official war statistics, about 11.6% of all Helldiver deaths since launch were friendly fire approx. The statistics do not define whether each counted incident is a kill, so treat the share as an estimate.
Your body helps a little. A Helldiver has 125 health and takes reduced damage from explosions and fire but extra from gas, and lying prone cuts the damage from an explosion's outer radius by 90%.
A red beam marks an offensive strike: when you see one near you, move. A stratagem ball sticks to whatever it hits, teammates included, so never throw one at a diver's feet.
6.1What hurts your squad
Every friendly-fire source the research found, with the habit that avoids it. Strikes, hellpods and sentries are the obvious ones; the surprises are launcher backblast, arc weapons that chain into divers, and the This Is Democracy emote's kick.
| Rule | Detail | Source |
|---|---|---|
| Always on | Friendly fire is part of the design and cannot be turned off | arrowhead.zendesk.com |
| How common | The galaxy counter shows 1,043,872,760 friendly-fire incidents against 9,015,080,755 deaths since launch, about 11.6% or one in nine (read 2026-09-26) | api.live.prod.thehelldiversgame.com |
| Damage taken | Divers take 50% of explosion damage (90% less again while prone or ragdolled), 50% of fire and 130% of gas | wiki |
| Stratagem strikes | Orbitals and Eagles hit divers like enemies; beacons stick to divers; a red beam marks an offensive strike | wiki |
| Hellpods | Every pod (supply, weapon, sentry, backpack and reinforcement) kills what it lands on | wiki |
| Sentries | Sentries fire through divers; the Mortar Sentry is the worst offender; Cross-Platform Compatibility makes your mortars favor your pinged targets | wiki |
| Tesla Tower | Zaps divers in range; its own terminal text says to remain prone | wiki |
| Arc weapons | Arcs chain between targets, including divers and civilians | wiki |
| Mines | Minefields kill divers; ping them (mines are pingable since 1.000.300) and tell the squad | wiki |
| Backblast | The Recoilless Rifle and Airburst Rocket Launcher knock down divers 2-6 m behind the shooter, which can make them drop a live grenade or stratagem ball | wiki |
| Stun grenades | A stun blast empties a diver's stamina | wiki |
| Firebomb Hellpods | The booster sets fire at every pod landing, teammates included | wiki |
| Melta Mine | The G/40 Melta Mine no longer sticks to divers or vehicles (7.1.0; its notes mention griefing) | Steam |
| Hellbomb | 25 m blast with no damage falloff for divers; pinging one plays a warning line | wiki |
| Extraction pad | The landing shuttle kills divers standing under it | wiki |
| Ricochets | Angled shots can glance off a target into squadmates (in-game loading tip) | wiki |
| SEAF and civilians | Each SEAF soldier you kill (sentries and drones count) costs 25 Requisition; 9 reckless kills of SEAF or civilians brand you a traitor and the Destroyer shells you; evacuation civilians cost 25 each | wiki |
| SEAF fire | SEAF specialists fire through divers and SEAF grenades hurt divers | wiki |
| Accidentals unverified | The game counts accidental kills and the Ship Master remarks on them after a mission; no gameplay penalty for killing Helldivers was found | wiki |
| Intentional team-killing | Deliberate team-killing is treated as griefing and gets divers kicked; a single accident usually does not (community-tested, GameRant 2024-03-09, ScreenRant 2024-02-14) | gamerant.com |
| Emote kick | The This Is Democracy emote's kick damages and knocks back anyone it hits, friend or foe, and can ragdoll a diver behind a Shield Generator Pack | wiki |
6.2Allies that cost you
SEAF soldiers and civilians count too. Each one you kill costs 25 Requisition before the difficulty multiplier, kills by your mines included, and after 9 such kills (mines aside) your own Super Destroyer turns its 380mm barrage on you.
6.3When it happens
Own it: say Sorry on the comms wheel and stim the diver you hit. Most hosts will not kick over a single accident, but deliberate team-killing is treated as griefing and gets divers kicked community-tested (ScreenRant, February 2024; GameRant, March 2024). The game keeps a tally of accidental kills, and the Ship Master remarks on them after a mission, but the research found no gameplay penalty for killing Helldivers unverified.
Pings, the comms wheel and chat
You do not need a microphone. Ping everything worth knowing about (enemies, samples, objectives, mines), and ping a teammate's ping to answer it; hold the same key for the comms wheel. Save voice and chat for plans, and keep push-to-talk off Caps Lock if you also type.
7.1The squad keys
The defaults on PC, with the console buttons where a guide gives them. There is no official key list: these come from dated guides (2024 to 2025) community-tested, so check or rebind them under Options, Mouse & Keyboard, Change Bindings, in the Communication section.
- Ping: Q (tap) on PC, R1 on PS5.
- Comms wheel: Hold the Mark key (Q or R1) and release on a phrase.
- Map marker: Open the map (Tab) and left-click; a marker lasts until reached or removed and follows moving objectives (1.001.100).
- Push to talk: Voice Activation (PTT/PTM) is Caps Lock on PC and unbound on PS5; move it off Caps Lock (for example to T) if you type in chat.
- Text chat: Enter opens chat; the 1.000.300 fix list made Open Text Chat rebindable, while PCGamingWiki still lists it as hard-coded.
- Stim a teammate: Walk up to a wounded ally (health in the red, about half or less) and press Interact (E) at the Stim prompt; it uses one of your stims.
- Drop samples or gear: Hold X on PC (D-pad down on a controller) for the drop wheel: samples, backpack or support weapon.
- Emote wheel: B (hold) on PC, D-pad left (hold) on a controller.
- Social menu: Esc (Options on PS5), then E (R1) to switch to the Social tab.
7.2Pings and map markers
A ping shows the target's name and distance, red for enemies and white for objects and places. An acknowledged ping lasts much longer, which is why the call and response matters; Arrowhead's own in-game short teaches it. Re-ping moving threats, since pings fade on a timer or when the enemy dies, and put a map marker on the next objective: it stays until you reach or remove it.
| Rule | Detail | Source |
|---|---|---|
| Mark key | Q (tap) on PC, R1 on PS5 | thegamer.com |
| What a ping shows | The target's name and distance: enemies in red, objects and locations with a white marker | wiki |
| Call and response | Ping a teammate's ping to acknowledge it; acknowledged pings last much longer (the in-game Brasch Tactics short teaches it) | wiki |
| Timeouts | Pings fade on a timer or when a pinged enemy dies; re-ping moving threats | wiki |
| Map markers | Open the map (Tab) and left-click; a marker lasts until reached or removed and follows moving objectives (1.001.100) | gamerant.com |
| Pingable extras | Side objectives from range, mines (1.000.300), sample containers (again since 1.003.000) and unexploded Hellbombs (1.001.100) | wiki |
| Marker scans | With the Scout armor passive (since launch) or Unflinching (since 1.003.101), your map markers radar-scan for enemies every 2 s | Steam |
| Gear that follows pings | Cross-Platform Compatibility: your mortar sentries favor your marked targets (acknowledging an ally's ping counts); the G-50 Seeker attacks pinged enemies | wiki |
7.3The comms wheel
A handful of phrases carry a silent squad; Wait, Follow Me, Need Supplies, Thanks and Sorry are the everyday ones. The phrase list is TheGamer's from March 2024, the only list the research found, so check the phrases in the game; on PC, a left click selects one (since patch 1.001.201). Follow Me and Wait also command SEAF soldiers.
| Rule | Detail | Source |
|---|---|---|
| Open it | Hold the Mark key (Q or R1) and release on a phrase | gamerant.com |
| Phrases | Location marker, Wait, Yes, No, Thanks, Need Supplies, Follow Me and Sorry (list of 2024-03-01) | thegamer.com |
| SEAF orders | Follow Me recruits nearby SEAF soldiers; Wait holds them; Wait twice releases them | wiki |
| Binding unverified | Options > Mouse & Keyboard > Change Bindings > Communication: Mark set to Tap and Open Comm Wheel to Long Press on the same key | Steam guide |
| Mouse selection | On PC, left click selects an option in the emote and comms wheels (1.001.201) | Steam |
7.4Voice and text chat
Voice runs open, on Push to Talk or on Push to Mute, set in the audio options. Choose Push to Talk and move its key off Caps Lock if you type in chat, or your messages come out in capitals. A Bluetooth headset's microphone drags your game audio down to low quality: use a separate microphone, or apply Arrowhead's Bluetooth fix. The research found no proximity chat; voice reaches the whole squad unverified.
| Rule | Detail | Source |
|---|---|---|
| Modes | Audio options: Open, Push to Talk or Push to Mute (or off) | gamesradar.com |
| Push-to-talk key | Voice Activation (PTT/PTM) is Caps Lock on PC and unbound on PS5; move it off Caps Lock (for example to T) if you type in chat | gamesradar.com |
| Toggle Microphone | A Toggle Microphone option (since 1.001.002) switches your microphone on and off | Steam |
| Volume | Voice chat has its own volume slider | wiki |
| Voice vanished | 6.3.1 fixed voice going silent after rejoining a lobby; if it happens anyway, leave and rejoin | Steam |
| Bluetooth headsets | A Bluetooth headset's microphone drops audio to low quality; use another microphone or disable Hands-free Telephony and the Bluetooth Audio Gateway; set Steam voice input to Default | arrowhead.zendesk.com |
| Game and Chat devices | For headsets with both, make the Game device the default device and the Chat device the default communications device | arrowhead.zendesk.com |
| Proximity chat unverified | None found; voice reaches the whole squad and players have asked for a proximity mode | Steam guide |
Text chat works in the ship menus, the loadout screen and the loading screen, so a joiner can name their role before dropping in.
| Rule | Detail | Source |
|---|---|---|
| Open chat | Enter opens chat; the 1.000.300 fix list made Open Text Chat rebindable, while PCGamingWiki still lists it as hard-coded | Steam |
| Where it works | In ship menus, the loadout and the mission loading screen (1.000.400), and from the loadout while the squad is on the planet (1.001.002) | Steam |
| IME | Typing Korean, Japanese or Chinese in chat through an IME is a known issue; 7.1.0 fixed the Microsoft IME control lock, though the Known Issues page still lists it | arrowhead.zendesk.com |
| Accessibility | Steam lists chat text-to-speech and speech-to-text; patch notes mention the text-to-speech setting | Steam |
7.5Emotes and hand signals
Answer a hug or a high-five: a partner emote waits for the other diver to press Interact, and since patch 7.1.0 Interact answers an emote before it stims or resupplies. The emote wheel holds 8 emotes, out of 50 emotes and victory poses in the game. Force of Law's hand signals (Signal: Hold, Signal: Silence and Signal: Group Up) organize a squad with the microphone off.
| Rule | Detail | Source |
|---|---|---|
| Emote key | B (hold) on PC, D-pad left (hold) on a controller | gamerant.com |
| Wheel slots | 8 emote slots since 7.0.0 (4 before) | Steam |
| Poses as emotes | Since 6.0.1 emotes and victory poses are interchangeable, except two-person emotes, the kick and a few others | Steam |
| Equipping | In the Armory, Character tab, on your ship or a friend's; not during a mission | gamerant.com |
| Partner emotes | A teammate presses Interact on you: Casual Salute, Explosive Handshake, Hug, High-Five, Scout Handshake, Rock Paper Scissors, Diplomatic Handshake, Thoracic Collision Exultation Maneuver, Test of Conviction and Natural Gas Extraction | wiki |
| Hand signals | Signal: Hold, Signal: Silence and Signal: Group Up (Force of Law) let a squad organize with the microphone off | Steam |
| SEAF emotes | Casual Salute or Lockstep near SEAF soldiers makes them follow you; they react to other emotes too | wiki |
| Count | 50 emotes and victory poses: 2 starter, 46 from warbonds, 2 from the Superstore; the legendary warbonds carry none | wiki |
| Emote before stim | Partner emotes, stims and Supply Pack refills share Interact; since 7.1.0 it answers a teammate's emote before stimming them or giving them ammo | Steam |
7.6Mute, block and report
Mute a player from the squad list in the pause menu. Block a griefer, and they can no longer join games you host, nor you theirs. Report from your friends list, the Recent Players tab or the squad menu.
| Rule | Detail | Source |
|---|---|---|
| Mute | Mute a player from the squad list in the pause menu; the host can mute a joiner still in the loadout (1.002.200) | Steam |
| Block | Blocked players cannot join or matchmake into sessions you host and you cannot join theirs; you stop hearing and seeing their chat; rarely you can still meet in a third player's lobby | arrowhead.zendesk.com |
| Report | Report from your friends list, the Recent Players tab or the squad menu (added 1.000.300) | arrowhead.zendesk.com |
Abbreviations you will meet in chat (AP, D1 to D10, MO, SEAF and more) are in the Getting Started glossary.
Etiquette and unwritten rules
Four habits make you a welcome squadmate: say your role and bring what the squad lacks, announce your ordnance and aim it away from people, take one box from a shared Resupply, and board the shuttle last.
These are community norms from guides written in 2024 and 2025 community-tested; the mechanics behind them (the shared Resupply, duplicated samples, the boarding rules) were checked again for patch 7.1.1. Kicking and leaving have their own chapter: Kicking, leaving and host migration.
Plan as a squad
Say your role and read the squad's picks before you lock yours: four divers with one tool struggle ("four Flamethrowers would be horrible for all involved", GamesRadar+, September 2025). Agree on 4 different boosters, and treat the host as the leader: follow their markers, and suggest rather than override.
Aim away from people
Announce big strikes and throw them away from the squad. Call pods and sentries beside the squad, never on it, and put sentries high, facing away from your route. Ping your minefields and tell the squad.
Reinforce and return the gear
Reinforce near the fallen diver unless that spot is overrun, and let the closest diver throw it. Ask before you take a dead teammate's support weapon or backpack: they will want it back when they land.
Board last
Do not board until everyone who can make it is close and alive: the first diver aboard starts a 20-second departure and ends reinforcements, and divers left behind lose their samples. Do not call extraction while teammates are still out collecting unless the timer forces it.
8.1Every rule, with its source
Each norm links its source, and the Detail column names the dated guide where there is one; a norm only one source supports carries the unverified tag.
| Rule | Detail | Source |
|---|---|---|
| Mix your loadouts | Say your role and read the squad's picks; do not all bring one tool ("four Flamethrowers would be horrible", community-tested, GamesRadar+ 2025-09-03; the in-game tip says to fit stratagems to your squad composition) | gamesradar.com |
| Different boosters | Agree on four different boosters in the lobby | wiki |
| Follow the host unverified | Treat the host as the leader: follow their markers and objective order and suggest rather than override (community-tested, ScreenRant 2024-02-14) | screenrant.com |
| Announce ordnance | Call out big strikes and throw them away from the squad; respect red beams (community-tested, PC Gamer 2024-10-16) | pcgamer.com |
| Pods and sentries | Call pods and sentries beside the squad, not on it; put sentries high and facing away from your route (community-tested, ScreenRant 2024-02-14; PC Gamer 2024-10-16) | screenrant.com |
| Mark minefields | Ping and announce your minefields | wiki |
| One box each | Take one box from a Resupply pod unless the squad agrees otherwise, and call it where everyone can reach it (community-tested, ScreenRant 2024-02-14; the pod is 4 boxes for the squad) | screenrant.com |
| Grab every sample | Pick up every sample, a fallen teammate's included; there is no need to leave any for others because they are duplicated | screenrant.com |
| Ask before looting gear unverified | Ask before taking a dead teammate's support weapon or backpack; they will want it back (community-tested, ScreenRant 2024-02-14) | screenrant.com |
| Help reload | If you carry the backpack or stand beside a team-weapon gunner, help reload (community-tested, GameRant 2024-03-09; the in-game Team Weapons short) | gamerant.com |
| Share anti-tank | Hand a spare EAT or backpack to a teammate who has no anti-tank | thegamer.com |
| Stay together | Explore in pairs rather than leaving teammates to fight while you loot (community-tested, GameRant 2024-03-09; the in-game tip "Don't go it alone") | gamerant.com |
| Board last | Do not board the shuttle until everyone who can make it is close and alive; boarding starts a 20 s departure and ends reinforcements | helldivers.fandom.com |
| Do not rush extraction unverified | Do not call extraction while teammates are still collecting unless the timer forces it (community-tested, GameRant 2024-03-09) | gamerant.com |
| Kick griefers only | Do not kick for accidents, low level or joining late (community-tested, ScreenRant 2024-02-14 and Steam threads) | screenrant.com |
| Leave cleanly unverified | Finish the mission; if you must go, leave between missions or after the summary, not during extraction | Steam guide |
| Own your accidents | Say Sorry on the comms wheel and stim the diver you hurt (community-tested, ScreenRant 2024-02-14) | screenrant.com |
| Mind the line of fire | Never step in front of a teammate lining up a shot and stay out of launcher backblast | screenrant.com |
| Return the gesture unverified | Answer a teammate's hug or high-five (community-tested, ScreenRant 2024-02-14) | screenrant.com |
Roles and loadout coordination
Nothing in the game assigns roles, but a squad that covers anti-tank, crowd control and support beats four copies of one build. For four divers, two on anti-tank, one on crowd control and one on support who also helps with crowds (an EMS Mortar does both) is a workable split: the Field Manual's suggestion, not a game rule unverified. Whatever your role, carry one anti-armor answer.
9.1The roles
The community's working model, from dated guides (PC Gamer, October 2024; GamesRadar+, September 2025) community-tested. Against Automatons, GamesRadar+ (February 2026) says every diver should carry some anti-tank. The heavy-killers for each slot are on Heavy-killers by slot, and whole squads on Squad compositions.
| Rule | Detail | Source |
|---|---|---|
| Anti-tank | Kills heavies and structures: Recoilless Rifle, Quasar Cannon, Spear, EAT-17, Commando, Orbital Precision Strike, Orbital Railcannon Strike, Eagle 500kg Bomb (community-tested) | pcgamer.com |
| Crowd control | Clears the swarm: Machine Gun, Stalwart, Flamethrower, Arc Thrower, Grenade Launcher, Eagle Cluster Bomb, Napalm, Strafing Run, gas, Gatling or Machine Gun sentries, EMS Mortar (community-tested) | gamesradar.com |
| Support | Keeps the squad fighting: Supply Pack, Shield Generator Pack, Stim Pistol, Med-Kit armor, EMS Mortar, smoke and team reloading (community-tested) | pcgamer.com |
| Scout or runner unverified | Light armor, the Scout passive, map markers, samples and side objectives, still carrying one anti-armor answer (Field Manual call) | Steam |
| Anti-armor against bots | Against Automatons every diver should carry some anti-tank, and on Cyberstan a mix of anti-tank across several players is practically essential (community-tested, GamesRadar+ 2026-02-19) | gamesradar.com |
| Suggested split unverified | For four divers a workable split is 2 anti-tank, 1-2 crowd control and 1 support (Field Manual call from the roles above, not a game rule) | gamesradar.com |
| Loadout screen | Shows each teammate's stratagems and boosters (booster owner since 1.001.201) and their equipment (6.3.0) | Steam |
| Weapon icons | Since 7.0.0 backpack-fed stratagem weapons show a backpack icon and non-reloadable ones a drop icon | Steam |
9.2Coordinating in the lobby
- Name the fightThe host says the front, the mission and the difficulty.
- Claim a roleOut loud or in chat: anti-tank, crowd control or support.
- Read the loadout screenIt shows every teammate's stratagems and equipment, and which diver brought which booster.
- Check the iconsA backpack icon marks a support weapon fed from a backpack, which wants a loader; a drop icon marks one you fire and throw away.
- Pick different boostersDuplicates add nothing, so agree who brings what.
- Agree on the danger rulesWho throws barrages, where mines and sentries go, and where the squad extracts.
The coverage check on the Loadouts tab tests one loadout against each front's heavies, crowds and spawners.
9.3Team weapons and assisted reload
If you carry the backpack, or stand next to a teammate firing a Recoilless Rifle, Spear, Autocannon, Airburst or W.A.S.P., help reload. Since patch 7.0.0 the assist works when either of you wears the backpack, and the ammunition comes from it. Stand beside the gunner, never behind (backblast), and press Interact at the prompt. Each EAT-17 call also drops a spare launcher: hand it to a teammate with no anti-tank.
Solo and assisted reload times: the Recoilless Rifle gains the most from a loader, the W.A.S.P. the least.
| Rule | Detail | Source |
|---|---|---|
| Assisted reload rule | A teammate can assist-reload as long as either the wielder or the helper carries the backpack; the ammo comes from the backpack (7.0.0) | Steam |
| GR-8 Recoilless Rifle | 6.1 s solo (5.5 s with Payroll Management System), 1.7 s assisted; backblast 2-6 m | wiki |
| FAF-14 Spear | 4.65 s solo (4.2 s), 2.1 s assisted | wiki |
| AC-8 Autocannon | About 4.5 s from empty (Arrowhead 6.1.0; the wiki times 4 s), 0.66 s per 5-round clip assisted | wiki |
| RL-77 Airburst Rocket Launcher | 5.1 s solo (4.6 s), 1.8 s assisted; backblast | wiki |
| StA-X3 W.A.S.P. Launcher | 4.9 s solo (4.4 s), 3.33 s assisted | wiki |
9.4Boosters in a squad
Each diver brings one booster and its effect covers the whole squad, so a full squad runs 4 different ones and a duplicate adds nothing. New squads can't go wrong with the four boosters from the free Helldivers Mobilize! warbond that GameRant put in its top tier (February 2026) community-tested:
- Hellpod Space Optimization: Divers leave every hellpod (first drop and each reinforce) with full ammo, grenades and stims, up to their armor's capacity.
- Vitality Enhancement: Minor damage reduction for all divers (about 10% per the wiki) and fewer limb injuries.
- Stamina Enhancement: More maximum stamina and faster stamina regen for all divers (wiki.gg: +22.5% and +40%; Fandom lists 30% and 23%) unverified.
- Muscle Enhancement: Less slowdown in snow, mud, water, foliage, barbed wire, blizzards, sandstorms and acid (not slopes or tremors).
Hellpod Space Optimization (page 3) and Vitality Enhancement (page 4) unlock early on the warbond; Stamina Enhancement (page 7) and Muscle Enhancement (page 9) come much later, and the purchase order ranks what to buy first.
Situational picks: Increased Reinforcement Budget for a squad that dies a lot, Surplus EAT Allocation when nobody brought anti-tank, Flexible Reinforcement Budget for a duo. Leave Firebomb Hellpods at home, since every pod landing sets fire to whatever is near, teammates included. Every booster is listed on the Armor tab; the squad rules for boosters follow.
| Rule | Detail | Source |
|---|---|---|
| One each | Each diver equips one booster and its effect applies to every diver in the mission | wiki |
| Four different | Up to four unique boosters per mission; a duplicate adds nothing | wiki |
| Who brought what | The loadout screen shows which diver equipped each booster (1.001.201) | Steam |
| Solo | A solo diver gets only their own booster | wiki |
| Squad core set | Hellpod Space Optimization, Vitality Enhancement, Stamina Enhancement and Muscle Enhancement, all on the free Helldivers Mobilize! warbond (community-tested, GameRant 2026-02-05) | gamerant.com |
| Situational picks | Increased Reinforcement Budget for squads that die a lot; Surplus EAT Allocation when nobody brought anti-tank; Flexible Reinforcement Budget for solo or duo; Sample Scanner or Extricator while the squad needs samples; Integrated Extinguishers against the Incineration Corps or in flamethrower-heavy squads | wiki |
| Skip in squads | Firebomb Hellpods sets fire at every pod landing, teammates included | wiki |
| Commando missions | Reinforcement boosters cannot be chosen for Commando missions | wiki |
| Free booster | On the planet under the DSS Orbital Blockade everyone gets Hellpod Space Optimization without equipping it | wiki |
9.5Shared tools
Some gear is built for more than one diver: vehicles seat a driver, a gunner and passengers who can shoot and call stratagems, bunker doors need two divers pressing both buttons at once, and in Mega Cities several divers can each recruit SEAF soldiers.
| Rule | Detail | Source |
|---|---|---|
| Vehicles | FRVs carry a driver, a gunner and passengers who can shoot and call stratagems; the Bastion and Maelstrom tanks take a driver, a gunner and 2 passengers; enemies ignore empty vehicles since 7.1.0 | wiki |
| Bunkers | Two divers press the two buttons at the same time (or one uses a Warp Pack) to open a bunker's 3 special loot slots | wiki |
| SEAF squads | More than one diver can recruit SEAF soldiers; up to 8 per diver in Mega Cities | wiki |
Squad size and difficulty
With a squad, play one step above the difficulty you can clear alone. The harder difficulties are tuned for co-op, rewards are never split, and every diver adds reinforcements and a booster. Move in pairs rather than alone.
What grows with the squad: the reinforcement pool (5 per diver), the boosters (one per diver), the extraction XP and the patrols. What stays fixed: the Resupply pod, the mission timer and the Commando reinforcements. Since patch 7.1.0, Evacuate High-Value Assets also sends more enemies when more divers are present. Which difficulty pays what is on Difficulty and rewards.
The scaling rules, graded; the 2024 community patrol timings predate patch 7.1.0 and are marked unverified.
| Rule | Detail | Source |
|---|---|---|
| Tuned for squads | The harder difficulties are tuned for co-op; solo divers may struggle with higher-level content | arrowhead.zendesk.com |
| Patrols | Patrol spawning scales with squad size: 1.000.300 raised it for squads under four and 1.000.400 restored the older squad-size scaling with small tweaks | Steam |
| Patrol timing (2024) unverified | A 2024 community study timed patrols: 2 divers shortened the interval about 17% and 3 divers 25% (4 not measured) | helldivers.fandom.com |
| Enemy pressure | Since 7.1.0 spawns are balanced per diver by nearby enemy count and distance; at the enemy cap new spawns favor a diver under low pressure and far enemies despawn when over budget | Steam |
| Split squads (2024) unverified | The 2024 study found each group more than 75 m apart got its own patrol timer; 7.1.0 moved to per-diver balancing, so the old multipliers are stale | wiki |
| Evacuate High-Value Assets | Since 7.1.0 the mission adds more encounter points when more players are present | Steam |
| Fixed per mission | The Resupply pod (4 boxes), Commando reinforcements (12) and mission timers do not change with squad size | wiki |
| Per diver | Reinforcements (5 each), boosters (1 each) and extraction XP (20 per diver aboard) grow with squad size | wiki |
| Rewards not split | Mission rewards do not shrink with more divers; each gets the full amount | wiki |
10.1Splitting up
Since patch 7.1.0 the game balances spawns per diver: it measures the enemy pressure on each diver, favors a diver under low pressure when it has to spawn more, and despawns far-away enemies when the map is over budget. The 2024 community multipliers for split squads no longer apply. Pairs are still the sweet spot: two divers can clear a side objective and open a two-button bunker, while a diver who dies alone comes back wherever a teammate throws the beacon, far from their gear and samples (the Field Manual's call). At extraction, one diver within 50 m of the beacon keeps the shuttle coming while the rest finish up.
10.2Lifelines for solo and duo play
- The SOS Beacon. It pulls public divers into your mission (The SOS Beacon).
- Flexible Reinforcement Budget. Once the budget runs out, each new reinforcement comes 25% sooner (120 -> 90 s).
- SEAF squadmates (Heavy SEAF Presence): unavailable since September 21, 2026. No official post says when, or whether, it returns. A planet modifier since 7.0.0: Pelicans drop SEAF squads (a leader, 2 riflemen, 2 specialists and a medic) on divers facing heavy fighting, aimed at solo players and short-handed squads. Arrowhead calls them "a genuine lifeline" for short squads.
- SEAF in Mega Cities. Mega City maps still start with a SEAF squad you can recruit, up to 8 per diver; Follow Me on the comms wheel, or the Casual Salute or Lockstep emote, brings them along. SEAF medics stim wounded divers; their stims are weaker than yours and ignore Experimental Infusion.
The Blazing Electorate campaign failed, and SEAF battalions were recalled from the front to guard the re-vote.
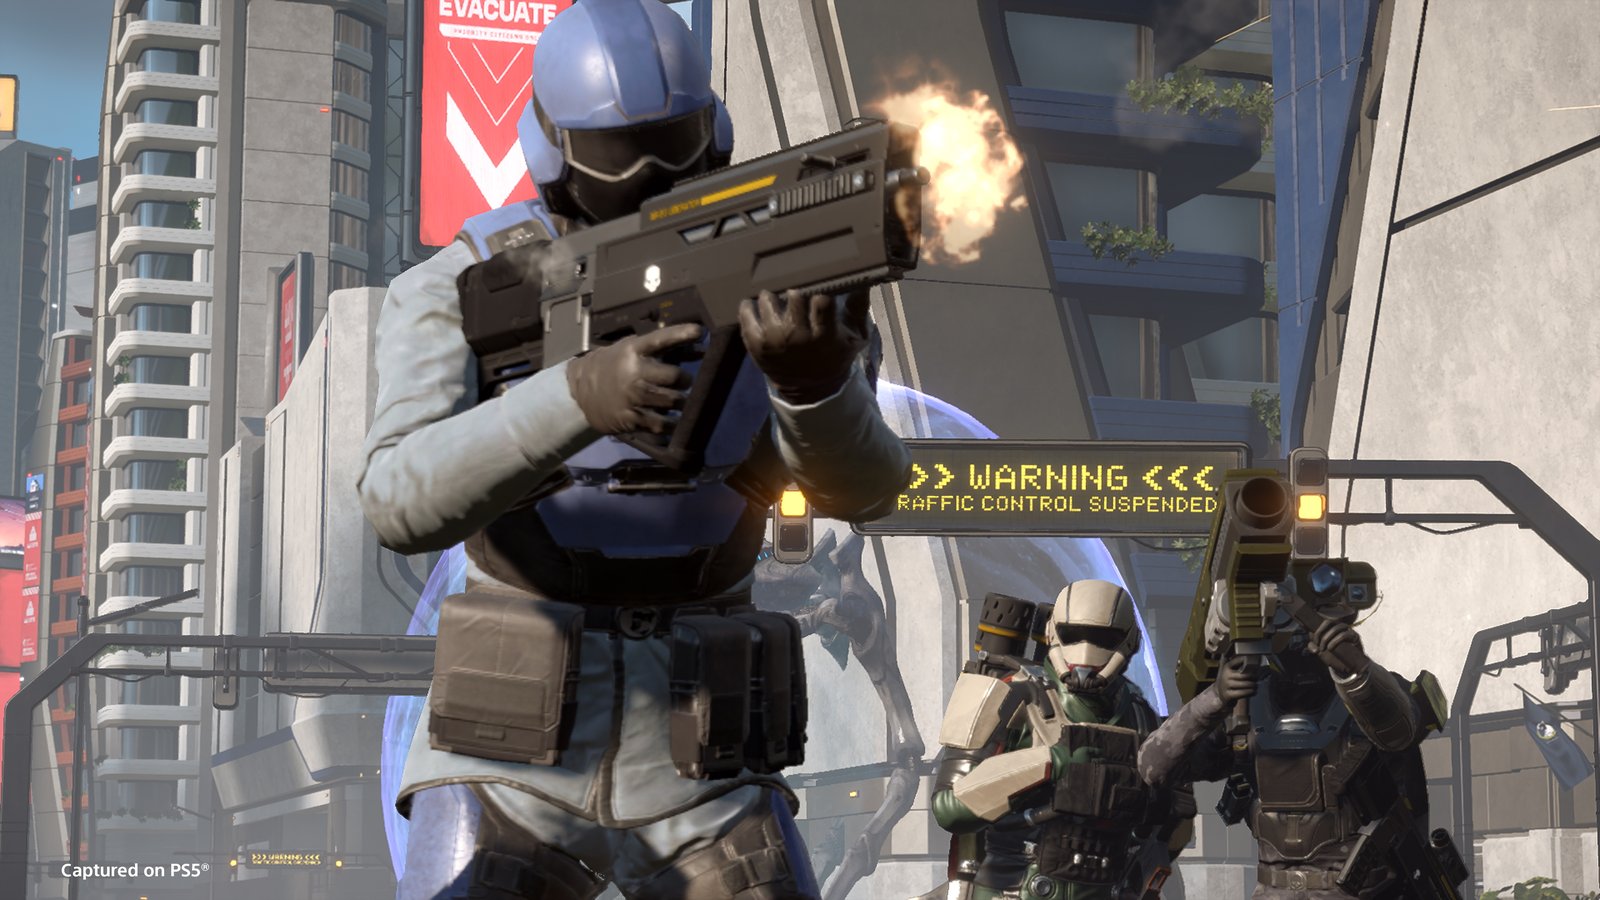
Kicking, leaving and host migration
Kick griefers, not beginners: never for an accident, a low level or a late join. If you have to go, leave between missions or after the summary screen, never during extraction. If the host leaves, the mission carries on under a new host.
11.1Kicking
Only the host can kick, and a kick costs the kicked diver nothing: since Escalation of Freedom (2024) they carry on in a copy of the mission as its host, with the team's loot, and can still extract for full rewards, while the squad keeps its own loot and sees a chat message. The host can also mute or kick a joiner who is still in the loadout screen, and every kick, block and unfriend asks for confirmation.
| Rule | Detail | Source |
|---|---|---|
| Host only | Only the host can kick; 1.000.302 fixed non-hosts kicking anyone, the host included | Steam |
| Grief protection | A kicked diver continues in a copy of the mission as host, with the team's loot and full rewards; the squad keeps its loot and sees a chat message (since 1.001.002) | Steam |
| Kick in the loadout | The host can kick or mute a joiner who is still in the loadout (fixed 1.002.200) | Steam |
| Confirmation | Kick, block and unfriend ask for confirmation (1.001.002); Remove Friend and Block are hold-to-confirm (1.000.402) | Steam |
11.2Leaving and host migration
When the host leaves, another diver becomes host and the mission continues; the SOS Beacon is destroyed so the new host can decide whether to throw another. Only the host's Abandon Mission With Squad ends the mission for everyone. When a client leaves, their booster's effect reportedly ends (extra reinforcements from Increased Reinforcement Budget stay), and their samples reportedly drop where they stood unverified. Quickplay or an SOS can fill the empty slot.
| Rule | Detail | Source |
|---|---|---|
| Host leaves | Host migration: another diver becomes host and the mission continues; the SOS Beacon is destroyed | Steam |
| Abandon with squad | The host's Abandon Mission With Squad takes everyone out; hidden when playing alone since 1.002.001 | Steam |
| Booster on leaving unverified | A leaving diver's booster stops working (Fandom), but Increased Reinforcement Budget's extra reinforcements stay (wiki.gg) | helldivers.fandom.com |
| Samples on leaving unverified | Players report that a diver who leaves or disconnects drops the samples they carried | Steam guide |
| Crash rejoin | After a crash you can rejoin your last match (1.002.001) | Steam |
AFK timer. 15 minutes idle sends a diver back to the title screen (1.000.11, 2024-02-22).
Relaunch the game: you can rejoin your last match (possible since patch 1.002.001), and, if your squad is still in it, the mission carries on while you are away.
Connection problems
If you can log in but cannot join anyone, suspect peer-to-peer reachability on your side (a strict or double NAT, carrier-grade NAT, a VPN) rather than Arrowhead's servers. Turn on UPnP, play wired, update your network drivers, and work down the steps below.
Why: the game talks to two places at once. Arrowhead's servers hold your profile (level, unlocks, currencies), while the match itself runs peer-to-peer with the host's machine as the server. That is also why the host's connection affects everyone in the squad (What the host controls).
12.1Try these in order
- Rule out matchmakingSet your privacy to Public, pick a busy planet and let Quickplay retry, or host and throw an SOS.
- Restart the networkRestart the modem and router (off for 5-7 minutes).
- Open the pathTurn on UPnP on the router. Fix a double NAT (put a second router in access-point mode, or the ISP modem in bridge mode), or ask your ISP for a public IPv4 address if you are behind carrier-grade NAT.
- Steady the linkPlay wired and update your network drivers: some Intel and Realtek 2.5 Gb adapters are known to drop the link.
- Fix name lookupsFlush the DNS cache (
ipconfig /flushdns) and switch to a public DNS server. - Drop the middlemenA VPN has to allow peer-to-peer traffic, and DPI bypass tools break the login and can trip the anti-cheat. Close them while you play.
- Then the game itselfVerify the files, delete the Helldivers 2 folder in
%APPDATA%\Arrowhead, and if nothing helps, open a ticket with Arrowhead quoting your Account ID.
12.2Symptoms and fixes
Every connection fault the research found, with its fix and source, error codes included. The Hellbomb Script row is a community tool, not Arrowhead's: read it before you run it.
| Rule | Detail | Source |
|---|---|---|
| Cannot join others | If you can log in but not join or host, suspect peer-to-peer reachability: strict NAT, CGNAT, double NAT or a VPN that blocks P2P | wiki |
| NAT type | PS5 NAT Type 2 is the target and Type 3 means strict; Xbox should read Open; turn on UPnP on the router | wiki |
| CGNAT and double NAT | Ask the ISP for a public IPv4, use a paid VPN that allows P2P, or set a second router to access-point mode (or the ISP modem to bridge) | wiki |
| Power cycle | Restart the modem and router (off for 5-7 minutes) | arrowhead.zendesk.com |
| DNS | Flush the DNS cache and use 1.1.1.1 / 1.0.0.1 or 8.8.8.8 / 8.8.4.4 for IPv4 and IPv6 | wiki |
| IPv6 | Disable IPv6 on the adapter for DS-Lite or Starlink trouble (Starlink UTR-211: router IPv6 set to autoconfigure) | wiki |
| Network drivers | Intel i225/i226 and Realtek 2.5 Gb adapters drop the link; update drivers (Event Viewer ID 27 shows the drops); play wired | wiki |
| VPN and DPI tools | A VPN must allow P2P (free VPNs rarely do); DPI bypass tools break login and can trigger anti-cheat error 10002039 | wiki |
| Poor-connection threshold | 1.001.102 doubled the poor-connection threshold after weak joiners could get existing players disconnected | Steam |
| Social tab stuck | For Please Wait Democratically on PC, delete the Helldivers 2 folder in %APPDATA%\Arrowhead and make your Steam profile public; on PS5 clear the cache | wiki |
| Social tab crashes unverified | Some PC and PS5 players stop Social-tab crashes by turning crossplay off | wiki |
| PlayFab Error 35 | Login fails because the system clock drifted; resync Windows time (w32tm /resync) | wiki |
| Error 1600 | Status Code 400 or Error 1600 comes from special characters in the Steam name; use letters and digits only | wiki |
| Error 114 | GameGuard: run as administrator (Windows 8 compatibility mode on Windows 11), reinstall GameGuard, add antivirus and firewall exceptions | arrowhead.zendesk.com |
| Error 0x44415441 | Out-of-date files, usually mods: purge mods, delete the data folder and verify files | arrowhead.zendesk.com |
| New account stuck unverified | If quickplay and difficulty choice are missing, play a mission on Azur Secundus (Sten sector) if it is available, otherwise contact support | wiki |
| General fixes | Verify files, update drivers, delete %APPDATA%\Arrowhead, reinstall, then open a ticket with your Account ID (Esc then the Options tab) | arrowhead.zendesk.com |
| Known issues scope | Arrowhead's known-issues list leaves out most crash, performance and connectivity problems because those are always being worked on | arrowhead.zendesk.com |
| Hellbomb Script unverified | A community PC diagnostic (open source on GitHub) for DNS, NAT and settings, promoted by the wiki; not Arrowhead's, so read it before running | wiki |
With a high ping you can die landing on an Automaton fabricator, so do not aim your hellpod at one when your connection is poor. Arrowhead's Known Issues list leaves out most crash and connection problems because those are always being worked on, so report yours with your Account ID.
More fixes: the community wiki's Network Troubleshooting page, and Known bugs on the Community tab.
First night in multiplayer: the checklist
Everything above as a pre-flight list. Work down it once and you will not be the problem diver.
13.1Before you launch
- Options, Gameplay: Matchmaking Privacy Public (or Friends Only with friends), and crossplay on.
- Audio: pick Push to Talk (or an open microphone), and move the talk key off Caps Lock if you type in chat.
- Learn the squad keys: ping, comms wheel, map marker, chat, Interact and the drop wheel (the key list).
- Bluetooth headset? Use a separate microphone, or voice will wreck your game audio.
13.2On the ship
- Friends on another platform: open the Social menu, Generate your friend code and have them search for it (the steps).
- Pick a difficulty you can clear alone, or one step above it with a squad; you can join harder missions than you have unlocked.
- Quickplay on a busy planet (the Major Order or campaign planets), or host and throw the SOS Beacon (↑ ↓ → ↑) once you land.
13.3In the loadout
- Claim a role in chat: anti-tank, crowd control or support. Read the squad's picks before you lock yours.
- Bring one anti-armor answer anyway: an EAT-17 or a Recoilless Rifle is enough (support weapons).
- Choose a booster nobody else has. Unsure? Hellpod Space Optimization or Vitality Enhancement, and later Stamina or Muscle Enhancement.
13.4On the ground
- Ping everything: enemies, samples, objectives. Answer a teammate's ping by pinging it.
- Stay within sight of the squad, in pairs at least. No microphone? Wait and Follow Me are on the comms wheel.
- Call it before you throw it: strikes, barrages, mines and sentries. Never step in front of a teammate's gun or behind a launcher.
- Resupply is shared (4 boxes every 180 seconds): take one box.
- Stim wounded teammates (Interact at the Stim prompt), and say Sorry if you hurt one.
- Pick up every sample, a fallen teammate's too: the squad's total goes to everyone.
- Reinforce (↑ ↓ → ← ↑) near where the teammate died unless it is overrun; when you are the one dropping in, steer your pod onto a big enemy.
- Help reload a teammate's Recoilless, Spear or Autocannon when you are close.
13.5At extraction
- The shuttle takes 120 seconds to arrive: one diver holds the zone (within 50 m of the beacon) while the rest defend it.
- Board last: the first diver aboard starts a 20-second departure and ends reinforcements.
13.6After the mission
- Stay for the mission summary before you leave.
- Add good squadmates from Recent Players; block or report griefers there.
- Do not kick for accidents or late joins: the kicked diver keeps the loot anyway.
- Connection trouble? Work down Connection problems.
Roadmap03
Progression & Currencies
What every level unlocks and what every currency buys -- Requisition, Medals, Super Credits and samples with their caps -- plus the ship modules to buy first.
On this page5 chapters
Currencies and caps: what each one buys first
Each currency has one main job, and most of them stop at a cap, so spend as you go: Requisition on stratagems, Medals on warbond pages (Helldivers Mobilize! first), Super Credits on a premium warbond, and samples on ship modules. Whatever you earn above a cap is thrown away.
Buy stratagems as you level
Start with the Eagle Airstrike and the EAT-17, then add a stratagem at each unlock that fills a gap in your loadout. Later, Requisition pays for weapon attachments and the top two tiers of ship modules. The shopping list
Spend them on warbond pages
Medals buy warbond items and nothing else, and spending them inside a warbond is what opens its next page. Start with the Super Credit stacks in Helldivers Mobilize!, and never sit at the cap. What to buy
Save for one premium warbond
Claim the stacks inside warbonds and pick them up in missions until you have 1,000, then unlock Democratic Detonation, rated S by GamesRadar (August 13, 2026) and S+ by a u.gg-based Steam guide (August 19, 2026) community-tested. The ranked order
Upgrade your ship
Your first 300 common samples buy four tier-1 ship modules. Rare samples start at difficulty 4 and super samples at 6, and none of them count until they are extracted. The module order
1.1Every currency at a glance
Where each one comes from and what it pays for. Pickups count for every diver in the mission the moment one of you grabs them; samples count only when the squad extracts.
| Currency | Cap | Where it comes from | What it buys | From difficulty |
|---|---|---|---|---|
| Requisition Slips | 50,000 | Objectives, destroyed outposts, slips on the map (100 each), some Major Orders | Requisition stratagems, weapon attachments, tier-4 and tier-5 ship modules, space station donations | 1 |
| Medals | 250 | Every mission, Medal cases (1 to 3), the daily Personal Order (15), won Major Orders | Warbond items only | 1 |
| Super Credits | none | Stacks on warbond pages, pickups on the map (10, rarely 100), real money | Premium and legendary warbonds, the Superstore | 1, densest at 1 to 3 |
| Common samples | 500 | The map, once extracted | Ship modules of every tier, space station donations | 1 |
| Rare samples | 250 | The map, plus extra ones in pods, containers and bunkers, once extracted | Ship modules from tier 2 (plus two tier-1 modules), space station donations | 4 |
| Super samples | 100 | Super sample rocks, city statues, burning convoys and difficulty-10 High-Value Pickups, once extracted | Ship modules from tier 3 (plus two tier-2 modules) | 6 |
1.2Requisition Slips
- Earning: a main objective pays 500 Requisition and 100 XP, an optional one 200 Requisition and 50 XP, and destroyed outposts pay 50, 100, 150 and 200 Requisition with 5, 10, 20 and 40 XP, from light to giant. The difficulty bonus lifts Requisition and XP by 0, 0, 25, 50, 75, 100, 150, 200, 250 and 300 percent at difficulties 1 to 10. Each slip you find adds 100 for every diver present, and the odd one holds 1,000.
- Spending, in the order you will meet it: the 60 stratagems that unlock by level (two are free; the rest cost 449,000 in all), weapon attachments from level 10, the tier-4 and tier-5 ship modules (20,000 to 35,000 each), and donations to the Democracy Space Station.
- The cap: the wallet stops at 50,000, so buy as you level instead of saving for everything at once. The most expensive single stratagem, the TD-220 Bastion tank, costs 35,000.
- A penalty: killing a civilian or a SEAF soldier costs you 25 Requisition each, before the difficulty multiplier.
1.3Medals
- Earning: every mission pays Medals, more for each later mission of an operation and more on harder difficulties: a whole operation pays 1, 2, 6, 8, 18, 21, 24, 29, 33 and 36 at difficulties 1 to 10. Medal cases hold 1 to 3, the daily Personal Order pays 15, and a won Major Order usually 35 to 55.
- Spending: warbond items only. A page opens once you have spent enough Medals in that warbond, so a full wallet opens nothing.
- The cap: 250. Spend down before a Major Order pays out.
- The best trade in the game: Helldivers Mobilize! sells 100 SC for 1, 2, 3, 6 and 10 Medals (pages 1-5), then 50 SC for 15, 15, 20, 25 and 50 Medals (pages 6-10). Each premium warbond holds three 100-SC stacks for 7, 12 and 32 Medals.
The Medal-by-Medal plan is on Warbonds: the short answer, and every Medal source on Earning Medals and Super Credits.
1.4Super Credits
- From warbonds: 750 in Helldivers Mobilize! and 300 in each premium warbond, 7,050 across every warbond; the legendary crossovers hold none.
- In missions: stacks of 10 (rarely 100) in pods, cargo containers and bunkers at points of interest, credited to every diver present, even if you never extract. They are densest on difficulties 1 to 3, Eradicate missions have none, and factory worlds have held them since patch 7.0.0.
- For money: the 1,000-SC pack costs US$9.99 on the PlayStation Store. Money buys Super Credits, not warbonds, with one exception: the Super Citizen Edition and its upgrade include a Premium Warbond Token that unlocks one warbond (premium warbonds only).
- Spending: a premium warbond costs 1,000 (700 once you claim the stacks inside it), a legendary one 1,500, and the Superstore sells armor, some weapons and cosmetics (Superstore and free gear).
- No wallet cap, but since July 9, 2026 an undisclosed limit on how fast Super Credits can be earned stops exploiters, and Arrowhead says normal play, even a weekend-long grind, never reaches it (Arrowhead on Steam). It plans to extend the limit to Medals, samples and Requisition; whether it has is not confirmed unverified.
1.5Samples
Three kinds, each with its own cap and its own starting difficulty. The Galactic War screen shows which kinds an operation offers before you launch.
| Sample | On the map | Found as | From difficulty | Cap |
|---|---|---|---|---|
| Common | A green circle split down the middle | Cases and machinery in structures, alien bulbs, corpse worms at graves, Illuminate cuboctahedra | 1 | 500 |
| Rare | An orange square with its lower-left corner split off | Crystallized E-710, Legendarium and Black Saffron, each with its own sound, plus extra ones in pods, containers and bunkers | 4 | 250 |
| Super | Four pink squares | Super Uranium, a pool of gray liquid under a floating blob that clicks like a Geiger counter, at super sample rocks, Helldiver statues in cities and burning convoys in colonies | 6 | 100 |
- Keep them: samples count only when they reach the shuttle, and a diver who is not aboard loses what they carry. They are handed over as you board, so dying inside the shuttle loses nothing.
- Share them: everything the squad extracts is credited in full to every member; if the squad extracts 10, each diver gets 10.
- Pick up the dead: a fallen diver drops their samples, and anyone can pick them up.
- Grab faster: starting a sprint cancels the pickup animation community-tested.
- After the modules: once you own every module, common and rare samples have one use left, donations to the Democracy Space Station, up to 75 common samples, 50 rare samples and 50,000 Requisition in 24 hours; super samples have none.
Levels and unlocks: what to buy as you level
Levels unlock Requisition stratagems, and Requisition buys them. Buy the Eagle Airstrike first, the EAT-17 at level 3, a reusable anti-tank weapon at level 5 and the AC-8 Autocannon at level 10. Arrowhead says the gear that matters for a loadout is all unlocked by the time you reach about 25 (only the TD-220 Bastion tank may come later, at level 30 unverified); the levels after that, up to 300, are prestige.
2.1Your Requisition shopping list
This order is the Field Manual's own analysis, not a community ranking: two of its research dossiers built it separately from unlock levels, costs and the enemies each difficulty adds, and arrived at the same first purchases. How each stratagem does on each front is on Stratagems and Beginner loadouts.
- Eagle Airstrike, first4,000 Requisition, open from your first visit to the ship. One call handles a patrol, a bug hole or a fabricator, and the Hangar ship modules make it better still.
- EAT-17 Expendable Anti-Tank, at level 33,000 Requisition for the cheapest anti-tank weapon: two launchers per call, back every 70 seconds.
- A cheap filler for the fourth slotThe Orbital Gatling Barrage (1,500), the A/MG-43 Machine Gun Sentry (1,500) or the Eagle Strafing Run (1,500), all open from the first visit. The Gatling Barrage is the cheapest answer to a bug breach or a bot drop.
- Level 5: a Recoilless Rifle or a Grenade LauncherThe GR-8 Recoilless Rifle (6,000) is reusable anti-tank carried with a backpack; the GL-21 Grenade Launcher (6,000) clears crowds and closes bug holes. Add the A/G-16 Gatling Sentry (4,000, level 5) for holding objectives and extraction.
- Level 10: AC-8 Autocannon7,000 Requisition for a flexible answer to medium armor, fabricators and flying enemies, which also closes bug holes from range. Weapon attachments unlock at level 10 too.
- Level 15: heavy removalThe Eagle 500kg Bomb (10,000) or the Orbital Laser (10,000, level 15; 3 per mission) removes a heavy without aiming a launcher; the A/MLS-4X Rocket Sentry (7,500, level 15) goes for heavies first.
- Level 18: LAS-99 Quasar Cannon7,500 Requisition: anti-tank with no ammunition to manage and no backpack.
- Level 20: the single-target killers and a shieldThe Orbital Railcannon Strike (10,000), the FAF-14 Spear (9,000) and the SH-32 Shield Generator Pack (10,000).
- Level 25: exosuits and the FRVThe EXO-45 Patriot (20,000) and EXO-49 Emancipator (20,000) exosuits and the M-102 Gunner FRV (25,000). The TD-220 Bastion tank (35,000) comes last, at level 30 unverified: the community wiki has listed it at 25, then 1, then 30, the second wiki says 25, and no patch note gives a level.
A dated outside view: DualShockers' early list (February 16, 2024) picked the Strafing Run, Airstrike, Supply Pack, EAT, Recoilless Rifle, Grenade Launcher and Guard Dog Rover first community-tested. Balance has moved a lot since (patches 4.1.0 and 6.3.0), so read it as history.
2.2Milestones
- Level 2, on arrival: basic training pays exactly the 100 XP that level 2 needs, so every stratagem the wikis place at level 1 or 2 is open on your first visit to the ship.
- Level 10 (7,100 XP in all): weapon attachments, and the rank title Sergeant.
- Level 25 (35,900 XP in all): by Arrowhead's count, the gear that matters for a loadout is unlocked around here, and everything after it is for the long haul.
- Level 300 (11,080,000 XP in all): the cap. It was 50 at launch, 150 from April 2, 2024 and 300 from August 12, 2026. Arrowhead says reaching 300 takes more than twice as long as reaching 150, and XP earned past the old cap was banked and paid out as levels.
- Rank titles: one every 5 levels up to 50 and one every 10 after that, 36 in all, from Cadet at level 1 to Skull Admiral at 50 and Rank 300 at the cap. Equip one under Armory, Character, Title.
2.3How XP is earned
Mission XP is tallied at the end, win or lose, and multiplied by the difficulty bonus (0, 0, 25, 50, 75, 100, 150, 200, 250 and 300 percent at difficulties 1 to 10).
- A main objective: 500 Requisition and 100 XP.
- An optional objective: 200 Requisition and 50 XP (Destroy High-Value Target pays 222 XP and no Requisition).
- Outposts: 50, 100, 150 and 200 Requisition with 5, 10, 20 and 40 XP, from light to giant.
- Extraction: 20 XP for each diver aboard, plus 1 XP for each percent of the mission time left.
For a sense of pace: a full squad at difficulty 5 that completes three optional objectives and a handful of outposts and extracts with half its time left earns about 760 XP. At that rate level 10 takes about 10 missions and level 25 about 47 approx; this is an illustration from the wiki's XP values, not a measurement.
2.4Weapon levels and attachments
From level 10, your primaries level up as you use them (a weapon earns XP while it is in your loadout), up to weapon level 25. Each weapon level unlocks attachments that you then buy with Requisition: open the Armory, pick a weapon and choose Customize. Only primaries take attachments, and not all of them do (Arrowhead support).
- The long Requisition sink: an attachment costs from nothing to 25,000 Requisition. Everything for the AR-23 Liberator comes to 124,000 across its 14 paid options, with the 4x Combat Scope and the Drum Magazine at 25,000 each unverified (the community wiki's figures, with no second source).
- Keep your setup: turn on the player-settings option that keeps your chosen customization after death.
- A known issue: some attachment stats do not preview until you buy and equip the attachment (Arrowhead's known-issues list).
2.5Stratagems you do not buy with Requisition
- Warbond stratagems (29 of them) cost Medals on the page of a warbond you own, and need no level.
- Campaign rewards: a won Galactic War Campaign gives its reward, sometimes a stratagem, to everyone who took part. A stratagem reward shows up in your mission loadout, not in the Ship Management list (Orders and their rewards).
- The M-103 Supply FRV, a campaign reward, becomes a Requisition purchase for everyone in October 2026; its level and price are not announced.
- Temporary permits: Major Orders and strategic opportunities sometimes lend every diver a stratagem for a set time, without taking a slot.
2.6Every Requisition unlock
All 60 stratagems that unlock by level, each with its level and Requisition cost, are in the generated tables on the Stratagems tab: orbitals, Eagles, support weapons and backpacks, sentries, emplacements and mines, and vehicles and exosuits. The paid ones come to 449,000 Requisition, so with a 50,000 wallet you buy them level by level.
Ship modules: which to buy first
Put your first 300 common samples into the four tier-1 modules that need no rare samples: Donation Access License, Liquid-Ventilated Cockpit, Targeting Software Upgrade and Exploding Shrapnel. Next comes Pit Crew Hazard Pay, then Expanded Weapons Bay as soon as you have super samples, if you call Eagles.
3.1How modules work
- Where: the Ship Management terminal, under Ship Module.
- Structure: 30 modules in six sections of five tiers, and each tier needs the one below it in the same section.
- Cost: samples for every tier, plus Requisition for tiers 4 and 5. Buying all of them costs 3,830 common, 2,920 rare and 305 super samples plus 335,000 Requisition.
- Who benefits: only the diver who bought the module, with one exception that works through objects: squadmates get full refills from your Resupply boxes if you own Superior Packing Methodology.
- Stable since 2024: no module has been added or repriced since July 2024. Arrowhead announced an overhaul with new ships on June 4, 2026, but gave no date unverified.
3.2Phase A: common samples only (difficulties 1 to 3)
300 common samples for four modules that pay off from the next mission on.
- Donation Access LicensePatriotic Administration Center, tier 1 · 60 common. Support weapons arrive with all the spare ammunition you can carry.
- Liquid-Ventilated CockpitHangar, tier 1 · 80 common. Halves the 15-second wait between two Eagle calls.
- Targeting Software UpgradeBridge, tier 1 · 60 common. Orbitals land sooner, the free Precision Strike included.
- Exploding ShrapnelOrbital Cannons, tier 1 · 100 common. Orbital blasts keep full damage over a wider core.
3.3Phase B: first rare samples (difficulties 4 and 5)
440 more common and 210 rare samples, for faster Eagles and shorter cooldowns.
- Pit Crew Hazard PayHangar, tier 2 · 80 common, 40 rare. A faster Eagle rearm, and the way to Expanded Weapons Bay.
- Streamlined Request ProcessPatriotic Administration Center, tier 2 · 80 common, 40 rare. Shorter support-weapon cooldowns.
- Synthetic SupplementationEngineering Bay, tier 1 · 60 common, 10 rare. Shorter Resupply, sentry and emplacement cooldowns.
- Dynamic TrackingRobotics Workshop, tier 1 · 60 common, 20 rare. Sentries drop in faster.
- Nuclear RadarBridge, tier 2 · 80 common, 40 rare. Your minimap shows enemies farther out.
- More GunsOrbital Cannons, tier 2 · 80 common, 60 rare. Barrages fire an extra salvo, and it is the way to Zero-G Breech Loading.
3.4Phase C: first super samples (difficulty 6 and up)
640 more common, 560 rare and 65 super samples; this is where Eagle users get their biggest upgrade.
- Expanded Weapons BayHangar, tier 3 · 80 common, 80 rare, 10 super. One more use of every Eagle strike per rearm.
- Zero-G Breech LoadingOrbital Cannons, tier 3 · 80 common, 80 rare, 10 super. Shorter orbital cooldowns.
- Hand CartsPatriotic Administration Center, tier 3 · 80 common, 60 rare, 5 super. Shorter backpack cooldowns, and the way to Superior Packing Methodology.
- Shock Absorption GelRobotics Workshop, tier 2 · 80 common, 40 rare, 5 super. More sentry ammunition.
- Advanced ConstructionEngineering Bay, tier 2 · 80 common, 60 rare, 5 super. Tougher sentries.
- High-Quality LubricantRobotics Workshop, tier 3 · 80 common, 80 rare, 10 super. Sentries turn faster, and the way to Blast Absorption.
- Power SteeringBridge, tier 3 · 80 common, 80 rare, 10 super. Better hellpod steering, and the way to the Bridge's top tiers.
- Rapid Launch SystemEngineering Bay, tier 3 · 80 common, 80 rare, 10 super. Emplacements drop in faster, and the way to the Engineering Bay's top tiers.
3.5Phase D: tiers 4 and 5 (Requisition too)
Each of these also costs Requisition, shown here; the sample costs are in the full table. Buy them in this order as your wallet allows.
- XXL Weapons Bay (25,000): one more bomb from the Airstrike, Cluster Bomb, Napalm and Smoke Eagles.
- Superior Packing Methodology (20,000): your Resupply fully refills support weapons, your squadmates' too.
- Enhanced Combustion (25,000): stronger fire from stratagems, and the way to Morale Augmentation.
- Morale Augmentation (35,000): every stratagem cooldown shorter, mission stratagems included.
- Circuit Expansion (20,000): arcs jump to more enemies, and the way to Streamlined Launch Process.
- Streamlined Launch Process (30,000): support weapons drop in faster.
- Payroll Management System (30,000): faster support-weapon reloads.
- Advanced Crew Training (30,000): a faster rearm when you call Eagle Rearm early.
- Atmospheric Monitoring (25,000): tighter HE barrages.
- High-Density Explosives (35,000): bigger orbital blasts.
- Blast Absorption (25,000): sentries shrug off explosions.
- Cross-Platform Compatibility (35,000): mortar sentries fire on what you mark.
3.6Variants by playstyle
- Eagle-heavy: finish the Hangar first: Liquid-Ventilated Cockpit, Pit Crew Hazard Pay, Expanded Weapons Bay, XXL Weapons Bay, Advanced Crew Training.
- Orbital-heavy: pull Zero-G Breech Loading and Atmospheric Monitoring forward.
- Sentries and emplacements: pull the Robotics Workshop (Dynamic Tracking, Shock Absorption Gel, High-Quality Lubricant, Blast Absorption, Cross-Platform Compatibility) and the Engineering Bay's Synthetic Supplementation and Advanced Construction forward; take Cross-Platform Compatibility early if you run mortars.
- Everyone ends up with all of them: the tier-4 and tier-5 modules need the weaker tier-2 and tier-3 modules below them.
3.7What the community rates highest
Two dated lists, both opinions community-tested. Both put Donation Access License, Liquid-Ventilated Cockpit and Targeting Software Upgrade near the top, as Phase A does.
- VideoGamer's tier list (updated October 11, 2024): S tier for Donation Access License, Dynamic Tracking, Expanded Weapons Bay, Liquid-Ventilated Cockpit, Synthetic Supplementation and Targeting Software Upgrade; C tier for Hand Carts, More Guns and Rapid Launch System.
- games.gg's order (June 9, 2026): Donation Access License, Targeting Software Upgrade, Liquid-Ventilated Cockpit, Pit Crew Hazard Pay, Expanded Weapons Bay, Dynamic Tracking and Shock Absorption Gel, with Rapid Launch System, Power Steering and More Guns called skippable. The same page gets two sample facts wrong (it puts super samples at difficulty 7 and up, and rare samples "reliably" at 5 to 6), so weigh it lightly.
3.8How long it takes
Estimates that assume your squad finds and extracts every sample on the map; a squad covers more ground than a solo diver, and each member receives the full count approx.
| Phase | Samples it needs | Missions at a sensible difficulty |
|---|---|---|
| A | 300 common | About 17 to 20 at difficulty 3, or 11 to 14 at 4 to 5 |
| B | 440 common, 210 rare | About 11 to 18 at difficulty 4 to 5 |
| C | 640 common, 560 rare, 65 super | About 22 to 33 at difficulty 6, 17 to 22 at 7, or 9 to 13 at 8 to 10 |
| Everything | 3,830 common, 2,920 rare and 305 super samples plus 335,000 Requisition | For the super samples alone, about 51 at difficulty 9 or 44 at 10; the Requisition comes in alongside |
3.9Every module
All 30, grouped by section. Within a section, read the Tier column: each tier needs the one before it. Three rows are graded likely because the sources disagree: the super-sample cost of Advanced Crew Training and of Streamlined Launch Process (25 on most records, 20 on one; only 25 adds up to the published total) and the effect of Circuit Expansion (one extra enemy on most records, two on its own wiki page).
| Module | Tier | Category | Effect | Common | Rare | Super | Requisition | Source |
|---|---|---|---|---|---|---|---|---|
| Enhanced Combustion | 4 | Bridge | Fire damage from stratagems +25% (direct and burn) | 200 | 150 | 15 | 25,000 | wiki |
| Morale Augmentation | 5 | Bridge | Every stratagem cooldown -5% (mission stratagems included) | 250 | 200 | 20 | 35,000 | wiki |
| Nuclear Radar | 2 | Bridge | Minimap enemy radius +50% (50 to 75 m) | 80 | 40 | 0 | 0 | wiki |
| Power Steering | 3 | Bridge | Better Hellpod steering during the drop (about double) | 80 | 80 | 10 | 0 | wiki |
| Targeting Software Upgrade | 1 | Bridge | Orbital stratagem call-in time -1 s | 60 | 0 | 0 | 0 | wiki |
| Advanced Construction | 2 | Engineering Bay | Sentry health +50% | 80 | 60 | 5 | 0 | wiki |
| Circuit Expansion | 4 | Engineering Bay | Arcs from weapons and turrets jump to 1 additional enemy (in-game text per 4 sources; one wiki page says 2 since a 2025-09-14 edit) | 200 | 150 | 20 | 20,000 | wiki |
| Rapid Launch System | 3 | Engineering Bay | Emplacements launch immediately once called in (about 3 s faster) | 80 | 80 | 10 | 0 | wiki |
| Streamlined Launch Process | 5 | Engineering Bay | Support weapons launch immediately once called in (about 3 s faster); super cost 25 per both wiki records and Fandom, 20 per GamesRadar+ | 250 | 200 | 25 | 30,000 | wiki |
| Synthetic Supplementation | 1 | Engineering Bay | Sentry, emplacement and Resupply cooldown -10% | 60 | 10 | 0 | 0 | wiki |
| Advanced Crew Training | 5 | Hangar | Eagle Rearm a further -10% when called with uses left (120 to 108 s); super cost 25 per the summary table, Fandom and GamesRadar+, 20 on its own wiki page | 200 | 250 | 25 | 30,000 | wiki |
| Expanded Weapons Bay | 3 | Hangar | +1 use of every Eagle stratagem per rearm | 80 | 80 | 10 | 0 | wiki |
| Liquid-Ventilated Cockpit | 1 | Hangar | Eagle stratagem cooldown -50% (15 to 7.5 s between calls; rearm unchanged) | 80 | 0 | 0 | 0 | wiki |
| Pit Crew Hazard Pay | 2 | Hangar | Eagle Rearm time -20% (150 to 120 s) | 80 | 40 | 0 | 0 | wiki |
| XXL Weapons Bay | 4 | Hangar | Eagles that drop several bombs drop 1 more (Airstrike, Cluster Bomb, Napalm, Smoke) | 150 | 150 | 15 | 25,000 | wiki |
| Atmospheric Monitoring | 4 | Orbital Cannons | Orbital 120mm and 380mm HE Barrage spread -15% | 200 | 150 | 15 | 25,000 | wiki |
| Exploding Shrapnel | 1 | Orbital Cannons | Less damage falloff on orbital explosions (inner radius +50%) | 100 | 0 | 0 | 0 | wiki |
| High-Density Explosives | 5 | Orbital Cannons | Orbital explosion radius +10% (inner and outer) | 250 | 200 | 20 | 35,000 | wiki |
| More Guns | 2 | Orbital Cannons | Barrage orbitals (Gatling, 120mm, 380mm, Walking, Napalm) fire 1 extra salvo | 80 | 60 | 0 | 0 | wiki |
| Zero-G Breech Loading | 3 | Orbital Cannons | Orbital stratagem cooldown -10% | 80 | 80 | 10 | 0 | wiki |
| Donation Access License | 1 | Patriotic Administration Center | Support weapons deploy with the maximum carriable magazines (e.g. MG-43 2 to 3 spares, Railgun 10 to 20 rounds) | 60 | 0 | 0 | 0 | wiki |
| Hand Carts | 3 | Patriotic Administration Center | Backpack stratagem cooldown -10% | 80 | 60 | 5 | 0 | wiki |
| Payroll Management System | 5 | Patriotic Administration Center | Support weapon reload time -10% | 200 | 200 | 20 | 30,000 | wiki |
| Streamlined Request Process | 2 | Patriotic Administration Center | Support weapon stratagem cooldown -10% | 80 | 40 | 0 | 0 | wiki |
| Superior Packing Methodology | 4 | Patriotic Administration Center | Your Resupply boxes refill support weapons to the maximum carriable magazines (about half without it); squadmates benefit; the Supply Pack is not affected | 150 | 150 | 15 | 20,000 | wiki |
| Blast Absorption | 4 | Robotics Workshop | Sentries take 50% less damage from explosions | 150 | 150 | 20 | 25,000 | wiki |
| Cross-Platform Compatibility | 5 | Robotics Workshop | Mortar sentries prioritize the targets you mark (your own pings only) | 250 | 200 | 30 | 35,000 | wiki |
| Dynamic Tracking | 1 | Robotics Workshop | Sentries launch immediately once called in (about 3 s faster) | 60 | 20 | 0 | 0 | wiki |
| High-Quality Lubricant | 3 | Robotics Workshop | Sentries turn to new targets faster (about 50-60%) | 80 | 80 | 10 | 0 | wiki |
| Shock Absorption Gel | 2 | Robotics Workshop | Sentry ammo +50% | 80 | 40 | 5 | 0 | wiki |
Earning fast: where each currency is densest
Farm each currency where it is densest: Super Credits and Medal cases on difficulties 1 to 3; Medals, XP and Requisition from full operations at the highest difficulty your squad clears reliably; rare samples at 5 to 7 and super samples at 8 to 10. Take the Personal Order every day, whatever you farm.
The sample counts behind this table are the community wiki's per-difficulty ranges, measured with every sample found approx.
| Goal | Where | Why |
|---|---|---|
| Super Credits and Medal cases | Difficulties 1 to 3, any mission but Eradicate | Below difficulty 4, rare samples do not compete for the loot spots, and Eradicate maps have no points of interest. Factory worlds have held Super Credits since patch 7.0.0, and patch 7.1.0 improved the reward caches in Mega Cities. |
| Medals from missions | The highest difficulty you clear reliably, as full operations | A full operation pays 1, 2, 6, 8, 18, 21, 24, 29, 33 and 36 Medals at difficulties 1 to 10, and one failed mission fails the rest of the operation. |
| XP and Requisition | The highest difficulty you clear | The difficulty bonus: 0, 0, 25, 50, 75, 100, 150, 200, 250 and 300 percent at difficulties 1 to 10. |
| Common samples | Difficulty 4 and up | About 21 to 29 per map at difficulties 4 and 5, against 12 to 18 at 1 to 3. |
| Rare samples | Difficulties 5 to 7 | About 17 to 30 per map. |
| Super samples | Difficulties 8 to 10 | About 5 to 8 per map, against 2 or 3 at difficulty 6. At difficulty 10, High-Value Pickups (a Mutated Egg in a Terminid Mega Nest, Confidential Data in an Automaton Fortress) add 2 super and 4 rare samples per extraction. |
The difficulty-10 count is the least certain: a map there holds about 40 common, 35 to 41 rare and 7 super samples on the best reading of the sources, which put the super samples anywhere from 3 to 9 unverified.
4.1Medals
- Every day: the Personal Order, 15 Medals. It resets daily; the community wiki names 09:00 UTC, but player reports disagree unverified. A mission you started before the reset still counts.
- Every Major Order you help win: usually 35 to 55 Medals in 2026, paid to everyone who played while it ran.
- Every operation: Medals per mission climb through an operation, so the last mission pays the most. Finish the whole operation.
- Before a big payout: spend down; anything above 250 is lost.
The Medal sources in detail, and GamesRadar's Super Credit farming loop, are on Earning Medals and Super Credits.
4.2Super Credits without paying
- Claim the warbond stacks500 SC for 22 Medals on the first five pages of Helldivers Mobilize!, then three 100-SC stacks for 7, 12 and 32 Medals in each premium warbond you own.
- Loot points of interest on difficulties 1 to 3Pods, cargo containers and bunkers hold 10 Super Credits (rarely 100), credited to every diver present at once and kept even if the mission fails.
- Finish the main objective, then searchThe mission still pays its rewards, and the map is yours to comb.
Guide sites quote Super-Credits-per-hour rates on Trivial; none is backed by a measurement, so none is repeated here unverified.
4.3Samples
- Squads earn more per hour: four divers cover more ground, and every extracted sample is credited to each member in full.
- Pick up the dead: a fallen diver drops what they carried.
- Boosters that add samples: Sample Scanner (Masters of Ceremony): 15% chance to double the samples from a pickup (all rarities). Sample Extricator (Borderline Justice): Large enemies can drop common samples on death (capped at 10 per mission).
- Grab faster: starting a sprint cancels the pickup animation community-tested.
- Check before you launch: the Galactic War screen shows which sample types an operation offers.
4.4XP and Requisition
Both grow with difficulty, and completed objectives pay even when a mission fails, so play the highest difficulty you can finish and take the optional objectives and outposts on the way. What each one pays is in Levels and unlocks.
Orders and their rewards
Take the Personal Order every day (15 Medals), and while a Major Order runs, play on its planets: a won order pays Medals to everyone who took part, and a won Galactic War Campaign adds a free item. There is no separate daily or weekly order system beyond these.
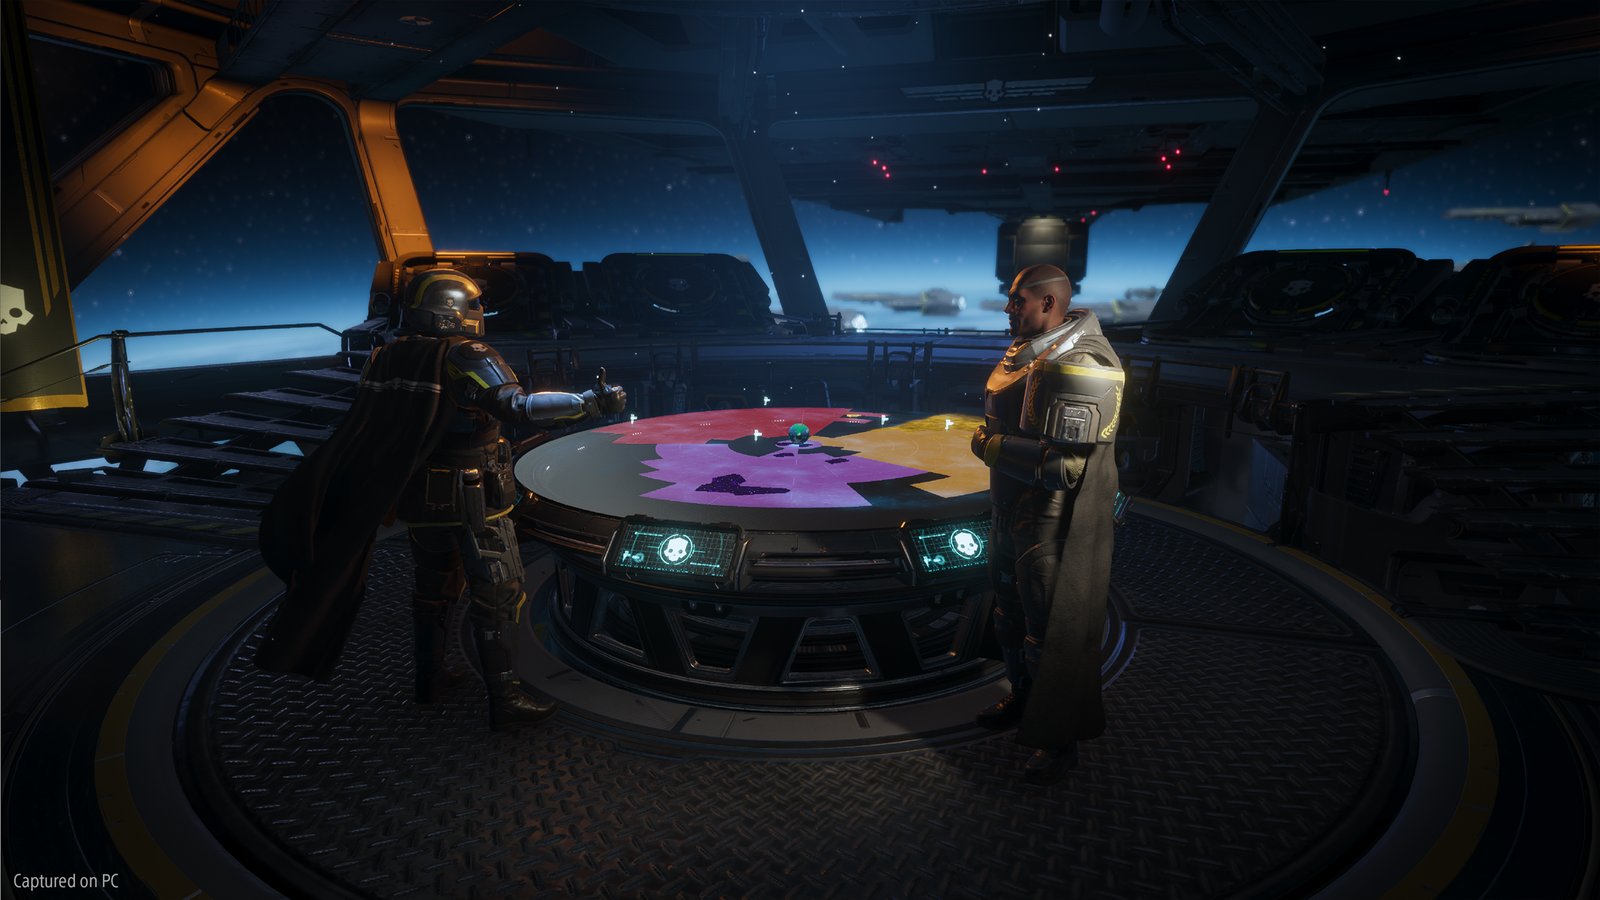
| Order | How often | Reward | How you qualify |
|---|---|---|---|
| Personal Order | One a day, for 24 hours | 15 Medals | Finish its task; squadmates' progress counts, and a mission started before the reset still counts |
| Major Order | Usually 3 to 7 days in 2026, one for the whole community | Usually 35 to 55 Medals; sometimes Requisition or an item | The community meets the goal, and you played while it ran |
| Galactic War Campaign | About two weeks, usually three Major Orders | One item (a stratagem, weapon, armor piece or cape), plus each order's Medals | Log in and play while it runs; the community must win a majority of the campaign's Major Orders |
| Minor Order, Strategic Opportunity, Threat or Imperative | A day or two, alongside a Major Order | Usually no Medals; more often a temporary stratagem for everyone, or an effect on the Major Order | The community meets the goal |
5.1Personal Order tasks
- Gather: extract with 10 common or 5 rare samples.
- Exterminate: kill a number of one faction's enemies or of one enemy type, or kill a number with a named weapon or stratagem (200 with the MG-43, for example, or 10 with the EAT-17).
- Extract: extract from 3 successful missions, or complete 6 optional objectives.
- What counts as a kill: a fatal hit on the main health pool. Fabricators and Spore Spewers count; bug holes and dropship thrusters do not.
5.2Major Orders and Campaigns
- Where to look: the Control Center terminal, across from the Armory, lists current and past campaigns with their orders and rewards. It shows the community's result, not whether you personally qualified.
- What they paid in 2026: the Major Orders that paid Medals from January to September offered 2,135 in all, and the community won most of them.
- Campaign rewards so far include the M-103 Supply FRV, the R-4 Hyena primary, the KDM-500 Outrider armor and helmet, the IX-Voidwalker helmet and the Eagle Gas Airstrike. Missed rewards are not granted on request (Arrowhead support); only the Supply FRV has an announced return, as a Requisition purchase in October 2026.
- Coming, without a date: Arrowhead has promised Personal Campaign Progression, a personal reward track for each campaign that replaces Personal Orders, for 2026; it is not live as of patch 7.1.1 unverified.
The live orders change daily, so this manual does not list them: the live war maps do. How the war counts your missions, and what each order asks, is on Major Orders and Campaigns.
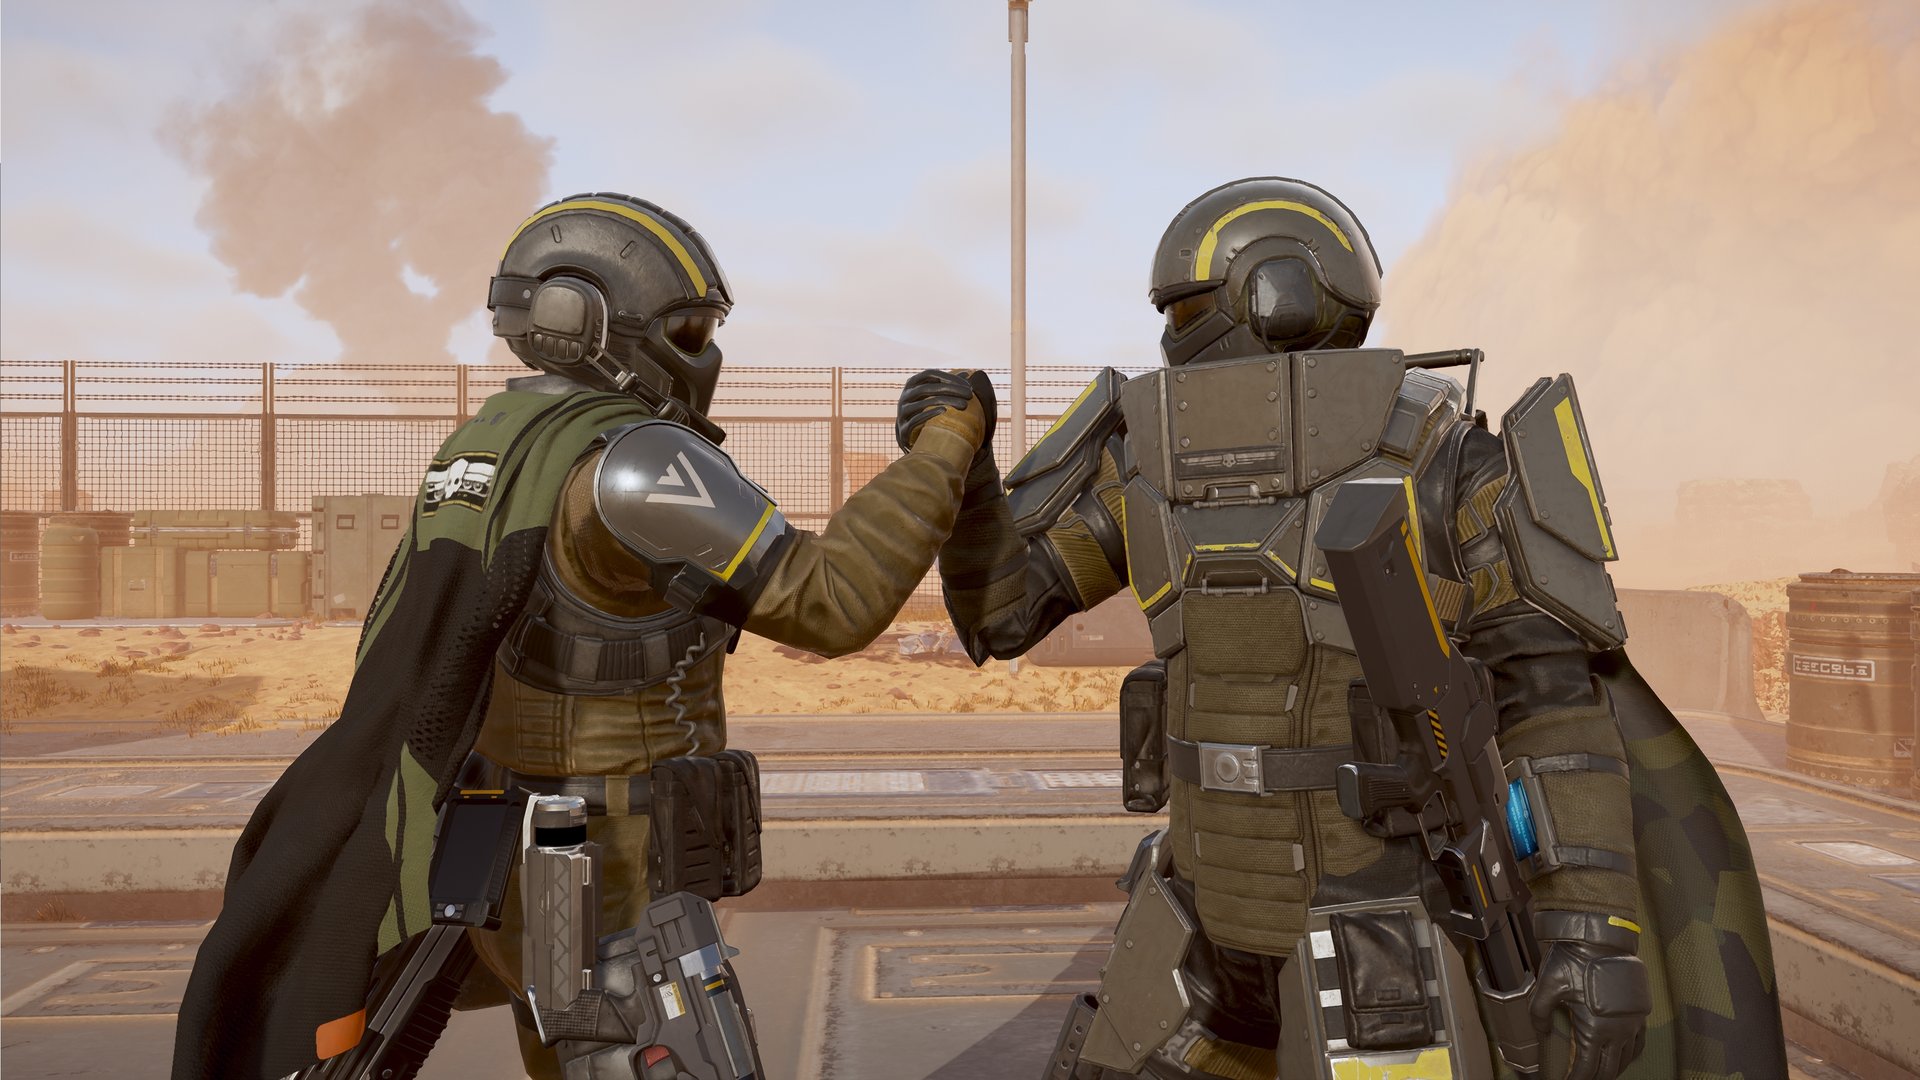
Buyer's guide04
Warbonds & Purchase Order
Where to spend Medals and Super Credits: the free warbond first, then every premium warbond ranked for a new diver, with a planner that tracks what you own.
On this page11 chapters
The short answer: what to buy with what you have
Spend your first Medals in the free Helldivers Mobilize! warbond, make Democratic Detonation your first premium warbond, and never let your Medals sit at the cap. Find your row below and buy down the list.
1.1If you have N Medals right now
Start at the top and stop when your Medals run out. Each row assumes you bought the rows above it; the third column is what you will have spent in Mobilize by the end of the row, and a page opens as soon as that total reaches its gate. Already own something? Skip it and keep the order. The numbers in parentheses are Medals.
| Medals to spend | Buy, in this order | Spent in Mobilize | What you get |
|---|---|---|---|
| 1 to 8 | Page 1: 100 Super Credits (1), SG-8 Punisher (4), G-6 Frag (2), the Independence Bringer player card (1) | 8 | 100 Super Credits, a pump shotgun that staggers, a wide-blast grenade; page 2 opens |
| 9 to 35 | Page 2: 100 Super Credits (2), FS-05 Marksman armor (6), P-19 Redeemer (5), R-63 Diligence (8); then page 1's SC-34 Infiltrator armor (3), its helmet (2) and the Clapping pose (1) | 35 | Fortified heavy armor (explosive resistance), a machine pistol and a marksman rifle for the bot front; page 3 opens |
| 36 to 63 | Page 3: 100 Super Credits (3), Hellpod Space Optimization (15), CE-35 Trench Engineer armor (10) | 63 | The booster to own first (your squad drops and reinforces fully stocked) and Engineering Kit armor (more grenades) |
| 64 to 161 | SMG-37 Defender (15), whose purchase opens page 4; page 4: 100 Super Credits (6), Vitality Enhancement (20), CM-09 Bonesnapper armor (15), SG-225 Breaker (20); the FS-05 and CE-35 helmets (5 and 7), which open page 5; page 5: 100 Super Credits (10) | 161 | A second top booster, Med-Kit armor (more stims), an automatic shotgun, and all five 100-SC stacks claimed (500 SC for 22 Medals) |
| 162 to 206 | Page 5: DP-40 Hero of the Federation armor (25), G-16 Impact (20) | 206 | Democracy Protects armor (a chance to survive a killing blow) and a grenade that explodes on impact |
| More than that | The key item of your first premium warbond (the ranked order names it); otherwise keep filling Mobilize: page 7's Stamina Enhancement (75) is the top booster and page 10's PLAS-1 Scorcher (75) its best gun | -- | The later pages open at the totals in How warbonds work |
| Close to 250 | Spend now, on anything on an open page | -- | Medals above the cap of 250 are thrown away |
Rows 1 to 3 cost 63. Bank the other 2 toward the SMG-37 Defender: its purchase opens page 4, where Vitality Enhancement, the next booster worth owning, waits.
1.2If you have Super Credits right now
| Super Credits | Do this |
|---|---|
| Under 1,000 | Claim Mobilize's five cheap stacks first (500 SC for 22 Medals; rows 1 to 4 above), then pick up Super Credits in missions, 10 at a time and densest on difficulties 1 to 3 (how). If you own the Super Citizen Edition, its Premium Warbond Token unlocks one premium warbond for nothing. |
| 1,000 or more | Buy Democratic Detonation. Claim its page-1 and page-2 stacks (7 and 12 Medals) as soon as their pages open: every premium returns 300 Super Credits, so the next one needs only 700 new ones. |
| 1,500 or more | Still buy a premium, not a legendary: a legendary costs 1,500, returns nothing and cannot be unlocked with the token. |
1.3The plan in five lines
- Free first. Helldivers Mobilize! costs nothing, its first five pages hold 500 SC for 22 Medals (the best Super Credit rate in the game), and it sells the cheapest armor passives and all four boosters Game Rant rates S.
- Then Democratic Detonation. Its G-123 Thermite puts anti-tank power in your grenade slot for 15 Medals, and its Eruptor and Grenade Pistol close bug holes and fabricators. Servants of Freedom and Dust Devils come next community-tested.
- Then buy for your front. Redacted Regiment for the Automatons; Entrenched Division for the Terminids and the Illuminate.
- Legendaries last. A legendary costs 1,500 Super Credits and gives none back; a premium costs 1,000 and returns 300.
- Spend before the cap. Medals stop at 250; everything above it is lost.
Plan your purchases
This chapter will become an interactive planner: tick the warbonds and items you own, enter your Medals, Super Credits and front, and it will name your next purchase, list the five to seven after it with running Medal totals, warn you before the 250-Medal cap and tell you how many Super Credits the next warbond still needs, saving only in your own browser. Until then, the table below is the plan it walks, top to bottom: the free Mobilize steps first, then each premium warbond in ranked order, each followed by its buy sequence or its key item, with Mobilize's later pages slotted in after Democratic Detonation and Entrenched Division. Skip any row you already own; a filler row only buys the Medals that open the next page, and the Cost column reads Medals for an item and Super Credits for a warbond. Rows that return to Mobilize wait for its page gates (0, 8, 35, 75, 150, 260, 420, 650, 850, 1200 Medals spent there, pages 1 to 10); the table does not list the items that reach them, so fill the gap with Mobilize items you want anyway.
| # | Buy | Warbond | Page | Cost | Why | Consensus (dated) | Source |
|---|---|---|---|---|---|---|---|
| 1 | 100 Super Credits (page 1) | Helldivers Mobilize! | 1 | 1 Medal | The best SC-per-Medal rate in the game. | arithmetic on the wiki's Mobilize costs and gates (rev. 2026-09-09) | wiki |
| 2 | SG-8 Punisher | Helldivers Mobilize! | 1 | 4 Medals | A pump shotgun with strong stagger, a serviceable first primary. | GamesRadar 2026-08-14 (B-C); research/02 8.1 | gamesradar.com |
| 3 | G-6 Frag | Helldivers Mobilize! | 1 | 2 Medals | A frag grenade with a wide blast. | research/02 8.1 plan on Steam guide (2026-08-19) and GamesRadar (2026-08-14) ratings | wiki |
| 4 | Independence Bringer (player card) | Helldivers Mobilize! | 1 | 1 Medal | A filler that opens page 2. | arithmetic on the wiki's Mobilize costs and gates (rev. 2026-09-09) | wiki |
| 5 | 100 Super Credits (page 2) | Helldivers Mobilize! | 2 | 2 Medals | A cheap SC stack: claim it as soon as its page opens. | arithmetic on the wiki's Mobilize costs and gates (rev. 2026-09-09) | wiki |
| 6 | FS-05 Marksman (armor) | Helldivers Mobilize! | 2 | 6 Medals | Fortified heavy armor, cheap here and good against bots. | research/02 8.1 plan on Steam guide (2026-08-19) and GamesRadar (2026-08-14) ratings | wiki |
| 7 | P-19 Redeemer | Helldivers Mobilize! | 2 | 5 Medals | A full-auto machine pistol. | research/02 8.1 plan on Steam guide (2026-08-19) and GamesRadar (2026-08-14) ratings | wiki |
| 8 | R-63 Diligence | Helldivers Mobilize! | 2 | 8 Medals | A marksman rifle for the bot front. | GamesRadar 2026-08-14 (A vs bots); Steam guide 2026-08-19 (S) | gamesradar.com |
| 9 | SC-34 Infiltrator (armor) | Helldivers Mobilize! | 1 | 3 Medals | A filler toward page 3: light armor with the Scout passive. | arithmetic on the wiki's Mobilize costs and gates (rev. 2026-09-09) | wiki |
| 10 | SC-34 Infiltrator (helmet) | Helldivers Mobilize! | 1 | 2 Medals | A filler toward page 3. | arithmetic on the wiki's Mobilize costs and gates (rev. 2026-09-09) | wiki |
| 11 | Clapping | Helldivers Mobilize! | 1 | 1 Medal | A filler that opens page 3. | arithmetic on the wiki's Mobilize costs and gates (rev. 2026-09-09) | wiki |
| 12 | 100 Super Credits (page 3) | Helldivers Mobilize! | 3 | 3 Medals | A cheap SC stack: claim it as soon as its page opens. | arithmetic on the wiki's Mobilize costs and gates (rev. 2026-09-09) | wiki |
| 13 | Hellpod Space Optimization | Helldivers Mobilize! | 3 | 15 Medals | A top booster: the squad drops with full ammo, grenades and stims. | Steam guide 2026-08-19 (S+ vs bugs and bots); GamesRadar boosters 2025-08-26 (3rd) | Steam guide |
| 14 | CE-35 Trench Engineer (armor) | Helldivers Mobilize! | 3 | 10 Medals | Engineering Kit armor: two extra grenades. | research/02 8.1 plan on Steam guide (2026-08-19) and GamesRadar (2026-08-14) ratings | wiki |
| 15 | SMG-37 Defender | Helldivers Mobilize! | 3 | 15 Medals | A one-handed SMG whose purchase opens page 4. | research/02 8.1 plan on Steam guide (2026-08-19) and GamesRadar (2026-08-14) ratings | wiki |
| 16 | 100 Super Credits (page 4) | Helldivers Mobilize! | 4 | 6 Medals | A cheap SC stack: claim it as soon as its page opens. | arithmetic on the wiki's Mobilize costs and gates (rev. 2026-09-09) | wiki |
| 17 | Vitality Enhancement | Helldivers Mobilize! | 4 | 20 Medals | A squad booster: less damage and fewer injuries. | Steam guide 2026-08-19 (S every front) | Steam guide |
| 18 | CM-09 Bonesnapper (armor) | Helldivers Mobilize! | 4 | 15 Medals | Med-Kit armor: two extra stims that last longer. | research/02 8.1 plan on Steam guide (2026-08-19) and GamesRadar (2026-08-14) ratings | wiki |
| 19 | SG-225 Breaker | Helldivers Mobilize! | 4 | 20 Medals | A shotgun upgrade: magazine-fed and fully automatic. | GamesRadar 2026-08-14 (B-C); research/02 8.1 | gamesradar.com |
| 20 | FS-05 Marksman (helmet) | Helldivers Mobilize! | 2 | 5 Medals | A filler toward page 5. | arithmetic on the wiki's Mobilize costs and gates (rev. 2026-09-09) | wiki |
| 21 | CE-35 Trench Engineer (helmet) | Helldivers Mobilize! | 3 | 7 Medals | A filler that opens page 5. | arithmetic on the wiki's Mobilize costs and gates (rev. 2026-09-09) | wiki |
| 22 | 100 Super Credits (page 5) | Helldivers Mobilize! | 5 | 10 Medals | The fifth cheap stack completes the SC of Mobilize pages 1-5. | arithmetic on the wiki's Mobilize costs and gates (rev. 2026-09-09) | wiki |
| 23 | DP-40 Hero of the Federation (armor) | Helldivers Mobilize! | 5 | 25 Medals | Democracy Protects armor: a chance to survive lethal damage. | research/02 8.1 plan on Steam guide (2026-08-19) and GamesRadar (2026-08-14) ratings | wiki |
| 24 | G-16 Impact | Helldivers Mobilize! | 5 | 20 Medals | A Heavy-pen grenade that explodes on impact. | research/02 8.1 plan on Steam guide (2026-08-19) and GamesRadar (2026-08-14) ratings | wiki |
| 25 | Democratic Detonation | Democratic Detonation | -- | 1,000 SC | Thermite is anti-tank power on page 1, and the Eruptor and Grenade Pistol close holes and fabricators. | GamesRadar S (2026-08-13); Steam guide S+ (2026-08-19) | gamesradar.com |
| 26 | G-123 Thermite | Democratic Detonation | 1 | 15 Medals | An anti-tank grenade on page 1: it kills armor without a support slot. | GamesRadar S (2026-08-13) and Steam guide S+ (2026-08-19) for the warbond | wiki |
| 27 | 100 Super Credits (page 1) | Democratic Detonation | 1 | 7 Medals | A cheap SC stack: claim it as soon as its page opens. | arithmetic on the wiki's costs and gates (checked 2026-09-26) | wiki |
| 28 | CE-27 Ground Breaker (armor) | Democratic Detonation | 1 | 18 Medals | Engineering Kit armor: two extra grenades. | research/02 8.3 plan on GamesRadar (2026-08-13/14) and Steam guide (2026-08-19) ratings | wiki |
| 29 | BR-14 Adjudicator | Democratic Detonation | 1 | 20 Medals | A hard-hitting Medium-pen rifle whose purchase opens page 2. | research/02 8.3 plan on GamesRadar (2026-08-13/14) and Steam guide (2026-08-19) ratings | wiki |
| 30 | 100 Super Credits (page 2) | Democratic Detonation | 2 | 12 Medals | A cheap SC stack: claim it as soon as its page opens. | arithmetic on the wiki's costs and gates (checked 2026-09-26) | wiki |
| 31 | R-36 Eruptor | Democratic Detonation | 2 | 60 Medals | An explosive rifle that closes bug holes and fabricators. | GamesRadar 2026-08-14 (A/S/A); Steam guide 2026-08-19 (S+ vs bugs and bots) | gamesradar.com |
| 32 | GP-31 Grenade Pistol | Democratic Detonation | 3 | 60 Medals | A grenade sidearm that closes nests and fabricators, freeing the grenade slot. | GamesRadar 2026-08-14 (S/S/S) | gamesradar.com |
| 33 | CB-9 Exploding Crossbow | Democratic Detonation | 3 | 80 Medals | A one-handed explosive crossbow, strong on every front. | GamesRadar 2026-08-14 (A/A/A); Steam guide 2026-08-19 (S+ vs bugs and bots) | gamesradar.com |
| 34 | 50 Super Credits (page 6) | Helldivers Mobilize! | 6 | 15 Medals | Claim this SC stack once page 6 opens. | arithmetic on the wiki's Mobilize costs and gates (rev. 2026-09-09) | wiki |
| 35 | AR-23P Liberator Penetrator | Helldivers Mobilize! | 6 | 40 Medals | An armor-piercing Liberator on page 6. | GamesRadar 2026-08-14 (B-C); research/02 8.1 | gamesradar.com |
| 36 | Stamina Enhancement | Helldivers Mobilize! | 7 | 75 Medals | The top booster on every front: come back to Mobilize for page 7. | Steam guide 2026-08-19 (S+ every front); GamesRadar boosters 2025-08-26 (1st) | Steam guide |
| 37 | Servants of Freedom | Servants of Freedom | -- | 1,000 SC | An anti-tank sidearm that also levels spawners, the Portable Hellbomb, and the cheapest S-tier warbond to complete. | GamesRadar S (2026-08-13); Steam guide S+ (2026-08-19) | gamesradar.com |
| 38 | LAS-17 Double-Edge Sickle | Servants of Freedom | 1 | 35 Medals | An energy rifle whose penetration rises with heat; it burns you when hot. | GamesRadar 2026-08-14 (S vs bots) | gamesradar.com |
| 39 | 100 Super Credits (page 1) | Servants of Freedom | 1 | 7 Medals | A cheap SC stack: claim it as soon as its page opens. | arithmetic on the wiki's costs and gates (checked 2026-09-26) | wiki |
| 40 | IE-3 Martyr (armor) | Servants of Freedom | 1 | 45 Medals | Integrated Explosives armor: two extra grenades, but you explode after death. | research/02 8.3 plan on GamesRadar (2026-08-13/14) and Steam guide (2026-08-19) ratings | wiki |
| 41 | Fre Liberam (cape) | Servants of Freedom | 1 | 8 Medals | A filler that opens page 2. | arithmetic on the wiki's costs and gates (checked 2026-09-26) | wiki |
| 42 | GP-20 Ultimatum | Servants of Freedom | 2 | 40 Medals | A one-shot anti-tank sidearm that also levels bug holes and fabricators. | GamesRadar 2026-08-14 (S/S/S) | gamesradar.com |
| 43 | 100 Super Credits (page 2) | Servants of Freedom | 2 | 12 Medals | A cheap SC stack: claim it as soon as its page opens. | arithmetic on the wiki's costs and gates (checked 2026-09-26) | wiki |
| 44 | B-100 Portable Hellbomb | Servants of Freedom | 3 | 110 Medals | A Hellbomb you carry and set off yourself. | Steam guide 2026-08-19 (S+ vs bots) | Steam guide |
| 45 | G-50 Seeker | Servants of Freedom | 3 | 65 Medals | A drone grenade that hunts nearby or pinged enemies. | research/02 8.3 plan on GamesRadar (2026-08-13/14) and Steam guide (2026-08-19) ratings | wiki |
| 46 | Dust Devils | Dust Devils | -- | 1,000 SC | A top primary against bugs and squids, plus the Speargun and Desert Stormer armor. | GamesRadar S (2026-08-13); Steam guide S+ (2026-08-19) | gamesradar.com |
| 47 | AR-2 Coyote | Dust Devils | 1 | 35 Medals | A Medium-pen incendiary rifle, a top primary against bugs and squids. | GamesRadar 2026-08-14 (S vs bugs and squids); Steam guide 2026-08-19 (S+ vs bugs and squids) | gamesradar.com |
| 48 | 100 Super Credits (page 1) | Dust Devils | 1 | 7 Medals | A cheap SC stack: claim it as soon as its page opens. | arithmetic on the wiki's costs and gates (checked 2026-09-26) | wiki |
| 49 | DS-42 Federation's Blade (armor) | Dust Devils | 1 | 45 Medals | Desert Stormer heavy armor: resists fire, gas, acid and arc. | research/02 8.3 plan on GamesRadar (2026-08-13/14) and Steam guide (2026-08-19) ratings | wiki |
| 50 | DS-42 Federation's Blade (helmet) | Dust Devils | 1 | 30 Medals | A filler that opens page 2. | arithmetic on the wiki's costs and gates (checked 2026-09-26) | wiki |
| 51 | S-11 Speargun | Dust Devils | 2 | 85 Medals | A harpoon plus gas; the EAT-700 Expendable Napalm is the alternative. | GamesRadar 2026-08-14 (S vs bugs and bots, A vs squids) | gamesradar.com |
| 52 | 100 Super Credits (page 2) | Dust Devils | 2 | 12 Medals | A cheap SC stack: claim it as soon as its page opens. | arithmetic on the wiki's costs and gates (checked 2026-09-26) | wiki |
| 53 unverified | MS-11 Solo Silo | Dust Devils | 3 | 110 Medals | A guided missile silo that kills the biggest targets with one body hit. | the lists split: GamesRadar 2026-08-14 (D/A/D); Steam guide 2026-08-19 (S/S/A) | wiki |
| 54 | Redacted Regiment | Redacted Regiment | -- | 1,000 SC | A top bot primary, Reduced Signature armor and the C4 Pack. | GamesRadar S (2026-08-13); Steam guide S (2026-08-19) | gamesradar.com |
| 55 | R-72 Censor | Redacted Regiment | 1 | 35 Medals | A suppressed marksman rifle, a top pick against bots. | GamesRadar 2026-08-14 (S vs bots) | gamesradar.com |
| 56 | RS-89 Shadow Paragon (armor) | Redacted Regiment | 1 | 45 Medals | Reduced Signature light armor: quieter, and enemies spot you later. | Steam guide 2026-08-19 (S+ vs bots, S vs squids) | Steam guide |
| 57 | P-35 Re-Educator | Redacted Regiment | 1 | 20 Medals | A cheap Heavy-pen gas pistol. | research/02 8.3 plan on GamesRadar (2026-08-13/14) and Steam guide (2026-08-19) ratings | wiki |
| 58 | 100 Super Credits (page 1) | Redacted Regiment | 1 | 7 Medals | A cheap SC stack: claim it as soon as its page opens. | arithmetic on the wiki's costs and gates (checked 2026-09-26) | wiki |
| 59 | RS-89 Shadow Paragon (helmet) | Redacted Regiment | 1 | 30 Medals | A filler toward page 2, which needs nearly all of page 1. | arithmetic on the wiki's costs and gates (checked 2026-09-26) | wiki |
| 60 | Pillar of the Abyss (cape) | Redacted Regiment | 1 | 8 Medals | A filler that opens page 2. | arithmetic on the wiki's costs and gates (checked 2026-09-26) | wiki |
| 61 | 100 Super Credits (page 2) | Redacted Regiment | 2 | 12 Medals | A cheap SC stack: claim it as soon as its page opens. | arithmetic on the wiki's costs and gates (checked 2026-09-26) | wiki |
| 62 | RS-67 Null Cipher (armor) | Redacted Regiment | 2 | 55 Medals | Reduced Signature medium armor. | research/02 8.3 plan on GamesRadar (2026-08-13/14) and Steam guide (2026-08-19) ratings | wiki |
| 63 | Triangulation Veil (player card) | Redacted Regiment | 2 | 7 Medals | A filler that opens page 3. | arithmetic on the wiki's costs and gates (checked 2026-09-26) | wiki |
| 64 | B/MD C4 Pack | Redacted Regiment | 3 | 110 Medals | Remote-detonated AT III charges, a top pick against bots. | GamesRadar 2026-08-14 (S vs bots); Steam guide 2026-08-19 (S+ vs bots) | gamesradar.com |
| 65 | Entrenched Division | Entrenched Division | -- | 1,000 SC | The Stoker and Cremator fire kit for bugs and squids, with Sapper armor on page 1. | GamesRadar S (2026-08-13); Steam guide A (2026-08-19) | gamesradar.com |
| 66 | SMG/FLAM-34 Stoker | Entrenched Division | 1 | 35 Medals | An SMG with an under-barrel flamethrower, a top pick against bugs and squids. | GamesRadar 2026-08-14 (S vs bugs and squids) | gamesradar.com |
| 67 | CPG-48 Sapper (armor) | Entrenched Division | 1 | 45 Medals | Grenadier armor: explosive resistance plus two extra grenades. | Steam guide 2026-08-19 (S+ vs bots) | Steam guide |
| 68 | 100 Super Credits (page 1) | Entrenched Division | 1 | 7 Medals | A cheap SC stack: claim it as soon as its page opens. | arithmetic on the wiki's costs and gates (checked 2026-09-26) | wiki |
| 69 | CQC-73 Entrenchment Tool | Entrenched Division | 1 | 20 Medals | A cheap melee sidearm on the way to page 2. | research/02 8.3 plan on GamesRadar (2026-08-13/14) and Steam guide (2026-08-19) ratings | wiki |
| 70 | Heritage Olive Hellpod pattern | Entrenched Division | 1 | 20 Medals | A filler that opens page 2. | arithmetic on the wiki's costs and gates (checked 2026-09-26) | wiki |
| 71 | G-48 Giga Grenade | Entrenched Division | 2 | 50 Medals | A big-blast AT I grenade, two carried. | research/02 8.3 plan on GamesRadar (2026-08-13/14) and Steam guide (2026-08-19) ratings | wiki |
| 72 | A/GM-17 Gas Mortar Sentry | Entrenched Division | 2 | 85 Medals | A gas mortar sentry on a short cooldown. | research/02 8.3 plan on GamesRadar (2026-08-13/14) and Steam guide (2026-08-19) ratings | wiki |
| 73 | 100 Super Credits (page 2) | Entrenched Division | 2 | 12 Medals | A cheap SC stack: claim it as soon as its page opens. | arithmetic on the wiki's costs and gates (checked 2026-09-26) | wiki |
| 74 | B/FLAM-80 Cremator | Entrenched Division | 3 | 110 Medals | A backpack flamethrower, a top pick against bugs and squids. | GamesRadar 2026-08-14 (S vs bugs, A vs squids); Steam guide 2026-08-19 (S+ vs bugs and squids) | gamesradar.com |
| 75 | PLAS-1 Scorcher | Helldivers Mobilize! | 10 | 75 Medals | The keeper of Mobilize: an explosive plasma rifle strong on every front. | GamesRadar 2026-08-14 (A/S/A); Steam guide 2026-08-19 (S every front) | gamesradar.com |
| 76 | Increased Reinforcement Budget | Helldivers Mobilize! | 10 | 150 Medals | One more reinforcement per diver, and the priciest item in any warbond. | research/02 3.1 and 8.1; 02-verify row 59 (checked 2026-09-26) | wiki |
| 77 unverified | Control Group | Control Group | -- | 1,000 SC | The Warp Pack, a top backpack on every front, though it takes practice. | GamesRadar A (2026-08-13); Steam guide S+ (2026-08-19) | gamesradar.com |
| 78 | LIFT-182 Warp Pack | Control Group | 3 | 110 Medals | A short-range teleport backpack, a top pick on every front. | Steam guide 2026-08-19 (S+ every front); GamesRadar 2026-08-13 (a best backpack) | wiki |
| 79 unverified | Polar Patriots | Polar Patriots | -- | 1,000 SC | One excellent item: the Purifier, the only primary rated S or better everywhere in both lists. | GamesRadar C (2026-08-13); Steam guide S (2026-08-19) | gamesradar.com |
| 80 | PLAS-101 Purifier | Polar Patriots | 3 | 80 Medals | A charge-up explosive primary rated S or better on every front in both lists. | GamesRadar 2026-08-14 (S/S/S); Steam guide 2026-08-19 (S+ every front) | gamesradar.com |
| 81 | Siege Breakers | Siege Breakers | -- | 1,000 SC | The Leveller, an expendable anti-tank rocket that closes Bile Titan holes. | GamesRadar A (2026-08-13); Steam guide S (2026-08-19) | gamesradar.com |
| 82 | EAT-411 Leveller | Siege Breakers | 2 | 85 Medals | An expendable anti-tank rocket that closes Bile Titan holes and destroys spawners. | GamesRadar 2026-08-14 (S vs bots); Steam guide 2026-08-19 (S+ vs bots) | wiki |
| 83 | Exo Experts | Exo Experts | -- | 1,000 SC | Two exosuits cheaply, plus the Missile Pistol. | GamesRadar A (2026-08-13); Steam guide S (2026-08-19) | gamesradar.com |
| 84 | EXO-51 Lumberer Exosuit | Exo Experts | 2 | 50 Medals | An exosuit with a flamethrower and an anti-tank cannon. | GamesRadar 2026-08-13 (both exosuits great); Steam guide S (2026-08-19) for the warbond | gamesradar.com |
| 85 | Urban Legends | Urban Legends | -- | 1,000 SC | Siege-Ready armors and the Anti-Tank Emplacement. | GamesRadar A (2026-08-13); Steam guide A (2026-08-19) | gamesradar.com |
| 86 | SR-24 Street Scout (armor) | Urban Legends | 1 | 40 Medals | Siege-Ready light armor: faster primary reloads and more ammo. | Steam guide 2026-08-19 (S every front); GamesRadar 2026-08-13 | Steam guide |
| 87 | Freedom's Flame | Freedom's Flame | -- | 1,000 SC | A fire kit for bugs and squids, and the cheapest premium warbond to complete. | GamesRadar A (2026-08-13); Steam guide A (2026-08-19) | gamesradar.com |
| 88 | FLAM-66 Torcher | Freedom's Flame | 2 | 40 Medals | A flamethrower primary, a top pick against bugs. | GamesRadar 2026-08-14 (S vs bugs, A vs squids, C vs bots); Steam guide 2026-08-19 (S+ vs squids) | gamesradar.com |
| 89 | Borderline Justice | Borderline Justice | -- | 1,000 SC | A top bot sidearm, the Talon, and the Hover Pack. | GamesRadar B (2026-08-13); Steam guide A (2026-08-19) | gamesradar.com |
| 90 | LAS-58 Talon | Borderline Justice | 2 | 40 Medals | A laser revolver that uses heat instead of ammo, a top pick against bots. | GamesRadar 2026-08-14 (S vs bots, A vs squids) | gamesradar.com |
| 91 | Cutting Edge | Cutting Edge | -- | 1,000 SC | An easy all-rounder primary, the Sickle. | GamesRadar B (2026-08-13); Steam guide B (2026-08-19) | gamesradar.com |
| 92 | LAS-16 Sickle | Cutting Edge | 1 | 20 Medals | A laser rifle with heat instead of reloads, an easy pick for new players. | GamesRadar 2026-08-14 (A vs bugs, B vs bots and squids) | gamesradar.com |
| 93 | Truth Enforcers | Truth Enforcers | -- | 1,000 SC | A top sidearm against bots and squids, the Loyalist. | GamesRadar B (2026-08-13); Steam guide B (2026-08-19) | gamesradar.com |
| 94 | PLAS-15 Loyalist | Truth Enforcers | 3 | 45 Medals | A plasma pistol with a charged explosive shot. | GamesRadar 2026-08-14 (S vs bots and squids, A vs bugs) | gamesradar.com |
| 95 unverified | Ironclad Democracy | Ironclad Democracy | -- | 1,000 SC | An AT III sidearm, the AT Seeker and free EATs, but no dated list has tested it yet. | no dated list yet: GamesRadar had not tested it (2026-09-22); Game Rant 2026-09-23 | gamerant.com |
| 96 unverified | P-34 Breacher | Ironclad Democracy | 2 | 50 Medals | An AT III sticky incendiary missile pistol that no dated list has tested yet. | no dated list yet: GamesRadar had not tested it (2026-09-22); Game Rant 2026-09-23 | wiki |
| 97 unverified | Castellan's Creed | Castellan's Creed | -- | 1,500 SC | The Meltagun and True Grit armor are excellent, but this legendary costs 1,500 SC with none back. | GamesRadar B (2026-08-13); Steam guide S (2026-08-19) | gamesradar.com |
| 98 | 40-K Meltagun | Castellan's Creed | 3 | 110 Medals | A short-range AT III thermal beam. | GamesRadar 2026-08-14 (S vs bots, A vs bugs and squids); Steam guide 2026-08-19 (S+ vs bugs and bots) | gamesradar.com |
| 99 | Python Commandos | Python Commandos | -- | 1,000 SC | The Hot Dog drone, and the One-Two improved in 7.1.0. | GamesRadar B (2026-08-13); Steam guide B (2026-08-19) | gamesradar.com |
| 100 | AX/FLAM-75 "Guard Dog" Hot Dog | Python Commandos | 1 | 75 Medals | A flamethrower drone backpack. | Steam guide 2026-08-19 (S+ every front) | Steam guide |
| 101 | Steeled Veterans | Steeled Veterans | -- | 1,000 SC | One strong sidearm, the Senator. | GamesRadar C (2026-08-13); Steam guide B (2026-08-19) | gamesradar.com |
| 102 | P-4 Senator | Steeled Veterans | 1 | 15 Medals | A Heavy-pen revolver, a top sidearm against bots. | GamesRadar 2026-08-14 (S vs bots, A vs squids) | gamesradar.com |
| 103 | Viper Commandos | Viper Commandos | -- | 1,000 SC | One strong booster, Experimental Infusion. | GamesRadar C (2026-08-13); Steam guide B (2026-08-19) | gamesradar.com |
| 104 | Experimental Infusion | Viper Commandos | 3 | 80 Medals | A booster: stims also add speed and damage resistance. | Steam guide 2026-08-19 (S+ every front); GamesRadar boosters 2025-08-26 (2nd) | Steam guide |
| 105 | Chemical Agents | Chemical Agents | -- | 1,000 SC | One strong grenade, the Gas grenade. | GamesRadar C (2026-08-13); Steam guide B (2026-08-19) | gamesradar.com |
| 106 | G-4 Gas | Chemical Agents | 1 | 30 Medals | A gas grenade for strong crowd control. | GamesRadar 2026-08-13 ('fantastic') | gamesradar.com |
| 107 | Force of Law | Force of Law | -- | 1,000 SC | One strong support weapon for bugs and squids, the De-Escalator. | GamesRadar C (2026-08-13); Steam guide C (2026-08-19) | gamesradar.com |
| 108 | GL-52 De-Escalator | Force of Law | 2 | 85 Medals | An arc grenade launcher that stuns groups. | GamesRadar 2026-08-14 (S vs bugs and squids, A vs bots) | gamesradar.com |
| 109 | Masters of Ceremony | Masters of Ceremony | -- | 1,000 SC | Little of note beyond the Amendment and the Pyrotech. | GamesRadar D (2026-08-13); Steam guide C (2026-08-19) | gamesradar.com |
| 110 | R-2 Amendment | Masters of Ceremony | 1 | 35 Medals | A marksman rifle with a bayonet, the pick of a weak warbond. | GamesRadar 2026-08-14 (A vs bots) | gamesradar.com |
| 111 | Obedient Democracy Support Troopers | Obedient Democracy Support Troopers | -- | 1,500 SC | A legendary that asks 1,500 SC for middling gear and gives no SC back. | GamesRadar C (2026-08-13); Steam guide D (2026-08-19) | gamesradar.com |
| 112 | M90A Shotgun | Obedient Democracy Support Troopers | 3 | 65 Medals | A high-damage shotgun, good but not great. | GamesRadar 2026-08-14 (B vs bugs and squids) | gamesradar.com |
| 113 | Righteous Revenants | Righteous Revenants | -- | 1,500 SC | Skip unless it came free: two D-tier guns for 1,500 SC. | GamesRadar D (2026-08-13); Steam guide D (2026-08-19) | gamesradar.com |
| 114 | PLAS-39 Accelerator Rifle | Righteous Revenants | 2 | 50 Medals | A plasma sniper rifle, the one standout gun here. | GamesRadar 2026-08-14 (C vs bots) | gamesradar.com |
Ranked purchase order
Buy the warbond whose best item fixes a problem you have on every front, and reach that item for the fewest Medals. For a new diver those problems are armor your gun cannot hurt, spawners your bullets cannot close, and running out of lives before extraction.
How the order is built: free items first; then gear that works on all three fronts; then how few Medals reach the key item; then value per Super Credit. Every step is checked against two dated community lists, shortened below to GR, GamesRadar's warbond tier list (updated August 13, 2026), and SG, a Steam guide that mirrors u.gg's tiers (updated August 19, 2026). Item ratings are GamesRadar's weapon lists of August 14, 2026 (primaries, secondaries, support weapons) unless another source is named. Ratings credited to u.gg come from its own per-front lists, read September 26, 2026 (the primary list is stamped for 7.1.1 and the support list for 7.0.2; the secondary and throwable lists carry no patch). The order itself is this manual's reading of those opinions community-tested, and both lists predate patch 7.1.0 (what changed since).
3.1Free first: Helldivers Mobilize!
Mobilize costs nothing and pays for your first premium: its first five pages hold 500 SC for 22 Medals. It is also the cheapest source of the passives a new diver wants: Fortified on the FS-05 Marksman (6 Medals), Engineering Kit on the CE-35 Trench Engineer (10), Med-Kit on the CM-09 Bonesnapper (15) and Democracy Protects on the DP-40 (25), where a Superstore body armor costs 150 Super Credits or more. It holds all four boosters that Game Rant rates S (February 5, 2026): Hellpod Space Optimization, Vitality Enhancement, Stamina Enhancement and Muscle Enhancement community-tested. Its keeper gun waits on the last page: the PLAS-1 Scorcher (75 Medals), rated S on all three fronts by u.gg. Work through pages 1 to 5 with the quick guide, then come back for page 7's Stamina Enhancement once your first premium is going.
3.2The paid warbonds, best first
- Democratic Detonation · GR S · SG S+Anti-tank in your grenade slot. The G-123 Thermite (page 1, 15 Medals) sticks, burns, then explodes at penetration 7 (anti-tank III): Chargers, Hulks, tanks and turrets go down without you spending a support slot, and u.gg rates it S+ on all three fronts. The R-36 Eruptor (page 2) and GP-31 Grenade Pistol (page 3) close bug holes and fabricators with one explosive hit, and its armors carry Engineering Kit (CE-27, CE-07) and Fortified (FS-55). Buy the Thermite, the page-1 stack and the CE-27 Ground Breaker armor; the BR-14 Adjudicator's purchase then opens page 2 for the Eruptor. Every item
- Servants of Freedom · GR S · SG S+Anti-tank in your sidearm slot. The GP-20 Ultimatum (page 2, 40 Medals) fires a single mini-nuke that levels bug holes (Bile Titan holes included) and fabricators from outside; penetration: 6 (anti-tank II) blast. The catch is one round per reload and a short, arcing range. GamesRadar rates it S on all three fronts. Buy the LAS-17 Double-Edge Sickle, the page-1 stack, the IE-3 Martyr armor and one cape, and page 2 opens for it; page 3 adds the B-100 Portable Hellbomb and the G-50 Seeker. The cheapest S-tier warbond to complete (598 Medals). Squad warning, its Integrated Explosives armor: The armor explodes 1.5 s after the wearer dies (2,000 damage, AP5, demolition 30); +2 throwables. Every item
- Dust Devils · GR S · SG S+A top rifle for bugs and squids. The AR-2 Coyote (page 1, 35 Medals) has penetration 3 (medium) and sets what it hits on fire: GR S against the Terminids and the Illuminate, B against the Automatons, whose small bots take half damage from fire. Page 2 brings the S-11 Speargun (a harpoon plus gas; GR S against bugs and bots) or the EAT-700 Expendable Napalm, and Desert Stormer armor that resists fire, gas, acid and arc. The MS-11 Solo Silo (page 3) kills a Bile Titan, Factory Strider or Vox Engine with one body hit, but the lists split on it (SG S against bugs and bots, GR D against bugs and squids) unverified, so treat it as a bonus, not the reason to buy. Every item
- Redacted Regiment · GR S · SG SThe pick for the bot front and for stealth. The R-72 Censor (page 1, 35 Medals) is a suppressed marksman rifle GR rates S against the Automatons; its Reduced Signature armors make you quieter and harder to spot (SG S+ against bots); the B/MD C4 Pack (page 3) is remote-detonated charges at penetration 7 (anti-tank III). GamesRadar calls the set arguably essential for Commando missions. Page 2 opens only after nearly all of page 1, so buy page 1 through before you plan page 2. Every item
- Entrenched Division · GR S · SG AThe fire kit for bugs and squids. The SMG/FLAM-34 Stoker (page 1, 35 Medals) hangs a flamethrower under an SMG (GR S against the Terminids and the Illuminate), the B/FLAM-80 Cremator (page 3) is a backpack flamethrower (SG S+ against both), and page 1's CPG-48 Sapper armor gives 50% explosive resistance; +2 throwables (starting and carried). It is the priciest premium to complete (888 Medals): buy pages 1 and 2, then come back for the Cremator. Every item
- Control Group · GR A · SG S+One superb backpack. The LIFT-182 Warp Pack (page 3, 110 Medals) teleports you a short hop: SG S+ on every front, one of GamesRadar's best backpacks, and its blast even opens cargo containers on a Super Credit run. It sits on page 3, so you reach it after about 430 Medals in this warbond approx. The PLAS-45 Epoch and VG-70 Variable are strong but can hurt you. The two lists are two tiers apart on the warbond, so its place here is provisional unverified. Every item
- Polar Patriots · GR C · SG SOne excellent gun. Its PLAS-101 Purifier (page 3, 80 Medals), a charge-up explosive plasma rifle, is the only primary rated S or better on all three fronts in both dated lists. The Purifier waits on page 3, about 310 Medals in approx; the CW-22 Kodiak (Fortified) and G-13 Incendiary Impact on page 2 are worth having on the way. The rest is middling, so the lists split on the warbond and its place here is provisional unverified. Every item
- Siege Breakers · GR A · SG SExpendable anti-tank. The EAT-411 Leveller (page 2, 85 Medals) is a throwaway rocket, penetration 6 (anti-tank II), every 140 seconds, that also destroys spawners and Bile Titan holes from outside (GR S and SG S+ against bots). Page 1 holds the CQC-20 Breaching Hammer and the LAS-13 Trident laser shotgun, whose recoil 7.1.0 cut; the GL-28 Belt-Fed Grenade Launcher underwhelms. Every item
- Exo Experts · GR A · SG STwo exosuits for the price of guns. The EXO-51 Lumberer (page 2, 50 Medals; flamethrower plus anti-tank cannon) and EXO-55 Breakthrough (page 3, 50; flak cannon plus shield) are both great by GamesRadar's account, on a 420-second cooldown. The MGX-42 Bullet Storm (SG S+ against squids) and P-33 Missile Pistol (GR S against bots) round it out. Its gates were never recorded page by page; the wiki's all-pages figure fits this manual's estimate unverified. Every item
- Urban Legends · GR A · SG AFaster reloads. The Siege-Ready armors (SR-24 light on page 1, 40 Medals; SR-18 heavy on page 2) carry a passive SG rates S on every front. Siege-Ready: Primary reload 30% faster; +20% ammo for all weapons (not weapon backpacks, underbarrels or the Ultimatum). The E/AT-12 Anti-Tank Emplacement (page 3) shreds big targets at range (SG S+ against bots). Its page-3 gate is uncertain unverified. Every item
- Freedom's Flame · GR A · SG AA cheap fire kit for the bug front. The FLAM-66 Torcher (page 2, 40 Medals) and P-72 Crisper (page 3) are GR S against the Terminids, its Inflammable armor gives 75% fire damage resistance, and at 569 Medals it is the cheapest premium to complete. Weak against bots. Every item
- Borderline Justice · GR B · SG AA top bot sidearm. The LAS-58 Talon (page 2, 40 Medals) is a laser revolver that runs on heat instead of ammo (GR S against bots). The R-6 Deadeye, TED-63 Dynamite, LIFT-860 Hover Pack and Sample Extricator booster fill it out, and its Gunslinger armor suits sidearm builds. Every item
- Cutting Edge · GR B · SG BAn easy first rifle. GamesRadar calls the LAS-16 Sickle (page 1, 20 Medals) one of the best primaries for new players: no reloads, only heat. The SG-8P Punisher Plasma and G-23 Stun on page 2 are good; the LAS-7 Dagger is not. Every item
- Truth Enforcers · GR B · SG BOne strong pistol: the PLAS-15 Loyalist (page 3, 45 Medals; GR S against bots and squids). More than half of this warbond's Medals buy cosmetics, the largest share of any premium approx. Every item
- Ironclad Democracy · not rated yetReleased 2026-09-22, it holds a provisional place unverified. Its anti-armor kit answers the same need as Thermite and the Ultimatum: the P-34 Breacher (page 2, 50 Medals) is an incendiary missile pistol; penetration: 7 (anti-tank III) sticky charge. The G-60 Anti-Tank Seeker (page 3) is a homing anti-tank grenade, and Surplus EAT Allocation (page 2) is a booster that hands the squad free EAT call-ins. No dated warbond list has ranked it yet; the first item ratings are strong (How the rankings move). Every item
- Castellan's Creed (legendary) · GR B · SG SExcellent gear at a bad price. The 40-K Meltagun (page 3, 110 Medals; GR S against bots), a short-range beam with penetration 7 (anti-tank III), and True Grit armor (SG S+ on every front) are top picks, but the warbond costs 1,500 Super Credits, returns none and cannot be unlocked with the token. The lists split on it, so its place here is provisional unverified. Every item
- Python Commandos · GR B · SG BThe AX/FLAM-75 "Guard Dog" Hot Dog (page 1, 75 Medals), a flamethrower drone SG rates S+ on every front, and an AR/GL-21 One-Two that got more grenades in 7.1.0. The M-1000 Maxigun and CQC-9 Defoliation Tool disappoint. Every item
- Steeled Veterans · GR C · SG BOne gun: the P-4 Senator (page 1, 15 Medals), a revolver with penetration 4 (heavy) that GR rates S against bots. Buy it late, for the Senator. Every item
- Viper Commandos · GR C · SG BOne booster: Experimental Infusion (page 3, 80 Medals) makes your stims add speed and damage resistance for a while (SG S+ on every front; second in GamesRadar's booster ranking, August 26, 2025). Every item
- Chemical Agents · GR C · SG BOne grenade: the G-4 Gas (page 1, 30 Medals), which GamesRadar calls fantastic crowd control. The TX-41 Sterilizer and P-11 Stim Pistol rate D. Every item
- Force of Law · GR C · SG COne support weapon: the GL-52 De-Escalator (page 2, 85 Medals), an arc grenade launcher GR rates S against bugs and squids. The AR-32 Pacifier rates D. Every item
- Masters of Ceremony · GR D · SG CLittle of note: the R-2 Amendment (GR A against bots), the G-142 Pyrotech and the Sample Scanner booster for ship-module farming. GamesRadar calls its CQC-1 One True Flag downright useless. Every item
- Obedient Democracy Support Troopers (legendary) · GR C · SG D1,500 Super Credits for middling gear: the M90A Shotgun is good but not great, and the Feet First armor and suppressed M7S SMG and M6C/SOCOM Pistol suit stealth. GamesRadar calls the price hard to justify. Every item
- Righteous Revenants (legendary) · GR D · SG DSkip it unless it came free: anyone who bought a Killzone item in the 2024 Superstore got it with those items unlocked. Only the PLAS-39 Accelerator Rifle and the Acclimated armor stand out. Every item
3.3What a Medal and a Super Credit buy
- Per Super Credit, premiums win. A premium costs 1,000 Super Credits and returns 300 through its pages, so it really costs 700; a legendary costs 1,500 and returns nothing, more than twice as much. That is why good legendary gear still ranks low.
- Per Medal, page-1 key items win. The Thermite (15), the Senator (15) and the Sickle (20) cost almost nothing, while a page-3 item waits behind most of pages 1 and 2: the Warp Pack and the Meltagun each take about 425 to 430 Medals in their warbond approx.
- Completing a premium costs 569 to 888 Medals, and cosmetics fill the gates: about a quarter of Redacted Regiment's Medals, more than half of Truth Enforcers' approx. The lower the cosmetic share, the more of your Medals buy gear.
- The cheapest Super Credits cost Medals. Mobilize sells 100 SC for 1, 2, 3, 6 and 10 Medals (pages 1-5), then 50 SC for 15, 15, 20, 25 and 50 Medals (pages 6-10); a premium's three 100-SC stacks cost 7, 12 and 32 Medals. Claim the first two as soon as their pages open.
Variants: your budget, your front, your squad
The ranked order assumes you buy Super Credits now and then and fight on every front. Change it when that is not you: here is the order for a diver who never pays, the order for each front, and what to settle with your squad.
4.1If you never buy Super Credits
Your first premium is free if you are patient. Mobilize's first five pages hold 500 SC for 22 Medals (rows 1 to 4 of the quick guide); the other 500 come from mission pickups, or from the Premium Warbond Token if you own the Super Citizen Edition. After that, claim each premium's cheap stacks as soon as their pages open, so every further premium needs only 700 new Super Credits; Mobilize's pages 6 to 10 add a little more. Keep scarce Super Credits away from legendaries and Superstore sets until the top three premiums are yours. The steps, in order:
| # | Buy | Warbond | Page | Cost | Why | Consensus (dated) | Source |
|---|---|---|---|---|---|---|---|
| 1 | 100 Super Credits (page 1) | Helldivers Mobilize! | 1 | 1 Medal | The best SC-per-Medal rate in the game. | arithmetic on the wiki's Mobilize costs and gates (rev. 2026-09-09) | wiki |
| 2 | 100 Super Credits (page 2) | Helldivers Mobilize! | 2 | 2 Medals | A cheap SC stack: claim it as soon as its page opens. | arithmetic on the wiki's Mobilize costs and gates (rev. 2026-09-09) | wiki |
| 3 | 100 Super Credits (page 3) | Helldivers Mobilize! | 3 | 3 Medals | A cheap SC stack: claim it as soon as its page opens. | arithmetic on the wiki's Mobilize costs and gates (rev. 2026-09-09) | wiki |
| 4 | 100 Super Credits (page 4) | Helldivers Mobilize! | 4 | 6 Medals | A cheap SC stack: claim it as soon as its page opens. | arithmetic on the wiki's Mobilize costs and gates (rev. 2026-09-09) | wiki |
| 5 | 100 Super Credits (page 5) | Helldivers Mobilize! | 5 | 10 Medals | The fifth cheap stack completes the SC of Mobilize pages 1-5. | arithmetic on the wiki's Mobilize costs and gates (rev. 2026-09-09) | wiki |
| 6 | Democratic Detonation | Democratic Detonation | -- | 1,000 SC | The first premium: Mobilize's free SC plus mission pickups, or the Super Citizen token. | research/02 8.4 on GamesRadar S (2026-08-13); Steam guide S+ (2026-08-19) | gamesradar.com |
| 7 | 100 Super Credits (page 1) | Democratic Detonation | 1 | 7 Medals | A cheap SC stack: claim it as soon as its page opens. | arithmetic on the wiki's costs and gates (checked 2026-09-26) | wiki |
| 8 | 100 Super Credits (page 2) | Democratic Detonation | 2 | 12 Medals | A cheap SC stack: claim it as soon as its page opens. | arithmetic on the wiki's costs and gates (checked 2026-09-26) | wiki |
| 9 | Servants of Freedom | Servants of Freedom | -- | 1,000 SC | The second pick for a player who does not buy SC. | research/02 8.4 on GamesRadar S (2026-08-13); Steam guide S+ (2026-08-19) | gamesradar.com |
| 10 | 100 Super Credits (page 1) | Servants of Freedom | 1 | 7 Medals | A cheap SC stack: claim it as soon as its page opens. | arithmetic on the wiki's costs and gates (checked 2026-09-26) | wiki |
| 11 | 100 Super Credits (page 2) | Servants of Freedom | 2 | 12 Medals | A cheap SC stack: claim it as soon as its page opens. | arithmetic on the wiki's costs and gates (checked 2026-09-26) | wiki |
| 12 | Dust Devils | Dust Devils | -- | 1,000 SC | The third pick; after it choose by front, and leave legendaries and Superstore sets for later. | research/02 8.4 on GamesRadar S (2026-08-13); Steam guide S+ (2026-08-19) | gamesradar.com |
| 13 | 100 Super Credits (page 1) | Dust Devils | 1 | 7 Medals | A cheap SC stack: claim it as soon as its page opens. | arithmetic on the wiki's costs and gates (checked 2026-09-26) | wiki |
| 14 | 100 Super Credits (page 2) | Dust Devils | 2 | 12 Medals | A cheap SC stack: claim it as soon as its page opens. | arithmetic on the wiki's costs and gates (checked 2026-09-26) | wiki |
| 15 | 50 Super Credits (page 6) | Helldivers Mobilize! | 6 | 15 Medals | Mobilize pages 6-10 add more SC toward the next warbond. | arithmetic on the wiki's Mobilize costs and gates (rev. 2026-09-09) | wiki |
| 16 | 50 Super Credits (page 7) | Helldivers Mobilize! | 7 | 15 Medals | Mobilize pages 6-10 add more SC toward the next warbond. | arithmetic on the wiki's Mobilize costs and gates (rev. 2026-09-09) | wiki |
| 17 | 50 Super Credits (page 8) | Helldivers Mobilize! | 8 | 20 Medals | Mobilize pages 6-10 add more SC toward the next warbond. | arithmetic on the wiki's Mobilize costs and gates (rev. 2026-09-09) | wiki |
| 18 | 50 Super Credits (page 9) | Helldivers Mobilize! | 9 | 25 Medals | Mobilize pages 6-10 add more SC toward the next warbond. | arithmetic on the wiki's Mobilize costs and gates (rev. 2026-09-09) | wiki |
| 19 | 50 Super Credits (page 10) | Helldivers Mobilize! | 10 | 50 Medals | Mobilize pages 6-10 add more SC toward the next warbond. | arithmetic on the wiki's Mobilize costs and gates (rev. 2026-09-09) | wiki |
4.2Against the Terminids
Bugs come in crowds and out of holes, with Chargers and Bile Titans on top, so buy fire or sustained fire, an explosive that closes holes, and anti-tank. First Dust Devils (Coyote, Speargun), then Entrenched Division (Stoker, Cremator), then Democratic Detonation (three hole-closers, and Thermite for Chargers); Freedom's Flame and Servants of Freedom are worth adding. The full list, with the items to buy in each warbond:
| # | Buy | Warbond | Page | Cost | Why | Consensus (dated) | Source |
|---|---|---|---|---|---|---|---|
| 1 | Dust Devils | Dust Devils | -- | 1,000 SC | First against Terminids: the Coyote and the Speargun. | GamesRadar 2026-08-14 (Coyote S, Speargun S vs bugs) | gamesradar.com |
| 2 | AR-2 Coyote | Dust Devils | 1 | 35 Medals | A Medium-pen incendiary rifle, a top primary against bugs and squids. | GamesRadar 2026-08-14 (S vs bugs and squids); Steam guide 2026-08-19 (S+ vs bugs and squids) | gamesradar.com |
| 3 | S-11 Speargun | Dust Devils | 2 | 85 Medals | A harpoon plus gas; the EAT-700 Expendable Napalm is the alternative. | GamesRadar 2026-08-14 (S vs bugs and bots, A vs squids) | gamesradar.com |
| 4 | Entrenched Division | Entrenched Division | -- | 1,000 SC | Second against Terminids: the Stoker and the Cremator. | GamesRadar 2026-08-14 (Stoker S, Cremator S vs bugs) | gamesradar.com |
| 5 | SMG/FLAM-34 Stoker | Entrenched Division | 1 | 35 Medals | An SMG with an under-barrel flamethrower, a top pick against bugs and squids. | GamesRadar 2026-08-14 (S vs bugs and squids) | gamesradar.com |
| 6 | B/FLAM-80 Cremator | Entrenched Division | 3 | 110 Medals | A backpack flamethrower, a top pick against bugs and squids. | GamesRadar 2026-08-14 (S vs bugs, A vs squids); Steam guide 2026-08-19 (S+ vs bugs and squids) | gamesradar.com |
| 7 | Democratic Detonation | Democratic Detonation | -- | 1,000 SC | Third against Terminids: three guns that close holes, and Thermite for Chargers. | research/02 8.5: wiki item pages (hole closing); GamesRadar 2026-08-14 | wiki |
| 8 | G-123 Thermite | Democratic Detonation | 1 | 15 Medals | An anti-tank grenade on page 1: it kills armor without a support slot. | GamesRadar S (2026-08-13) and Steam guide S+ (2026-08-19) for the warbond | wiki |
| 9 | R-36 Eruptor | Democratic Detonation | 2 | 60 Medals | An explosive rifle that closes bug holes and fabricators. | GamesRadar 2026-08-14 (A/S/A); Steam guide 2026-08-19 (S+ vs bugs and bots) | gamesradar.com |
| 10 | GP-31 Grenade Pistol | Democratic Detonation | 3 | 60 Medals | A grenade sidearm that closes nests and fabricators, freeing the grenade slot. | GamesRadar 2026-08-14 (S/S/S) | gamesradar.com |
| 11 | CB-9 Exploding Crossbow | Democratic Detonation | 3 | 80 Medals | A one-handed explosive crossbow, strong on every front. | GamesRadar 2026-08-14 (A/A/A); Steam guide 2026-08-19 (S+ vs bugs and bots) | gamesradar.com |
| 12 | Freedom's Flame | Freedom's Flame | -- | 1,000 SC | Worth adding against Terminids: the Torcher and the Crisper. | GamesRadar 2026-08-14 (Torcher S, Crisper S vs bugs) | gamesradar.com |
| 13 | FLAM-66 Torcher | Freedom's Flame | 2 | 40 Medals | A flamethrower primary, a top pick against bugs. | GamesRadar 2026-08-14 (S vs bugs, A vs squids, C vs bots); Steam guide 2026-08-19 (S+ vs squids) | gamesradar.com |
| 14 | P-72 Crisper | Freedom's Flame | 3 | 45 Medals | A flamethrower sidearm. | GamesRadar 2026-08-14 (S vs bugs) | gamesradar.com |
| 15 | Servants of Freedom | Servants of Freedom | -- | 1,000 SC | Worth adding against Terminids: the Ultimatum closes Bile Titan holes. | research/02 8.5: wiki GP-20 Ultimatum page; GamesRadar 2026-08-14 (S) | wiki |
| 16 | GP-20 Ultimatum | Servants of Freedom | 2 | 40 Medals | A one-shot anti-tank sidearm that also levels bug holes and fabricators. | GamesRadar 2026-08-14 (S/S/S) | gamesradar.com |
| 17 | Polar Patriots | Polar Patriots | -- | 1,000 SC | Once the top three are owned: the Purifier fits any front. | GamesRadar 2026-08-14 (S/S/S); Steam guide 2026-08-19 (S+ every front) | gamesradar.com |
| 18 | PLAS-101 Purifier | Polar Patriots | 3 | 80 Medals | A charge-up explosive primary rated S or better on every front in both lists. | GamesRadar 2026-08-14 (S/S/S); Steam guide 2026-08-19 (S+ every front) | gamesradar.com |
Unit by unit: the Terminid playbook.
4.3Against the Automatons
Bots shoot back from range with armor, rockets and cannons, so buy precise Medium or Heavy penetration for heads and vents, explosive resistance, and anti-tank for Hulks and tanks. Fire is weaker here: small bots take half damage from it. First Democratic Detonation (Eruptor, Thermite, the Fortified FS-55 armor), then Redacted Regiment (Censor, Reduced Signature, C4), then Siege Breakers (Leveller); Castellan's Creed, Borderline Justice, Steeled Veterans and Entrenched Division each add one bot-front standout:
| # | Buy | Warbond | Page | Cost | Why | Consensus (dated) | Source |
|---|---|---|---|---|---|---|---|
| 1 | Democratic Detonation | Democratic Detonation | -- | 1,000 SC | First against Automatons: the Eruptor, Thermite for tanks and Hulks, and Fortified armor. | GamesRadar 2026-08-14 (Eruptor S vs bots) | gamesradar.com |
| 2 | G-123 Thermite | Democratic Detonation | 1 | 15 Medals | An anti-tank grenade on page 1: it kills armor without a support slot. | GamesRadar S (2026-08-13) and Steam guide S+ (2026-08-19) for the warbond | wiki |
| 3 | R-36 Eruptor | Democratic Detonation | 2 | 60 Medals | An explosive rifle that closes bug holes and fabricators. | GamesRadar 2026-08-14 (A/S/A); Steam guide 2026-08-19 (S+ vs bugs and bots) | gamesradar.com |
| 4 | FS-55 Devastator (armor) | Democratic Detonation | 3 | 64 Medals | Fortified heavy armor: half damage from explosions. | research/02 8.5 on GamesRadar (2026-08-14) and Steam guide (2026-08-19) per-front tiers | wiki |
| 5 | Redacted Regiment | Redacted Regiment | -- | 1,000 SC | Second against Automatons: the Censor, Reduced Signature armor and the C4 Pack. | GamesRadar 2026-08-14 (Censor S, C4 S vs bots); Steam guide 2026-08-19 (Reduced Signature S+) | gamesradar.com |
| 6 | R-72 Censor | Redacted Regiment | 1 | 35 Medals | A suppressed marksman rifle, a top pick against bots. | GamesRadar 2026-08-14 (S vs bots) | gamesradar.com |
| 7 | RS-89 Shadow Paragon (armor) | Redacted Regiment | 1 | 45 Medals | Reduced Signature light armor: quieter, and enemies spot you later. | Steam guide 2026-08-19 (S+ vs bots, S vs squids) | Steam guide |
| 8 | B/MD C4 Pack | Redacted Regiment | 3 | 110 Medals | Remote-detonated AT III charges, a top pick against bots. | GamesRadar 2026-08-14 (S vs bots); Steam guide 2026-08-19 (S+ vs bots) | gamesradar.com |
| 9 | Siege Breakers | Siege Breakers | -- | 1,000 SC | Third against Automatons: the Leveller. | GamesRadar 2026-08-14 (S vs bots); Steam guide 2026-08-19 (S+ vs bots) | gamesradar.com |
| 10 | EAT-411 Leveller | Siege Breakers | 2 | 85 Medals | An expendable anti-tank rocket that closes Bile Titan holes and destroys spawners. | GamesRadar 2026-08-14 (S vs bots); Steam guide 2026-08-19 (S+ vs bots) | wiki |
| 11 | Castellan's Creed | Castellan's Creed | -- | 1,500 SC | Worth adding against Automatons: the Meltagun. | GamesRadar 2026-08-14 (Meltagun S vs bots) | gamesradar.com |
| 12 | 40-K Meltagun | Castellan's Creed | 3 | 110 Medals | A short-range AT III thermal beam. | GamesRadar 2026-08-14 (S vs bots, A vs bugs and squids); Steam guide 2026-08-19 (S+ vs bugs and bots) | gamesradar.com |
| 13 | Borderline Justice | Borderline Justice | -- | 1,000 SC | Worth adding against Automatons: the Talon. | GamesRadar 2026-08-14 (Talon S vs bots) | gamesradar.com |
| 14 | LAS-58 Talon | Borderline Justice | 2 | 40 Medals | A laser revolver that uses heat instead of ammo, a top pick against bots. | GamesRadar 2026-08-14 (S vs bots, A vs squids) | gamesradar.com |
| 15 | Steeled Veterans | Steeled Veterans | -- | 1,000 SC | Worth adding against Automatons: the Senator. | GamesRadar 2026-08-14 (Senator S vs bots) | gamesradar.com |
| 16 | P-4 Senator | Steeled Veterans | 1 | 15 Medals | A Heavy-pen revolver, a top sidearm against bots. | GamesRadar 2026-08-14 (S vs bots, A vs squids) | gamesradar.com |
| 17 | Entrenched Division | Entrenched Division | -- | 1,000 SC | Worth adding against Automatons: the Sapper armor. | Steam guide 2026-08-19 (Sapper armor S+ vs bots) | Steam guide |
| 18 | CPG-48 Sapper (armor) | Entrenched Division | 1 | 45 Medals | Grenadier armor: explosive resistance plus two extra grenades. | Steam guide 2026-08-19 (S+ vs bots) | Steam guide |
| 19 | Polar Patriots | Polar Patriots | -- | 1,000 SC | Once the top three are owned: the Purifier fits any front. | GamesRadar 2026-08-14 (S/S/S); Steam guide 2026-08-19 (S+ every front) | gamesradar.com |
| 20 | PLAS-101 Purifier | Polar Patriots | 3 | 80 Medals | A charge-up explosive primary rated S or better on every front in both lists. | GamesRadar 2026-08-14 (S/S/S); Steam guide 2026-08-19 (S+ every front) | gamesradar.com |
Unit by unit: the Automaton playbook.
4.4Against the Illuminate
The Illuminate send hordes of Voteless, shielded walkers and fliers, so crowd fire comes first, and dedicated anti-tank launchers matter less: u.gg's support list (read September 26, 2026, stamped 7.0.2) drops the Recoilless, EAT, Quasar and Spear to C on this front. First Dust Devils (Coyote), then Entrenched Division (Stoker, Cremator), then Servants of Freedom (Ultimatum); Force of Law, Truth Enforcers, Freedom's Flame and Exo Experts each add one standout:
| # | Buy | Warbond | Page | Cost | Why | Consensus (dated) | Source |
|---|---|---|---|---|---|---|---|
| 1 | Dust Devils | Dust Devils | -- | 1,000 SC | First against the Illuminate: the Coyote. | GamesRadar 2026-08-14 (Coyote S vs squids); Steam guide 2026-08-19 (S+) | gamesradar.com |
| 2 | AR-2 Coyote | Dust Devils | 1 | 35 Medals | A Medium-pen incendiary rifle, a top primary against bugs and squids. | GamesRadar 2026-08-14 (S vs bugs and squids); Steam guide 2026-08-19 (S+ vs bugs and squids) | gamesradar.com |
| 3 | Entrenched Division | Entrenched Division | -- | 1,000 SC | Second against the Illuminate: the Stoker and the Cremator. | GamesRadar 2026-08-14 (Stoker S); Steam guide 2026-08-19 (Cremator S+) | gamesradar.com |
| 4 | SMG/FLAM-34 Stoker | Entrenched Division | 1 | 35 Medals | An SMG with an under-barrel flamethrower, a top pick against bugs and squids. | GamesRadar 2026-08-14 (S vs bugs and squids) | gamesradar.com |
| 5 | B/FLAM-80 Cremator | Entrenched Division | 3 | 110 Medals | A backpack flamethrower, a top pick against bugs and squids. | GamesRadar 2026-08-14 (S vs bugs, A vs squids); Steam guide 2026-08-19 (S+ vs bugs and squids) | gamesradar.com |
| 6 | Servants of Freedom | Servants of Freedom | -- | 1,000 SC | Third against the Illuminate: the Ultimatum. | GamesRadar 2026-08-14 (Ultimatum S vs squids) | gamesradar.com |
| 7 | GP-20 Ultimatum | Servants of Freedom | 2 | 40 Medals | A one-shot anti-tank sidearm that also levels bug holes and fabricators. | GamesRadar 2026-08-14 (S/S/S) | gamesradar.com |
| 8 | Force of Law | Force of Law | -- | 1,000 SC | Worth adding against the Illuminate: the De-Escalator. | GamesRadar 2026-08-14 (De-Escalator S vs squids) | gamesradar.com |
| 9 | GL-52 De-Escalator | Force of Law | 2 | 85 Medals | An arc grenade launcher that stuns groups. | GamesRadar 2026-08-14 (S vs bugs and squids, A vs bots) | gamesradar.com |
| 10 | Truth Enforcers | Truth Enforcers | -- | 1,000 SC | Worth adding against the Illuminate: the Loyalist. | GamesRadar 2026-08-14 (Loyalist S vs squids) | gamesradar.com |
| 11 | PLAS-15 Loyalist | Truth Enforcers | 3 | 45 Medals | A plasma pistol with a charged explosive shot. | GamesRadar 2026-08-14 (S vs bots and squids, A vs bugs) | gamesradar.com |
| 12 | Freedom's Flame | Freedom's Flame | -- | 1,000 SC | Worth adding against the Illuminate: the Torcher. | Steam guide 2026-08-19 (Torcher S+ vs squids) | Steam guide |
| 13 | FLAM-66 Torcher | Freedom's Flame | 2 | 40 Medals | A flamethrower primary, a top pick against bugs. | GamesRadar 2026-08-14 (S vs bugs, A vs squids, C vs bots); Steam guide 2026-08-19 (S+ vs squids) | gamesradar.com |
| 14 | Exo Experts | Exo Experts | -- | 1,000 SC | Worth adding against the Illuminate: the Bullet Storm. | Steam guide 2026-08-19 (Bullet Storm S+ vs squids) | Steam guide |
| 15 | MGX-42 Bullet Storm | Exo Experts | 1 | 75 Medals | An expendable rotary gun, two per pod. | Steam guide 2026-08-19 (S+ vs squids) | Steam guide |
| 16 | Polar Patriots | Polar Patriots | -- | 1,000 SC | Once the top three are owned: the Purifier fits any front. | GamesRadar 2026-08-14 (S/S/S); Steam guide 2026-08-19 (S+ every front) | gamesradar.com |
| 17 | PLAS-101 Purifier | Polar Patriots | 3 | 80 Medals | A charge-up explosive primary rated S or better on every front in both lists. | GamesRadar 2026-08-14 (S/S/S); Steam guide 2026-08-19 (S+ every front) | gamesradar.com |
Unit by unit: the Illuminate playbook. The front picks are this manual's reading of GamesRadar's weapon lists (August 14, 2026) and the Steam guide's per-front tables (August 19, 2026) community-tested.
4.5Buying for a squad
- Your booster is the squad's booster. Each diver brings one and it works for everyone, but a duplicate adds nothing, so a full squad runs up to 4 different ones. The four S-rated boosters on Mobilize (Hellpod Space Optimization, Vitality Enhancement, Stamina Enhancement, Muscle Enhancement) make a complete squad set: buy them before premium boosters, and say in the lobby which one you bring community-tested.
- Gear is not shared, drops are. You bring only what you own, but anyone can pick up a support weapon or backpack a teammate drops. Friends who buy different warbonds widen what the squad can call in.
- Pickups are shared. Super Credits and Medal cases credit every diver in the mission at once, so a squad farms them together (how).
- An anti-tank booster. Ironclad Democracy's Surplus EAT Allocation: Two free EAT-17 call-ins per mission (two launchers each, one per diver in a full squad); cannot be rearmed. Worth bringing when nobody packed anti-tank.
Roles and loadout coordination: Multiplayer & Squads; how boosters stack: Boosters in a squad.
Variants by playstyle
Know the job you want in the squad? Buy for it. Each list gives the warbonds in order and the items that earn them their place; the ratings behind them are the same dated lists as the main order community-tested.
5.1Anti-tank without a backpack
Anti-tank power in the grenade and sidearm slots or an expendable launcher, so your backpack stays free for a shield or a supply pack: Thermite, the Ultimatum, the Leveller, then Ironclad Democracy's untested kit.
| # | Buy | Warbond | Page | Cost | Why | Consensus (dated) | Source |
|---|---|---|---|---|---|---|---|
| 1 | Democratic Detonation | Democratic Detonation | -- | 1,000 SC | Thermite puts anti-tank power in the grenade slot. | research/02 8.6 on GamesRadar (2026-08-13/14) and Steam guide (2026-08-19) tiers | gamesradar.com |
| 2 | G-123 Thermite | Democratic Detonation | 1 | 15 Medals | An anti-tank grenade on page 1: it kills armor without a support slot. | GamesRadar S (2026-08-13) and Steam guide S+ (2026-08-19) for the warbond | wiki |
| 3 | Servants of Freedom | Servants of Freedom | -- | 1,000 SC | The Ultimatum puts it in the sidearm slot. | research/02 8.6 on GamesRadar (2026-08-13/14) and Steam guide (2026-08-19) tiers | gamesradar.com |
| 4 | GP-20 Ultimatum | Servants of Freedom | 2 | 40 Medals | A one-shot anti-tank sidearm that also levels bug holes and fabricators. | GamesRadar 2026-08-14 (S/S/S) | gamesradar.com |
| 5 | Siege Breakers | Siege Breakers | -- | 1,000 SC | The Leveller is an expendable rocket, no backpack needed. | research/02 8.6 on GamesRadar (2026-08-13/14) and Steam guide (2026-08-19) tiers | gamesradar.com |
| 6 | EAT-411 Leveller | Siege Breakers | 2 | 85 Medals | An expendable anti-tank rocket that closes Bile Titan holes and destroys spawners. | GamesRadar 2026-08-14 (S vs bots); Steam guide 2026-08-19 (S+ vs bots) | wiki |
| 7 unverified | Ironclad Democracy | Ironclad Democracy | -- | 1,000 SC | The Breacher, AT Seeker and free EATs, all still untested by the dated lists. | research/02 8.6 on GamesRadar (2026-08-13/14) and Steam guide (2026-08-19) tiers | gamesradar.com |
| 8 unverified | P-34 Breacher | Ironclad Democracy | 2 | 50 Medals | An AT III sticky incendiary missile pistol that no dated list has tested yet. | no dated list yet: GamesRadar had not tested it (2026-09-22); Game Rant 2026-09-23 | wiki |
| 9 unverified | Surplus EAT Allocation | Ironclad Democracy | 2 | 55 Medals | A booster that adds two free EAT call-ins a mission. | no dated list yet: GamesRadar had not tested it (2026-09-22); Game Rant 2026-09-23 | wiki |
| 10 unverified | G-60 Anti-Tank Seeker | Ironclad Democracy | 3 | 65 Medals | A homing AT I drone grenade, unreliable on Bile Titans. | no dated list yet: GamesRadar had not tested it (2026-09-22); Game Rant 2026-09-23 | wiki |
5.2Anti-tank specialist
The squad's heavy-killer, on top of the Recoilless Rifle or Quasar Cannon you buy with Requisition (support weapons): the Leveller, the Meltagun, the Solo Silo and the Anti-Tank Emplacement.
| # | Buy | Warbond | Page | Cost | Why | Consensus (dated) | Source |
|---|---|---|---|---|---|---|---|
| 1 | Siege Breakers | Siege Breakers | -- | 1,000 SC | The Leveller. | research/02 8.6 on GamesRadar (2026-08-13/14) and Steam guide (2026-08-19) tiers | gamesradar.com |
| 2 | EAT-411 Leveller | Siege Breakers | 2 | 85 Medals | An expendable anti-tank rocket that closes Bile Titan holes and destroys spawners. | GamesRadar 2026-08-14 (S vs bots); Steam guide 2026-08-19 (S+ vs bots) | wiki |
| 3 | Castellan's Creed | Castellan's Creed | -- | 1,500 SC | The Meltagun. | research/02 8.6 on GamesRadar (2026-08-13/14) and Steam guide (2026-08-19) tiers | gamesradar.com |
| 4 | 40-K Meltagun | Castellan's Creed | 3 | 110 Medals | A short-range AT III thermal beam. | GamesRadar 2026-08-14 (S vs bots, A vs bugs and squids); Steam guide 2026-08-19 (S+ vs bugs and bots) | gamesradar.com |
| 5 unverified | Dust Devils | Dust Devils | -- | 1,000 SC | The Solo Silo. | research/02 8.6 on GamesRadar (2026-08-13/14) and Steam guide (2026-08-19) tiers | gamesradar.com |
| 6 unverified | MS-11 Solo Silo | Dust Devils | 3 | 110 Medals | A guided missile silo that kills the biggest targets with one body hit. | the lists split: GamesRadar 2026-08-14 (D/A/D); Steam guide 2026-08-19 (S/S/A) | wiki |
| 7 | Urban Legends | Urban Legends | -- | 1,000 SC | The Anti-Tank Emplacement. | research/02 8.6 on GamesRadar (2026-08-13/14) and Steam guide (2026-08-19) tiers | gamesradar.com |
| 8 | E/AT-12 Anti-Tank Emplacement | Urban Legends | 3 | 110 Medals | A manned anti-tank cannon that shreds big targets at range. | Steam guide 2026-08-19 (S+ vs bots, S vs bugs and squids) | Steam guide |
5.3Horde clearing and fire
Fire and gas for the Terminid and Illuminate fronts (fire is weaker against bots): Entrenched Division, Freedom's Flame, the Hot Dog drone and the Gas grenade.
| # | Buy | Warbond | Page | Cost | Why | Consensus (dated) | Source |
|---|---|---|---|---|---|---|---|
| 1 | Entrenched Division | Entrenched Division | -- | 1,000 SC | The Stoker, the Gas Mortar Sentry and the Cremator. | research/02 8.6 on GamesRadar (2026-08-13/14) and Steam guide (2026-08-19) tiers | gamesradar.com |
| 2 | SMG/FLAM-34 Stoker | Entrenched Division | 1 | 35 Medals | An SMG with an under-barrel flamethrower, a top pick against bugs and squids. | GamesRadar 2026-08-14 (S vs bugs and squids) | gamesradar.com |
| 3 | A/GM-17 Gas Mortar Sentry | Entrenched Division | 2 | 85 Medals | A gas mortar sentry on a short cooldown. | research/02 8.3 plan on GamesRadar (2026-08-13/14) and Steam guide (2026-08-19) ratings | wiki |
| 4 | B/FLAM-80 Cremator | Entrenched Division | 3 | 110 Medals | A backpack flamethrower, a top pick against bugs and squids. | GamesRadar 2026-08-14 (S vs bugs, A vs squids); Steam guide 2026-08-19 (S+ vs bugs and squids) | gamesradar.com |
| 5 | Freedom's Flame | Freedom's Flame | -- | 1,000 SC | The Torcher and the Crisper. | research/02 8.6 on GamesRadar (2026-08-13/14) and Steam guide (2026-08-19) tiers | gamesradar.com |
| 6 | FLAM-66 Torcher | Freedom's Flame | 2 | 40 Medals | A flamethrower primary, a top pick against bugs. | GamesRadar 2026-08-14 (S vs bugs, A vs squids, C vs bots); Steam guide 2026-08-19 (S+ vs squids) | gamesradar.com |
| 7 | P-72 Crisper | Freedom's Flame | 3 | 45 Medals | A flamethrower sidearm. | GamesRadar 2026-08-14 (S vs bugs) | gamesradar.com |
| 8 | Python Commandos | Python Commandos | -- | 1,000 SC | The Hot Dog drone. | research/02 8.6 on GamesRadar (2026-08-13/14) and Steam guide (2026-08-19) tiers | gamesradar.com |
| 9 | AX/FLAM-75 "Guard Dog" Hot Dog | Python Commandos | 1 | 75 Medals | A flamethrower drone backpack. | Steam guide 2026-08-19 (S+ every front) | Steam guide |
| 10 | Chemical Agents | Chemical Agents | -- | 1,000 SC | The Gas grenade. | research/02 8.6 on GamesRadar (2026-08-13/14) and Steam guide (2026-08-19) tiers | gamesradar.com |
| 11 | G-4 Gas | Chemical Agents | 1 | 30 Medals | A gas grenade for strong crowd control. | GamesRadar 2026-08-13 ('fantastic') | gamesradar.com |
5.4Stealth and Commando missions
Quiet guns, armor that keeps you unseen and smoke on landing: Redacted Regiment first, the ODST legendary only if you want its look.
| # | Buy | Warbond | Page | Cost | Why | Consensus (dated) | Source |
|---|---|---|---|---|---|---|---|
| 1 | Redacted Regiment | Redacted Regiment | -- | 1,000 SC | The Censor, Reduced Signature armor, the C4 Pack and Concealed Insertion. | research/02 8.6 on GamesRadar (2026-08-13/14) and Steam guide (2026-08-19) tiers | gamesradar.com |
| 2 | R-72 Censor | Redacted Regiment | 1 | 35 Medals | A suppressed marksman rifle, a top pick against bots. | GamesRadar 2026-08-14 (S vs bots) | gamesradar.com |
| 3 | RS-89 Shadow Paragon (armor) | Redacted Regiment | 1 | 45 Medals | Reduced Signature light armor: quieter, and enemies spot you later. | Steam guide 2026-08-19 (S+ vs bots, S vs squids) | Steam guide |
| 4 | B/MD C4 Pack | Redacted Regiment | 3 | 110 Medals | Remote-detonated AT III charges, a top pick against bots. | GamesRadar 2026-08-14 (S vs bots); Steam guide 2026-08-19 (S+ vs bots) | gamesradar.com |
| 5 | Concealed Insertion | Redacted Regiment | 3 | 40 Medals | A booster: hellpods pop smoke on landing. | research/02 8.6; GamesRadar 2026-08-13 (the gear is 'arguably essential' for Commando) | gamesradar.com |
| 6 | Obedient Democracy Support Troopers | Obedient Democracy Support Troopers | -- | 1,500 SC | Feet First armor and a suppressed SMG and pistol. | research/02 8.6 on GamesRadar (2026-08-13/14) and Steam guide (2026-08-19) tiers | gamesradar.com |
| 7 | A-9 Helljumper (armor) | Obedient Democracy Support Troopers | 1 | 45 Medals | Feet First armor: quieter steps and no leg injuries. | research/02 8.6 on GamesRadar (2026-08-13/14) and Steam guide (2026-08-19) tiers | wiki |
| 8 | M7S SMG | Obedient Democracy Support Troopers | 2 | 50 Medals | A suppressed SMG. | research/02 8.6 on GamesRadar (2026-08-13/14) and Steam guide (2026-08-19) tiers | wiki |
| 9 | M6C/SOCOM Pistol | Obedient Democracy Support Troopers | 3 | 75 Medals | A suppressed pistol. | research/02 8.6 on GamesRadar (2026-08-13/14) and Steam guide (2026-08-19) tiers | wiki |
5.5Marksman
Head-shooters, strongest on the bot front: the Censor, the Deadeye and the Hot-Shot, plus the Diligence you already get in Mobilize.
| # | Buy | Warbond | Page | Cost | Why | Consensus (dated) | Source |
|---|---|---|---|---|---|---|---|
| 1 | Redacted Regiment | Redacted Regiment | -- | 1,000 SC | The Censor. | research/02 8.6 on GamesRadar (2026-08-13/14) and Steam guide (2026-08-19) tiers | gamesradar.com |
| 2 | R-72 Censor | Redacted Regiment | 1 | 35 Medals | A suppressed marksman rifle, a top pick against bots. | GamesRadar 2026-08-14 (S vs bots) | gamesradar.com |
| 3 | Borderline Justice | Borderline Justice | -- | 1,000 SC | The Deadeye. | research/02 8.6 on GamesRadar (2026-08-13/14) and Steam guide (2026-08-19) tiers | gamesradar.com |
| 4 | R-6 Deadeye | Borderline Justice | 1 | 35 Medals | A lever-action marksman rifle. | GamesRadar 2026-08-14 (A vs bots) | gamesradar.com |
| 5 | Castellan's Creed | Castellan's Creed | -- | 1,500 SC | The Hot-Shot. | research/02 8.6 on GamesRadar (2026-08-13/14) and Steam guide (2026-08-19) tiers | gamesradar.com |
| 6 | R/40-K Hot-Shot Marksman Rifle | Castellan's Creed | 1 | 35 Medals | An energy marksman rifle. | GamesRadar 2026-08-14 (A vs bots) | gamesradar.com |
| 7 | Helldivers Mobilize! | Helldivers Mobilize! | -- | -- | The Diligence, free in Mobilize. | research/02 8.6 on GamesRadar (2026-08-13/14) and Steam guide (2026-08-19) tiers | gamesradar.com |
| 8 | R-63 Diligence | Helldivers Mobilize! | 2 | 8 Medals | A marksman rifle for the bot front. | GamesRadar 2026-08-14 (A vs bots); Steam guide 2026-08-19 (S) | gamesradar.com |
5.6Sidearm-first
Builds around the pistol: Gunslinger armor and the Talon, the Senator, the Loyalist.
| # | Buy | Warbond | Page | Cost | Why | Consensus (dated) | Source |
|---|---|---|---|---|---|---|---|
| 1 | Borderline Justice | Borderline Justice | -- | 1,000 SC | Gunslinger armor and the Talon. | research/02 8.6 on GamesRadar (2026-08-13/14) and Steam guide (2026-08-19) tiers | gamesradar.com |
| 2 | GS-17 Frontier Marshal (armor) | Borderline Justice | 1 | 45 Medals | Gunslinger armor: faster sidearm reloads and draws, less recoil. | research/02 8.6 on GamesRadar (2026-08-13/14) and Steam guide (2026-08-19) tiers | wiki |
| 3 | LAS-58 Talon | Borderline Justice | 2 | 40 Medals | A laser revolver that uses heat instead of ammo, a top pick against bots. | GamesRadar 2026-08-14 (S vs bots, A vs squids) | gamesradar.com |
| 4 | Steeled Veterans | Steeled Veterans | -- | 1,000 SC | The Senator. | research/02 8.6 on GamesRadar (2026-08-13/14) and Steam guide (2026-08-19) tiers | gamesradar.com |
| 5 | P-4 Senator | Steeled Veterans | 1 | 15 Medals | A Heavy-pen revolver, a top sidearm against bots. | GamesRadar 2026-08-14 (S vs bots, A vs squids) | gamesradar.com |
| 6 | Truth Enforcers | Truth Enforcers | -- | 1,000 SC | The Loyalist. | research/02 8.6 on GamesRadar (2026-08-13/14) and Steam guide (2026-08-19) tiers | gamesradar.com |
| 7 | PLAS-15 Loyalist | Truth Enforcers | 3 | 45 Medals | A plasma pistol with a charged explosive shot. | GamesRadar 2026-08-14 (S vs bots and squids, A vs bugs) | gamesradar.com |
5.7Mobility and scouting
Getting around the map: the Warp Pack, the Hover Pack and Oxygenator armor.
| # | Buy | Warbond | Page | Cost | Why | Consensus (dated) | Source |
|---|---|---|---|---|---|---|---|
| 1 | Control Group | Control Group | -- | 1,000 SC | The Warp Pack. | research/02 8.6 on GamesRadar (2026-08-13/14) and Steam guide (2026-08-19) tiers | gamesradar.com |
| 2 | LIFT-182 Warp Pack | Control Group | 3 | 110 Medals | A short-range teleport backpack, a top pick on every front. | Steam guide 2026-08-19 (S+ every front); GamesRadar 2026-08-13 (a best backpack) | wiki |
| 3 | Borderline Justice | Borderline Justice | -- | 1,000 SC | The Hover Pack. | research/02 8.6 on GamesRadar (2026-08-13/14) and Steam guide (2026-08-19) tiers | gamesradar.com |
| 4 | LIFT-860 Hover Pack | Borderline Justice | 3 | 110 Medals | A hover jump pack for getting around. | research/02 8.6 on GamesRadar (2026-08-13/14) and Steam guide (2026-08-19) tiers | wiki |
| 5 | Exo Experts | Exo Experts | -- | 1,000 SC | Oxygenator armor. | research/02 8.6 on GamesRadar (2026-08-13/14) and Steam guide (2026-08-19) tiers | gamesradar.com |
| 6 | O-3 Free Spirit (armor) | Exo Experts | 1 | 45 Medals | Oxygenator light armor: faster movement and longer slides. | research/02 8.6 on GamesRadar (2026-08-13/14) and Steam guide (2026-08-19) tiers | wiki |
5.8Support and survival
Keeping yourself and the squad alive: Experimental Infusion, Adreno-Defibrillator armor (a one-time revive) and Mobilize's Med-Kit armor.
| # | Buy | Warbond | Page | Cost | Why | Consensus (dated) | Source |
|---|---|---|---|---|---|---|---|
| 1 | Viper Commandos | Viper Commandos | -- | 1,000 SC | Experimental Infusion. | research/02 8.6 on GamesRadar (2026-08-13/14) and Steam guide (2026-08-19) tiers | gamesradar.com |
| 2 | Experimental Infusion | Viper Commandos | 3 | 80 Medals | A booster: stims also add speed and damage resistance. | Steam guide 2026-08-19 (S+ every front); GamesRadar boosters 2025-08-26 (2nd) | Steam guide |
| 3 | Control Group | Control Group | -- | 1,000 SC | Adreno-Defibrillator armor. | research/02 8.6 on GamesRadar (2026-08-13/14) and Steam guide (2026-08-19) tiers | gamesradar.com |
| 4 | AD-26 Bleeding Edge (armor) | Control Group | 1 | 45 Medals | Adreno-Defibrillator armor: a one-time revive on death. | research/02 8.6 on GamesRadar (2026-08-13/14) and Steam guide (2026-08-19) tiers | wiki |
| 5 | Helldivers Mobilize! | Helldivers Mobilize! | -- | -- | Med-Kit armor, free in Mobilize. | research/02 8.6 on GamesRadar (2026-08-13/14) and Steam guide (2026-08-19) tiers | gamesradar.com |
| 6 | CM-09 Bonesnapper (armor) | Helldivers Mobilize! | 4 | 15 Medals | Med-Kit armor: two extra stims that last longer. | research/02 8.1 plan on Steam guide (2026-08-19) and GamesRadar (2026-08-14) ratings | wiki |
5.9Exosuits and vehicles
Exo Experts' two exosuits; Ironclad Democracy's tank patterns are cosmetic only.
| # | Buy | Warbond | Page | Cost | Why | Consensus (dated) | Source |
|---|---|---|---|---|---|---|---|
| 1 | Exo Experts | Exo Experts | -- | 1,000 SC | Two exosuits; the tank patterns in Ironclad Democracy are cosmetic only. | research/02 8.6 on GamesRadar (2026-08-13/14) and Steam guide (2026-08-19) tiers | gamesradar.com |
| 2 | EXO-51 Lumberer Exosuit | Exo Experts | 2 | 50 Medals | An exosuit with a flamethrower and an anti-tank cannon. | GamesRadar 2026-08-13 (both exosuits great); Steam guide S (2026-08-19) for the warbond | gamesradar.com |
| 3 | EXO-55 Breakthrough Exosuit | Exo Experts | 3 | 50 Medals | An exosuit with a flak cannon and a shield. | GamesRadar 2026-08-13 (both exosuits great); Steam guide S (2026-08-19) for the warbond | gamesradar.com |
5.10Melee
Rock Solid armor, the Breaching Hammer and Peak Physique armor. Patch 6.0.1 cut the melee passives by more than half, which is why melee warbonds rank low overall.
| # | Buy | Warbond | Page | Cost | Why | Consensus (dated) | Source |
|---|---|---|---|---|---|---|---|
| 1 | Python Commandos | Python Commandos | -- | 1,000 SC | Rock Solid armor. | research/02 8.6 on GamesRadar (2026-08-13/14) and Steam guide (2026-08-19) tiers | gamesradar.com |
| 2 | RS-20 Constrictor (armor) | Python Commandos | 1 | 45 Medals | Rock Solid light armor: more melee damage, resists knockdown. | research/02 8.6 on GamesRadar (2026-08-13/14) and Steam guide (2026-08-19) tiers | wiki |
| 3 | Siege Breakers | Siege Breakers | -- | 1,000 SC | The Breaching Hammer. | research/02 8.6 on GamesRadar (2026-08-13/14) and Steam guide (2026-08-19) tiers | gamesradar.com |
| 4 | CQC-20 Breaching Hammer | Siege Breakers | 1 | 75 Medals | A hammer with an explosive head for melee builds. | GamesRadar 2026-08-14 (A vs bots) | gamesradar.com |
| 5 | Viper Commandos | Viper Commandos | -- | 1,000 SC | Peak Physique armor. | research/02 8.6 on GamesRadar (2026-08-13/14) and Steam guide (2026-08-19) tiers | gamesradar.com |
| 6 | PH-9 Predator (armor) | Viper Commandos | 1 | 40 Medals | Peak Physique light armor: more melee damage, less weapon drag. | research/02 8.6 on GamesRadar (2026-08-13/14) and Steam guide (2026-08-19) tiers | wiki |
The skip list
Until the top three premiums are yours, skip the legendaries and the warbonds with a single standout, unless that one item is exactly what you want. Never spend Medals on a D-rated item except to open a page.
Warbonds first, then single items, each with the exception that would make it worth buying:
| # | Buy | Warbond | Page | Cost | Why | Consensus (dated) | Source |
|---|---|---|---|---|---|---|---|
| 1 | Righteous Revenants | Righteous Revenants | -- | 1,500 SC | Skip unless it came free with a 2024 Killzone item: two D-tier guns for 1,500 SC. | GamesRadar D (2026-08-13); Steam guide D (2026-08-19) | gamesradar.com |
| 2 | Obedient Democracy Support Troopers | Obedient Democracy Support Troopers | -- | 1,500 SC | Skip unless you want the Halo look or a stealth set: 1,500 SC and no SC back. | GamesRadar C (2026-08-13); Steam guide D (2026-08-19) | gamesradar.com |
| 3 | Masters of Ceremony | Masters of Ceremony | -- | 1,000 SC | Skip unless you want the Sample Scanner for module farming. | GamesRadar D (2026-08-13); Steam guide C (2026-08-19); One True Flag D everywhere (2026-08-14) | gamesradar.com |
| 4 | Force of Law | Force of Law | -- | 1,000 SC | Skip unless you fight bugs or squids and want the De-Escalator. | GamesRadar C (2026-08-13); Steam guide C (2026-08-19); Pacifier D everywhere (2026-08-14) | gamesradar.com |
| 5 | Chemical Agents | Chemical Agents | -- | 1,000 SC | Skip unless you want the Gas grenade; its Sterilizer and Stim Pistol rate D. | GamesRadar C (2026-08-13); Steam guide B (2026-08-19); GamesRadar weapon lists 2026-08-14 | gamesradar.com |
| 6 | Steeled Veterans | Steeled Veterans | -- | 1,000 SC | Buy it late, for its one standout, the Senator. | GamesRadar C (2026-08-13); Steam guide B (2026-08-19) | gamesradar.com |
| 7 | Viper Commandos | Viper Commandos | -- | 1,000 SC | Buy it late, for its one standout, Experimental Infusion. | GamesRadar C (2026-08-13); Steam guide B (2026-08-19) | gamesradar.com |
| 8 | AR-23C Liberator Concussive | Steeled Veterans | 1 | 20 Medals | Rated D on every front: buy it only to fill a gate. | GamesRadar 2026-08-14 (D/D/D) | gamesradar.com |
| 9 | SMG-72 Pummeler | Polar Patriots | 2 | 60 Medals | Rated D on every front: buy it only to fill a gate. | GamesRadar 2026-08-14 (D/D/D) | gamesradar.com |
| 10 | AR-32 Pacifier | Force of Law | 1 | 35 Medals | Rated D on every front: buy it only to fill a gate. | GamesRadar 2026-08-14 (D/D/D) | gamesradar.com |
| 11 | StA-52 Assault Rifle | Righteous Revenants | 1 | 35 Medals | Rated D on every front: buy it only to fill a gate. | GamesRadar 2026-08-14 (D/D/D) | gamesradar.com |
| 12 | StA-11 SMG | Righteous Revenants | 3 | 65 Medals | Rated D on every front: buy it only to fill a gate. | GamesRadar 2026-08-14 (D/D/D) | gamesradar.com |
| 13 | P-11 Stim Pistol | Chemical Agents | 3 | 80 Medals | Rated D on every front: buy it only to fill a gate. | GamesRadar 2026-08-14 (D/D/D) | gamesradar.com |
| 14 | TX-41 Sterilizer | Chemical Agents | 2 | 85 Medals | Rated D on every front: buy it only to fill a gate. | GamesRadar 2026-08-14 (D/D/D) | gamesradar.com |
| 15 | CQC-1 One True Flag | Masters of Ceremony | 3 | 110 Medals | Rated D on every front ('downright useless'): buy it only to fill a gate. | GamesRadar 2026-08-13 and 2026-08-14 (D/D/D) | gamesradar.com |
| 16 | M-1000 Maxigun | Python Commandos | 3 | 110 Medals | Rated D against bugs and C elsewhere: buy it only to fill a gate. | GamesRadar 2026-08-14 (D/C/C) | gamesradar.com |
| 17 | GL-28 Belt-Fed Grenade Launcher | Siege Breakers | 3 | 110 Medals | Rated D against bugs and C elsewhere: buy it only to fill a gate. | GamesRadar 2026-08-14 (D/C/C) | gamesradar.com |
| 18 | LAS-5 Scythe | Helldivers Mobilize! | 5 | 30 Medals | Rated D against bugs and squids: buy it only to fill a gate. | GamesRadar 2026-08-14 (D/C/D) | gamesradar.com |
| 19 | SG-225SP Breaker Spray&Pray | Helldivers Mobilize! | 9 | 60 Medals | Rated C against bugs and D elsewhere: buy it only to fill a gate. | GamesRadar 2026-08-14 (C/D/D) | gamesradar.com |
A skip-list item still has one use: when a page gate is a few Medals away and nothing better is open, it is as good a filler as a cape. The gate counts Medals spent, not what they bought.
How warbonds work
Super Credits unlock a warbond; Medals buy what is inside it, page by page. A page opens once you have spent enough Medals in that warbond, and your wallet stops at 250 Medals, so plan the spending, not the saving.
7.1Three kinds of warbond
Helldivers Mobilize!
10 pages and 2,015 Medals of items, with 750 Super Credits to claim along the way.
21 premium warbonds
Three pages each and 300 Super Credits to claim back (7, 12 and 32 Medals for the three stacks), so each really costs 700.
3 crossover warbonds
The Halo: ODST, Killzone and Warhammer 40,000 tie-ins: three pages, no Super Credits inside, and the Premium Warbond Token cannot unlock them.
- There are 25 warbonds in all. None expires, and you can fill several at once, in any order.
- You cannot buy a single item without owning its warbond, and money buys Super Credits, not warbonds.
- The Super Citizen Edition and its upgrade include one Premium Warbond Token, good for premium warbonds only; it is not sold on its own. Spend it on your first premium pick.
- Anyone who bought a Killzone item in the 2024 Superstore got Righteous Revenants free, with those items already unlocked.
7.2Pages open as you spend in that warbond
The game counts the Medals you have spent in one warbond, cumulatively; Medals spent in another do not count, and a locked page shows how many more it needs. So you never save up for a page: you spend your way to it, filling the gap with the cheapest items you would buy anyway.
- Mobilize opens pages 1 to 10 at these totals of Medals spent inside it: 0, 8, 35, 75, 150, 260, 420, 650, 850, 1200 (graded likely; the Fandom wiki reads 430 for page 7).
- Premium and legendary warbonds open page 2 after roughly three quarters of page 1's value, and page 3 after roughly three quarters of pages 1 and 2 approx; the first 2024 premiums open page 2 at a flat, lower gate. Each warbond's gates are on its card in the catalog.
- Page 3 is uncertain for most warbonds since Dust Devils (September 2025): the recorded figure is either a total or "this many more after page 2". This manual plans with the higher reading, so if the lower one is right, page 3 simply opens early unverified.
7.3The Medal cap
You can hold 250 Medals; anything you earn above that is thrown away. Spend down before a big Major Order pays out, and keep a warbond with open pages on hand as a place to put Medals (Mobilize is one until you have spent all 2,015 Medals in it).
7.4What your Medals buy
- Body armor carries the passive. Helmets and capes are cosmetic, so a helmet is a filler, never a need (passives by job).
- Boosters: all 20 come from warbonds, six of them from Mobilize (every booster).
- Stratagems: 29 come from warbonds, cost Medals and need no player level; most of the rest are bought with Requisition as you level (how stratagems work).
- Cosmetics: capes, player cards, emotes, victory poses, titles and vehicle patterns change nothing in a fight; Ironclad Democracy's patterns fit only the Bastion and Maelstrom tanks.
Earning Medals and Super Credits
Medals: play the hardest difficulty your squad finishes reliably, take the daily Personal Order and join the Major Order. Super Credits: claim the cheap warbond stacks, then loot the points of interest on easy missions.
8.1Medals
Where Medals come from, biggest steady source first. The operation totals climb steeply with difficulty, and so do the Medals per mission:
| Source | Medals | Worth knowing |
|---|---|---|
| A whole operation | 1, 2, 6, 8, 18, 21, 24, 29, 33 and 36 at difficulties 1 to 10 | Missions per operation: 1 at difficulties 1-2, 2 at 3-4 and 3 from 5 |
| A Medal case | 1 to 3 | Found at points of interest; every diver present gets it, and cases are more common on difficulties 1 to 3 |
| The daily Personal Order | 15 | A new one every 24 hours; squadmates' kills count toward yours. Arrowhead plans to replace Personal Orders later in 2026 |
| A won Major Order | usually 35 to 55 | Paid only when the community wins; the 2026 orders offered 2,135 Medals from January to September |
| A won Galactic War Campaign | gear, not Medals | See free gear |
What a premium costs in play: 569 to 888 Medals to finish, roughly 24 to 37 operations at difficulty 7 before any orders approx; daily and Major Orders shorten that. Near the cap, spend before an order pays out.
8.2Super Credits
- Claim the stacks first. Mobilize sells 100 SC for 1, 2, 3, 6 and 10 Medals (pages 1-5), then 50 SC for 15, 15, 20, 25 and 50 Medals (pages 6-10), and every premium holds three 100-SC stacks for 7, 12 and 32 Medals. Across all warbonds that is 7,050 Super Credits.
- Then pick them up. Sealed pods, locked cargo containers and bunkers at minor points of interest hold 10 Super Credits (rarely 100). A pickup credits every diver in the mission at once and stays yours even if the squad never extracts. Minor points of interest are densest on difficulties 1 to 3; Eradicate missions have none; factory worlds have had them since 7.0.0.
- Squads farm faster. A bunker's two control panels need two divers at once (or one diver with a Warp Pack), and everyone present is credited.
- Super Credit cap: none. Since July 9, 2026 an undisclosed anti-exploit limit flags only earning rates far above the best players ever recorded; normal farming never meets it (Arrowhead).
GamesRadar's farming loop (August 27, 2025) community-tested:
- Pick TrivialMinor points of interest spawn most densely there, and nothing threatens the run.
- Finish the main objectiveThe mission still pays its rewards, and the map is yours to search.
- Loot every point of interestBunkers first (two panels, three loot slots), then cargo containers (two slots) and pods (one).
- Extract and repeatYour Super Credits counted the moment you picked them up; the extraction brings home the samples.
No reliable Super-Credits-per-hour figure exists, and guide sites' claims were not used here unverified.
Buying them. The 1,000-SC pack, enough for one premium warbond, costs 9.99 US dollars on the PlayStation Store (Steam's price was not checked); bigger packs give more per dollar, up to about 30% more with the 13,000-SC pack approx. Warbonds themselves cannot be bought with money.
Every currency and its cap: Progression & Currencies; points of interest: Missions; what you keep in someone else's mission: Multiplayer & Squads.
Superstore and free gear
The Superstore sells armor sets and a few weapons for Super Credits only. Shop there after your core premiums, and check first whether the passive you want is not already cheap in Mobilize. Some gear is free: the starter kit and the rewards of Galactic War Campaigns.
9.1The Superstore
- Everything stays on sale. Rotating pages: none since April 28, 2026; every set is now permanently for sale. Arrowhead announced the change on the official Discord, and no patch note records it.
- 26 sets are for sale, 20,245 Super Credits for everything, and each is exclusive: no warbond sells its pieces. Most are armor; body armor alone costs 150 Super Credits or more, so take Fortified or Engineering Kit from Mobilize for a handful of Medals instead.
- Weapons worth Super Credits once the core premiums are yours:
- SG-97 Sweeper · Superstore, 400 SC. A fast pump shotgun, penetration 3 (medium); GR A on all three fronts, u.gg S against bugs and squids (September 26, 2026).
- DBS-2 Double Freedom · Superstore, 400 SC. A two-shell burst for heavy weak spots up close; GR A on all three fronts.
- LAS-12 Sai · Superstore (Ironclad Democracy page), 400 SC. A laser, penetration 3 (medium), that never needs an ammo pickup; u.gg S on all three fronts (September 26, 2026), too new for GamesRadar.
- Skip the melee weapons (Machete, Combat Hatchet, Stun Baton): GR C to D.
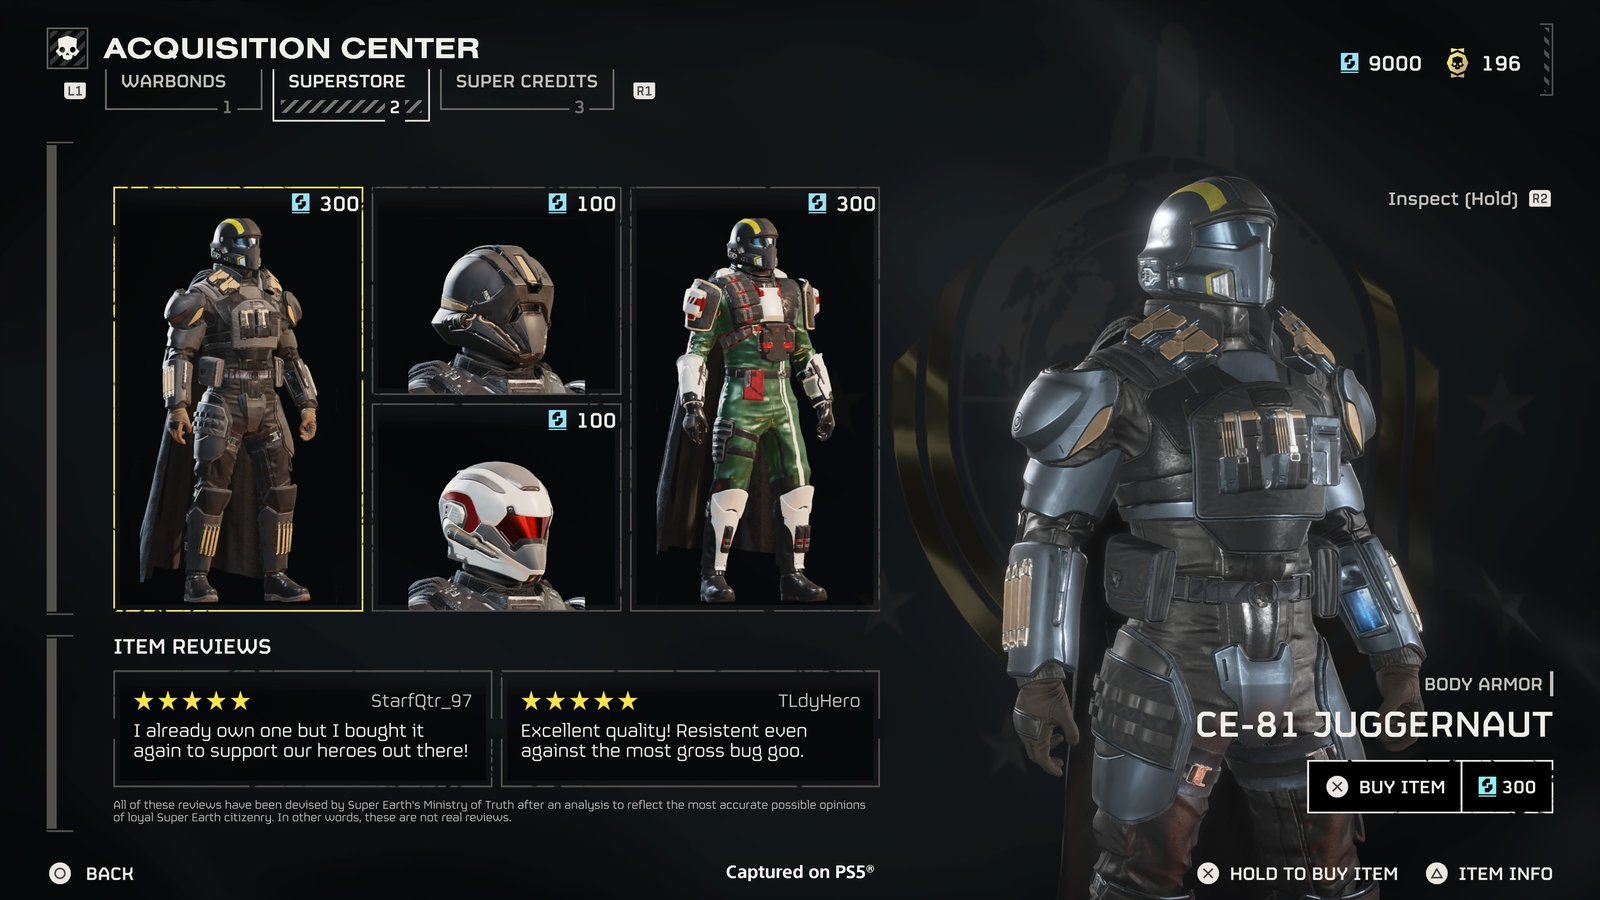
9.2Free gear outside the warbonds
Every diver starts with the AR-23 Liberator, P-2 Peacemaker, G-12 High Explosive and MG-43 Machine Gun; most other stratagems are bought with Requisition as you level (Stratagems). Galactic War Campaigns reward everyone who logged in during a campaign, when the community wins a majority of the campaign's Major Orders. So far that has meant the M-103 Supply FRV, the R-4 Hyena marksman rifle, KDM-500 Outrider armor, the IX-Voidwalker helmet, the Eagle Gas Airstrike and the Message of Morale cape; the TD-110 Maelstrom tank is the prize of the Armored Eagle campaign, which began September 22, 2026. Missed the Supply FRV? It becomes a Requisition purchase for everyone in October 2026. How campaigns work: Rewards for taking part.
Every warbond, page by page
Every warbond in release order: its price, pages, the Medals it takes to buy everything, its page gates, and every item on every page with its Medal cost. Choose with the ranked order; plan your Medals with this.
The overview in release order; the legendaries are the three at 1,500 Super Credits:
| Warbond | Released | Price (SC) | Type | Pages | Medals to complete | Source |
|---|---|---|---|---|---|---|
| Helldivers Mobilize! | 2024-02-08 | 0 | free | 10 | 2,015 | wiki |
| Steeled Veterans | 2024-02-08 | 1,000 | premium | 3 | 686 | wiki |
| Cutting Edge | 2024-03-14 | 1,000 | premium | 3 | 672 | wiki |
| Democratic Detonation | 2024-04-11 | 1,000 | premium | 3 | 699 | wiki |
| Polar Patriots | 2024-05-09 | 1,000 | premium | 3 | 669 | wiki |
| Viper Commandos | 2024-06-13 | 1,000 | premium | 3 | 734 | wiki |
| Freedom's Flame | 2024-08-08 | 1,000 | premium | 3 | 569 | wiki |
| Chemical Agents | 2024-09-19 | 1,000 | premium | 3 | 814 | wiki |
| Truth Enforcers | 2024-10-31 | 1,000 | premium | 3 | 686 | wiki |
| Urban Legends | 2024-12-13 | 1,000 | premium | 3 | 836 | wiki |
| Servants of Freedom | 2025-02-06 | 1,000 | premium | 3 | 598 | wiki |
| Borderline Justice | 2025-03-20 | 1,000 | premium | 3 | 663 | wiki |
| Masters of Ceremony | 2025-05-15 | 1,000 | premium | 3 | 641 | wiki |
| Force of Law | 2025-06-12 | 1,000 | premium | 3 | 873 | wiki |
| Control Group | 2025-07-17 | 1,000 | premium | 3 | 713 | wiki |
| Obedient Democracy Support Troopers | 2025-08-26 | 1,500 | legendary | 3 | 637 | wiki |
| Dust Devils | 2025-09-04 | 1,000 | premium | 3 | 863 | wiki |
| Python Commandos | 2025-12-02 | 1,000 | premium | 3 | 788 | wiki |
| Righteous Revenants | 2025-12-18 | 1,500 | legendary | 3 | 562 | wiki |
| Redacted Regiment | 2026-01-22 | 1,000 | premium | 3 | 628 | wiki |
| Siege Breakers | 2026-02-03 | 1,000 | premium | 3 | 853 | wiki |
| Entrenched Division | 2026-03-17 | 1,000 | premium | 3 | 888 | wiki |
| Exo Experts | 2026-04-28 | 1,000 | premium | 3 | 778 | wiki |
| Castellan's Creed | 2026-08-12 | 1,500 | legendary | 3 | 657 | wiki |
| Ironclad Democracy | 2026-09-22 | 1,000 | premium | 3 | 803 | wiki |
How to read each warbond below: the card gives its price, its page gates and the community tiers (GR and SG, defined with the ranked order; opinions, community-tested); the table lists every item page by page. Rows typed "super credits" are the Super Credit stacks; helmets, capes, player cards, emotes, victory poses, titles and patterns are cosmetic.
10.1Helldivers Mobilize!

10 pages · buy it first
2,015 Medals buy every item. Page gates, pages 1 to 10: 0, 8, 35, 75, 150, 260, 420, 650, 850, 1200 Medals spent here (graded likely). Its ten stacks hold 750 Super Credits.
Buy first: the Super Credit stacks on pages 1 to 5, Hellpod Space Optimization (page 3) and the cheap armor passives. Keep going for Stamina Enhancement (page 7) and the PLAS-1 Scorcher (page 10); the LAS-5 Scythe and Breaker Spray&Pray are fillers at best. Increased Reinforcement Budget on page 10 is the priciest item in any warbond.
| Page | Item | Type | Medals | Notes | Source |
|---|---|---|---|---|---|
| 1 | Clapping | victory pose | 1 | cosmetic | wiki |
| 1 | Independence Bringer (player card) | player card | 1 | cosmetic | wiki |
| 1 | 100 Super Credits (page 1) | super credits | 1 | 100 SC for 1 Medals (100.0 SC per Medal) | wiki |
| 1 | G-6 Frag | throwable | 2 | Medium pen; frag grenade; wide blast | wiki |
| 1 | Independence Bringer (cape) | cape | 2 | cosmetic | wiki |
| 1 | SC-34 Infiltrator (helmet) | helmet | 2 | cosmetic; helmets carry no passive | wiki |
| 1 | SC-34 Infiltrator (armor) | armor | 3 | light (armor 70, speed 530); passive Scout: map markers radar-scan every 2 s; enemy detection range -30% | wiki |
| 1 | SG-8 Punisher | primary | 4 | shotgun; Light pen; pump action; strong stagger | wiki |
| 2 | Liberty's Herald (player card) | player card | 1 | cosmetic | wiki |
| 2 | Finger Guns | victory pose | 2 | cosmetic | wiki |
| 2 | 100 Super Credits (page 2) | super credits | 2 | 100 SC for 2 Medals (50.0 SC per Medal) | wiki |
| 2 | Liberty's Herald (cape) | cape | 3 | cosmetic | wiki |
| 2 | P-19 Redeemer | secondary | 5 | pistol; Light pen; full-auto machine pistol | wiki |
| 2 | FS-05 Marksman (helmet) | helmet | 5 | cosmetic; helmets carry no passive | wiki |
| 2 | FS-05 Marksman (armor) | armor | 6 | heavy (armor 150, speed 450); passive Fortified: 50% explosive resistance; -30% recoil crouched or prone | wiki |
| 2 | R-63 Diligence | primary | 8 | marksman rifle; Light pen; semi-auto, 25 rounds | wiki |
| 3 | Tideturner (player card) | player card | 2 | cosmetic | wiki |
| 3 | 100 Super Credits (page 3) | super credits | 3 | 100 SC for 3 Medals (33.3 SC per Medal) | wiki |
| 3 | Tideturner (cape) | cape | 5 | cosmetic | wiki |
| 3 | CE-35 Trench Engineer (helmet) | helmet | 7 | cosmetic; helmets carry no passive | wiki |
| 3 | Explosive Handshake | emote | 8 | cosmetic | wiki |
| 3 | CE-35 Trench Engineer (armor) | armor | 10 | medium (armor 100, speed 500); passive Engineering Kit: +2 throwables; -30% recoil crouched or prone | wiki |
| 3 | SMG-37 Defender | primary | 15 | SMG; Light pen; one-handed SMG (works with a shield) | wiki |
| 3 | Hellpod Space Optimization | booster | 15 | squad drops and reinforces with full ammo, grenades and stims | wiki |
| 4 | Stars and Suffrage (player card) | player card | 2 | cosmetic | wiki |
| 4 | 100 Super Credits (page 4) | super credits | 6 | 100 SC for 6 Medals (16.7 SC per Medal) | wiki |
| 4 | The Cape of Stars and Suffrage (cape) | cape | 8 | cosmetic | wiki |
| 4 | CM-09 Bonesnapper (helmet) | helmet | 12 | cosmetic; helmets carry no passive | wiki |
| 4 | CM-09 Bonesnapper (armor) | armor | 15 | medium (armor 100, speed 500); passive Med-Kit: +2 stims; stims last 2 s longer | wiki |
| 4 | SG-225 Breaker | primary | 20 | shotgun; Light pen; magazine-fed, fully automatic | wiki |
| 4 | Vitality Enhancement | booster | 20 | squad takes less damage and fewer injuries | wiki |
| 4 | Hug | emote | 20 | cosmetic | wiki |
| 5 | Unblemished Allegiance (player card) | player card | 4 | cosmetic | wiki |
| 5 | 100 Super Credits (page 5) | super credits | 10 | 100 SC for 10 Medals (10.0 SC per Medal) | wiki |
| 5 | Unblemished Allegiance (cape) | cape | 12 | cosmetic | wiki |
| 5 | G-16 Impact | throwable | 20 | Heavy pen; explodes on impact | wiki |
| 5 | DP-40 Hero of the Federation (helmet) | helmet | 20 | cosmetic; helmets carry no passive | wiki |
| 5 | High-Five | emote | 20 | cosmetic | wiki |
| 5 | DP-40 Hero of the Federation (armor) | armor | 25 | medium (armor 100, speed 500); passive Democracy Protects: 50% chance to survive lethal damage; no chest bleeding | wiki |
| 5 | LAS-5 Scythe | primary | 30 | energy weapon; Light pen; continuous beam; heat, no reloads | wiki |
| 6 | Judgment Day (player card) | player card | 6 | cosmetic | wiki |
| 6 | Flex | victory pose | 10 | cosmetic | wiki |
| 6 | Judgment Day (cape) | cape | 15 | cosmetic | wiki |
| 6 | 50 Super Credits (page 6) | super credits | 15 | 50 SC for 15 Medals (3.3 SC per Medal) | wiki |
| 6 | FS-23 Battle Master (helmet) | helmet | 25 | cosmetic; helmets carry no passive | wiki |
| 6 | FS-23 Battle Master (armor) | armor | 35 | heavy (armor 150, speed 450); passive Fortified: 50% explosive resistance; -30% recoil crouched or prone | wiki |
| 6 | AR-23P Liberator Penetrator | primary | 40 | assault rifle; Medium pen; armor-piercing Liberator | wiki |
| 6 | UAV Recon Booster | booster | 40 | squad radar range about +50% | wiki |
| 7 | Cresting Honor (player card) | player card | 7 | cosmetic | wiki |
| 7 | Cresting Honor (cape) | cape | 15 | cosmetic | wiki |
| 7 | 50 Super Credits (page 7) | super credits | 15 | 50 SC for 15 Medals (3.3 SC per Medal) | wiki |
| 7 | SC-30 Trailblazer Scout (helmet) | helmet | 35 | cosmetic; helmets carry no passive | wiki |
| 7 | Scout Handshake | emote | 35 | cosmetic | wiki |
| 7 | R-63CS Diligence Counter Sniper | primary | 40 | marksman rifle; Medium pen; harder-hitting Diligence, 15 rounds | wiki |
| 7 | SC-30 Trailblazer Scout (armor) | armor | 50 | light (armor 50, speed 550); passive Scout: map markers radar-scan every 2 s; enemy detection range -30% | wiki |
| 7 | Stamina Enhancement | booster | 75 | squad +22.5% max stamina, +40% stamina regen | wiki |
| 8 | Mantle of True Citizenship (player card) | player card | 10 | cosmetic | wiki |
| 8 | 50 Super Credits (page 8) | super credits | 20 | 50 SC for 20 Medals (2.5 SC per Medal) | wiki |
| 8 | G-3 Smoke | throwable | 25 | smoke screen; no damage | wiki |
| 8 | Mantle of True Citizenship (cape) | cape | 25 | cosmetic | wiki |
| 8 | SA-04 Combat Technician (helmet) | helmet | 40 | cosmetic; helmets carry no passive | wiki |
| 8 | Rock Paper Scissors | emote | 50 | cosmetic | wiki |
| 8 | SG-8S Slugger | primary | 60 | shotgun; Medium pen; slugs; stagger | wiki |
| 8 | SA-04 Combat Technician (armor) | armor | 60 | medium (armor 100, speed 500); passive Scout: map markers radar-scan every 2 s; enemy detection range -30% | wiki |
| 9 | Blazing Samaritan (player card) | player card | 15 | cosmetic | wiki |
| 9 | 50 Super Credits (page 9) | super credits | 25 | 50 SC for 25 Medals (2.0 SC per Medal) | wiki |
| 9 | Blazing Samaritan (cape) | cape | 30 | cosmetic | wiki |
| 9 | Loosen Up | victory pose | 30 | cosmetic | wiki |
| 9 | CM-14 Physician (helmet) | helmet | 50 | cosmetic; helmets carry no passive | wiki |
| 9 | SG-225SP Breaker Spray&Pray | primary | 60 | shotgun; Light pen; many weak pellets | wiki |
| 9 | Muscle Enhancement | booster | 70 | squad slowed less by snow, mud and acid | wiki |
| 9 | CM-14 Physician (armor) | armor | 70 | medium (armor 100, speed 500); passive Med-Kit: +2 stims; stims last 2 s longer | wiki |
| 10 | Light of Eternal Liberty (player card) | player card | 20 | cosmetic | wiki |
| 10 | Light of Eternal Liberty (cape) | cape | 40 | cosmetic | wiki |
| 10 | Big Whoop | victory pose | 50 | cosmetic | wiki |
| 10 | 50 Super Credits (page 10) | super credits | 50 | 50 SC for 50 Medals (1.0 SC per Medal) | wiki |
| 10 | PLAS-1 Scorcher | primary | 75 | energy weapon; Light/Medium pen; explosive plasma bolts | wiki |
| 10 | DP-11 Champion of the People (helmet) | helmet | 75 | cosmetic; helmets carry no passive | wiki |
| 10 | DP-11 Champion of the People (armor) | armor | 100 | medium (armor 100, speed 500); passive Democracy Protects: 50% chance to survive lethal damage; no chest bleeding | wiki |
| 10 | Increased Reinforcement Budget | booster | 150 | +1 reinforcement per diver (5 to 6) | wiki |
10.2Steeled Veterans
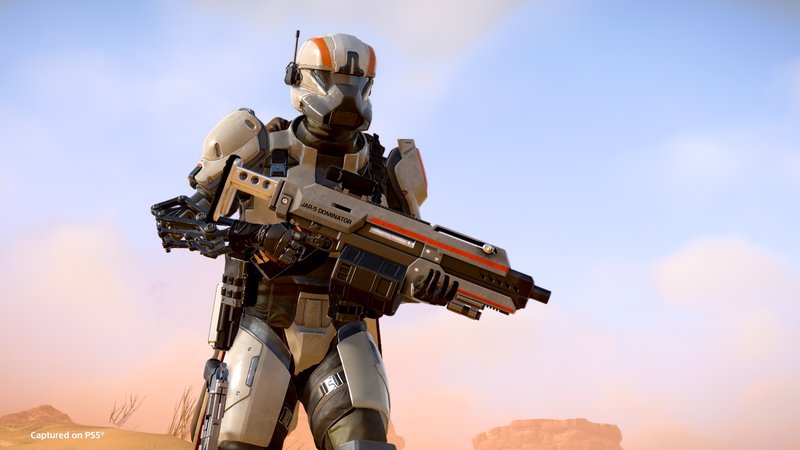
1,000 SC · #18 of 24
686 Medals buy every item. Page gates: 0, 60, 200 Medals spent here (graded confirmed). Community tiers: GR C · SG B.
Buy it for the P-4 Senator (page 1). The SG-225IE Breaker Incendiary and JAR-5 Dominator are solid; the AR-23C Liberator Concussive is a filler.
| Page | Item | Type | Medals | Notes | Source |
|---|---|---|---|---|---|
| 1 | Tyrant Hunter (player card) | player card | 2 | cosmetic | wiki |
| 1 | 100 Super Credits (page 1) | super credits | 7 | 100 SC for 7 Medals (14.3 SC per Medal) | wiki |
| 1 | Super Person | victory pose | 8 | cosmetic | wiki |
| 1 | Tyrant Hunter (cape) | cape | 8 | cosmetic | wiki |
| 1 | SA-25 Steel Trooper (helmet) | helmet | 12 | cosmetic; helmets carry no passive | wiki |
| 1 | P-4 Senator | secondary | 15 | pistol; Heavy pen; 6-shot revolver | wiki |
| 1 | SA-25 Steel Trooper (armor) | armor | 18 | medium (armor 100, speed 500); passive Servo-Assisted: +30% throw range; +50% limb health | wiki |
| 1 | AR-23C Liberator Concussive | primary | 20 | assault rifle; Light pen; knockback, slow fire | wiki |
| 2 | Cloak of Posterity's Gratitude (player card) | player card | 5 | cosmetic | wiki |
| 2 | 100 Super Credits (page 2) | super credits | 12 | 100 SC for 12 Medals (8.3 SC per Medal) | wiki |
| 2 | Roll 'Em | victory pose | 15 | cosmetic | wiki |
| 2 | Cloak of Posterity's Gratitude (cape) | cape | 16 | cosmetic | wiki |
| 2 | Drape of Glory (cape) | cape | 16 | cosmetic | wiki |
| 2 | G-10 Incendiary | throwable | 25 | Medium pen; fire grenade | wiki |
| 2 | SA-12 Servo Assisted (helmet) | helmet | 35 | cosmetic; helmets carry no passive | wiki |
| 2 | SA-12 Servo Assisted (armor) | armor | 45 | medium (armor 100, speed 500); passive Servo-Assisted: +30% throw range; +50% limb health | wiki |
| 2 | SG-225IE Breaker Incendiary | primary | 60 | shotgun; Light pen; incendiary pellets | wiki |
| 3 | Bastion of Integrity (player card) | player card | 16 | cosmetic | wiki |
| 3 | Bastion of Integrity (cape) | cape | 20 | cosmetic | wiki |
| 3 | You're Next | victory pose | 32 | cosmetic | wiki |
| 3 | 100 Super Credits (page 3) | super credits | 32 | 100 SC for 32 Medals (3.1 SC per Medal) | wiki |
| 3 | SA-32 Dynamo (helmet) | helmet | 48 | cosmetic; helmets carry no passive | wiki |
| 3 | SA-32 Dynamo (armor) | armor | 64 | heavy (armor 150, speed 450); passive Servo-Assisted: +30% throw range; +50% limb health | wiki |
| 3 | Flexible Reinforcement Budget | booster | 75 | after the budget runs out, new reinforcements come 25% faster (2:00 to 1:30) | wiki |
| 3 | JAR-5 Dominator | primary | 80 | special primary; Medium pen; jet-propelled rounds; heavy stagger | wiki |
10.3Cutting Edge
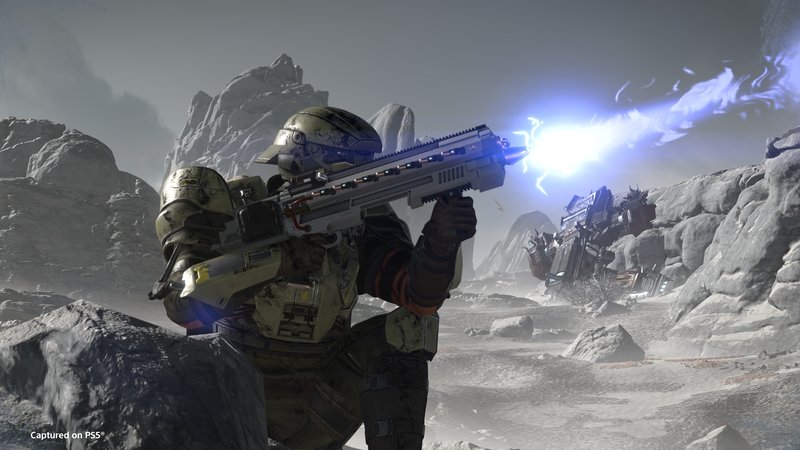
1,000 SC · #13 of 24
672 Medals buy every item. Page gates: 0, 60, 230 Medals spent here (graded confirmed). Community tiers: GR B · SG B.
Buy it for the LAS-16 Sickle (page 1); the SG-8P Punisher Plasma and G-23 Stun are page 2's picks. The ARC-12 Blitzer is a bug-front gun; skip the LAS-7 Dagger.
| Page | Item | Type | Medals | Notes | Source |
|---|---|---|---|---|---|
| 1 | Botslayer (player card) | player card | 2 | cosmetic | wiki |
| 1 | 100 Super Credits (page 1) | super credits | 7 | 100 SC for 7 Medals (14.3 SC per Medal) | wiki |
| 1 | Botslayer (cape) | cape | 8 | cosmetic | wiki |
| 1 | Head Tap | victory pose | 8 | cosmetic | wiki |
| 1 | EX-03 Prototype 3 (helmet) | helmet | 12 | cosmetic; helmets carry no passive | wiki |
| 1 | Localization Confusion | booster | 18 | about 15% longer between enemy reinforcement calls | wiki |
| 1 | EX-03 Prototype 3 (armor) | armor | 18 | medium (armor 100, speed 500); passive Electrical Conduit: 95% arc resistance | wiki |
| 1 | LAS-16 Sickle | primary | 20 | energy weapon; Light pen; heat instead of ammo | wiki |
| 2 | Martyris Rex (player card) | player card | 5 | cosmetic | wiki |
| 2 | 100 Super Credits (page 2) | super credits | 12 | 100 SC for 12 Medals (8.3 SC per Medal) | wiki |
| 2 | Shotgun Show | victory pose | 15 | cosmetic | wiki |
| 2 | Martyris Rex (cape) | cape | 20 | cosmetic | wiki |
| 2 | G-23 Stun | throwable | 25 | stuns enemies in the blast; no damage | wiki |
| 2 | EX-16 Prototype 16 (helmet) | helmet | 35 | cosmetic; helmets carry no passive | wiki |
| 2 | EX-16 Prototype 16 (armor) | armor | 45 | medium (armor 100, speed 500); passive Electrical Conduit: 95% arc resistance | wiki |
| 2 | SG-8P Punisher Plasma | primary | 60 | energy weapon; Medium pen; explosive plasma shotgun | wiki |
| 3 | Agent of Oblivion (player card) | player card | 16 | cosmetic | wiki |
| 3 | Agent of Oblivion (cape) | cape | 30 | cosmetic | wiki |
| 3 | Presentable | victory pose | 32 | cosmetic | wiki |
| 3 | 100 Super Credits (page 3) | super credits | 32 | 100 SC for 32 Medals (3.1 SC per Medal) | wiki |
| 3 | EX-00 Prototype X (helmet) | helmet | 48 | cosmetic; helmets carry no passive | wiki |
| 3 | LAS-7 Dagger | secondary | 60 | special sidearm; Light pen; laser pistol; heat instead of ammo | wiki |
| 3 | EX-00 Prototype X (armor) | armor | 64 | light (armor 50, speed 550); passive Electrical Conduit: 95% arc resistance | wiki |
| 3 | ARC-12 Blitzer | primary | 80 | energy weapon; Medium pen; arc shotgun; unlimited ammo, chains | wiki |
10.4Democratic Detonation
1,000 SC · #1 of 24
699 Medals buy every item. Page gates: 0, 60, 230 Medals spent here (graded confirmed). Community tiers: GR S · SG S+.
Buy the G-123 Thermite first (page 1), then the R-36 Eruptor (page 2); the GP-31 Grenade Pistol and CB-9 Exploding Crossbow wait on page 3.
| Page | Item | Type | Medals | Notes | Source |
|---|---|---|---|---|---|
| 1 | Harbinger of True Equality (player card) | player card | 2 | cosmetic | wiki |
| 1 | 100 Super Credits (page 1) | super credits | 7 | 100 SC for 7 Medals (14.3 SC per Medal) | wiki |
| 1 | Harbinger of True Equality (cape) | cape | 8 | cosmetic | wiki |
| 1 | Squat | victory pose | 8 | cosmetic | wiki |
| 1 | CE-27 Ground Breaker (helmet) | helmet | 12 | cosmetic; helmets carry no passive | wiki |
| 1 | G-123 Thermite | throwable | 15 | AT III pen; sticky; burns, then explodes (2,000) | wiki |
| 1 | CE-27 Ground Breaker (armor) | armor | 18 | medium (armor 100, speed 500); passive Engineering Kit: +2 throwables; -30% recoil crouched or prone | wiki |
| 1 | BR-14 Adjudicator | primary | 20 | assault rifle; Medium pen; hard-hitting rifle, small magazine | wiki |
| 2 | Eagle's Fury (player card) | player card | 5 | cosmetic | wiki |
| 2 | 100 Super Credits (page 2) | super credits | 12 | 100 SC for 12 Medals (8.3 SC per Medal) | wiki |
| 2 | Courtly Bow | victory pose | 15 | cosmetic | wiki |
| 2 | Eagle's Fury (cape) | cape | 20 | cosmetic | wiki |
| 2 | CE-07 Demolition Specialist (helmet) | helmet | 35 | cosmetic; helmets carry no passive | wiki |
| 2 | CE-07 Demolition Specialist (armor) | armor | 45 | light (armor 64, speed 536); passive Engineering Kit: +2 throwables; -30% recoil crouched or prone | wiki |
| 2 | Expert Extraction Pilot | booster | 55 | extraction shuttle 30% faster (2:00 to 1:24) | wiki |
| 2 | R-36 Eruptor | primary | 60 | explosive weapon; Heavy/Medium pen; bolt-action explosive rifle; closes holes and fabricators | wiki |
| 3 | Freedom's Tapestry (player card) | player card | 16 | cosmetic | wiki |
| 3 | Freedom's Tapestry (cape) | cape | 30 | cosmetic | wiki |
| 3 | Boxer | victory pose | 32 | cosmetic | wiki |
| 3 | 100 Super Credits (page 3) | super credits | 32 | 100 SC for 32 Medals (3.1 SC per Medal) | wiki |
| 3 | FS-55 Devastator (helmet) | helmet | 48 | cosmetic; helmets carry no passive | wiki |
| 3 | GP-31 Grenade Pistol | secondary | 60 | special sidearm; Medium pen; single-shot grenade sidearm; closes holes and fabricators | wiki |
| 3 | FS-55 Devastator (armor) | armor | 64 | heavy (armor 150, speed 450); passive Fortified: 50% explosive resistance; -30% recoil crouched or prone | wiki |
| 3 | CB-9 Exploding Crossbow | primary | 80 | explosive weapon; Medium pen; one-handed; explosive bolts | wiki |
10.5Polar Patriots
1,000 SC · #7 of 24
669 Medals buy every item. Page gates: 0, 60, 230 Medals spent here (graded confirmed). Community tiers: GR C · SG S.
Buy it for the PLAS-101 Purifier (page 3); the CW-22 Kodiak (Fortified heavy armor) and G-13 Incendiary Impact on page 2 are the other keepers. Skip the SMG-72 Pummeler.
| Page | Item | Type | Medals | Notes | Source |
|---|---|---|---|---|---|
| 1 | Dissident's Nightmare (player card) | player card | 2 | cosmetic | wiki |
| 1 | 100 Super Credits (page 1) | super credits | 7 | 100 SC for 7 Medals (14.3 SC per Medal) | wiki |
| 1 | Dissident's Nightmare (cape) | cape | 8 | cosmetic | wiki |
| 1 | Mime Instrumentation | victory pose | 8 | cosmetic | wiki |
| 1 | CW-36 Winter Warrior (helmet) | helmet | 12 | cosmetic; helmets carry no passive | wiki |
| 1 | Motivational Shocks | booster | 15 | squad recovers faster from slows (acid) | wiki |
| 1 | CW-36 Winter Warrior (armor) | armor | 18 | heavy (armor 150, speed 450); passive Servo-Assisted: +30% throw range; +50% limb health | wiki |
| 1 | AR-61 Tenderizer | primary | 20 | assault rifle; Light pen; high damage per round | wiki |
| 2 | Pinions of Everlasting Glory (player card) | player card | 5 | cosmetic | wiki |
| 2 | 100 Super Credits (page 2) | super credits | 12 | 100 SC for 12 Medals (8.3 SC per Medal) | wiki |
| 2 | Call the Helldivers | victory pose | 15 | cosmetic | wiki |
| 2 | Pinions of Everlasting Glory (cape) | cape | 20 | cosmetic | wiki |
| 2 | G-13 Incendiary Impact | throwable | 25 | Medium pen; fire on impact | wiki |
| 2 | CW-22 Kodiak (helmet) | helmet | 35 | cosmetic; helmets carry no passive | wiki |
| 2 | CW-22 Kodiak (armor) | armor | 45 | heavy (armor 150, speed 450); passive Fortified: 50% explosive resistance; -30% recoil crouched or prone | wiki |
| 2 | SMG-72 Pummeler | primary | 60 | SMG; Light pen; SMG that staggers and slows | wiki |
| 3 | Order of the Venerated Ballot (player card) | player card | 16 | cosmetic | wiki |
| 3 | Order of the Venerated Ballot (cape) | cape | 30 | cosmetic | wiki |
| 3 | Distribute Ballots | victory pose | 32 | cosmetic | wiki |
| 3 | 100 Super Credits (page 3) | super credits | 32 | 100 SC for 32 Medals (3.1 SC per Medal) | wiki |
| 3 | CW-4 Arctic Ranger (helmet) | helmet | 48 | cosmetic; helmets carry no passive | wiki |
| 3 | P-113 Verdict | secondary | 60 | pistol; Medium pen; semi-auto, 10 rounds | wiki |
| 3 | CW-4 Arctic Ranger (armor) | armor | 64 | light (armor 50, speed 550); passive Scout: map markers radar-scan every 2 s; enemy detection range -30% | wiki |
| 3 | PLAS-101 Purifier | primary | 80 | energy weapon; Medium pen; charge-up explosive shots | wiki |
10.6Viper Commandos
1,000 SC · #19 of 24
734 Medals buy every item. Page gates: 0, 100, 275 Medals spent here (graded unverified: GamesRadar's launch article reads the higher page-2 figure used here, both wikis 60). Community tiers: GR C · SG B.
Buy it for Experimental Infusion (page 3). The SG-22 Bushwhacker and AR-23A Liberator Carbine are adequate, and Peak Physique armor is for melee builds.
| Page | Item | Type | Medals | Notes | Source |
|---|---|---|---|---|---|
| 1 | Mark of the Crimson Fang (player card) | player card | 2 | cosmetic | wiki |
| 1 | 100 Super Credits (page 1) | super credits | 7 | 100 SC for 7 Medals (14.3 SC per Medal) | wiki |
| 1 | Mark of the Crimson Fang (cape) | cape | 8 | cosmetic | wiki |
| 1 | Welcome Adoration | victory pose | 8 | cosmetic | wiki |
| 1 | AR-23A Liberator Carbine | primary | 20 | assault rifle; Light pen; fast fire rate | wiki |
| 1 | Undergrowth Hellpod pattern | pattern | 20 | cosmetic; Hellpod wrap | wiki |
| 1 | PH-9 Predator (helmet) | helmet | 30 | cosmetic; helmets carry no passive | wiki |
| 1 | PH-9 Predator (armor) | armor | 40 | light (armor 50, speed 550); passive Peak Physique: +40% melee damage; less weapon drag | wiki |
| 2 | Executioner's Canopy (player card) | player card | 5 | cosmetic | wiki |
| 2 | 100 Super Credits (page 2) | super credits | 12 | 100 SC for 12 Medals (8.3 SC per Medal) | wiki |
| 2 | Guns of Liberty | victory pose | 15 | cosmetic | wiki |
| 2 | Executioner's Canopy (cape) | cape | 20 | cosmetic | wiki |
| 2 | PH-202 Twigsnapper (helmet) | helmet | 35 | cosmetic; helmets carry no passive | wiki |
| 2 | PH-202 Twigsnapper (armor) | armor | 45 | heavy (armor 150, speed 450); passive Peak Physique: +40% melee damage; less weapon drag | wiki |
| 2 | SG-22 Bushwhacker | secondary | 50 | special sidearm; Light pen; triple-barrel sawed-off shotgun | wiki |
| 2 | Undergrowth Shuttle pattern | pattern | 50 | cosmetic; shuttle wrap | wiki |
| 3 | Viper Commando | title | 20 | cosmetic | wiki |
| 3 | 100 Super Credits (page 3) | super credits | 32 | 100 SC for 32 Medals (3.1 SC per Medal) | wiki |
| 3 | Undergrowth Exosuit pattern | pattern | 50 | cosmetic; exosuit wrap | wiki |
| 3 | Undergrowth Vehicle pattern | pattern | 55 | cosmetic; vehicle wrap (FRV; Bastion tank too since 6.3.0) | wiki |
| 3 | K-2 Throwing Knife | throwable | 60 | Medium pen; silent knives; carry 20 | wiki |
| 3 | Test of Conviction | emote | 70 | cosmetic | wiki |
| 3 | Experimental Infusion | booster | 80 | stims add 10% speed and 10% damage resistance for a while | wiki |
10.7Freedom's Flame
1,000 SC · #11 of 24
569 Medals buy every item. Page gates: 0, 60, 230 Medals spent here (graded confirmed). Community tiers: GR A · SG A.
Buy it for the FLAM-66 Torcher (page 2) and P-72 Crisper (page 3); Inflammable armor resists fire. The cheapest premium to complete, and weak against bots.
| Page | Item | Type | Medals | Notes | Source |
|---|---|---|---|---|---|
| 1 | Purifying Eclipse (player card) | player card | 2 | cosmetic | wiki |
| 1 | 100 Super Credits (page 1) | super credits | 7 | 100 SC for 7 Medals (14.3 SC per Medal) | wiki |
| 1 | Big Stretch | victory pose | 8 | cosmetic | wiki |
| 1 | Purifying Eclipse (cape) | cape | 8 | cosmetic | wiki |
| 1 | Safety Orange Hellpod pattern | pattern | 10 | cosmetic; Hellpod wrap | wiki |
| 1 | I-09 Heatseeker (helmet) | helmet | 12 | cosmetic; helmets carry no passive | wiki |
| 1 | I-09 Heatseeker (armor) | armor | 18 | light (armor 50, speed 550); passive Inflammable: 75% fire resistance | wiki |
| 1 | SG-451 Cookout | primary | 20 | shotgun; Light pen; incendiary pump action | wiki |
| 2 | The Breach (player card) | player card | 5 | cosmetic | wiki |
| 2 | 100 Super Credits (page 2) | super credits | 12 | 100 SC for 12 Medals (8.3 SC per Medal) | wiki |
| 2 | Deep Reflection | victory pose | 15 | cosmetic | wiki |
| 2 | The Breach (cape) | cape | 20 | cosmetic | wiki |
| 2 | Safety Orange Shuttle pattern | pattern | 25 | cosmetic; shuttle wrap | wiki |
| 2 | I-102 Draconaught (helmet) | helmet | 35 | cosmetic; helmets carry no passive | wiki |
| 2 | FLAM-66 Torcher | primary | 40 | special primary; Heavy pen; flamethrower primary | wiki |
| 2 | I-102 Draconaught (armor) | armor | 45 | medium (armor 100, speed 500); passive Inflammable: 75% fire resistance | wiki |
| 3 | Fire Safety Officer | title | 20 | cosmetic | wiki |
| 3 | 100 Super Credits (page 3) | super credits | 32 | 100 SC for 32 Medals (3.1 SC per Medal) | wiki |
| 3 | Thoracic Collision Exultation Maneuver | emote | 35 | cosmetic | wiki |
| 3 | Safety Orange Exosuit pattern | pattern | 40 | cosmetic; exosuit wrap | wiki |
| 3 | P-72 Crisper | secondary | 45 | special sidearm; Heavy pen; flamethrower sidearm | wiki |
| 3 | Safety Orange Vehicle pattern | pattern | 55 | cosmetic; vehicle wrap (FRV; Bastion tank too since 6.3.0) | wiki |
| 3 | Firebomb Hellpods | booster | 60 | hellpods set enemies on fire on landing | wiki |
10.8Chemical Agents

1,000 SC · #20 of 24
814 Medals buy every item. Page gates: 0, 110, 300 Medals spent here (graded confirmed). Community tiers: GR C · SG B.
Buy it for the G-4 Gas grenade (page 1). The TX-41 Sterilizer and P-11 Stim Pistol rate D; the Dog Breath drone and Advanced Filtration armor are for gas builds.
| Page | Item | Type | Medals | Notes | Source |
|---|---|---|---|---|---|
| 1 | Standard of Safe Distance (player card) | player card | 2 | cosmetic | wiki |
| 1 | 100 Super Credits (page 1) | super credits | 7 | 100 SC for 7 Medals (14.3 SC per Medal) | wiki |
| 1 | Ew | victory pose | 8 | cosmetic | wiki |
| 1 | Standard of Safe Distance (cape) | cape | 8 | cosmetic | wiki |
| 1 | Mustard Hellpod pattern | pattern | 20 | cosmetic; Hellpod wrap | wiki |
| 1 | G-4 Gas | throwable | 30 | gas cloud; confuses and damages | wiki |
| 1 | AF-50 Noxious Ranger (helmet) | helmet | 30 | cosmetic; helmets carry no passive | wiki |
| 1 | AF-50 Noxious Ranger (armor) | armor | 40 | light (armor 50, speed 550); passive Advanced Filtration: 80% gas resistance | wiki |
| 2 | Patient Zero's Remembrance (player card) | player card | 5 | cosmetic | wiki |
| 2 | 100 Super Credits (page 2) | super credits | 12 | 100 SC for 12 Medals (8.3 SC per Medal) | wiki |
| 2 | Patient Zero's Remembrance (cape) | cape | 20 | cosmetic | wiki |
| 2 | AF-02 Haz-Master (helmet) | helmet | 35 | cosmetic; helmets carry no passive | wiki |
| 2 | AF-02 Haz-Master (armor) | armor | 45 | medium (armor 100, speed 500); passive Advanced Filtration: 80% gas resistance | wiki |
| 2 | Mustard Shuttle pattern | pattern | 50 | cosmetic; shuttle wrap | wiki |
| 2 | TX-41 Sterilizer | stratagem | 85 | support weapon; 480 s cooldown; gas sprayer; blinds and slows | wiki |
| 3 | Expert Exterminator | title | 20 | cosmetic | wiki |
| 3 | 100 Super Credits (page 3) | super credits | 32 | 100 SC for 32 Medals (3.1 SC per Medal) | wiki |
| 3 | Mustard Exosuit pattern | pattern | 50 | cosmetic; exosuit wrap | wiki |
| 3 | Mustard Vehicle pattern | pattern | 55 | cosmetic; vehicle wrap (FRV; Bastion tank too since 6.3.0) | wiki |
| 3 | Natural Gas Extraction | emote | 70 | cosmetic | wiki |
| 3 | P-11 Stim Pistol | secondary | 80 | special sidearm; heals teammates at range; no damage | wiki |
| 3 | AX/TX-13 "Guard Dog" Dog Breath | stratagem | 110 | backpack; 480 s cooldown; gas-spraying drone | wiki |
10.9Truth Enforcers
1,000 SC · #14 of 24
686 Medals buy every item. Page gates: 0, 90, 250 Medals spent here (graded likely; recorded by GamesRadar only). Community tiers: GR B · SG B.
Buy it for the PLAS-15 Loyalist (page 3); the Unflinching armors resist flinching and add radar scans, and the SMG-32 Reprimand is a fair SMG against bots and squids (GR B).
| Page | Item | Type | Medals | Notes | Source |
|---|---|---|---|---|---|
| 1 | 100 Super Credits (page 1) | super credits | 7 | 100 SC for 7 Medals (14.3 SC per Medal) | wiki |
| 1 | Inconspicuous Black Hellpod pattern | pattern | 10 | cosmetic; Hellpod wrap | wiki |
| 1 | SG-20 Halt | primary | 20 | shotgun; Medium/Light pen; switches stun rounds and flechettes | wiki |
| 1 | Dead Sprint | booster | 35 | sprint on empty stamina by spending health | wiki |
| 1 | Inconspicuous Black Exosuit pattern | pattern | 50 | cosmetic; exosuit wrap | wiki |
| 2 | Pride of the Whistleblower (player card) | player card | 5 | cosmetic | wiki |
| 2 | 100 Super Credits (page 2) | super credits | 12 | 100 SC for 12 Medals (8.3 SC per Medal) | wiki |
| 2 | Pride of the Whistleblower (cape) | cape | 20 | cosmetic | wiki |
| 2 | UF-50 Bloodhound (helmet) | helmet | 35 | cosmetic; helmets carry no passive | wiki |
| 2 | SMG-32 Reprimand | primary | 40 | SMG; Medium pen; hard-hitting, 25 rounds | wiki |
| 2 | UF-50 Bloodhound (armor) | armor | 45 | medium (armor 125, speed 500); passive Unflinching: less flinch; higher armor rating; map-marker radar scans | wiki |
| 2 | Inconspicuous Black Shuttle pattern | pattern | 50 | cosmetic; shuttle wrap | wiki |
| 3 | Proof of Faultless Virtue (player card) | player card | 15 | cosmetic | wiki |
| 3 | Free of Thought | title | 20 | cosmetic | wiki |
| 3 | Proof of Faultless Virtue (cape) | cape | 30 | cosmetic | wiki |
| 3 | 100 Super Credits (page 3) | super credits | 32 | 100 SC for 32 Medals (3.1 SC per Medal) | wiki |
| 3 | PLAS-15 Loyalist | secondary | 45 | special sidearm; Medium pen; plasma pistol; charged explosive shot | wiki |
| 3 | UF-16 Inspector (helmet) | helmet | 45 | cosmetic; helmets carry no passive | wiki |
| 3 | At Ease | emote | 50 | cosmetic | wiki |
| 3 | Inconspicuous Black Vehicle pattern | pattern | 55 | cosmetic; vehicle wrap (FRV; Bastion tank too since 6.3.0) | wiki |
| 3 | UF-16 Inspector (armor) | armor | 65 | light (armor 75, speed 550); passive Unflinching: less flinch; higher armor rating; map-marker radar scans | wiki |
10.10Urban Legends

1,000 SC · #10 of 24
836 Medals buy every item. Page gates: 0, 160, 410 Medals spent here (graded unverified; page 3 may open at 250). Community tiers: GR A · SG A.
Buy it for the Siege-Ready armors (pages 1 and 2) and the E/AT-12 Anti-Tank Emplacement (page 3); the A/FLAM-40 Flame Sentry suits bugs and squids.
| Page | Item | Type | Medals | Notes | Source |
|---|---|---|---|---|---|
| 1 | Rebar Resolve (player card) | player card | 2 | cosmetic | wiki |
| 1 | 100 Super Credits (page 1) | super credits | 7 | 100 SC for 7 Medals (14.3 SC per Medal) | wiki |
| 1 | Greatcloak of Rebar Resolve (cape) | cape | 8 | cosmetic | wiki |
| 1 | Concrete Jungle Hellpod pattern | pattern | 20 | cosmetic; Hellpod wrap | wiki |
| 1 | CQC-19 Stun Lance | secondary | 30 | melee; Medium pen; reach melee; stuns | wiki |
| 1 | SR-24 Street Scout (helmet) | helmet | 30 | cosmetic; helmets carry no passive | wiki |
| 1 | SR-24 Street Scout (armor) | armor | 40 | light (armor 50, speed 550); passive Siege-Ready: +30% primary reload speed; +20% ammo for all weapons | wiki |
| 1 | SH-51 Directional Shield | stratagem | 75 | backpack; 300 s cooldown; front-facing shield backpack | wiki |
| 2 | Holder of the Yellow Line (player card) | player card | 5 | cosmetic | wiki |
| 2 | 100 Super Credits (page 2) | super credits | 12 | 100 SC for 12 Medals (8.3 SC per Medal) | wiki |
| 2 | Holder of the Yellow Line (cape) | cape | 20 | cosmetic | wiki |
| 2 | SR-18 Roadblock (helmet) | helmet | 35 | cosmetic; helmets carry no passive | wiki |
| 2 | SR-18 Roadblock (armor) | armor | 45 | heavy (armor 150, speed 450); passive Siege-Ready: +30% primary reload speed; +20% ammo for all weapons | wiki |
| 2 | Concrete Jungle Shuttle pattern | pattern | 50 | cosmetic; shuttle wrap | wiki |
| 2 | Armed Resupply Pods | booster | 55 | resupply pods double as Liberator turrets | wiki |
| 2 | A/FLAM-40 Flame Sentry | stratagem | 85 | sentry; 100 s cooldown; flamethrower turret; cost check: GamesRadar (2024) says 75; grid, table, item page and Fandom say 85 | wiki |
| 3 | Super Pedestrian | title | 20 | cosmetic | wiki |
| 3 | 100 Super Credits (page 3) | super credits | 32 | 100 SC for 32 Medals (3.1 SC per Medal) | wiki |
| 3 | Concrete Jungle Exosuit pattern | pattern | 50 | cosmetic; exosuit wrap | wiki |
| 3 | This Is Democracy | emote | 50 | cosmetic | wiki |
| 3 | Concrete Jungle Vehicle pattern | pattern | 55 | cosmetic; vehicle wrap (FRV; Bastion tank too since 6.3.0) | wiki |
| 3 | E/AT-12 Anti-Tank Emplacement | stratagem | 110 | emplacement; 180 s cooldown; manned anti-tank cannon | wiki |
10.11Servants of Freedom
1,000 SC · #2 of 24
598 Medals buy every item. Page gates: 0, 95, 230 Medals spent here (graded likely). Community tiers: GR S · SG S+.
Buy it for the GP-20 Ultimatum (page 2) and the B-100 Portable Hellbomb (page 3). Its Integrated Explosives armor explodes after you die, so mind your squad.
| Page | Item | Type | Medals | Notes | Source |
|---|---|---|---|---|---|
| 1 | Fre Liberam (player card) | player card | 2 | cosmetic | wiki |
| 1 | 100 Super Credits (page 1) | super credits | 7 | 100 SC for 7 Medals (14.3 SC per Medal) | wiki |
| 1 | Fre Liberam (cape) | cape | 8 | cosmetic | wiki |
| 1 | IE-3 Martyr (helmet) | helmet | 30 | cosmetic; helmets carry no passive | wiki |
| 1 | LAS-17 Double-Edge Sickle | primary | 35 | energy weapon; pen rises Light to Heavy with heat, burning the user | wiki |
| 1 | IE-3 Martyr (armor) | armor | 45 | medium (armor 100, speed 500); passive Integrated Explosives: you explode 1.5 s after death; +2 throwables | wiki |
| 2 | Per Democrasum (player card) | player card | 7 | cosmetic | wiki |
| 2 | 100 Super Credits (page 2) | super credits | 12 | 100 SC for 12 Medals (8.3 SC per Medal) | wiki |
| 2 | Per Democrasum (cape) | cape | 25 | cosmetic | wiki |
| 2 | GP-20 Ultimatum | secondary | 40 | special sidearm; AT II pen; one-shot mini-nuke sidearm; short range | wiki |
| 2 | IE-12 Righteous (helmet) | helmet | 45 | cosmetic; helmets carry no passive | wiki |
| 2 | IE-12 Righteous (armor) | armor | 55 | medium (armor 100, speed 500); passive Integrated Explosives: you explode 1.5 s after death; +2 throwables | wiki |
| 3 | Servant of Freedom | title | 25 | cosmetic | wiki |
| 3 | 100 Super Credits (page 3) | super credits | 32 | 100 SC for 32 Medals (3.1 SC per Medal) | wiki |
| 3 | Raise Weapon | emote | 55 | cosmetic | wiki |
| 3 | G-50 Seeker | throwable | 65 | Heavy pen; drone that hunts nearby or pinged enemies | wiki |
| 3 | B-100 Portable Hellbomb | stratagem | 110 | backpack; 300 s cooldown; carry and set off a Hellbomb (10 s fuse) | wiki |
10.12Borderline Justice

1,000 SC · #12 of 24
663 Medals buy every item. Page gates: 0, 95, 230 Medals spent here (graded confirmed). Community tiers: GR B · SG A.
Buy it for the LAS-58 Talon (page 2); the R-6 Deadeye, TED-63 Dynamite and LIFT-860 Hover Pack round it out.
| Page | Item | Type | Medals | Notes | Source |
|---|---|---|---|---|---|
| 1 | Reaper of Bounties (player card) | player card | 2 | cosmetic | wiki |
| 1 | 100 Super Credits (page 1) | super credits | 7 | 100 SC for 7 Medals (14.3 SC per Medal) | wiki |
| 1 | Reaper of Bounties (cape) | cape | 8 | cosmetic | wiki |
| 1 | GS-17 Frontier Marshal (helmet) | helmet | 30 | cosmetic; helmets carry no passive | wiki |
| 1 | R-6 Deadeye | primary | 35 | marksman rifle; Medium pen; lever-action rifle | wiki |
| 1 | GS-17 Frontier Marshal (armor) | armor | 45 | medium (armor 100, speed 500); passive Gunslinger: sidearm reload +40%, draw +50%, recoil -70% | wiki |
| 2 | Way of the Bandolier (player card) | player card | 7 | cosmetic | wiki |
| 2 | 100 Super Credits (page 2) | super credits | 12 | 100 SC for 12 Medals (8.3 SC per Medal) | wiki |
| 2 | Way of the Bandolier (cape) | cape | 25 | cosmetic | wiki |
| 2 | LAS-58 Talon | secondary | 40 | special sidearm; Medium pen; laser revolver; heat instead of ammo | wiki |
| 2 | GS-66 Lawmaker (helmet) | helmet | 45 | cosmetic; helmets carry no passive | wiki |
| 2 | GS-66 Lawmaker (armor) | armor | 55 | heavy (armor 150, speed 450); passive Gunslinger: sidearm reload +40%, draw +50%, recoil -70% | wiki |
| 3 | Super Sheriff | title | 25 | cosmetic | wiki |
| 3 | 100 Super Credits (page 3) | super credits | 32 | 100 SC for 32 Medals (3.1 SC per Medal) | wiki |
| 3 | Tip Hat | emote | 55 | cosmetic | wiki |
| 3 | TED-63 Dynamite | throwable | 65 | Heavy pen; big blast; variable fuse | wiki |
| 3 | Sample Extricator | booster | 65 | large enemies may drop samples (max 10 a mission) | wiki |
| 3 | LIFT-860 Hover Pack | stratagem | 110 | backpack; 480 s cooldown; hover jump pack | wiki |
10.13Masters of Ceremony

1,000 SC · #22 of 24
641 Medals buy every item. Page gates: 0, 95, 230 Medals spent here (graded likely). Community tiers: GR D · SG C.
Little to buy for combat: the R-2 Amendment and G-142 Pyrotech, and the Sample Scanner if you are still farming samples for ship modules. Skip the CQC-1 One True Flag.
| Page | Item | Type | Medals | Notes | Source |
|---|---|---|---|---|---|
| 1 | Federation's Embrace (player card) | player card | 2 | cosmetic | wiki |
| 1 | 100 Super Credits (page 1) | super credits | 7 | 100 SC for 7 Medals (14.3 SC per Medal) | wiki |
| 1 | Federation's Embrace (cape) | cape | 8 | cosmetic | wiki |
| 1 | RE-2310 Honorary Guard (helmet) | helmet | 30 | cosmetic; helmets carry no passive | wiki |
| 1 | R-2 Amendment | primary | 35 | marksman rifle; Light pen; bayonet | wiki |
| 1 | RE-2310 Honorary Guard (armor) | armor | 45 | medium (armor 100, speed 500); passive Reinforced Epaulettes: +30% primary reload; 50% limb-injury avoidance; +20% melee | wiki |
| 2 | Humble Regalia (player card) | player card | 2 | cosmetic | wiki |
| 2 | Humble Regalia (cape) | cape | 8 | cosmetic | wiki |
| 2 | 100 Super Credits (page 2) | super credits | 12 | 100 SC for 12 Medals (8.3 SC per Medal) | wiki |
| 2 | CQC-2 Saber | secondary | 40 | melee; Medium pen; sword | wiki |
| 2 | RE-1861 Parade Commander (helmet) | helmet | 45 | cosmetic; helmets carry no passive | wiki |
| 2 | RE-1861 Parade Commander (armor) | armor | 55 | light (armor 50, speed 550); passive Reinforced Epaulettes: +30% primary reload; 50% limb-injury avoidance; +20% melee | wiki |
| 3 | Decorated Hero | title | 25 | cosmetic | wiki |
| 3 | 100 Super Credits (page 3) | super credits | 32 | 100 SC for 32 Medals (3.1 SC per Medal) | wiki |
| 3 | Lockstep | emote | 55 | cosmetic | wiki |
| 3 | G-142 Pyrotech | throwable | 65 | AT III pen; sticky burning charge | wiki |
| 3 | Sample Scanner | booster | 65 | 15% chance to double sample pickups | wiki |
| 3 | CQC-1 One True Flag | stratagem | 110 | support weapon; Medium pen; 480 s cooldown; melee flag | wiki |
10.14Force of Law

1,000 SC · #21 of 24
873 Medals buy every item. Page gates: 0, 125, 390 Medals spent here (graded likely). Community tiers: GR C · SG C.
Buy it for the GL-52 De-Escalator (page 2) if you fight bugs or squids; skip the AR-32 Pacifier.
| Page | Item | Type | Medals | Notes | Source |
|---|---|---|---|---|---|
| 1 | Miranda's Legacy (player card) | player card | 2 | cosmetic | wiki |
| 1 | 100 Super Credits (page 1) | super credits | 7 | 100 SC for 7 Medals (14.3 SC per Medal) | wiki |
| 1 | Miranda's Legacy (cape) | cape | 8 | cosmetic | wiki |
| 1 | Signal: Hold | emote | 20 | cosmetic; cost check: item page says p3/50 (copy error); grid, table and GamesRadar p1/20 | wiki |
| 1 | True Blue Hellpod pattern | pattern | 20 | cosmetic; Hellpod wrap | wiki |
| 1 | BP-20 Correct Officer (helmet) | helmet | 30 | cosmetic; helmets carry no passive | wiki |
| 1 | AR-32 Pacifier | primary | 35 | assault rifle; Medium pen; stun-round rifle | wiki |
| 1 | BP-20 Correct Officer (armor) | armor | 45 | medium (armor 100, speed 500); passive Ballistic Padding: 25% chest and 25% explosive resistance; no chest bleeding | wiki |
| 2 | Mother Eagle's Wings (player card) | player card | 7 | cosmetic | wiki |
| 2 | 100 Super Credits (page 2) | super credits | 12 | 100 SC for 12 Medals (8.3 SC per Medal) | wiki |
| 2 | Signal: Silence | emote | 20 | cosmetic | wiki |
| 2 | Mother Eagle's Wings (cape) | cape | 25 | cosmetic | wiki |
| 2 | BP-32 Jackboot (helmet) | helmet | 45 | cosmetic; helmets carry no passive | wiki |
| 2 | True Blue Shuttle pattern | pattern | 50 | cosmetic; shuttle wrap | wiki |
| 2 | Stun Pods | booster | 55 | hellpods stun enemies on landing | wiki |
| 2 | BP-32 Jackboot (armor) | armor | 55 | light (armor 50, speed 550); passive Ballistic Padding: 25% chest and 25% explosive resistance; no chest bleeding | wiki |
| 2 | GL-52 De-Escalator | stratagem | 85 | support weapon; Heavy pen; 480 s cooldown; arc grenade launcher; stuns groups | wiki |
| 3 | Extra Judicial | title | 20 | cosmetic | wiki |
| 3 | Signal: Group Up | emote | 20 | cosmetic | wiki |
| 3 | 100 Super Credits (page 3) | super credits | 32 | 100 SC for 32 Medals (3.1 SC per Medal) | wiki |
| 3 | True Blue Exosuit pattern | pattern | 50 | cosmetic; exosuit wrap | wiki |
| 3 | True Blue Vehicle pattern | pattern | 55 | cosmetic; vehicle wrap (FRV; Bastion tank too since 6.3.0) | wiki |
| 3 | G-109 Urchin | throwable | 65 | sticky stun spikes | wiki |
| 3 | AX/ARC-3 K-9 | stratagem | 110 | backpack; 480 s cooldown; arc drone | wiki |
10.15Control Group
1,000 SC · #6 of 24
713 Medals buy every item. Page gates: 0, 150, 320 Medals spent here (graded confirmed). Community tiers: GR A · SG S+.
Buy it for the LIFT-182 Warp Pack (page 3); the PLAS-45 Epoch and VG-70 Variable are strong but can hurt you, and Adreno-Defibrillator armor gives a one-time revive.
| Page | Item | Type | Medals | Notes | Source |
|---|---|---|---|---|---|
| 1 | Conductor of Brilliance (player card) | player card | 2 | cosmetic | wiki |
| 1 | 100 Super Credits (page 1) | super credits | 7 | 100 SC for 7 Medals (14.3 SC per Medal) | wiki |
| 1 | Conductor of Brilliance (cape) | cape | 8 | cosmetic | wiki |
| 1 | AD-26 Bleeding Edge (helmet) | helmet | 30 | cosmetic; helmets carry no passive | wiki |
| 1 | VG-70 Variable | primary | 35 | special primary; Light pen; switchable fire-rate rifle | wiki |
| 1 | AD-26 Bleeding Edge (armor) | armor | 45 | medium (armor 100, speed 500); passive Adreno-Defibrillator: one-time revive on death; stims +2 s; 50% arc resistance | wiki |
| 1 | PLAS-45 Epoch | stratagem | 75 | support weapon; AT I pen; 480 s cooldown; charged plasma cannon; overcharge hurts the user | wiki |
| 2 | Over Artifice Triumphant (player card) | player card | 7 | cosmetic | wiki |
| 2 | 100 Super Credits (page 2) | super credits | 12 | 100 SC for 12 Medals (8.3 SC per Medal) | wiki |
| 2 | Over Artifice Triumphant (cape) | cape | 25 | cosmetic | wiki |
| 2 | AD-49 Apollonian (helmet) | helmet | 45 | cosmetic; helmets carry no passive | wiki |
| 2 | AD-49 Apollonian (armor) | armor | 55 | heavy (armor 150, speed 450); passive Adreno-Defibrillator: one-time revive on death; stims +2 s; 50% arc resistance | wiki |
| 2 | A/LAS-98 Laser Sentry | stratagem | 85 | sentry; 150 s cooldown; laser turret | wiki |
| 3 | Exemplary Subject | title | 20 | cosmetic | wiki |
| 3 | 100 Super Credits (page 3) | super credits | 32 | 100 SC for 32 Medals (3.1 SC per Medal) | wiki |
| 3 | Protect Eardrums | emote | 55 | cosmetic | wiki |
| 3 | G-31 Arc | throwable | 65 | Heavy pen; arc blast that chains | wiki |
| 3 | LIFT-182 Warp Pack | stratagem | 110 | backpack; 480 s cooldown; short-range teleport | wiki |
10.16Obedient Democracy Support Troopers

1,500 SC · #23 of 24
637 Medals buy every item. Page gates: 0, 135, 280 Medals spent here (graded likely). No Super Credits inside; the token cannot unlock it. Community tiers: GR C · SG D.
Buy it only for the Halo look or a quiet set: Feet First armor, the M7S SMG and the M6C/SOCOM Pistol.
| Page | Item | Type | Medals | Notes | Source |
|---|---|---|---|---|---|
| 1 | Honored Heirloom (player card) | player card | 2 | cosmetic | wiki |
| 1 | Honored Heirloom (cape) | cape | 8 | cosmetic | wiki |
| 1 | Mean Green Hellpod pattern | pattern | 20 | cosmetic; Hellpod wrap | wiki |
| 1 | A-9 Helljumper (helmet) | helmet | 30 | cosmetic; helmets carry no passive | wiki |
| 1 | MA5C Assault Rifle | primary | 35 | assault rifle; Medium pen; Halo crossover rifle | wiki |
| 1 | A-9 Helljumper (armor) | armor | 45 | medium (armor 100, speed 500); passive Feet First: 50% quieter; +30% point-of-interest range; no leg injuries | wiki |
| 2 | Eye of the Clandestine (player card) | player card | 7 | cosmetic | wiki |
| 2 | Eye of the Clandestine (cape) | cape | 25 | cosmetic | wiki |
| 2 | A-35 Recon (helmet) | helmet | 45 | cosmetic; helmets carry no passive | wiki |
| 2 | M7S SMG | primary | 50 | SMG; Light pen; suppressed | wiki |
| 2 | Mean Green Shuttle pattern | pattern | 50 | cosmetic; shuttle wrap | wiki |
| 2 | A-35 Recon (armor) | armor | 55 | medium (armor 100, speed 500); passive Feet First: 50% quieter; +30% point-of-interest range; no leg injuries | wiki |
| 3 | Rookie | title | 20 | cosmetic | wiki |
| 3 | Mean Green Exosuit pattern | pattern | 50 | cosmetic; exosuit wrap | wiki |
| 3 | Mean Green Vehicle pattern | pattern | 55 | cosmetic; vehicle wrap (FRV; Bastion tank too since 6.3.0) | wiki |
| 3 | M90A Shotgun | primary | 65 | shotgun; Light pen; high damage, 6 shells | wiki |
| 3 | M6C/SOCOM Pistol | secondary | 75 | pistol; Light pen; suppressed | wiki |
10.17Dust Devils

1,000 SC · #3 of 24
863 Medals buy every item. Page gates: 0, 110, 380 Medals spent here (graded unverified; page 3 may open at 270). Community tiers: GR S · SG S+.
Buy the AR-2 Coyote first (page 1), then the S-11 Speargun or EAT-700 Expendable Napalm (page 2); the MS-11 Solo Silo waits on page 3.
| Page | Item | Type | Medals | Notes | Source |
|---|---|---|---|---|---|
| 1 | Rightful Occupier (player card) | player card | 2 | cosmetic | wiki |
| 1 | 100 Super Credits (page 1) | super credits | 7 | 100 SC for 7 Medals (14.3 SC per Medal) | wiki |
| 1 | Rightful Occupier (cape) | cape | 8 | cosmetic | wiki |
| 1 | Rattlesnake Hellpod pattern | pattern | 20 | cosmetic; Hellpod wrap | wiki |
| 1 | DS-42 Federation's Blade (helmet) | helmet | 30 | cosmetic; helmets carry no passive | wiki |
| 1 | AR-2 Coyote | primary | 35 | assault rifle; Medium pen; incendiary rounds | wiki |
| 1 | DS-42 Federation's Blade (armor) | armor | 45 | heavy (armor 150, speed 450); passive Desert Stormer: 40% fire, gas, acid and arc resistance; +20% throw range | wiki |
| 2 | Windswept Wayfinder (player card) | player card | 7 | cosmetic | wiki |
| 2 | 100 Super Credits (page 2) | super credits | 12 | 100 SC for 12 Medals (8.3 SC per Medal) | wiki |
| 2 | Windswept Wayfinder (cape) | cape | 25 | cosmetic | wiki |
| 2 | DS-191 Scorpion (helmet) | helmet | 45 | cosmetic; helmets carry no passive | wiki |
| 2 | Rattlesnake Shuttle pattern | pattern | 50 | cosmetic; shuttle wrap | wiki |
| 2 | DS-191 Scorpion (armor) | armor | 55 | medium (armor 100, speed 500); passive Desert Stormer: 40% fire, gas, acid and arc resistance; +20% throw range | wiki |
| 2 | EAT-700 Expendable Napalm | stratagem | 85 | support weapon; Medium pen; 140 s cooldown; expendable napalm rocket | wiki |
| 2 | S-11 Speargun | stratagem | 85 | support weapon; AT I pen; 480 s cooldown; harpoon plus gas | wiki |
| 3 | Burier of Heads | title | 20 | cosmetic | wiki |
| 3 | Raider's Cheer | emote | 20 | cosmetic | wiki |
| 3 | 100 Super Credits (page 3) | super credits | 32 | 100 SC for 32 Medals (3.1 SC per Medal) | wiki |
| 3 | Rattlesnake Exosuit pattern | pattern | 50 | cosmetic; exosuit wrap | wiki |
| 3 | Rattlesnake Vehicle pattern | pattern | 55 | cosmetic; vehicle wrap (FRV; Bastion tank too since 6.3.0) | wiki |
| 3 | G-7 Pineapple | throwable | 65 | Medium pen; cluster bomblets | wiki |
| 3 | MS-11 Solo Silo | stratagem | 110 | support weapon; AT III/AT V pen; 180 s cooldown; guided missile silo; one-shots the biggest targets | wiki |
10.18Python Commandos
1,000 SC · #17 of 24
788 Medals buy every item. Page gates: 0, 165, 370 Medals spent here (graded unverified; page 3 may open at 205). Community tiers: GR B · SG B.
Buy it for the AX/FLAM-75 Hot Dog drone (page 1); the AR/GL-21 One-Two got more grenades in 7.1.0. The M-1000 Maxigun and CQC-9 Defoliation Tool disappoint.
| Page | Item | Type | Medals | Notes | Source |
|---|---|---|---|---|---|
| 1 | Mark of the Constrictor (player card) | player card | 2 | cosmetic | wiki |
| 1 | 100 Super Credits (page 1) | super credits | 7 | 100 SC for 7 Medals (14.3 SC per Medal) | wiki |
| 1 | Mark of the Constrictor (cape) | cape | 8 | cosmetic | wiki |
| 1 | Chameleon Camo Hellpod pattern | pattern | 20 | cosmetic; Hellpod wrap | wiki |
| 1 | RS-20 Constrictor (helmet) | helmet | 30 | cosmetic; helmets carry no passive | wiki |
| 1 | AR/GL-21 One-Two | primary | 35 | assault rifle; Light/Medium pen; rifle with under-barrel grenade launcher (grenades 3/5/5 since 7.1.0) | wiki |
| 1 | RS-20 Constrictor (armor) | armor | 45 | light (armor 50, speed 550); passive Rock Solid: +40% melee damage; resists knockdown | wiki |
| 1 | AX/FLAM-75 "Guard Dog" Hot Dog | stratagem | 75 | backpack; 480 s cooldown; flamethrower drone | wiki |
| 2 | Foe Rent Asunder (player card) | player card | 7 | cosmetic | wiki |
| 2 | 100 Super Credits (page 2) | super credits | 12 | 100 SC for 12 Medals (8.3 SC per Medal) | wiki |
| 2 | Foe Rent Asunder (cape) | cape | 25 | cosmetic | wiki |
| 2 | RS-40 Beast of Prey (helmet) | helmet | 45 | cosmetic; helmets carry no passive | wiki |
| 2 | Chameleon Camo Shuttle pattern | pattern | 50 | cosmetic; shuttle wrap | wiki |
| 2 | RS-40 Beast of Prey (armor) | armor | 55 | heavy (armor 150, speed 450); passive Rock Solid: +40% melee damage; resists knockdown | wiki |
| 2 | CQC-9 Defoliation Tool | stratagem | 85 | support weapon; AT I pen; 480 s cooldown; chainsaw | wiki |
| 3 | Front-Leaning Rest Position | emote | 20 | cosmetic | wiki |
| 3 | Python Commando | title | 20 | cosmetic | wiki |
| 3 | 100 Super Credits (page 3) | super credits | 32 | 100 SC for 32 Medals (3.1 SC per Medal) | wiki |
| 3 | Chameleon Camo Exosuit pattern | pattern | 50 | cosmetic; exosuit wrap | wiki |
| 3 | Chameleon Camo Vehicle pattern | pattern | 55 | cosmetic; vehicle wrap (FRV; Bastion tank too since 6.3.0) | wiki |
| 3 | M-1000 Maxigun | stratagem | 110 | support weapon; Medium pen; 480 s cooldown; backpack minigun | wiki |
10.19Righteous Revenants

1,500 SC · #24 of 24
562 Medals buy every item. Page gates: 0, 105, 280 Medals spent here (graded unverified: never recorded page by page, so estimated; the wiki's all-pages figure agrees). No Super Credits inside; the token cannot unlock it. Community tiers: GR D · SG D.
Skip it unless it came free with a 2024 Killzone Superstore item; the PLAS-39 Accelerator Rifle and Acclimated armor are its only standouts.
| Page | Item | Type | Medals | Notes | Source |
|---|---|---|---|---|---|
| 1 | Strength in Our Arms (player card) | player card | 2 | cosmetic | wiki |
| 1 | Strength in Our Arms (cape) | cape | 8 | cosmetic | wiki |
| 1 | Extrasolar Ash Hellpod pattern | pattern | 20 | cosmetic; Hellpod wrap | wiki |
| 1 | AC-1 Dutiful (helmet) | helmet | 30 | cosmetic; helmets carry no passive | wiki |
| 1 | StA-52 Assault Rifle | primary | 35 | assault rifle; Light pen; drum magazine | wiki |
| 1 | AC-1 Dutiful (armor) | armor | 45 | medium (armor 100, speed 500); passive Acclimated: 50% fire, gas, acid and arc resistance | wiki |
| 2 | Defender of Our Dream (player card) | player card | 7 | cosmetic | wiki |
| 2 | Defender of Our Dream (cape) | cape | 25 | cosmetic | wiki |
| 2 | AC-2 Obedient (helmet) | helmet | 45 | cosmetic; helmets carry no passive | wiki |
| 2 | PLAS-39 Accelerator Rifle | primary | 50 | energy weapon; Medium pen; plasma sniper rifle | wiki |
| 2 | Extrasolar Ash Shuttle pattern | pattern | 50 | cosmetic; shuttle wrap | wiki |
| 2 | AC-2 Obedient (armor) | armor | 55 | light (armor 50, speed 550); passive Acclimated: 50% fire, gas, acid and arc resistance | wiki |
| 3 | Assault Infantry | title | 20 | cosmetic | wiki |
| 3 | Extrasolar Ash Exosuit pattern | pattern | 50 | cosmetic; exosuit wrap | wiki |
| 3 | Extrasolar Ash Vehicle pattern | pattern | 55 | cosmetic; vehicle wrap (FRV; Bastion tank too since 6.3.0) | wiki |
| 3 | StA-11 SMG | primary | 65 | SMG; Light pen; helical magazine | wiki |
10.20Redacted Regiment
1,000 SC · #4 of 24
628 Medals buy every item. Page gates: 0, 145, 215 Medals spent here (graded likely). Community tiers: GR S · SG S.
Buy the R-72 Censor and RS-89 Shadow Paragon armor first (page 1): page 2 needs nearly all of page 1. The B/MD C4 Pack and Concealed Insertion wait on page 3.
| Page | Item | Type | Medals | Notes | Source |
|---|---|---|---|---|---|
| 1 | Pillar of the Abyss (player card) | player card | 2 | cosmetic | wiki |
| 1 | 100 Super Credits (page 1) | super credits | 7 | 100 SC for 7 Medals (14.3 SC per Medal) | wiki |
| 1 | Pillar of the Abyss (cape) | cape | 8 | cosmetic | wiki |
| 1 | P-35 Re-Educator | secondary | 20 | special sidearm; Heavy pen; gas pistol | wiki |
| 1 | RS-89 Shadow Paragon (helmet) | helmet | 30 | cosmetic; helmets carry no passive | wiki |
| 1 | R-72 Censor | primary | 35 | marksman rifle; Light pen; suppressed | wiki |
| 1 | RS-89 Shadow Paragon (armor) | armor | 45 | light (armor 50, speed 550); passive Reduced Signature: 50% quieter; enemy detection range -40% | wiki |
| 2 | Triangulation Veil (player card) | player card | 7 | cosmetic | wiki |
| 2 | 100 Super Credits (page 2) | super credits | 12 | 100 SC for 12 Medals (8.3 SC per Medal) | wiki |
| 2 | Triangulation Veil (cape) | cape | 25 | cosmetic | wiki |
| 2 | RS-67 Null Cipher (helmet) | helmet | 45 | cosmetic; helmets carry no passive | wiki |
| 2 | AR-59 Suppressor | primary | 50 | assault rifle; Light pen; suppressed | wiki |
| 2 | RS-67 Null Cipher (armor) | armor | 55 | medium (armor 100, speed 500); passive Reduced Signature: 50% quieter; enemy detection range -40% | wiki |
| 3 | Target Sighted | victory pose | 20 | cosmetic | wiki |
| 3 | [REDACTED] | title | 20 | cosmetic | wiki |
| 3 | 100 Super Credits (page 3) | super credits | 32 | 100 SC for 32 Medals (3.1 SC per Medal) | wiki |
| 3 | Concealed Insertion | booster | 40 | hellpods pop smoke on landing | wiki |
| 3 | TM-1 Lure Mine | throwable | 65 | AT I/Medium pen; sticky mine that draws enemies in | wiki |
| 3 | B/MD C4 Pack | stratagem | 110 | support weapon; AT III pen; 480 s cooldown; remote-detonated C4 charges | wiki |
10.21Siege Breakers
1,000 SC · #8 of 24
853 Medals buy every item. Page gates: 0, 165, 375 Medals spent here (graded unverified; page 3 may open at 210). Community tiers: GR A · SG S.
Buy it for the EAT-411 Leveller (page 2); the CQC-20 Breaching Hammer and LAS-13 Trident sit on page 1. The GL-28 Belt-Fed Grenade Launcher underwhelms.
| Page | Item | Type | Medals | Notes | Source |
|---|---|---|---|---|---|
| 1 | Rags of the Fashionable (player card) | player card | 2 | cosmetic | wiki |
| 1 | 100 Super Credits (page 1) | super credits | 7 | 100 SC for 7 Medals (14.3 SC per Medal) | wiki |
| 1 | Rags of the Fashionable (cape) | cape | 8 | cosmetic | wiki |
| 1 | Churned Earth Hellpod pattern | pattern | 20 | cosmetic; Hellpod wrap | wiki |
| 1 | SA-7 Headfirst (helmet) | helmet | 30 | cosmetic; helmets carry no passive | wiki |
| 1 | LAS-13 Trident | primary | 35 | energy weapon; Light pen; laser shotgun, 6 beams per shot, wide horizontal spread; heat instead of magazines (recoil cut in 7.1.0) | wiki |
| 1 | SA-7 Headfirst (armor) | armor | 45 | medium (armor 125, speed 500); passive Supplementary Adrenaline: regain stamina when hit; higher armor rating | wiki |
| 1 | CQC-20 Breaching Hammer | stratagem | 75 | support weapon; Medium/AT II pen; 480 s cooldown; hammer with an explosive head | wiki |
| 2 | Wedgeful Tricorn (player card) | player card | 7 | cosmetic | wiki |
| 2 | 100 Super Credits (page 2) | super credits | 12 | 100 SC for 12 Medals (8.3 SC per Medal) | wiki |
| 2 | Wedgeful Tricorn (cape) | cape | 25 | cosmetic | wiki |
| 2 | SA-8 Ram (helmet) | helmet | 45 | cosmetic; helmets carry no passive | wiki |
| 2 | Churned Earth Shuttle pattern | pattern | 50 | cosmetic; shuttle wrap | wiki |
| 2 | SA-8 Ram (armor) | armor | 55 | heavy (armor 175, speed 450); passive Supplementary Adrenaline: regain stamina when hit; higher armor rating | wiki |
| 2 | EAT-411 Leveller | stratagem | 85 | support weapon; AT II pen; 140 s cooldown; expendable anti-tank rocket | wiki |
| 3 | Bunker Buster | title | 20 | cosmetic | wiki |
| 3 | Display of Brawn | emote | 20 | cosmetic | wiki |
| 3 | 100 Super Credits (page 3) | super credits | 32 | 100 SC for 32 Medals (3.1 SC per Medal) | wiki |
| 3 | Churned Earth Exosuit pattern | pattern | 50 | cosmetic; exosuit wrap | wiki |
| 3 | Churned Earth Vehicle pattern | pattern | 55 | cosmetic; vehicle wrap (FRV; Bastion tank too since 6.3.0) | wiki |
| 3 | G/SH-39 Shield | throwable | 65 | deployable shield bubble | wiki |
| 3 | GL-28 Belt-Fed Grenade Launcher | stratagem | 110 | support weapon; Heavy pen; 480 s cooldown; backpack-fed grenade launcher | wiki |
10.22Entrenched Division
1,000 SC · #5 of 24
888 Medals buy every item. Page gates: 0, 125, 370 Medals spent here (graded unverified; page 3 may open at 245). Community tiers: GR S · SG A.
Buy the SMG/FLAM-34 Stoker and CPG-48 Sapper armor first (page 1), then the A/GM-17 Gas Mortar Sentry and G-48 Giga Grenade (page 2); the B/FLAM-80 Cremator waits on page 3.
| Page | Item | Type | Medals | Notes | Source |
|---|---|---|---|---|---|
| 1 | Dignity of Toil (player card) | player card | 2 | cosmetic | wiki |
| 1 | 100 Super Credits (page 1) | super credits | 7 | 100 SC for 7 Medals (14.3 SC per Medal) | wiki |
| 1 | Dignity of Toil (cape) | cape | 8 | cosmetic | wiki |
| 1 | CQC-73 Entrenchment Tool | secondary | 20 | melee; Medium pen; shovel | wiki |
| 1 | Heritage Olive Hellpod pattern | pattern | 20 | cosmetic; Hellpod wrap | wiki |
| 1 | CPG-48 Sapper (helmet) | helmet | 30 | cosmetic; helmets carry no passive; cost check: grid and GamesRadar 30; wiki table and item page 35 | wiki |
| 1 | SMG/FLAM-34 Stoker | primary | 35 | SMG; Light/Heavy pen; SMG with under-barrel flamethrower | wiki |
| 1 | CPG-48 Sapper (armor) | armor | 45 | medium (armor 100, speed 500); passive Concussive Padding, Grenadier: 50% explosive resistance; +2 throwables | wiki |
| 2 | Crest of the Unsullied (player card) | player card | 7 | cosmetic; cost check: grid and GamesRadar 7; wiki table 6 | wiki |
| 2 | 100 Super Credits (page 2) | super credits | 12 | 100 SC for 12 Medals (8.3 SC per Medal) | wiki |
| 2 | Crest of the Unsullied (cape) | cape | 25 | cosmetic | wiki |
| 2 | CPH-26 Commandant (helmet) | helmet | 45 | cosmetic; helmets carry no passive | wiki |
| 2 | G-48 Giga Grenade | throwable | 50 | AT I pen; big blast (2,000); carry 2 | wiki |
| 2 | Heritage Olive Exosuit pattern | pattern | 50 | cosmetic; exosuit wrap | wiki |
| 2 | CPH-26 Commandant (armor) | armor | 55 | light (armor 50, speed 550); passive Concussive Padding, Hazmat: 50% explosive and 25% gas resistance; -30% sidearm recoil | wiki |
| 2 | A/GM-17 Gas Mortar Sentry | stratagem | 85 | sentry; 180 s cooldown; gas mortar turret | wiki |
| 3 | Mudskipper | title | 20 | cosmetic | wiki |
| 3 | 100 Super Credits (page 3) | super credits | 32 | 100 SC for 32 Medals (3.1 SC per Medal) | wiki |
| 3 | Diplomatic Handshake | emote | 55 | cosmetic | wiki |
| 3 | Heritage Olive Shuttle pattern | pattern | 55 | cosmetic; shuttle wrap | wiki |
| 3 | Heritage Olive Vehicle pattern | pattern | 55 | cosmetic; vehicle wrap (FRV; Bastion tank too since 6.3.0) | wiki |
| 3 | P-69 Veto | secondary | 65 | pistol; Medium pen; jet-round pistol | wiki |
| 3 | B/FLAM-80 Cremator | stratagem | 110 | support weapon; Heavy pen; 480 s cooldown; backpack flamethrower | wiki |
10.23Exo Experts
1,000 SC · #9 of 24
778 Medals buy every item. Page gates: 0, 165, 385 Medals spent here (graded unverified: never recorded page by page, so estimated; the wiki's all-pages figure agrees). Community tiers: GR A · SG S.
Buy it for the two exosuits (pages 2 and 3) and the MGX-42 Bullet Storm (page 1); the P-33 Missile Pistol is a strong bot-front sidearm.
| Page | Item | Type | Medals | Notes | Source |
|---|---|---|---|---|---|
| 1 | Free-Spirited Spangles (player card) | player card | 2 | cosmetic | wiki |
| 1 | 100 Super Credits (page 1) | super credits | 7 | 100 SC for 7 Medals (14.3 SC per Medal) | wiki |
| 1 | Free-Spirited Spangles (cape) | cape | 8 | cosmetic | wiki |
| 1 | Mobile White Hellpod pattern | pattern | 20 | cosmetic; Hellpod wrap | wiki |
| 1 | O-3 Free Spirit (helmet) | helmet | 30 | cosmetic; helmets carry no passive | wiki |
| 1 | SMG-203 Gallant | primary | 35 | SMG; Medium pen; one-handed rapid-fire SMG | wiki |
| 1 | O-3 Free Spirit (armor) | armor | 45 | light (armor 50, speed 550); passive Oxygenator: faster walk and run; longer, faster slides | wiki |
| 1 | MGX-42 Bullet Storm | stratagem | 75 | support weapon; Light pen; 70 s cooldown; expendable rotary gun; 2 per pod | wiki |
| 2 | Watchful Compatriot (player card) | player card | 7 | cosmetic | wiki |
| 2 | 100 Super Credits (page 2) | super credits | 12 | 100 SC for 12 Medals (8.3 SC per Medal) | wiki |
| 2 | Watchful Compatriot (cape) | cape | 25 | cosmetic | wiki |
| 2 | O-2 Heavy Operator (helmet) | helmet | 45 | cosmetic; helmets carry no passive | wiki |
| 2 | P-33 Missile Pistol | secondary | 50 | special sidearm; AT I/Medium pen; guided missile sidearm | wiki |
| 2 | EXO-51 Lumberer Exosuit | stratagem | 50 | exosuit; flamethrower and anti-tank cannon | wiki |
| 2 | Mobile White Shuttle pattern | pattern | 50 | cosmetic; shuttle wrap | wiki |
| 2 | O-2 Heavy Operator (armor) | armor | 55 | heavy (armor 150, speed 450); passive Oxygenator: faster walk and run; longer, faster slides | wiki |
| 3 | Exosuit Certified | title | 20 | cosmetic | wiki |
| 3 | 100 Super Credits (page 3) | super credits | 32 | 100 SC for 32 Medals (3.1 SC per Medal) | wiki |
| 3 | EXO-55 Breakthrough Exosuit | stratagem | 50 | exosuit; flak cannon and shield | wiki |
| 3 | Mobile White Exosuit pattern | pattern | 50 | cosmetic; exosuit wrap | wiki |
| 3 | Mobile White Vehicle pattern | pattern | 55 | cosmetic; vehicle wrap (FRV; Bastion tank too since 6.3.0) | wiki |
| 3 | Thumb of Approval | emote | 55 | cosmetic | wiki |
10.24Castellan's Creed
1,500 SC · #16 of 24
657 Medals buy every item. Page gates: 0, 105, 315 Medals spent here (graded unverified; page 3 may open at 210). No Super Credits inside; the token cannot unlock it. Community tiers: GR B · SG S.
The 40-K Meltagun (page 3) and True Grit armor are excellent, but you pay the full legendary price with nothing back.
| Page | Item | Type | Medals | Notes | Source |
|---|---|---|---|---|---|
| 1 | Camo Cloak (player card) | player card | 2 | cosmetic | wiki |
| 1 | Camo Cloak (cape) | cape | 8 | cosmetic | wiki |
| 1 | Castellans Green Hellpod pattern | pattern | 20 | cosmetic; Hellpod wrap | wiki |
| 1 | TG-8 Sharpshooter (helmet) | helmet | 30 | cosmetic; helmets carry no passive; cost check: grid and GamesRadar 30; wiki table 39 | wiki |
| 1 | R/40-K Hot-Shot Marksman Rifle | primary | 35 | energy weapon; Medium pen; energy marksman rifle | wiki |
| 1 | TG-8 Sharpshooter (armor) | armor | 45 | medium (armor 100, speed 500); passive True Grit: +30% support-weapon reload; better handling | wiki |
| 2 | City Fighter's Resolve (player card) | player card | 7 | cosmetic | wiki |
| 2 | City Fighter's Resolve (cape) | cape | 25 | cosmetic | wiki |
| 2 | TG-122 Demo-Trooper (helmet) | helmet | 45 | cosmetic; helmets carry no passive | wiki |
| 2 | P/40-K Bolt Pistol | secondary | 50 | special sidearm; Heavy/Medium pen; explosive-round pistol; 6 shots | wiki |
| 2 | G/40-K Melta Mine | throwable | 50 | AT III pen; thrown thermal anti-tank mine | wiki |
| 2 | Castellans Green Shuttle pattern | pattern | 50 | cosmetic; shuttle wrap | wiki |
| 2 | TG-122 Demo-Trooper (armor) | armor | 55 | heavy (armor 150, speed 450); passive True Grit: +30% support-weapon reload; better handling | wiki |
| 3 | Still Standing | title | 20 | cosmetic | wiki |
| 3 | Castellans Green Exosuit pattern | pattern | 50 | cosmetic; exosuit wrap | wiki |
| 3 | Castellans Green Vehicle pattern | pattern | 55 | cosmetic; vehicle wrap (FRV; Bastion tank too since 6.3.0) | wiki |
| 3 | 40-K Meltagun | stratagem | 110 | support weapon; AT III pen; 480 s cooldown; short-range thermal beam | wiki |
10.25Ironclad Democracy
1,000 SC · #15 of 24
803 Medals buy every item. Page gates: 0, 135, 360 Medals spent here (graded unverified; page 3 may open at 225). Community tiers: not rated yet.
The P-34 Breacher and Surplus EAT Allocation sit on page 2, the G-60 Anti-Tank Seeker and GL-15 Evictor on page 3. Too new for a dated warbond ranking; its three vehicle patterns fit only the tanks.
| Page | Item | Type | Medals | Notes | Source |
|---|---|---|---|---|---|
| 1 | Standard of Rapid Evacuation (player card) | player card | 2 | cosmetic | wiki |
| 1 | 100 Super Credits (page 1) | super credits | 7 | 100 SC for 7 Medals (14.3 SC per Medal) | wiki |
| 1 | Standard of Rapid Evacuation (cape) | cape | 8 | cosmetic | wiki |
| 1 | Verdant Camouflage (tank pattern) | pattern | 20 | cosmetic; Bastion and Maelstrom tank wrap only | wiki |
| 1 | BFM-16 Tanker (helmet) | helmet | 30 | cosmetic; helmets carry no passive | wiki |
| 1 | AR-11 Arbitrator | primary | 35 | assault rifle; Light/Medium pen; rifle with 4-shell under-barrel shotgun | wiki |
| 1 | G-8 Immolation | throwable | 35 | firebomb; area fire | wiki |
| 1 | BFM-16 Tanker (armor) | armor | 45 | light (armor 75, speed 550); passive Blunt-Force Mitigation: resists knockdown; -30% impact damage; higher armor rating | wiki |
| 2 | Shroud of the Juggernaut (player card) | player card | 7 | cosmetic | wiki |
| 2 | 100 Super Credits (page 2) | super credits | 12 | 100 SC for 12 Medals (8.3 SC per Medal) | wiki |
| 2 | Shroud of the Juggernaut (cape) | cape | 25 | cosmetic | wiki |
| 2 | BFM-220 Ironclad (helmet) | helmet | 45 | cosmetic; helmets carry no passive | wiki |
| 2 | P-34 Breacher | secondary | 50 | special sidearm; AT III pen; sticky incendiary missile pistol | wiki |
| 2 | Glacial Polymer (tank pattern) | pattern | 50 | cosmetic; Bastion and Maelstrom tank wrap only | wiki |
| 2 | Surplus EAT Allocation | booster | 55 | 2 free EAT call-ins a mission (4 launchers); cost check: page 2 per grid, item page and GamesRadar; the wiki table swaps the two boosters | wiki |
| 2 | BFM-220 Ironclad (armor) | armor | 55 | heavy (armor 175, speed 450); passive Blunt-Force Mitigation: resists knockdown; -30% impact damage; higher armor rating | wiki |
| 3 | Helmet Durability Check | emote | 20 | cosmetic | wiki |
| 3 | Treadhead | title | 20 | cosmetic | wiki |
| 3 | 100 Super Credits (page 3) | super credits | 32 | 100 SC for 32 Medals (3.1 SC per Medal) | wiki |
| 3 | Executive Onyx (tank pattern) | pattern | 55 | cosmetic; Bastion and Maelstrom tank wrap only | wiki |
| 3 | GL-15 Evictor | primary | 65 | explosive weapon; Medium pen; pump-action grenade launcher, 4 rounds | wiki |
| 3 | G-60 Anti-Tank Seeker | throwable | 65 | AT I pen; homing anti-tank drone grenade | wiki |
| 3 | Integrated Extinguishers | booster | 65 | you stop burning in about 1 s instead of 3; cost check: page 3 per grid, item page and GamesRadar; the wiki table swaps the two boosters | wiki |
How the rankings move
Trust a ranking only as far as its date. Both warbond lists behind this order were written before patch 7.1.0, so recheck the order after every balance patch, and expect the newest warbond to move once dated tests exist.
11.1Patches that move the order
11.2Ironclad Democracy: the first reports
No dated warbond list has ranked it: GamesRadar had not tested it on release day, and Game Rant called it B-tier at best the day after (September 23, 2026). The first item ratings point higher: u.gg rates the P-34 Breacher S+ against bots and bugs (A against the Illuminate), the G-60 Anti-Tank Seeker S against bots and bugs, the AR-11 Arbitrator S against bugs and squids and the GL-15 Evictor S against bots (u.gg lists, read September 26, 2026; only the primary list is stamped for 7.1.1), and Power Up Gaming ranks the AT Seeker the best of its weapons (September 24, 2026). Its kit answers the same need as Thermite and the Ultimatum, so it may climb once the warbond lists test it unverified.
11.3How to read any tier list
- Date against patch. Set the list's date beside the patch history: a list older than a balance patch can rate a changed item wrongly.
- Whose opinion. GamesRadar's lists are its editors' calls; the Steam guide copies u.gg rather than testing on its own; u.gg publishes no method. Tier letters are opinions, and this manual tags them community-tested.
- Which front. One item can be S on one front and two or more tiers lower on another: GamesRadar rates the Coyote S against bugs and squids but B against bots, and u.gg drops the anti-tank launchers to C against the Illuminate. Use the front lists.
Weapon tiers by front, dated: Weapons & Comparisons.
11.4What to watch next
- Personal Orders are due to become "Personal Campaign Progression" later in 2026, which may change the daily 15 Medals.
- The M-103 Supply FRV becomes a Requisition purchase for everyone in October 2026.
- The anti-exploit earning limit is being extended from Super Credits to Medals, samples and Requisition; normal play is not affected.
- Every new warbond enters this order provisionally, tagged unverified, until dated lists have tested it.
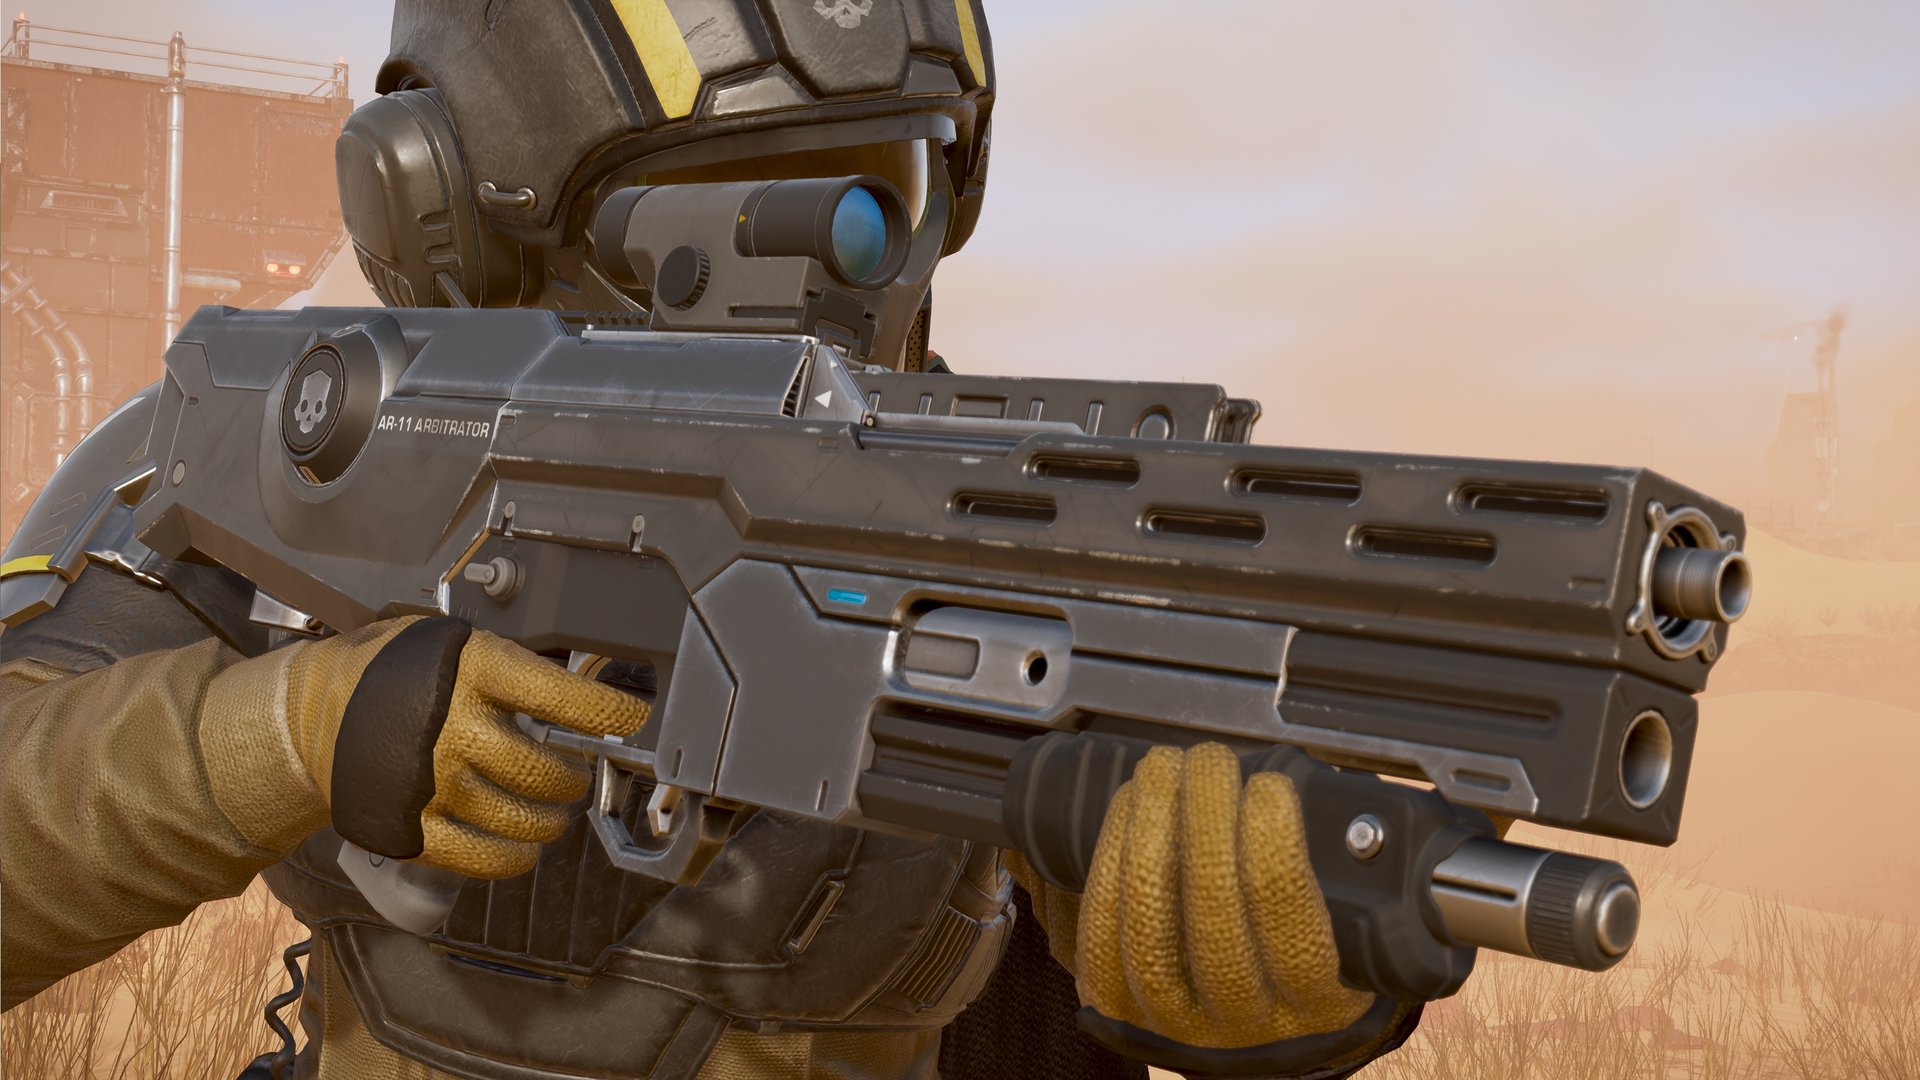
Armory05
Weapons & Comparisons
Every primary, secondary, throwable and support weapon compared on penetration, damage, fire rate, ammo and source, with what each is best and worst at.
On this page10 chapters
First picks: what to carry and buy
Your weapons have three jobs: kill armor, clear crowds and close spawners. Only two primaries hit with heavy penetration as their main attack, so plan your anti-armor in the secondary, grenade or support slot, and always carry one explosive that can close a bug hole or a fabricator. You start with the AR-23 Liberator, P-2 Peacemaker, G-12 High Explosive and MG-43 Machine Gun; here is what to add, slot by slot.
Liberator, then medium penetration
Start: AR-23 Liberator (free). Cheap upgrade: AR-23P Liberator Penetrator (Helldivers Mobilize! p6, 40 Medals) or PLAS-1 Scorcher (Helldivers Mobilize! p10, 75 Medals). Save for: PLAS-101 Purifier (Polar Patriots p3, 80 Medals) or R-36 Eruptor (Democratic Detonation p2, 60 Medals).
Medium penetration gets through Devastator torsos and Hive Guard heads, where the Liberator's rounds bounce. The PLAS-101 Purifier is the only primary both dated community lists rate S or better on every front, and u.gg puts the Eruptor at S+ on all three.community-tested
Give your sidearm a job
Start: P-2 Peacemaker (free). Cheap upgrade: P-19 Redeemer (Helldivers Mobilize! p2, 5 Medals). Save for: GP-31 Grenade Pistol (Democratic Detonation p3, 60 Medals), P-4 Senator (Steeled Veterans p1, 15 Medals) or LAS-58 Talon (Borderline Justice p2, 40 Medals).
The Grenade Pistol closes bug holes and fabricators, which frees your grenade slot for Thermite; the Senator puts heavy penetration in your holster; the Talon never needs ammo. The GP-31 Grenade Pistol is the only secondary both dated lists rate S or better on every front.community-tested
Thermite as soon as you can
Start: G-12 High Explosive (free). Cheap upgrade: G-16 Impact (Helldivers Mobilize! p5, 20 Medals). Save for: G-123 Thermite (Democratic Detonation p1, 15 Medals).
Thermite is anti-tank in your pocket: it sticks, burns, then blows with anti-tank penetration. The G-123 Thermite is the only throwable u.gg rates S+ on all three fronts, and it comes from Democratic Detonation, the first premium warbond to buy by community consensus (S tier on GamesRadar's warbond list, August 13, 2026, and S+ in a u.gg-based Steam guide, August 19, 2026; see the ranked purchase order).community-tested
An anti-tank answer on every dive
Start: MG-43 Machine Gun (free). Cheap upgrade: EAT-17 Expendable Anti-Tank (Ship Management (PAC), level 3, 3,000 Req). Save for: GR-8 Recoilless Rifle (Ship Management (PAC), level 5, 6,000 Req), AC-8 Autocannon (Ship Management (PAC), level 10, 7,000 Req) or LAS-99 Quasar Cannon (Ship Management (Engineering Bay), level 18, 7,500 Req).
The EAT comes back 70 seconds after each call and needs no backpack; the Quasar never needs ammo. The AC-8 Autocannon is the only support weapon u.gg rates S+ on every front, though GamesRadar rates it B against Terminids and Automatons and C against the Illuminate.community-tested
The base game's support weapons are stratagems: you buy each one with Requisition at your ship's terminal once you reach its level, so they never compete with warbond items for Medals. Only warbond support weapons cost Medals. Support weapons and backpacks has their codes and cooldowns, and the ranked purchase order puts every Medal purchase in order.
1.1In a squad, split the jobs
A squad covers more when each diver takes a different job. Agree on who carries what before the drop (roles and loadout coordination, squad compositions):
- Anti-tank: anti-tank penetration on a short cycle, such as the EAT-17, Recoilless Rifle, Quasar Cannon, Spear or Leveller. The Recoilless reloads much faster when a teammate loads it.
- Crowd control: sustained fire or area damage, such as the Stalwart, MG-43, Grenade Launcher, Belt-Fed Grenade Launcher, Flamethrower or Cremator, and the Airburst against the Illuminate.
- Flexible middle: heavy penetration, with explosive shells on the Autocannon: the Autocannon or the Heavy Machine Gun, and the Anti-Materiel Rifle against Automatons.
- Spawner closing: an explosive with demolition 20 or more, such as the Grenade Pistol, the One-Two, the Eruptor, the Crossbow, most explosive grenades or the Autocannon. Spawner closers lists them all.
The picks and roles are this manual's reading of the numbers on this tab and of the two dated community lists compared in Community tiers: u.gg (read September 26, 2026) and GamesRadar (updated August 14, 2026).
How damage works
Every enemy part has an armor value (AV) and every attack an armor penetration value (AP). Higher AP than AV does full damage, equal AP does 65%, and lower AP bounces off and does nothing at all. That rule decides whether a weapon can hurt a target; damage, durable damage and weak points decide how fast.
2.1The penetration scale
In the game's weapon traits the tiers read AP2 Light, AP3 Medium, AP4 Heavy and AP5 to AP10 Anti-Tank. The tables on this tab follow the wiki and number the anti-tank tiers I to VI (AP5 to AP10); that numbering is the wiki's convention, not in-game text. What each tier adds:
- AP2, Light. Most assault rifles, SMGs and shotguns, the Peacemaker and the Stalwart. Full damage on unarmored and lightly armored parts: most Terminid and Illuminate chaff, and Automaton heads and stomachs.
- AP3, Medium. The Liberator Penetrator, Purifier, Verdict and MG-43. Adds Devastator torsos, Hive Guard heads, Overseer helmets, Gunships and, from difficulty 6, Bile Spewer heads, all at 65%.
- AP4, Heavy. The Eruptor, Senator, Anti-Materiel Rifle, Autocannon, Heavy Machine Gun, Laser Cannon and every fire effect. Hurts the plating of Chargers, Hulks, Bile Titans, Impalers and Harvesters at 65%.
- AP5, Anti-Tank I. The Railgun, Missile Pistol, charged Epoch, Speargun, Giga Grenade and Anti-Tank Seeker. Full damage on that heavy plating; 65% on tank hulls, fabricators, cannon turrets and dropships.
- AP6, Anti-Tank II. The EAT-17, Recoilless Rifle, Quasar Cannon, Commando, Ultimatum and Leveller. Full damage on tank hulls and fabricators.
- AP7, Anti-Tank III. The Spear, Arc Thrower, Thermite, Breacher, C4 Pack and Meltagun. Full damage on Command Bunkers and a Hive Lord's head.
- AP8 to AP10. Orbital barrages (8), the Solo Silo's impact (9), Hellbombs and a hellpod landing on a target (10). Only AP10 touches a Hive Lord's crown or an Illuminate Overship.
Two refinements matter in practice. Weak points are often softer than the body (a Hulk's back heatsink, a tank's turret heatsink, a Charger's rear), so the right answer is frequently a medium-penetration weapon aimed at the vent rather than an anti-tank weapon aimed anywhere. And a round whose AP beats a part's AV by two or more passes through into the next part or enemy, while the breakable plates on Chargers, Bile Titans, Harvesters and Factory Striders need three times their AV to be pierced, so you break the plate first. Penetration also depends on the angle: most weapons keep their full AP until a hit glances off at more than about 80 degrees.approx The least penetration each enemy needs is in Minimum penetration by enemy.
2.2Standard damage and durable damage
Every attack carries two damage numbers, and every enemy part a durability between 0% and 100%. A part takes a blend of the two: all standard damage at 0%, all durable damage at 100%, and a mix in between (standard × (1 − durability) + durable × durability). Big, soft parts such as a Charger's rear or a Bile Titan's belly are highly durable, and explosions always count as fully durable damage.
What that means in a fight: weapons with a high standard number and a low durable one shred small, soft enemies but crawl on big targets (the LAS-12 Sai deals 80 standard and 4 durable, the AR-2 Coyote 75 and 10), while heavy slugs and explosives keep their punch (the AC-8 Autocannon 325 and 260, the APW-1 Anti-Materiel Rifle 450 and 225). The weapon tables list both numbers, as Damage and Durable. Since patch 4.1.0 (October 23, 2025), light-penetration weapons carry a bigger share of durable damage than medium ones, so the two classes have different jobs.
Damage also falls off as a round slows down. Since 4.1.0, SMGs and pistols fire high-drag rounds that make them close-range weapons; lasers, rockets and missiles, and the jet-propelled rounds of the Dominator and the Veto, keep full damage at any range. Explosions do not lose damage with the distance a round has traveled.
2.3Weak points: read a part table
Enemies are built from parts, each with its own armor, health and durability. Damage to a part also drains the enemy's main health, and the enemy dies when main health runs out or a fatal part is destroyed; destroying some parts starts a bleed-out instead. There is no universal headshot bonus against enemies: heads are good targets because they are usually small, fragile and fatal, but some wear armor (Hive Guards, Overseers). Helldivers are different: you take 50% extra damage from a hit to the head.
The Hulk Bruiser shows the whole rule in one small table. Every part but the back heatsink is Heavy armor (AV 4), so a medium-penetration rifle can hurt it only from behind; a heavy-penetration Senator, Anti-Materiel Rifle or Autocannon does 65% to the eye slit; and any anti-tank weapon does full damage anywhere (the first row names the launchers that kill it in one shot).
| Part | Armor | Health | Weak point | Source |
|---|---|---|---|---|
| Main (body pool) | 4 | 1,800 | main pool; EAT-17, LAS-99, GR-8 or FAF-14 Spear one-shots it | wiki |
| Head (eye slit) | 4 | 250 | fatal weak spot | wiki |
| Arms (2) | 4 | 500 | non-fatal; disarms (it then stomps) | wiki |
| Legs (2) | 4 | 500 | non-fatal; one cripples it, both kill it (+500 no-decay bleed) | wiki |
| Back heatsink | 1 | 900 | fatal weak spot from behind (downs it; 650 bleed at 50/s) | wiki |
Every unit's part table sits on its faction tab (Terminid heavies, Automaton heavies, Illuminate heavies), and the penetration ladder sums them up tier by tier.
2.4Explosions
A blast has three zones: an inner radius with full damage and full AP, an outer radius where the damage fades and the AP drops by one (never below AP2), and a shockwave that only staggers. Inner-radius damage reaches through cover; outer-radius damage does not. Explosions count as fully durable damage and can hit several parts at once, which is why launchers, grenades and the Autocannon do so well against big targets, though some parts resist explosions or ignore them.
They hurt you too. A diver has 125 health and takes half damage from explosions and fire; going prone, or being ragdolled, cuts the damage from a blast's outer radius by 90%. Grenade launchers need a few meters to arm, so a point-blank shot can bounce off its target and explode beside you, and the biggest hand-held blasts (the Leveller and the Solo Silo) reach far enough to catch your squad.
2.5Stagger and demolition
Stagger interrupts attacks, including a call for reinforcements. Each hit's stagger force is compared with the target's threshold and never builds up, and every shotgun pellet applies the full value, so one pellet from a Punisher staggers anything up to a Devastator or an Overseer. Thresholds climb from 1 (Scavengers, Pouncers, Voteless) and 10 (Automaton Troopers) through 20 (Warriors, Hive Guards) and 30 (Spewers, Devastators, Berserkers) to 38 (Chargers), 40 (Hulks, Harvesters, War Striders) and 50 (Impalers, Bile Titans). You stagger at 10 yourself and ragdoll at 25.
Demolition force decides whether a hit destroys a structure; armor and damage do not matter. Spawners (bug holes, Automaton fabricators, Illuminate warp-ship doors and gateways) take only explosives through the opening: demolition 20 or more closes one from inside, and 40 or more destroys a bug hole or a Bile Titan's hole from its rim. A Gunship Facility, Gazer Spire or Monolith needs 60, which only Hellbombs and the SEAF Artillery Mini-Nuke reach. Spawner closers lists every weapon that closes spawners; Spawners and structures covers the targets.
2.6Fire, gas, arc and stun
Burns the main health pool
Burning damage goes straight to main health, skipping weak points, and it hits harder on bigger enemies. It still has to get past the main armor, which is why flamethrowers burn Chargers but not tanks. Since patch 6.1.0, direct flame makes small and medium enemies of every faction, and large Terminids, panic and slow down. Robots are slow to ignite, and small Automatons take reduced fire damage (about half, per the wiki).community-tested
Confuses and slows
Gas damages over time and confuses: enemies wander and attack each other. Since patch 6.2.2, confused enemies are also 25% slower. Bile Titans, Impalers and Hive Lords are never confused, Factory Striders are never slowed, and divers take extra gas damage, so stay out of your own cloud.
Jumps from target to target
Arc bolts chain to nearby enemies with a short stun, and they chain to your teammates just as readily. They can ground out on corpses and cover. Fleshmobs take extra arc damage.
Stops an enemy in place
A stun freezes an enemy and interrupts its attack. It comes in four sizes: small (1.5 s, arc weapons), medium (3 s, the Pacifier and Pummeler), large (5 s, the G-23 Stun, Urchin, the Halt's stun shells, Stun Lance and Stun Baton) and massive (10 s, the Stun Pods booster). The G-23 does not affect Tanks, Factory Striders, Impalers or Bile Titans.
How each effect plays on each front is in Fire, gas, arc and stun by front.
2.7Handling, reloads and attachments
Ergonomics (0 to 100) is how quickly your aim follows your camera. Pistols and SMGs sit near the top, most rifles in the middle and heavy weapons near the bottom (the MG-206 Heavy Machine Gun scores 0). Since patch 5.0.0 scopes cost little: 1 point for a 2x sight, 2 for a 4x and 4 for a 10x. Crouching and going prone cut recoil, and the Engineering Kit and Fortified armor passives cut it in every stance, although the in-game text says crouched only (passives by job). Noise: the suppressed AR-59, R-72, M7S and M6C/SOCOM can be heard only within about 12 to 13 m, and enemies who hear them search instead of locking on;approx the P-35 Re-Educator is nearly silent and the K-2 Throwing Knife silent.
- Magazines: reload with a round or two left. A tactical reload is faster than an empty one and keeps the chambered round, but the rest of the dropped magazine is lost.
- Round by round (the Punisher, Slugger, Cookout, Halt, Deadeye, Senator, Evictor and others): top up in every lull; nothing is wasted.
- Heat sinks (the LAS weapons): fire until the sink overheats, then swap. Letting it burn out ejects it automatically, faster than a manual swap, and a holstered sink cools off. Very cold and very hot planets change the cooling.
- No ammo at all: the Blitzer and the Arc Thrower never reload, and the Quasar Cannon charges each shot, then recharges for about 15 seconds.approx
- Backpack-fed (the Recoilless, Autocannon, Spear, Airburst and W.A.S.P.): kneel to reload, or let a teammate load you much faster. Since patch 7.0.0 a team reload works when either of you carries the backpack.
- Expendable (the EAT-17, Expendable Napalm, Leveller, Commando and Bullet Storm): call in, fire, drop. Call them early and keep a stack nearby.
Attachments: at level 10 (Sergeant) you can fit most primaries with optics, muzzles, magazines and underbarrels bought with Requisition, and each weapon levels up with use, to level 25. Short magazines trade capacity for spares (more so since 7.0.0); drums do the reverse. A few primaries take no attachments at all (the StA-52, StA-11, MA5C, M7S, M90A, PLAS-39 Accelerator Rifle and R-2124 Constitution), and the Coyote takes only some. A Resupply box refills a support weapon completely, while single-round secondaries such as the Missile Pistol and the Breacher get just one round back.
2.8Reading the weapon tables
Every comparison table on this tab is generated from one dataset, so the tables always agree with each other. Column by column:
- Penetration: the AP of the weapon's main attack, with any other part noted (a blast, sparks, a charged shot).
- Damage and Durable: standard and durable damage of the main attack: per trigger pull (a shotgun's pellets added up), per second for beams and flames, and the blast itself for launchers and grenades.
- RPM: rounds per minute; a dash for beams, flames, single-shot launchers, charge weapons and throwables.
- Mag and Spares: rounds per magazine and spare magazines; spare rounds for weapons that load one round at a time; shots per sink and spare sinks for heat weapons. For throwables, Mag is the most you can carry.
- Reload (s): the base empty reload in seconds, before armor passives and ship modules.
- Where to get it: the level and Requisition price for base-game support weapons, the warbond page and Medal cost for warbond items, or the Superstore price in Super Credits.
- Source: the wiki page behind the row. The numbers come from the wiki's datamine of the game files (revised September 25, 2026), checked against patch 7.1.1; a row the data grades unverified carries the unverified tag.
Sources: wiki: Damage (penetration, durable damage, explosions; revised September 18, 2026), wiki: Status Effects (stagger, fire, gas, stun), wiki: Demolition, wiki: Combat (handling, reloads), wiki: the tier labels; official notes for 1.001.100 (the 65% rule), 4.1.0 (light versus medium penetration), 6.1.0 (flame panic) and 6.2.2 (gas slow).
Compare every weapon
This chapter is becoming an interactive comparator: filters for slot, minimum penetration, source and the items you own, sorting on every column, and up to four pinned weapons compared side by side. Until then it is the whole armory, all 138 weapons, in one table sorted by slot (primary, secondary, support, throwable), then type and name. Read the Penetration column first (can it hurt the target at all?), then Damage and Durable (how fast?), then the ammo columns; Reading the weapon tables explains each column, and each slot chapter below repeats its own weapons' rows with a verdict on each.
| Weapon | Slot | Type | Penetration | Damage | Durable | RPM | Mag | Spares | Reload (s) | Where to get it | Source |
|---|---|---|---|---|---|---|---|---|---|---|---|
| AR-11 Arbitrator | primary | Assault Rifle | 2 (light) | 70 | 20 | 1,200 | 45 | 7 | 3.75 | Ironclad Democracy p1, 35 Medals | wiki |
| AR-2 Coyote | primary | Assault Rifle | 3 (medium) | 75 | 10 | 600 | 45 | 8 | 3 | Dust Devils p1, 35 Medals | wiki |
| AR-23 Liberator | primary | Assault Rifle | 2 (light) | 90 | 22 | 640 | 45 | 8 | 3 | Starter (free) | wiki |
| AR-23A Liberator Carbine | primary | Assault Rifle | 2 (light) | 90 | 22 | 920 | 45 | 8 | 2.5 | Viper Commandos p1, 20 Medals | wiki |
| AR-23C Liberator Concussive | primary | Assault Rifle | 2 (light) | 75 | 35 | 400 | 60 | 6 | 3.5 | Steeled Veterans p1, 20 Medals | wiki |
| AR-23P Liberator Penetrator | primary | Assault Rifle | 3 (medium) | 65 | 15 | 640 | 45 | 8 | 3 | Helldivers Mobilize! p6, 40 Medals | wiki |
| AR-32 Pacifier | primary | Assault Rifle | 3 (medium) | 55 | 10 | 700 | 40 | 8 | 3 | Force of Law p1, 35 Medals | wiki |
| AR-59 Suppressor | primary | Assault Rifle | 2 (light) | 80 | 20 | 850 | 45 | 8 | 3 | Redacted Regiment p2, 50 Medals | wiki |
| AR-61 Tenderizer | primary | Assault Rifle | 2 (light) | 105 | 30 | 600 | 35 | 7 | 3.33 | Polar Patriots p1, 20 Medals | wiki |
| AR/GL-21 One-Two | primary | Assault Rifle | 2 (light); blast 3 | 95 | 24 | 650 | 40 | 6 | 3.33 | Python Commandos p1, 35 Medals | wiki |
| BR-14 Adjudicator | primary | Assault Rifle | 3 (medium) | 95 | 23 | 550 | 30 | 8 | 3 | Democratic Detonation p1, 20 Medals | wiki |
| MA5C Assault Rifle | primary | Assault Rifle | 3 (medium) | 90 | 16 | 640 | 32 | 8 | 3.15 | Obedient Democracy Support Troopers (Halo: ODST) p1, 35 Medals | wiki |
| StA-52 Assault Rifle | primary | Assault Rifle | 2 (light) | 90 | 22 | 790 | 56 | 6 | 4.2 | Righteous Revenants p1, 35 Medals | wiki |
| ARC-12 Blitzer | primary | Energy | 3 (medium) | 250 | 175 | 45 | -- | -- | -- | Cutting Edge p3, 80 Medals | wiki |
| LAS-12 Sai | primary | Energy | 3 (medium) | 80 | 4 | 800 | 53 | 5 | 2 | Superstore (Ironclad Democracy page), 400 SC | wiki |
| LAS-13 Trident | primary | Energy | 2 (light) | 360 | 36 | 300 | 10 | 3 | 2.9 | Siege Breakers p1, 35 Medals | wiki |
| LAS-16 Sickle | primary | Energy | 2 (light) | 60 | 6 | 750 | 87 | 3 | 2.25 | Cutting Edge p1, 20 Medals | wiki |
| LAS-17 Double-Edge Sickle | primary | Energy | 2 (light) rising to 4 (heavy) with heat | 60 | 6 | 700 | 175 | 3 | 2.83 | Servants of Freedom p1, 35 Medals | wiki |
| LAS-5 Scythe | primary | Energy | 2 (light) | 350 | 70 | -- | -- | 4 | 3 | Helldivers Mobilize! p5, 30 Medals | wiki |
| PLAS-1 Scorcher | primary | Energy | 2 (light); blast 3 | 100 | 50 | 350 | 20 | 5 | 2.5 | Helldivers Mobilize! p10, 75 Medals | wiki |
| PLAS-101 Purifier | primary | Energy | 3 (medium) | 200 | 100 | 1,000 | 15 | 6 | 2.5 | Polar Patriots p3, 80 Medals | wiki |
| PLAS-39 Accelerator Rifle | primary | Energy | 3 (medium) | 250 | 125 | 550 | 9 | 12 | 3.4 | Righteous Revenants p2, 50 Medals | wiki |
| R/40-K Hot-Shot Marksman Rifle | primary | Energy | 3 (medium) | 275 | 40 | 210 | 12 | 7 | 2.9 | Castellan's Creed p1, 35 Medals | wiki |
| SG-8P Punisher Plasma | primary | Energy | 3 (medium) blast | 225 | 225 | 80 | 10 | 8 | 2.5 | Cutting Edge p2, 60 Medals | wiki |
| CB-9 Exploding Crossbow | primary | Explosive | 3 (medium) | 270 | 50 | 50 | 5 | 8 | 3.33 | Democratic Detonation p3, 80 Medals | wiki |
| GL-15 Evictor | primary | Explosive | 3 (medium) blast | 440 | 440 | 60 | 4 | 32 | 2.75 | Ironclad Democracy p3, 65 Medals | wiki |
| R-36 Eruptor | primary | Explosive | 4 (heavy); blast 3 | 230 | 115 | 32 | 5 | 6 | 4.67 | Democratic Detonation p2, 60 Medals | wiki |
| R-2 Amendment | primary | Marksman Rifle | 2 (light) | 200 | 50 | 480 | 20 | 8 | 3.5 | Masters of Ceremony p1, 35 Medals | wiki |
| R-2124 Constitution | primary | Marksman Rifle | 3 (medium) | 180 | 50 | 60 | 5 | 100 | 1.3 | Liberty Day gift to all players (late October 2024; Liberty Day is October 26, wiki.gg says distributed October 27) | wiki |
| R-4 Hyena | primary | Marksman Rifle | 3 (medium) | 220 | 45 | 190 | 15 | 5 | 2.5 | Campaign reward: Celestial Fence (granted 2026-07-13 to participants) | wiki |
| R-6 Deadeye | primary | Marksman Rifle | 3 (medium) | 300 | 100 | 100 | 8 | 60 | 6.4 | Borderline Justice p1, 35 Medals | wiki |
| R-63 Diligence | primary | Marksman Rifle | 2 (light) | 165 | 45 | 350 | 25 | 8 | 2.83 | Helldivers Mobilize! p2, 8 Medals | wiki |
| R-63CS Diligence Counter Sniper | primary | Marksman Rifle | 3 (medium) | 200 | 50 | 350 | 15 | 6 | 3 | Helldivers Mobilize! p7, 40 Medals | wiki |
| R-72 Censor | primary | Marksman Rifle | 2 (light) | 165 | 45 | 400 | 20 | 8 | 2.5 | Redacted Regiment p1, 35 Medals | wiki |
| DBS-2 Double Freedom | primary | Shotgun | 3 (medium) | 840 | 420 | 650 | 2 | 40 | 1.9 | Superstore, 400 SC | wiki |
| M90A Shotgun | primary | Shotgun | 2 (light) | 605 | 220 | 80 | 6 | 44 | 3.6 | Obedient Democracy Support Troopers (Halo: ODST) p3, 65 Medals | wiki |
| SG-20 Halt | primary | Shotgun | 3 (medium) | 385 | 110 | 80 | 16 | 60 | 3.7 | Truth Enforcers p1, 20 Medals | wiki |
| SG-225 Breaker | primary | Shotgun | 2 (light) | 330 | 66 | 300 | 16 | 7 | 2.5 | Helldivers Mobilize! p4, 20 Medals | wiki |
| SG-225IE Breaker Incendiary | primary | Shotgun | 2 (light) | 240 | 120 | 300 | 26 | 4 | 3 | Steeled Veterans p2, 60 Medals | wiki |
| SG-225SP Breaker Spray&Pray | primary | Shotgun | 2 (light) | 240 | 64 | 330 | 26 | 8 | 3 | Helldivers Mobilize! p9, 60 Medals | wiki |
| SG-451 Cookout | primary | Shotgun | 2 (light) | 320 | 60 | 80 | 16 | 60 | 6.45 | Freedom's Flame p1, 20 Medals | wiki |
| SG-8 Punisher | primary | Shotgun | 2 (light) | 405 | 108 | 80 | 16 | 60 | 6.45 | Helldivers Mobilize! p1, 4 Medals | wiki |
| SG-8S Slugger | primary | Shotgun | 3 (medium) | 330 | 90 | 80 | 16 | 60 | 6.45 | Helldivers Mobilize! p8, 60 Medals | wiki |
| SG-97 Sweeper | primary | Shotgun | 3 (medium) | 504 | 132 | 150 | 7 | 70 | 4 | Superstore, 400 SC | wiki |
| M7S SMG | primary | SMG | 2 (light) | 90 | 18 | 872 | 48 | 7 | 3 | Obedient Democracy Support Troopers (Halo: ODST) p2, 50 Medals | wiki |
| MP-98 Knight | primary | SMG | 2 (light) | 90 | 18 | 1,380 | 50 | 7 | 2.5 | Super Citizen Edition (paid upgrade) | wiki |
| SMG-203 Gallant | primary | SMG | 3 (medium) | 65 | 13 | 1,380 | 50 | 7 | 2.5 | Exo Experts p1, 35 Medals | wiki |
| SMG-32 Reprimand | primary | SMG | 3 (medium) | 140 | 32 | 490 | 25 | 9 | 3.55 | Truth Enforcers p2, 40 Medals | wiki |
| SMG-37 Defender | primary | SMG | 2 (light) | 110 | 22 | 520 | 45 | 7 | 2.8 | Helldivers Mobilize! p3, 15 Medals | wiki |
| SMG-72 Pummeler | primary | SMG | 2 (light) | 85 | 17 | 475 | 45 | 7 | 2.8 | Polar Patriots p2, 60 Medals | wiki |
| SMG/FLAM-34 Stoker | primary | SMG | 2 (light) | 130 | 30 | 420 | 45 | 5 | 2.8 | Entrenched Division p1, 35 Medals | wiki |
| StA-11 SMG | primary | SMG | 2 (light) | 90 | 18 | 1,050 | 48 | 7 | 2.6 | Righteous Revenants p3, 65 Medals | wiki |
| FLAM-66 Torcher | primary | Special | 4 (heavy) | 150 | 150 | -- | 100 | 6 | 3.25 | Freedom's Flame p2, 40 Medals | wiki |
| JAR-5 Dominator | primary | Special | 3 (medium) | 275 | 90 | 250 | 15 | 6 | 3.8 | Steeled Veterans p3, 80 Medals | wiki |
| VG-70 Variable | primary | Special | 2 (light) | 85 | 23 | 550 | 49 | 7 | 3.58 | Control Group p1, 35 Medals | wiki |
| CQC-19 Stun Lance | secondary | Melee | 3 (medium) | 165 | 83 | -- | -- | -- | -- | Urban Legends p1, 30 Medals | wiki |
| CQC-2 Saber | secondary | Melee | 3 (medium) | 188 | 98 | 150 | -- | -- | -- | Masters of Ceremony p2, 40 Medals | wiki |
| CQC-30 Stun Baton | secondary | Melee | 3 (medium) | 120 | 60 | -- | -- | -- | -- | Superstore, 200 SC | wiki |
| CQC-42 Machete | secondary | Melee | 3 (medium) | 300 | 150 | 72 | -- | -- | -- | Superstore, 200 SC | wiki |
| CQC-5 Combat Hatchet | secondary | Melee | 3 (medium) | 240 | 120 | 100 | -- | -- | -- | Superstore, 200 SC | wiki |
| CQC-73 Entrenchment Tool | secondary | Melee | 3 (medium) | 165 | 83 | 150 | -- | -- | -- | Entrenched Division p1, 20 Medals | wiki |
| M6C/SOCOM Pistol | secondary | Pistol | 2 (light) | 125 | 28 | 900 | 12 | 10 | 1.5 | Obedient Democracy Support Troopers (Halo: ODST) p3, 75 Medals | wiki |
| P-113 Verdict | secondary | Pistol | 3 (medium) | 140 | 32 | 450 | 10 | 10 | 2 | Polar Patriots p3, 60 Medals | wiki |
| P-19 Redeemer | secondary | Pistol | 2 (light) | 70 | 12 | 1,100 | 31 | 6 | 2.15 | Helldivers Mobilize! p2, 5 Medals | wiki |
| P-2 Peacemaker | secondary | Pistol | 2 (light) | 100 | 32 | 900 | 15 | 8 | 1.8 | Starter (free) | wiki |
| P-4 Senator | secondary | Pistol | 4 (heavy) | 225 | 75 | 200 | 6 | 40 | 2.3 | Steeled Veterans p1, 15 Medals | wiki |
| P-69 Veto | secondary | Pistol | 3 (medium) | 105 | 35 | 750 | 12 | 90 | 3.3 | Entrenched Division p3, 65 Medals | wiki |
| P-92 Warrant | secondary | Pistol | 3 (medium) | 80 | 20 | 450 | 13 | 7 | 2 | Superstore, 300 SC | wiki |
| GP-20 Ultimatum | secondary | Special | 6 (anti-tank II) blast | 2,000 | 2,000 | -- | 1 | 1 | 3 | Servants of Freedom p2, 40 Medals | wiki |
| GP-31 Grenade Pistol | secondary | Special | 3 (medium) | 250 | 250 | -- | 1 | 6 | 1.72 | Democratic Detonation p3, 60 Medals | wiki |
| LAS-58 Talon | secondary | Special | 3 (medium) | 200 | 20 | 750 | 7 | 3 | 2.4 | Borderline Justice p2, 40 Medals | wiki |
| LAS-7 Dagger | secondary | Special | 2 (light) | 250 | 50 | -- | -- | 3 | 2 | Cutting Edge p3, 60 Medals | wiki |
| P-11 Stim Pistol | secondary | Special | -- (heals, no damage) | 0 | 0 | 70 | 6 | 24 | -- | Chemical Agents p3, 80 Medals | wiki |
| P-33 Missile Pistol | secondary | Special | 5 (anti-tank I); blast 3 | 1,000 | 1,000 | -- | 1 | 3 | 2.7 | Exo Experts p2, 50 Medals | wiki |
| P-34 Breacher | secondary | Special | 7 (anti-tank III) sticky charge | 2,000 | 2,000 | -- | 1 | 2 | 2.68 | Ironclad Democracy p2, 50 Medals | wiki |
| P-35 Re-Educator | secondary | Special | 4 (heavy) | 60 | 10 | 110 | 6 | 2 | 3 | Redacted Regiment p1, 20 Medals | wiki |
| P-72 Crisper | secondary | Special | 4 (heavy) | 150 | 150 | -- | 50 | 4 | 2.35 | Freedom's Flame p3, 45 Medals | wiki |
| P/40-K Bolt Pistol | secondary | Special | 4 (heavy); blast 3 | 325 | 115 | 150 | 6 | 4 | 2.45 | Castellan's Creed p2, 50 Medals | wiki |
| PLAS-15 Loyalist | secondary | Special | 3 (medium) | 150 | 75 | 1,000 | 8 | 5 | 1.9 | Truth Enforcers p3, 45 Medals | wiki |
| SG-22 Bushwhacker | secondary | Special | 2 (light) | 405 | 108 | 650 | 3 | 30 | 1.75 | Viper Commandos p2, 50 Medals | wiki |
| APW-1 Anti-Materiel Rifle | support | Anti-materiel rifle | 4 (heavy) | 450 | 225 | 400 | 7 | 8 | 3.05 | Ship Management (PAC), level 1, 5,000 Req | wiki |
| FAF-14 Spear | support | Anti-tank (backpack) | 7 (anti-tank III); blast 3 | 4,000 | 4,000 | -- | 1 | 4 | 4.65 | Ship Management (PAC), level 20, 9,000 Req | wiki |
| GR-8 Recoilless Rifle | support | Anti-tank (backpack) | 6 (anti-tank II) HEAT; HE shell 5, HE blast 4 | 3,200 | 3,200 | -- | 1 | 5 | 6.1 | Ship Management (PAC), level 5, 6,000 Req | wiki |
| LAS-99 Quasar Cannon | support | Anti-tank (energy) | 6 (anti-tank II); blast 3 | 2,000 | 2,000 | -- | -- | -- | -- | Ship Management (Engineering Bay), level 18, 7,500 Req | wiki |
| EAT-17 Expendable Anti-Tank | support | Anti-tank (expendable) | 6 (anti-tank II); blast 3 | 2,000 | 2,000 | -- | 1 | -- | -- | Ship Management (PAC), level 3, 3,000 Req | wiki |
| EAT-411 Leveller | support | Anti-tank (expendable) | 6 (anti-tank II) | 2,500 | 2,500 | -- | 1 | -- | -- | Siege Breakers p2, 85 Medals | wiki |
| MLS-4X Commando | support | Anti-tank (expendable) | 6 (anti-tank II); blast 3 | 1,100 | 1,100 | 240 | 4 | -- | -- | Ship Management (PAC), level 15, 8,000 Req | wiki |
| RS-422 Railgun | support | Anti-tank (railgun) | 5 (anti-tank I) | 600 | 225 | -- | 1 | 20 | 1.35 | Ship Management (PAC), level 20, 10,000 Req | wiki |
| MS-11 Solo Silo | support | Anti-tank (silo) | 7 (anti-tank III); impact 9 (anti-tank V) | 2,500 | 2,500 | -- | 1 | -- | -- | Dust Devils p3, 110 Medals | wiki |
| AC-8 Autocannon | support | Autocannon (backpack) | 4 (heavy); blast 3 | 325 | 260 | 190 | 10 | 10 | 4.5 | Ship Management (PAC), level 10, 7,000 Req | wiki |
| CQC-72 Entrenchment Tool | support | Civilian find | 3 (medium) | 165 | 83 | 150 | -- | -- | -- | Found on the map only (graves, bunkers); cannot be called in | wiki |
| SG-88 Break-Action Shotgun | support | Civilian find | 2 (light) | 585 | 117 | 600 | 2 | 40 | 1.55 | Found on the map only (graves, houses); cannot be called in | wiki |
| B/MD C4 Pack | support | Demolition (backpack) | 7 (anti-tank III) | 2,000 | 2,000 | -- | 1 | 6 | 1.1 | Redacted Regiment p3, 110 Medals | wiki |
| ARC-3 Arc Thrower | support | Energy arc | 7 (anti-tank III) | 250 | 100 | 60 | -- | -- | -- | Ship Management (Engineering Bay), level 15, 7,000 Req | wiki |
| LAS-98 Laser Cannon | support | Energy beam | 4 (heavy) | 350 | 200 | -- | -- | 2 | 3.65 | Ship Management (Engineering Bay), level 5, 4,000 Req | wiki |
| 40-K Meltagun | support | Energy melta | 7 (anti-tank III) | 2,600 | 2,600 | -- | 3 | 4 | 3.75 | Castellan's Creed p3, 110 Medals | wiki |
| PLAS-45 Epoch | support | Energy plasma | 5 (anti-tank I) | 800 | 400 | -- | 3 | 4 | 5.15 | Control Group p1, 75 Medals | wiki |
| FLAM-40 Flamethrower | support | Flame | 4 (heavy) | 150 | 150 | -- | 150 | 5 | 4 | Ship Management (PAC), level 10, 6,000 Req | wiki |
| B/FLAM-80 Cremator | support | Flame (backpack) | 4 (heavy) | 225 | 225 | -- | 500 | -- | -- | Entrenched Division p3, 110 Medals | wiki |
| TX-41 Sterilizer | support | Gas | 5 (anti-tank I) | 30 | 30 | -- | 125 | 4 | 4 | Chemical Agents p2, 85 Medals | wiki |
| GL-21 Grenade Launcher | support | Grenade launcher | 3 (medium) blast | 400 | 400 | 160 | 10 | 3 | 3.55 | Ship Management (Engineering Bay), level 5, 6,000 Req | wiki |
| GL-52 De-Escalator | support | Grenade launcher (arc) | 4 (heavy) per arc | 100 | 70 | 200 | 6 | 40 | 5.5 | Force of Law p2, 85 Medals | wiki |
| GL-28 Belt-Fed Grenade Launcher | support | Grenade launcher (backpack) | 4 (heavy) blast | 150 | 150 | 320 | 120 | -- | -- | Siege Breakers p3, 110 Medals | wiki |
| EAT-700 Expendable Napalm | support | Incendiary (expendable) | 3 (medium) rocket; napalm blast 6 | 500 | 500 | -- | 1 | -- | -- | Dust Devils p2, 85 Medals | wiki |
| M-105 Stalwart | support | Machine gun | 2 (light) | 90 | 22 | 850 | 250 | 3 | 5.9 | Ship Management (PAC), level 1, 3,500 Req | wiki |
| MG-206 Heavy Machine Gun | support | Machine gun | 4 (heavy) | 150 | 35 | 600 | 100 | 2 | 5.55 | Ship Management (PAC), level 12, 6,000 Req | wiki |
| MG-43 Machine Gun | support | Machine gun | 3 (medium) | 90 | 23 | 760 | 175 | 3 | 4.55 | Ship Management (PAC), level 1, free | wiki |
| M-1000 Maxigun | support | Machine gun (backpack) | 3 (medium) | 80 | 18 | 1,500 | 1,000 | -- | -- | Python Commandos p3, 110 Medals | wiki |
| MGX-42 Bullet Storm | support | Machine gun (expendable) | 2 (light) | 100 | 25 | 1,300 | 300 | -- | -- | Exo Experts p1, 75 Medals | wiki |
| CQC-1 One True Flag | support | Melee | 3 (medium) | 200 | 100 | 117 | -- | -- | -- | Masters of Ceremony p3, 110 Medals | wiki |
| CQC-20 Breaching Hammer | support | Melee (breaching charge) | 6 (anti-tank II) charge; hammer 3 | 2,200 | 2,200 | -- | 1 | 7 | 1 | Siege Breakers p1, 75 Medals | wiki |
| CQC-9 Defoliation Tool | support | Melee (chainsaw) | 3 (medium) rising to 5 on sustained contact | 450 | 225 | -- | -- | -- | -- | Python Commandos p2, 85 Medals | wiki |
| StA-X3 W.A.S.P. Launcher | support | Missile launcher (backpack) | 6 (anti-tank II); blast 3 | 200 | 200 | 500 | 7 | 5 | 4.9 | Ship Management (PAC), level 20, 12,000 Req | wiki |
| RL-77 Airburst Rocket Launcher | support | Rocket launcher (backpack) | 3 (medium) | 350 | 350 | -- | 1 | 5 | 5.1 | Ship Management (PAC), level 15, 8,000 Req | wiki |
| S-11 Speargun | support | Speargun | 5 (anti-tank I) spear; gas burst 6 | 650 | 275 | -- | 1 | 12 | 2.5 | Dust Devils p2, 85 Medals | wiki |
| G-109 Urchin | throwable | Special | 6 (anti-tank II) | 0 | 0 | -- | 5 | -- | -- | Force of Law p3, 65 Medals | wiki |
| G-123 Thermite | throwable | Special | 7 (anti-tank III) | 2,000 | 2,000 | -- | 3 | -- | -- | Democratic Detonation p1, 15 Medals | wiki |
| G-13 Incendiary Impact | throwable | Special | 3 (medium) | 150 | 150 | -- | 5 | -- | -- | Polar Patriots p2, 25 Medals | wiki |
| G-142 Pyrotech | throwable | Special | 3 (medium) blast; sparks 7 | 50 | 50 | -- | 6 | -- | -- | Masters of Ceremony p3, 65 Medals | wiki |
| G-16 Impact | throwable | Special | 4 (heavy) | 400 | 400 | -- | 5 | -- | -- | Helldivers Mobilize! p5, 20 Medals | wiki |
| G-23 Stun | throwable | Special | 6 (anti-tank II) | 0 | 0 | -- | 5 | -- | -- | Cutting Edge p2, 25 Medals | wiki |
| G-3 Smoke | throwable | Special | -- | 0 | -- | -- | 5 | -- | -- | Helldivers Mobilize! p8, 25 Medals | wiki |
| G-31 Arc | throwable | Special | 4 (heavy) per arc | 100 | 70 | -- | 5 | -- | -- | Control Group p3, 65 Medals | wiki |
| G-4 Gas | throwable | Special | 6 (anti-tank II) | 3 | 3 | -- | 4 | -- | -- | Chemical Agents p1, 30 Medals | wiki |
| G-48 Giga Grenade | throwable | Special | 5 (anti-tank I) | 2,000 | 2,000 | -- | 2 | -- | -- | Entrenched Division p2, 50 Medals | wiki |
| G-50 Seeker | throwable | Special | 4 (heavy) | 500 | 500 | -- | 5 | -- | -- | Servants of Freedom p3, 65 Medals | wiki |
| G-60 Anti-Tank Seeker | throwable | Special | 5 (anti-tank I) | 1,800 | 1,800 | -- | 3 | -- | -- | Ironclad Democracy p3, 65 Medals | wiki |
| G-8 Immolation | throwable | Special | 4 (heavy) fire pool; blast 0 | 20 | 20 | -- | 6 | -- | -- | Ironclad Democracy p1, 35 Medals | wiki |
| G-89 Smokescreen | throwable | Special | -- | 0 | -- | -- | 5 | -- | -- | Superstore, 300 SC | wiki |
| G/40-K Melta Mine | throwable | Special | 7 (anti-tank III) | 2,000 | 2,000 | -- | 4 | -- | -- | Castellan's Creed p2, 50 Medals | wiki |
| G/SH-39 Shield | throwable | Special | -- | 0 | -- | -- | 4 | -- | -- | Siege Breakers p3, 65 Medals | wiki |
| K-2 Throwing Knife | throwable | Special | 3 (medium) | 300 | 150 | -- | 20 | -- | -- | Viper Commandos p3, 60 Medals | wiki |
| TM-1 Lure Mine | throwable | Special | 5 (anti-tank I) | 1,000 | 1,000 | -- | 4 | -- | -- | Redacted Regiment p3, 65 Medals | wiki |
| G-10 Incendiary | throwable | Standard | 3 (medium) | 300 | 300 | -- | 5 | -- | -- | Steeled Veterans p2, 25 Medals | wiki |
| G-12 High Explosive | throwable | Standard | 4 (heavy) | 800 | 800 | -- | 5 | -- | -- | Starter (free) | wiki |
| G-6 Frag | throwable | Standard | 3 (medium) | 500 | 500 | -- | 6 | -- | -- | Helldivers Mobilize! p1, 2 Medals | wiki |
| G-7 Pineapple | throwable | Standard | 3 (medium) | 300 | 300 | -- | 5 | -- | -- | Dust Devils p3, 65 Medals | wiki |
| TED-63 Dynamite | throwable | Standard | 4 (heavy) | 1,000 | 1,000 | -- | 4 | -- | -- | Borderline Justice p3, 65 Medals | wiki |
Primaries
Your primary clears chaff and handles medium armor; it almost never kills heavies. Start with the Liberator, move to medium penetration (the Liberator Penetrator or the Scorcher from the free warbond) once Devastators and Hive Guards show up, and save for the Purifier or the Eruptor, the two primaries u.gg rates S+ on every front.
Only the Eruptor and the Torcher hit with heavy penetration as their main attack; the Stoker's underbarrel flamer and the Double-Edge Sickle at high heat reach it too. The Eruptor, the Crossbow, the Evictor and the One-Two's underbarrel grenade close spawners by themselves, and most SMGs are one-handed (Special jobs). Each line reads best at, bad at, then u.gg's tier letters against Automatons / Terminids / Illuminate, from its primary list read September 26, 2026 and updated for patch 7.1.1.community-tested
4.1Assault rifles
The all-rounders. The Liberator family carries the early game; move to a medium-penetration rifle (the Penetrator, Adjudicator or Coyote) before Devastators and Hive Guards arrive in numbers.
- AR-23 Liberator · best at all-round work early on: Terminid chaff and Voteless, accurate at mid range · bad at medium armor, where its light rounds bounce off Devastator torsos and Hive Guard heads · u.gg B / A / A
- AR-23P Liberator Penetrator · best at Automaton infantry and Hive Guards: full damage through light armor, partial damage on medium · bad at unarmored targets, which it hits softer than the plain Liberator · u.gg B / A / B
- AR-23C Liberator Concussive · best at stagger-locking Berserkers, Stalkers and Overseers for your squad · bad at killing anything: low damage at a slow rate of fire · u.gg D / D / D
- BR-14 Adjudicator · best at Devastators and Hive Guards through medium armor at range · bad at swarms: a small magazine and heavy recoil · u.gg B / A / B
- AR-61 Tenderizer · best at unarmored and lightly armored targets (bugs, Voteless, Trooper heads), with the hardest-hitting rounds of the assault rifles · bad at medium armor; no extended magazines · u.gg B / A / A
- AR-23A Liberator Carbine · best at close-to-mid bug fights: the fastest-firing Liberator · bad at long bursts (recoil on full auto) and medium armor · u.gg B / A / A
- StA-52 Assault Rifle · best at sustained fire on Voteless and light bugs from its drum · bad at range (iron sights only) and medium armor; its empty reload is slow · u.gg C / B / A
- AR-32 Pacifier · best at stunning Stalkers, Hunters and Overseers so a teammate can finish them · bad at raw damage: the lowest per round of the assault rifles · u.gg B / A / C
- MA5C Assault Rifle · best at medium armor at mid range, sitting between the Penetrator and the Adjudicator · bad at big targets (low durable damage); a small magazine · u.gg C / A / A
- AR-2 Coyote · best at bugs and the Illuminate: medium penetration that sets everything it hits on fire · bad at small Automatons, which take reduced fire damage; low durable damage · u.gg A / S+ / S+
- AR/GL-21 One-Two · best at closing bug holes and fabricators with its underbarrel grenade, which frees your grenade slot · bad at quick aiming (poor handling) · u.gg B / A / B
- AR-59 Suppressor · best at stealth and Commando missions: quiet head shots on Troopers · bad at range (slow rounds) and medium armor · u.gg B / B / B
- AR-11 Arbitratornew · best at burst-fire chaff clearing, with an underslung medium-penetration shotgun as backup · bad at sustained fire (the spread widens fast) and quick aiming · u.gg A / S / S
4.2Marksman rifles
The bot front's rifles: small heads at range decide Automaton fights, so these rate far higher there than against bugs.
- R-63 Diligence · best at Automaton infantry at range: one head shot drops a Devastator · bad at Terminid swarms and medium armor · u.gg S / C / A
- R-63CS Diligence Counter Sniper · best at bots at range with medium penetration: Devastator bodies, Scout Strider joints, Gunship engines · bad at close quarters and bug hordes · u.gg A / C / B
- R-2124 Constitution · best at challenge runs: a bolt-action rifle with medium-penetration shots and a bayonet · bad at sustained damage, the lowest of any primary · u.gg D / D / D
- R-6 Deadeye · best at one-shotting Overseers and Devastators and stunning mediums · bad at reloading: a very slow full reload into a small tube · u.gg C / C / B
- R-2 Amendment · best at big hits on unarmored mediums, with a burst mode up close · bad at medium armor: it bounces off Devastator torsos and Hive Guard heads · u.gg A / C / A
- R-72 Censor · best at silent picks on Automaton infantry (Troopers, Commissars) · bad at medium armor; slow rounds · u.gg S / C / A
- R-4 Hyena · best at one-shotting light enemies and setting them alight at range · bad at long fights (a small ammo pool, strong vertical recoil); so far only divers who took part in the Celestial Fence campaign have it · u.gg A / B / B
4.3Submachine guns
Close-range guns since patch 4.1.0 gave them high-drag rounds. Most are one-handed, so they pair with a Ballistic Shield or an objective in your other hand.
- MP-98 Knight · best at point-blank damage on bugs and Voteless, one-handed · bad at range (the damage falls off fast) and ammo economy; it comes with the Super Citizen Edition · u.gg B / A / A
- SMG-37 Defender · best at fighting behind a Ballistic Shield: controllable close fire · bad at range and medium armor · u.gg C / C / B
- SMG-72 Pummeler · best at stunning Chargers and Stalkers up close · bad at killing (low damage), and it can't stun Bile Titans or turrets · u.gg D / C / C
- SMG-32 Reprimand · best at medium armor up close: Hive Guards, Devastators, Overseers · bad at long fights (a small magazine, a slow empty reload); unlike most SMGs it isn't one-handed · u.gg B / A / A
- StA-11 SMG · best at shredding bugs and Voteless up close · bad at range and medium armor · u.gg C / B / A
- M7S SMG · best at quiet close-quarters stealth · bad at medium armor, and it has no laser sight · u.gg C / B / B
- SMG/FLAM-34 Stoker · best at Voteless and Fleshmobs: ignite them with the underbarrel flamer, then shoot · bad at Automatons (reduced fire damage on small bots); few spare magazines · u.gg B / A / S
- SMG-203 Gallant · best at medium armor up close, at SMG fire rates · bad at ammo economy: low damage per round at a high rate of fire · u.gg B / S / S
4.4Shotguns
Close-range crowd killers for bugs and Voteless. Every pellet carries the full stagger value, which makes the pump shotguns great at interrupting.
- SG-8 Punisher · best at staggering bugs (Stalkers, Hunters) up close; one of the first buys in the free warbond · bad at range and medium armor · u.gg C / A / C
- SG-225 Breaker · best at burst damage on bug and Voteless crowds · bad at ammo economy; low stagger · u.gg C / A / A
- SG-8S Slugger · best at Hive Guard heads and Devastator torsos at mid range with a medium-penetration slug · bad at reloading (shell by shell) and long range (high drag) · u.gg D / B / D
- SG-225SP Breaker Spray&Pray · best at clearing tiny targets (Scavengers, Voteless) · bad at anything bigger than a Brood Commander; almost no stagger · u.gg C / C / B
- SG-225IE Breaker Incendiary · best at setting bug crowds on fire · bad at Chargers and Bile Titans (fire only drains main health); few spare drums · u.gg C / A / A
- SG-451 Cookout · best at igniting and staggering small bugs and Voteless · bad at single-target damage · u.gg C / A / B
- SG-20 Halt · best at stun, then kill: its stun shells halt Commanders and Overseers · bad at range: the spread opens wide past close quarters · u.gg B / A / B
- DBS-2 Double Freedom · best at point-blank bursts on heavy weak spots (a Charger's rear, a Hulk's vent) · bad at crowds: two shells, then a reload · u.gg A / S / A
- M90A Shotgun · best at big single hits on unarmored targets; warp-ship shields · bad at medium armor, and its tube is small · u.gg D / B / C
- SG-97 Sweeper · best at fast medium-penetration shotgun damage on bugs and the Illuminate (hold the trigger to slam-fire) · bad at staggering: low stagger for a pump shotgun · u.gg A / S / S
4.5Explosive weapons
The primaries that do a support weapon's jobs: they close spawners and reach the weak spots of heavies, at the cost of ammo and fire rate.
- R-36 Eruptor · best at closing holes and fabricators, one-shotting mediums, and Hulk and Charger weak spots · bad at sustained fights (a small ammo pool, the slowest fire of any primary) and point blank, where its blast hurts you · u.gg S+ / S+ / S+
- CB-9 Exploding Crossbow · best at closing spawners and splashing packed mediums, one-handed · bad at range: the bolt is slow and drops · u.gg S+ / S+ / S
- GL-15 Evictornew · best at bug patrols and spawners; hurting Hulks from range · bad at sustained fire: a small tube and slow cycling · u.gg S / A / A
4.6Energy weapons
Heat sinks, charged shots and plasma blasts. Several never need an ammo pickup; the plasma guns' blasts hurt you at point blank.
- LAS-5 Scythe · best at endless work on Voteless and Fleshmobs and igniting at range, with no ammo if you manage the heat · bad at armored targets (slow) and staggering (it has none) · u.gg A / A / A
- PLAS-1 Scorcher · best at everything medium (Devastators, Gunship engines, Hive Guards): its bolt is light but its blast is medium penetration · bad at point blank, where the blast hurts you · u.gg S / S / S
- LAS-16 Sickle · best at sustained fire without ammo pickups · bad at big targets (very low durable damage) and medium armor · u.gg B / B / B
- SG-8P Punisher Plasma · best at staggering groups of Devastators and Berserkers; the Jet Brigade · bad at point blank (it kills you) and range (an arcing shot) · u.gg S+ / S / S+
- ARC-12 Blitzer · best at bugs: stun-locking Hive Guards and Stalkers with no ammo to manage · bad at Automatons at range; its arcs can ground on corpses · u.gg D / S / A
- PLAS-101 Purifier · best at everything: u.gg and GamesRadar (August 14, 2026) both rate it S or better on every front · bad at moving while it charges (it slows you); tap-firing wastes ammo · u.gg S+ / S+ / S+
- PLAS-39 Accelerator Rifle · best at long-range bursts into the weak spots of mediums and heavies · bad at sustained fire: a small magazine and frequent reloads · u.gg A / B / A
- LAS-17 Double-Edge Sickle · best at long sustained fire that reaches heavy penetration as it heats up · bad at long bursts: at high heat it burns you · u.gg A / A / A
- LAS-13 Trident · best at clearing close crowds without ammo pickups · bad at precision (an unpredictable spread) and medium armor · u.gg A / A / A
- R/40-K Hot-Shot Marksman Rifle · best at lines of Voteless (it cleaves through light targets) and big hits at range · bad at long fights (a small power cell) and big targets (low durable damage) · u.gg B / D / C
- LAS-12 Sainew · best at medium armor up close with no ammo pickups, one-handed · bad at range (a shotgun-like spread) and big targets (very low durable damage) · u.gg S / S / S
4.7Special weapons
Three that fit nowhere else.
- JAR-5 Dominator · best at stagger-killing Devastators, Berserkers and Stalkers with jet-propelled rounds · bad at quick follow-ups: heavy recoil and slow handling · u.gg A / A / A
- FLAM-66 Torcher · best at Illuminate hordes and Fleshmobs, and Chargers through heavy-penetration flame · bad at Automatons (reduced fire damage on small bots) and anything beyond short range · u.gg C / B / S
- VG-70 Variable · best at burst damage on tough mediums (Commander heads, Spewer mouths) with its volley modes · bad at quick aiming (very poor handling) and medium armor · u.gg A / A / A
4.8Every primary by the numbers
Sorted by type, then name. Check the Penetration column against your front first: against Automatons, a 3 (medium) or better gets through Devastator torsos. High Durable numbers (the Eruptor, Purifier, Punisher Plasma, Evictor) keep their damage on big targets, and a small Mag (the Eruptor, Crossbow, Double Freedom) means you pick your shots.
| Weapon | Type | Penetration | Damage | Durable | RPM | Mag | Spares | Reload (s) | Where to get it | Source |
|---|---|---|---|---|---|---|---|---|---|---|
| AR-11 Arbitrator | Assault Rifle | 2 (light) | 70 | 20 | 1,200 | 45 | 7 | 3.75 | Ironclad Democracy p1, 35 Medals | wiki |
| AR-2 Coyote | Assault Rifle | 3 (medium) | 75 | 10 | 600 | 45 | 8 | 3 | Dust Devils p1, 35 Medals | wiki |
| AR-23 Liberator | Assault Rifle | 2 (light) | 90 | 22 | 640 | 45 | 8 | 3 | Starter (free) | wiki |
| AR-23A Liberator Carbine | Assault Rifle | 2 (light) | 90 | 22 | 920 | 45 | 8 | 2.5 | Viper Commandos p1, 20 Medals | wiki |
| AR-23C Liberator Concussive | Assault Rifle | 2 (light) | 75 | 35 | 400 | 60 | 6 | 3.5 | Steeled Veterans p1, 20 Medals | wiki |
| AR-23P Liberator Penetrator | Assault Rifle | 3 (medium) | 65 | 15 | 640 | 45 | 8 | 3 | Helldivers Mobilize! p6, 40 Medals | wiki |
| AR-32 Pacifier | Assault Rifle | 3 (medium) | 55 | 10 | 700 | 40 | 8 | 3 | Force of Law p1, 35 Medals | wiki |
| AR-59 Suppressor | Assault Rifle | 2 (light) | 80 | 20 | 850 | 45 | 8 | 3 | Redacted Regiment p2, 50 Medals | wiki |
| AR-61 Tenderizer | Assault Rifle | 2 (light) | 105 | 30 | 600 | 35 | 7 | 3.33 | Polar Patriots p1, 20 Medals | wiki |
| AR/GL-21 One-Two | Assault Rifle | 2 (light); blast 3 | 95 | 24 | 650 | 40 | 6 | 3.33 | Python Commandos p1, 35 Medals | wiki |
| BR-14 Adjudicator | Assault Rifle | 3 (medium) | 95 | 23 | 550 | 30 | 8 | 3 | Democratic Detonation p1, 20 Medals | wiki |
| MA5C Assault Rifle | Assault Rifle | 3 (medium) | 90 | 16 | 640 | 32 | 8 | 3.15 | Obedient Democracy Support Troopers (Halo: ODST) p1, 35 Medals | wiki |
| StA-52 Assault Rifle | Assault Rifle | 2 (light) | 90 | 22 | 790 | 56 | 6 | 4.2 | Righteous Revenants p1, 35 Medals | wiki |
| ARC-12 Blitzer | Energy | 3 (medium) | 250 | 175 | 45 | -- | -- | -- | Cutting Edge p3, 80 Medals | wiki |
| LAS-12 Sai | Energy | 3 (medium) | 80 | 4 | 800 | 53 | 5 | 2 | Superstore (Ironclad Democracy page), 400 SC | wiki |
| LAS-13 Trident | Energy | 2 (light) | 360 | 36 | 300 | 10 | 3 | 2.9 | Siege Breakers p1, 35 Medals | wiki |
| LAS-16 Sickle | Energy | 2 (light) | 60 | 6 | 750 | 87 | 3 | 2.25 | Cutting Edge p1, 20 Medals | wiki |
| LAS-17 Double-Edge Sickle | Energy | 2 (light) rising to 4 (heavy) with heat | 60 | 6 | 700 | 175 | 3 | 2.83 | Servants of Freedom p1, 35 Medals | wiki |
| LAS-5 Scythe | Energy | 2 (light) | 350 | 70 | -- | -- | 4 | 3 | Helldivers Mobilize! p5, 30 Medals | wiki |
| PLAS-1 Scorcher | Energy | 2 (light); blast 3 | 100 | 50 | 350 | 20 | 5 | 2.5 | Helldivers Mobilize! p10, 75 Medals | wiki |
| PLAS-101 Purifier | Energy | 3 (medium) | 200 | 100 | 1,000 | 15 | 6 | 2.5 | Polar Patriots p3, 80 Medals | wiki |
| PLAS-39 Accelerator Rifle | Energy | 3 (medium) | 250 | 125 | 550 | 9 | 12 | 3.4 | Righteous Revenants p2, 50 Medals | wiki |
| R/40-K Hot-Shot Marksman Rifle | Energy | 3 (medium) | 275 | 40 | 210 | 12 | 7 | 2.9 | Castellan's Creed p1, 35 Medals | wiki |
| SG-8P Punisher Plasma | Energy | 3 (medium) blast | 225 | 225 | 80 | 10 | 8 | 2.5 | Cutting Edge p2, 60 Medals | wiki |
| CB-9 Exploding Crossbow | Explosive | 3 (medium) | 270 | 50 | 50 | 5 | 8 | 3.33 | Democratic Detonation p3, 80 Medals | wiki |
| GL-15 Evictor | Explosive | 3 (medium) blast | 440 | 440 | 60 | 4 | 32 | 2.75 | Ironclad Democracy p3, 65 Medals | wiki |
| R-36 Eruptor | Explosive | 4 (heavy); blast 3 | 230 | 115 | 32 | 5 | 6 | 4.67 | Democratic Detonation p2, 60 Medals | wiki |
| R-2 Amendment | Marksman Rifle | 2 (light) | 200 | 50 | 480 | 20 | 8 | 3.5 | Masters of Ceremony p1, 35 Medals | wiki |
| R-2124 Constitution | Marksman Rifle | 3 (medium) | 180 | 50 | 60 | 5 | 100 | 1.3 | Liberty Day gift to all players (late October 2024; Liberty Day is October 26, wiki.gg says distributed October 27) | wiki |
| R-4 Hyena | Marksman Rifle | 3 (medium) | 220 | 45 | 190 | 15 | 5 | 2.5 | Campaign reward: Celestial Fence (granted 2026-07-13 to participants) | wiki |
| R-6 Deadeye | Marksman Rifle | 3 (medium) | 300 | 100 | 100 | 8 | 60 | 6.4 | Borderline Justice p1, 35 Medals | wiki |
| R-63 Diligence | Marksman Rifle | 2 (light) | 165 | 45 | 350 | 25 | 8 | 2.83 | Helldivers Mobilize! p2, 8 Medals | wiki |
| R-63CS Diligence Counter Sniper | Marksman Rifle | 3 (medium) | 200 | 50 | 350 | 15 | 6 | 3 | Helldivers Mobilize! p7, 40 Medals | wiki |
| R-72 Censor | Marksman Rifle | 2 (light) | 165 | 45 | 400 | 20 | 8 | 2.5 | Redacted Regiment p1, 35 Medals | wiki |
| DBS-2 Double Freedom | Shotgun | 3 (medium) | 840 | 420 | 650 | 2 | 40 | 1.9 | Superstore, 400 SC | wiki |
| M90A Shotgun | Shotgun | 2 (light) | 605 | 220 | 80 | 6 | 44 | 3.6 | Obedient Democracy Support Troopers (Halo: ODST) p3, 65 Medals | wiki |
| SG-20 Halt | Shotgun | 3 (medium) | 385 | 110 | 80 | 16 | 60 | 3.7 | Truth Enforcers p1, 20 Medals | wiki |
| SG-225 Breaker | Shotgun | 2 (light) | 330 | 66 | 300 | 16 | 7 | 2.5 | Helldivers Mobilize! p4, 20 Medals | wiki |
| SG-225IE Breaker Incendiary | Shotgun | 2 (light) | 240 | 120 | 300 | 26 | 4 | 3 | Steeled Veterans p2, 60 Medals | wiki |
| SG-225SP Breaker Spray&Pray | Shotgun | 2 (light) | 240 | 64 | 330 | 26 | 8 | 3 | Helldivers Mobilize! p9, 60 Medals | wiki |
| SG-451 Cookout | Shotgun | 2 (light) | 320 | 60 | 80 | 16 | 60 | 6.45 | Freedom's Flame p1, 20 Medals | wiki |
| SG-8 Punisher | Shotgun | 2 (light) | 405 | 108 | 80 | 16 | 60 | 6.45 | Helldivers Mobilize! p1, 4 Medals | wiki |
| SG-8S Slugger | Shotgun | 3 (medium) | 330 | 90 | 80 | 16 | 60 | 6.45 | Helldivers Mobilize! p8, 60 Medals | wiki |
| SG-97 Sweeper | Shotgun | 3 (medium) | 504 | 132 | 150 | 7 | 70 | 4 | Superstore, 400 SC | wiki |
| M7S SMG | SMG | 2 (light) | 90 | 18 | 872 | 48 | 7 | 3 | Obedient Democracy Support Troopers (Halo: ODST) p2, 50 Medals | wiki |
| MP-98 Knight | SMG | 2 (light) | 90 | 18 | 1,380 | 50 | 7 | 2.5 | Super Citizen Edition (paid upgrade) | wiki |
| SMG-203 Gallant | SMG | 3 (medium) | 65 | 13 | 1,380 | 50 | 7 | 2.5 | Exo Experts p1, 35 Medals | wiki |
| SMG-32 Reprimand | SMG | 3 (medium) | 140 | 32 | 490 | 25 | 9 | 3.55 | Truth Enforcers p2, 40 Medals | wiki |
| SMG-37 Defender | SMG | 2 (light) | 110 | 22 | 520 | 45 | 7 | 2.8 | Helldivers Mobilize! p3, 15 Medals | wiki |
| SMG-72 Pummeler | SMG | 2 (light) | 85 | 17 | 475 | 45 | 7 | 2.8 | Polar Patriots p2, 60 Medals | wiki |
| SMG/FLAM-34 Stoker | SMG | 2 (light) | 130 | 30 | 420 | 45 | 5 | 2.8 | Entrenched Division p1, 35 Medals | wiki |
| StA-11 SMG | SMG | 2 (light) | 90 | 18 | 1,050 | 48 | 7 | 2.6 | Righteous Revenants p3, 65 Medals | wiki |
| FLAM-66 Torcher | Special | 4 (heavy) | 150 | 150 | -- | 100 | 6 | 3.25 | Freedom's Flame p2, 40 Medals | wiki |
| JAR-5 Dominator | Special | 3 (medium) | 275 | 90 | 250 | 15 | 6 | 3.8 | Steeled Veterans p3, 80 Medals | wiki |
| VG-70 Variable | Special | 2 (light) | 85 | 23 | 550 | 49 | 7 | 3.58 | Control Group p1, 35 Medals | wiki |
Sources: each row's Source link (the wiki's weapon page, with the numbers from its datamine module); tiers from u.gg's primary list. Best at and bad at are this manual's reading of the numbers and the wiki's tactical notes.
Secondaries
Give your sidearm a second job instead of a backup role: anti-armor (the Senator, Bolt Pistol, Missile Pistol, Ultimatum or Breacher) or spawner closing (the Grenade Pistol, Missile Pistol, Ultimatum or Breacher). The Redeemer from the free warbond is the cheap all-purpose pick; the GP-31 Grenade Pistol is the only secondary u.gg and GamesRadar (August 14, 2026) both rate S or better on every front.
All 25 secondaries are one-handed, so you can fire while carrying an objective or holding a Ballistic Shield. u.gg rates every one but the P-33 Missile Pistol and the P/40-K Bolt Pistol. Each line reads best at, bad at, then u.gg's letters against Automatons / Terminids / Illuminate (read September 26, 2026; the secondary list carries no date).community-tested
5.1Pistols
Backups with a range of jobs, from the free Peacemaker to the heavy-penetration Senator.
- P-2 Peacemaker · best at chaff, as a free backup · bad at range (falloff) and medium armor · u.gg D / C / C
- P-19 Redeemer · best at emergency close-range bursts for marksman and backpack users; almost free in the free warbond · bad at staying power (it empties in moments) and medium armor · u.gg B / A / A
- P-4 Senator · best at heavy penetration in the holster: Overseer heads, Hulk eyes, Devastators · bad at volume: a 6-round cylinder · u.gg S / S / A
- P-113 Verdict · best at medium-armor backup: Hive Guards, Devastators · bad at long fights: a small magazine · u.gg A / A / A
- P-92 Warrant · best at fast or flying targets (Watchers, Overseers, Shriekers), with guided rounds · bad at picking targets: the lock-on can choose the wrong one, and guided shots fly slower · u.gg B / A / S
- M6C/SOCOM Pistol · best at quiet head shots on Troopers and Commissars · bad at medium armor, and it one-shots a Devastator's head only up close · u.gg B / B / B
- P-69 Veto · best at staggering Hunters, Alpha Commanders and Berserkers with medium-penetration jet rounds · bad at topping up: it reloads by clips, so you can't reload until a clip's worth is spent · u.gg A / A / A
5.2Melee weapons
Ammo-free and much stronger since patch 6.0.1 raised base melee damage by half, but they put you face to face with the enemy. They do their best work on the Voteless.
- CQC-19 Stun Lance · best at shield play: stunning one target at a time · bad at reach: it hits only what's straight ahead · u.gg D / C / C
- CQC-30 Stun Baton · best at stunning melee units that reach you · bad at killing: the lowest damage of the melee weapons · u.gg D / C / C
- CQC-5 Combat Hatchet · best at Voteless hordes: tied with the Saber for the top melee damage per second · bad at reach, and it doesn't stun · u.gg C / B / B
- CQC-2 Saber · best at Voteless: consistent leg cuts · bad at reach · u.gg C / B / B
- CQC-42 Machete · best at big single hits: the heaviest melee blow, which staggers Devastators and Berserkers · bad at quick follow-ups: a long recovery between swings · u.gg B / B / B
- CQC-73 Entrenchment Tool · best at digging cover for sentries and mortars · bad at fighting · u.gg D / C / C
5.3Special sidearms
Where the secondary slot earns its keep: grenade and missile launchers, anti-tank one-shots, lasers and a medic's stim gun.
- LAS-7 Dagger · best at igniting crowds with no ammo to manage · bad at stopping a Trooper before it fires its flare (too slow) · u.gg C / C / B
- GP-31 Grenade Pistol · best at closing bug holes and fabricators, which frees your grenade slot · bad at long range (an arcing shot) and supply (few spare rounds) · u.gg S / S+ / S+
- SG-22 Bushwhacker · best at point-blank bursts on Alpha Commanders and Fleshmobs · bad at sustained fire (three barrels, then a reload) and medium armor · u.gg C / B / C
- P-72 Crisper · best at Illuminate hordes, and Chargers and Hulks through heavy-penetration flame · bad at long burns: each canister empties fast · u.gg B / A / S+
- P-11 Stim Pistol · best at healing squadmates at range: a squad medic's sidearm · bad at self-defense: it does no damage · u.gg A / A / A
- PLAS-15 Loyalist · best at mid-range plasma bombardment; Charger rears · bad at point blank (the blast hurts you); a small magazine · u.gg A / S / S+
- GP-20 Ultimatum · best at emergency heavy kills, and at closing spawners (Bile Titan holes too) from outside · bad at ammo (1 shell plus 1 spare) and range (very short) · u.gg S+ / S+ / A
- LAS-58 Talon · best at accurate medium-penetration backup: it recharges while holstered · bad at big targets (low durable damage) · u.gg S / S / S+
- P-35 Re-Educator · best at silently confusing Overseers, Hulks and Chargers with gas darts · bad at killing (tiny damage) and supply (very little ammo) · u.gg A / S / S
- P-33 Missile Pistol · best at Gunships, Stingrays and War Striders · bad at ammo: few missiles, and a resupply returns only one · u.gg: not rated
- P/40-K Bolt Pistol · best at one-shotting mediums on weak points (Spewers, Devastators, Overseers) · bad at closing spawners (its blast is too weak); a small ammo pool · u.gg: not rated
- P-34 Breachernew · best at one-shotting Hulks, Cannon Turrets and Charger rears; fabricators · bad at ammo: very few rounds, and a resupply returns only one · u.gg S+ / S+ / A
5.4Every secondary by the numbers
Sorted by type, then name. The Penetration column is the story here: the few rows at 4 (heavy) or anti-tank are your armor answers, and the melee weapons show a dash for magazine and reload because they never run dry.
| Weapon | Type | Penetration | Damage | Durable | RPM | Mag | Spares | Reload (s) | Where to get it | Source |
|---|---|---|---|---|---|---|---|---|---|---|
| CQC-19 Stun Lance | Melee | 3 (medium) | 165 | 83 | -- | -- | -- | -- | Urban Legends p1, 30 Medals | wiki |
| CQC-2 Saber | Melee | 3 (medium) | 188 | 98 | 150 | -- | -- | -- | Masters of Ceremony p2, 40 Medals | wiki |
| CQC-30 Stun Baton | Melee | 3 (medium) | 120 | 60 | -- | -- | -- | -- | Superstore, 200 SC | wiki |
| CQC-42 Machete | Melee | 3 (medium) | 300 | 150 | 72 | -- | -- | -- | Superstore, 200 SC | wiki |
| CQC-5 Combat Hatchet | Melee | 3 (medium) | 240 | 120 | 100 | -- | -- | -- | Superstore, 200 SC | wiki |
| CQC-73 Entrenchment Tool | Melee | 3 (medium) | 165 | 83 | 150 | -- | -- | -- | Entrenched Division p1, 20 Medals | wiki |
| M6C/SOCOM Pistol | Pistol | 2 (light) | 125 | 28 | 900 | 12 | 10 | 1.5 | Obedient Democracy Support Troopers (Halo: ODST) p3, 75 Medals | wiki |
| P-113 Verdict | Pistol | 3 (medium) | 140 | 32 | 450 | 10 | 10 | 2 | Polar Patriots p3, 60 Medals | wiki |
| P-19 Redeemer | Pistol | 2 (light) | 70 | 12 | 1,100 | 31 | 6 | 2.15 | Helldivers Mobilize! p2, 5 Medals | wiki |
| P-2 Peacemaker | Pistol | 2 (light) | 100 | 32 | 900 | 15 | 8 | 1.8 | Starter (free) | wiki |
| P-4 Senator | Pistol | 4 (heavy) | 225 | 75 | 200 | 6 | 40 | 2.3 | Steeled Veterans p1, 15 Medals | wiki |
| P-69 Veto | Pistol | 3 (medium) | 105 | 35 | 750 | 12 | 90 | 3.3 | Entrenched Division p3, 65 Medals | wiki |
| P-92 Warrant | Pistol | 3 (medium) | 80 | 20 | 450 | 13 | 7 | 2 | Superstore, 300 SC | wiki |
| GP-20 Ultimatum | Special | 6 (anti-tank II) blast | 2,000 | 2,000 | -- | 1 | 1 | 3 | Servants of Freedom p2, 40 Medals | wiki |
| GP-31 Grenade Pistol | Special | 3 (medium) | 250 | 250 | -- | 1 | 6 | 1.72 | Democratic Detonation p3, 60 Medals | wiki |
| LAS-58 Talon | Special | 3 (medium) | 200 | 20 | 750 | 7 | 3 | 2.4 | Borderline Justice p2, 40 Medals | wiki |
| LAS-7 Dagger | Special | 2 (light) | 250 | 50 | -- | -- | 3 | 2 | Cutting Edge p3, 60 Medals | wiki |
| P-11 Stim Pistol | Special | -- (heals, no damage) | 0 | 0 | 70 | 6 | 24 | -- | Chemical Agents p3, 80 Medals | wiki |
| P-33 Missile Pistol | Special | 5 (anti-tank I); blast 3 | 1,000 | 1,000 | -- | 1 | 3 | 2.7 | Exo Experts p2, 50 Medals | wiki |
| P-34 Breacher | Special | 7 (anti-tank III) sticky charge | 2,000 | 2,000 | -- | 1 | 2 | 2.68 | Ironclad Democracy p2, 50 Medals | wiki |
| P-35 Re-Educator | Special | 4 (heavy) | 60 | 10 | 110 | 6 | 2 | 3 | Redacted Regiment p1, 20 Medals | wiki |
| P-72 Crisper | Special | 4 (heavy) | 150 | 150 | -- | 50 | 4 | 2.35 | Freedom's Flame p3, 45 Medals | wiki |
| P/40-K Bolt Pistol | Special | 4 (heavy); blast 3 | 325 | 115 | 150 | 6 | 4 | 2.45 | Castellan's Creed p2, 50 Medals | wiki |
| PLAS-15 Loyalist | Special | 3 (medium) | 150 | 75 | 1,000 | 8 | 5 | 1.9 | Truth Enforcers p3, 45 Medals | wiki |
| SG-22 Bushwhacker | Special | 2 (light) | 405 | 108 | 650 | 3 | 30 | 1.75 | Viper Commandos p2, 50 Medals | wiki |
Sources: each row's Source link and the wiki's datamine module; tiers from u.gg's secondary list. Best at and bad at are this manual's reading of the numbers and the wiki's tactical notes.
Throwables
Carry Thermite once you own it. Until then the free High Explosive grenade does the two jobs that matter, closing holes and fabricators and hurting heavies when you cook it; the Impact from the free warbond explodes on contact, which suits vents and weak spots. Take a control grenade (Stun, Smoke, Shield) only when your secondary or support weapon already closes spawners.
Patch 6.3.0 (June 2026) raised the starting and carried counts of most grenades, which made the niche ones practical, and armor with the Engineering Kit passive carries more. Each line reads best at, bad at, then u.gg's letters against Automatons / Terminids / Illuminate (read September 26, 2026; the throwable list carries no date).community-tested
6.1Explosive grenades
Your spawner closers and your emergency damage on heavies.
- G-12 High Explosive · best at heavies when cooked (Chargers, Hulks), and spawners when thrown in · bad at quick reactions: the fuse is long · u.gg A / A / A
- G-6 Frag · best at groups of light enemies; you carry more of them than any other standard grenade · bad at armor (medium penetration only); it catches squadmates too · u.gg B / A / A
- G-7 Pineapple · best at unarmored hordes (Voteless, Warriors), or cooked under a Charger · bad at aim: the bomblets scatter at random · u.gg A / A / A
- G-16 Impact · best at precise hits on vents and weak spots, including tank turret vents · bad at holes: it must land inside to close one, and it blows up on the first enemy it touches · u.gg A / S / S
- TED-63 Dynamite · best at spawners and outposts (enough demolition to work from outside), with selectable timers for stealth · bad at speed: a long fuse, and fewer carried · u.gg S / S / A
6.2Anti-tank throwables
Heavy-killers in the grenade slot. Thermite is the default; the mines and the Giga Grenade trade speed or supply for power.
- G-123 Thermite · best at killing heavies from the grenade slot: Chargers, Hulks, Tanks, turrets · bad at supply (only a few carried); it can't close Bile Titan holes · u.gg S+ / S+ / S+
- G/40-K Melta Mine · best at killing Hulks and Chargers that walk over it · bad at range: a short throw, and it depends on placement · u.gg S+ / S / S
- G-48 Giga Grenade · best at heavies and spawners from outside · bad at supply (only 2 carried) and precision (a tiny inner radius) · u.gg A / A / A
- G-60 Anti-Tank Seekernew · best at guided anti-tank hits: one Hulk per grenade · bad at Bile Titans (it tends to hit armor); few carried · u.gg S / S / B
- TM-1 Lure Mine · best at pulling patrols into a trap, or distracting them while you leave · bad at range: a short throw · u.gg A / S / A
6.3Fire and gas
Area denial for bugs and the Illuminate, weaker against Automatons, which ignite slowly. All but the Immolation also close spawners.
- G-10 Incendiary · best at bug and Voteless hordes: a lasting fire pool · bad at Automatons (reduced fire damage on small bots) · u.gg B / S+ / S+
- G-13 Incendiary Impact · best at igniting approaching groups, and Stalkers and Crushers, whose regeneration the fire stops · bad at armor: its blast is only medium penetration · u.gg B / S+ / S+
- G-142 Pyrotech · best at area fire that also hurts heavies (Hulks, Factory Striders): its sparks carry anti-tank penetration · bad at lasting: the shortest-lived fire of the incendiaries · u.gg S / A / A
- G-8 Immolationnew · best at wiping chaff patrols and reinforcement drops with a big fire pool · bad at medium enemies, which survive it; it can't close spawners · u.gg C / S / S
- G-4 Gas · best at crowd control on every front; it also closes spawners · bad at killing quickly on its own · u.gg A / S / S+
6.4Control and utility
Little or no damage: stuns, smoke, a shield, a homing drone and a silent knife. None of them closes spawners, so pair one with a closer elsewhere in your kit.
- G-23 Stun · best at freezing Chargers, Hulks and crowds for a follow-up · bad at the biggest targets (no effect on Tanks, Factory Striders, Impalers or Bile Titans); no demolition · u.gg S / S / C
- G-109 Urchin · best at long single-target lockdown; it staggers even a Bile Titan · bad at crowds (a tiny radius); no damage, no demolition · u.gg D / D / C
- G-31 Arc · best at crowds of light enemies · bad at spawners (it can't close them), and its arcs can hit you · u.gg C / C / C
- G-50 Seeker · best at Gunships and fliers: hands-free heavy-penetration hits · bad at spawners: it homes on enemies instead · u.gg A / B / A
- G-3 Smoke · best at breaking Automaton line of sight; covering revives and extraction · bad at bugs, which keep coming to your last position · u.gg B / D / D
- G-89 Smokescreen · best at instant cover exactly where it lands · bad at covering much ground: a smaller cloud and no damage · u.gg B / D / D
- G/SH-39 Shield · best at covering a Hellbomb, a revive or a point-blank Leveller shot (it blocks explosions, not direct hits) · bad at covering a group: a tiny radius and no damage · u.gg S / S / A
- K-2 Throwing Knife · best at silent kills on stealth runs · bad at anything big: low damage for a throwable slot · u.gg D / D / D
6.5Every throwable by the numbers
Sorted by type, then name. Here Mag is the most you can carry and Damage is the blast itself; fire, gas and stun effects come on top, and a 0 means the throwable does no damage by itself (smoke, stun, the shield).
| Weapon | Type | Penetration | Damage | Durable | RPM | Mag | Spares | Reload (s) | Where to get it | Source |
|---|---|---|---|---|---|---|---|---|---|---|
| G-109 Urchin | Special | 6 (anti-tank II) | 0 | 0 | -- | 5 | -- | -- | Force of Law p3, 65 Medals | wiki |
| G-123 Thermite | Special | 7 (anti-tank III) | 2,000 | 2,000 | -- | 3 | -- | -- | Democratic Detonation p1, 15 Medals | wiki |
| G-13 Incendiary Impact | Special | 3 (medium) | 150 | 150 | -- | 5 | -- | -- | Polar Patriots p2, 25 Medals | wiki |
| G-142 Pyrotech | Special | 3 (medium) blast; sparks 7 | 50 | 50 | -- | 6 | -- | -- | Masters of Ceremony p3, 65 Medals | wiki |
| G-16 Impact | Special | 4 (heavy) | 400 | 400 | -- | 5 | -- | -- | Helldivers Mobilize! p5, 20 Medals | wiki |
| G-23 Stun | Special | 6 (anti-tank II) | 0 | 0 | -- | 5 | -- | -- | Cutting Edge p2, 25 Medals | wiki |
| G-3 Smoke | Special | -- | 0 | -- | -- | 5 | -- | -- | Helldivers Mobilize! p8, 25 Medals | wiki |
| G-31 Arc | Special | 4 (heavy) per arc | 100 | 70 | -- | 5 | -- | -- | Control Group p3, 65 Medals | wiki |
| G-4 Gas | Special | 6 (anti-tank II) | 3 | 3 | -- | 4 | -- | -- | Chemical Agents p1, 30 Medals | wiki |
| G-48 Giga Grenade | Special | 5 (anti-tank I) | 2,000 | 2,000 | -- | 2 | -- | -- | Entrenched Division p2, 50 Medals | wiki |
| G-50 Seeker | Special | 4 (heavy) | 500 | 500 | -- | 5 | -- | -- | Servants of Freedom p3, 65 Medals | wiki |
| G-60 Anti-Tank Seeker | Special | 5 (anti-tank I) | 1,800 | 1,800 | -- | 3 | -- | -- | Ironclad Democracy p3, 65 Medals | wiki |
| G-8 Immolation | Special | 4 (heavy) fire pool; blast 0 | 20 | 20 | -- | 6 | -- | -- | Ironclad Democracy p1, 35 Medals | wiki |
| G-89 Smokescreen | Special | -- | 0 | -- | -- | 5 | -- | -- | Superstore, 300 SC | wiki |
| G/40-K Melta Mine | Special | 7 (anti-tank III) | 2,000 | 2,000 | -- | 4 | -- | -- | Castellan's Creed p2, 50 Medals | wiki |
| G/SH-39 Shield | Special | -- | 0 | -- | -- | 4 | -- | -- | Siege Breakers p3, 65 Medals | wiki |
| K-2 Throwing Knife | Special | 3 (medium) | 300 | 150 | -- | 20 | -- | -- | Viper Commandos p3, 60 Medals | wiki |
| TM-1 Lure Mine | Special | 5 (anti-tank I) | 1,000 | 1,000 | -- | 4 | -- | -- | Redacted Regiment p3, 65 Medals | wiki |
| G-10 Incendiary | Standard | 3 (medium) | 300 | 300 | -- | 5 | -- | -- | Steeled Veterans p2, 25 Medals | wiki |
| G-12 High Explosive | Standard | 4 (heavy) | 800 | 800 | -- | 5 | -- | -- | Starter (free) | wiki |
| G-6 Frag | Standard | 3 (medium) | 500 | 500 | -- | 6 | -- | -- | Helldivers Mobilize! p1, 2 Medals | wiki |
| G-7 Pineapple | Standard | 3 (medium) | 300 | 300 | -- | 5 | -- | -- | Dust Devils p3, 65 Medals | wiki |
| TED-63 Dynamite | Standard | 4 (heavy) | 1,000 | 1,000 | -- | 4 | -- | -- | Borderline Justice p3, 65 Medals | wiki |
Sources: each row's Source link and the wiki's datamine module; carry counts per the 6.3.0 notes; tiers from u.gg's throwables list. Best at and bad at are this manual's reading of the numbers and the wiki's tactical notes.
Support weapons
Bring a support weapon that kills heavies unless a squadmate already does. Buy the EAT-17 as soon as it unlocks at level 3, then the Recoilless Rifle, Autocannon or Quasar Cannon as they unlock; the Autocannon is the one u.gg rates S+ on every front.
Support weapons are stratagems: call one in and it drops in a hellpod. Most come back 480 seconds after the call, and the expendables much sooner: the EAT-17 after 70 seconds, the Bullet Storm after 70, the Commando after 120, the Expendable Napalm after 140, the Leveller after 140 and the Solo Silo after 180. Two of the 35 can't be called in at all: the SG-88 Break-Action Shotgun and the CQC-72 Entrenchment Tool lie on the map at graves, houses and bunkers. Each line reads best at, bad at, then u.gg's letters against Automatons / Terminids / Illuminate (read September 26, 2026, from a list stamped patch 7.0.2).community-tested
7.1What to unlock with Requisition, in order
- EAT-17 Expendable Anti-TankShip Management (PAC), level 3, 3,000 Req. Your first anti-tank answer: cheap, no backpack, back quickly.
- GR-8 Recoilless RifleShip Management (PAC), level 5, 6,000 Req. A reloadable launcher that one-shots most heavies with a hit to the head or a weak point; best with a teammate loading it.
- AC-8 AutocannonShip Management (PAC), level 10, 7,000 Req. The flexible pick: heavy penetration and explosive shells for Devastators, Gunships, fabricators and bug holes from range.
- LAS-99 Quasar CannonShip Management (Engineering Bay), level 18, 7,500 Req. Anti-tank with no ammo and no backpack, which frees the slot for a shield or a jump pack.
- The level-20 specialistsFAF-14 Spear (Ship Management (PAC), level 20, 9,000 Req), RS-422 Railgun (Ship Management (PAC), level 20, 10,000 Req) and StA-X3 W.A.S.P. Launcher (Ship Management (PAC), level 20, 12,000 Req): lock-on anti-tank, precision anti-armor and long-range anti-air, each better at one job than the anchors above.
The M-105 Stalwart and the APW-1 Anti-Materiel Rifle are cheap early options, for crowds and for bot weak points. Their unlock levels and the MLS-4X Commando's, as this manual gives them from wiki.gg (levels 1, 1 and 15), differ from the Fandom wiki's (5, 2 and 18), and no official source settles it.unverified
7.2Anti-tank, reusable
The heavy-killers you keep. The Recoilless, Spear, W.A.S.P. and C4 Pack take your backpack slot; the Quasar, Railgun, Epoch, Speargun and Meltagun leave it free.
- GR-8 Recoilless Rifle · best at reloadable heavy killing: Tanks, Chargers, Hulks and Bile Titans at their weak points · bad at reloading solo (you kneel); it takes your backpack slot · u.gg S+ / S+ / C
- LAS-99 Quasar Cannon · best at anti-tank work with no ammo and no backpack; Commando missions · bad at tempo: a charge-up, then a long recharge before the next shot · u.gg S / S / C
- FAF-14 Spear · best at Bile Titans, Factory Striders, Gunships and anti-air turrets at range, with lock-on · bad at close range (under about 30 m) and targets it can't lock · u.gg S / A / C
- RS-422 Railgun · best at precision anti-armor: Hulk eyes, Charger legs, and Bile Titan heads when overcharged · bad at pace: one round per reload, and it self-destructs if you hold the overcharge too long · u.gg S / B / C
- StA-X3 W.A.S.P. Launcher · best at medium and flying targets out to long range; Stingrays · bad at small enemies (it can't lock them) and close range · u.gg B / B / S+
- PLAS-45 Epoch · best at packed heavy infantry (Heavy Devastators, Alpha Commanders) and Chargers · bad at durable and explosion-resistant targets, which shrug off half; few shots per battery · u.gg S / A / B
- S-11 Speargun · best at one-shotting Hulk eyes, sealing bug holes, and interrupting Bile Titans and Chargers · bad at pace: one shot per reload · u.gg S / S / S
- 40-K Meltagun · best at Tanks, Chargers and Fleshmobs in one or two shots · bad at range (short) and ammo (a small pool) · u.gg S+ / S+ / S
- B/MD C4 Pack · best at Bile Titans, Vox Engines and Hive Lords; objectives and fabricators · bad at speed: it takes setup time, and your backpack slot · u.gg S+ / S / A
7.3Anti-tank, expendable
Call in, fire, drop: no backpack, no reload, and cooldowns short enough to keep one ready.
- EAT-17 Expendable Anti-Tank · best at cheap, frequent heavy kills (Chargers, Hulks, Tanks, turrets) on a short cooldown, with no backpack · bad at follow-ups: one shot per launcher · u.gg S / S+ / C
- MLS-4X Commando · best at turrets and Tanks, and Striders at range · bad at fast targets (slow rockets); you drop it after the last one · u.gg S / B / B
- EAT-411 Leveller · best at one-shotting massive targets and whole groups; it closes spawners · bad at safety: the blast endangers your squad, and it is one shot per call · u.gg S+ / B / A
- MS-11 Solo Silo · best at massive targets and big groups from anywhere, with a guided missile · bad at speed (it takes setup time) and safety (the launch blast ragdolls divers nearby) · u.gg S / S / A
7.4The flexible middle
Heavy penetration with sustained fire: enough for Devastators, Gunships and weak points, not enough to trade blows with a tank.
- AC-8 Autocannon · best at almost everything: heavy penetration plus explosive shells for Devastators, Gunships, fabricators and bug holes from range · bad at reloading (you kneel); it takes your backpack slot · u.gg S+ / S+ / S+
- APW-1 Anti-Materiel Rifle · best at bot weak points at range: Devastator heads, Hulk eyes, Gunship engines · bad at swarms; slow handling · u.gg A / B / C
- MG-206 Heavy Machine Gun · best at heavy-penetration sustained fire: Devastators, Spewers, Hulk eyes · bad at quick aiming: poor handling and heavy recoil · u.gg B / B / B
- LAS-98 Laser Cannon · best at heavy penetration with no ammo: Devastators, Gunships, Hulk eyes · bad at burst damage against big heavies · u.gg B / B / B
7.5Crowd control
Volume and area for breaches, bot drops and Voteless waves. The machine guns cover the Illuminate best, and the two explosive grenade launchers (GL-21 and GL-28) also close spawners.
- MG-43 Machine Gun · best at medium-penetration sustained fire on Illuminate and bug crowds; free from the start · bad at close quarters (slow handling) · u.gg B / B / S
- M-105 Stalwart · best at Voteless and bug chaff: a machine gun you can move with · bad at medium armor, which its light rounds can't hurt · u.gg B / A / S+
- M-1000 Maxigun · best at walls of medium-penetration fire into hordes; a teammate with a Supply Pack keeps it fed · bad at ammo economy and quick aiming · u.gg B / B / A
- MGX-42 Bullet Storm · best at bug breaches and Illuminate waves on a short cooldown · bad at medium armor and Automatons · u.gg B / A / S+
- GL-21 Grenade Launcher · best at crowds, mediums and spawners · bad at long range (arcing shots) and point blank (the rounds need distance to arm) · u.gg S / S / S
- GL-28 Belt-Fed Grenade Launcher · best at clearing hordes and stagger-locking Stalkers and Commanders · bad at massive heavies, which take dozens of grenades · u.gg A / A / A
- RL-77 Airburst Rocket Launcher · best at crowds and fliers, especially the Illuminate · bad at safety (friendly fire) and reloading (you kneel) · u.gg A / B / S+
- GL-52 De-Escalator · best at stunning and killing crowds, and Hulks with a hit to the visor · bad at spawners (it isn't explosive); since patch 7.1.0 its arcs can hurt you again · u.gg B / A / A
- ARC-3 Arc Thrower · best at crowds of bugs and Illuminate, and stun-locking Chargers and Hulks, with no ammo · bad at safety (it chains to friends) and cluttered fights (arcs ground on corpses) · u.gg C / A / A
7.6Fire and gas
Strong against bugs and the Illuminate, weak against Automatons; mind your squad around the flames.
- FLAM-40 Flamethrower · best at bug and Illuminate hordes, and Chargers through heavy-penetration flame · bad at Automatons; it can set you on fire · u.gg B / S / S+
- B/FLAM-80 Cremator · best at bugs and the Illuminate: the strongest flamethrower · bad at Automatons; it takes your backpack slot · u.gg A / S+ / S+
- EAT-700 Expendable Napalm · best at instant area denial on hordes; its napalm blast carries anti-tank penetration · bad at control: the bomblets bounce unpredictably · u.gg B / S / S
- TX-41 Sterilizer · best at crowd control: confused enemies attack each other · bad at killing: low damage · u.gg D / D / C
7.7Melee and map pickups
Close-in tools, and the two civilian weapons you find on the map.
- CQC-20 Breaching Hammer · best at fast heavy kills up close, without a backpack · bad at reach; enemies that explode when they die · u.gg S / S / A
- CQC-9 Defoliation Tool · best at clearing foliage and fences, and sawing through Fabricators; point-blank heavies · bad at reach · u.gg D / C / C
- CQC-1 One True Flag · best at stunning thrusts from behind a shield · bad at survival: enemies target the bearer · u.gg D / D / D
- CQC-72 Entrenchment Tool · best at digging cover; found on the map at graves and bunkers · bad at fighting · u.gg: not rated
- SG-88 Break-Action Shotgun · best at Alpha Commanders and Spewers, as a free pickup · bad at sustained fire (two shells, then a reload) and medium armor · u.gg: not rated
7.8Every support weapon by the numbers
Sorted by type, then name. Where to get it gives the level and Requisition price for base-game weapons, or the warbond page and Medal cost. Cooldowns aren't in this table: Support weapons and backpacks lists them with the call-in codes.
| Weapon | Type | Penetration | Damage | Durable | RPM | Mag | Spares | Reload (s) | Where to get it | Source |
|---|---|---|---|---|---|---|---|---|---|---|
| APW-1 Anti-Materiel Rifle | Anti-materiel rifle | 4 (heavy) | 450 | 225 | 400 | 7 | 8 | 3.05 | Ship Management (PAC), level 1, 5,000 Req | wiki |
| FAF-14 Spear | Anti-tank (backpack) | 7 (anti-tank III); blast 3 | 4,000 | 4,000 | -- | 1 | 4 | 4.65 | Ship Management (PAC), level 20, 9,000 Req | wiki |
| GR-8 Recoilless Rifle | Anti-tank (backpack) | 6 (anti-tank II) HEAT; HE shell 5, HE blast 4 | 3,200 | 3,200 | -- | 1 | 5 | 6.1 | Ship Management (PAC), level 5, 6,000 Req | wiki |
| LAS-99 Quasar Cannon | Anti-tank (energy) | 6 (anti-tank II); blast 3 | 2,000 | 2,000 | -- | -- | -- | -- | Ship Management (Engineering Bay), level 18, 7,500 Req | wiki |
| EAT-17 Expendable Anti-Tank | Anti-tank (expendable) | 6 (anti-tank II); blast 3 | 2,000 | 2,000 | -- | 1 | -- | -- | Ship Management (PAC), level 3, 3,000 Req | wiki |
| EAT-411 Leveller | Anti-tank (expendable) | 6 (anti-tank II) | 2,500 | 2,500 | -- | 1 | -- | -- | Siege Breakers p2, 85 Medals | wiki |
| MLS-4X Commando | Anti-tank (expendable) | 6 (anti-tank II); blast 3 | 1,100 | 1,100 | 240 | 4 | -- | -- | Ship Management (PAC), level 15, 8,000 Req | wiki |
| RS-422 Railgun | Anti-tank (railgun) | 5 (anti-tank I) | 600 | 225 | -- | 1 | 20 | 1.35 | Ship Management (PAC), level 20, 10,000 Req | wiki |
| MS-11 Solo Silo | Anti-tank (silo) | 7 (anti-tank III); impact 9 (anti-tank V) | 2,500 | 2,500 | -- | 1 | -- | -- | Dust Devils p3, 110 Medals | wiki |
| AC-8 Autocannon | Autocannon (backpack) | 4 (heavy); blast 3 | 325 | 260 | 190 | 10 | 10 | 4.5 | Ship Management (PAC), level 10, 7,000 Req | wiki |
| CQC-72 Entrenchment Tool | Civilian find | 3 (medium) | 165 | 83 | 150 | -- | -- | -- | Found on the map only (graves, bunkers); cannot be called in | wiki |
| SG-88 Break-Action Shotgun | Civilian find | 2 (light) | 585 | 117 | 600 | 2 | 40 | 1.55 | Found on the map only (graves, houses); cannot be called in | wiki |
| B/MD C4 Pack | Demolition (backpack) | 7 (anti-tank III) | 2,000 | 2,000 | -- | 1 | 6 | 1.1 | Redacted Regiment p3, 110 Medals | wiki |
| ARC-3 Arc Thrower | Energy arc | 7 (anti-tank III) | 250 | 100 | 60 | -- | -- | -- | Ship Management (Engineering Bay), level 15, 7,000 Req | wiki |
| LAS-98 Laser Cannon | Energy beam | 4 (heavy) | 350 | 200 | -- | -- | 2 | 3.65 | Ship Management (Engineering Bay), level 5, 4,000 Req | wiki |
| 40-K Meltagun | Energy melta | 7 (anti-tank III) | 2,600 | 2,600 | -- | 3 | 4 | 3.75 | Castellan's Creed p3, 110 Medals | wiki |
| PLAS-45 Epoch | Energy plasma | 5 (anti-tank I) | 800 | 400 | -- | 3 | 4 | 5.15 | Control Group p1, 75 Medals | wiki |
| FLAM-40 Flamethrower | Flame | 4 (heavy) | 150 | 150 | -- | 150 | 5 | 4 | Ship Management (PAC), level 10, 6,000 Req | wiki |
| B/FLAM-80 Cremator | Flame (backpack) | 4 (heavy) | 225 | 225 | -- | 500 | -- | -- | Entrenched Division p3, 110 Medals | wiki |
| TX-41 Sterilizer | Gas | 5 (anti-tank I) | 30 | 30 | -- | 125 | 4 | 4 | Chemical Agents p2, 85 Medals | wiki |
| GL-21 Grenade Launcher | Grenade launcher | 3 (medium) blast | 400 | 400 | 160 | 10 | 3 | 3.55 | Ship Management (Engineering Bay), level 5, 6,000 Req | wiki |
| GL-52 De-Escalator | Grenade launcher (arc) | 4 (heavy) per arc | 100 | 70 | 200 | 6 | 40 | 5.5 | Force of Law p2, 85 Medals | wiki |
| GL-28 Belt-Fed Grenade Launcher | Grenade launcher (backpack) | 4 (heavy) blast | 150 | 150 | 320 | 120 | -- | -- | Siege Breakers p3, 110 Medals | wiki |
| EAT-700 Expendable Napalm | Incendiary (expendable) | 3 (medium) rocket; napalm blast 6 | 500 | 500 | -- | 1 | -- | -- | Dust Devils p2, 85 Medals | wiki |
| M-105 Stalwart | Machine gun | 2 (light) | 90 | 22 | 850 | 250 | 3 | 5.9 | Ship Management (PAC), level 1, 3,500 Req | wiki |
| MG-206 Heavy Machine Gun | Machine gun | 4 (heavy) | 150 | 35 | 600 | 100 | 2 | 5.55 | Ship Management (PAC), level 12, 6,000 Req | wiki |
| MG-43 Machine Gun | Machine gun | 3 (medium) | 90 | 23 | 760 | 175 | 3 | 4.55 | Ship Management (PAC), level 1, free | wiki |
| M-1000 Maxigun | Machine gun (backpack) | 3 (medium) | 80 | 18 | 1,500 | 1,000 | -- | -- | Python Commandos p3, 110 Medals | wiki |
| MGX-42 Bullet Storm | Machine gun (expendable) | 2 (light) | 100 | 25 | 1,300 | 300 | -- | -- | Exo Experts p1, 75 Medals | wiki |
| CQC-1 One True Flag | Melee | 3 (medium) | 200 | 100 | 117 | -- | -- | -- | Masters of Ceremony p3, 110 Medals | wiki |
| CQC-20 Breaching Hammer | Melee (breaching charge) | 6 (anti-tank II) charge; hammer 3 | 2,200 | 2,200 | -- | 1 | 7 | 1 | Siege Breakers p1, 75 Medals | wiki |
| CQC-9 Defoliation Tool | Melee (chainsaw) | 3 (medium) rising to 5 on sustained contact | 450 | 225 | -- | -- | -- | -- | Python Commandos p2, 85 Medals | wiki |
| StA-X3 W.A.S.P. Launcher | Missile launcher (backpack) | 6 (anti-tank II); blast 3 | 200 | 200 | 500 | 7 | 5 | 4.9 | Ship Management (PAC), level 20, 12,000 Req | wiki |
| RL-77 Airburst Rocket Launcher | Rocket launcher (backpack) | 3 (medium) | 350 | 350 | -- | 1 | 5 | 5.1 | Ship Management (PAC), level 15, 8,000 Req | wiki |
| S-11 Speargun | Speargun | 5 (anti-tank I) spear; gas burst 6 | 650 | 275 | -- | 1 | 12 | 2.5 | Dust Devils p2, 85 Medals | wiki |
Sources: each row's Source link, the wiki's weapons and stratagems datamine modules (damage, cooldowns); tiers from u.gg's support list. Best at and bad at are this manual's reading of the numbers and the wiki's tactical notes.
Special jobs: spawners, one-handed, quiet
Some jobs need a particular kind of weapon, whatever its damage: closing spawners needs an explosive, carrying an objective or holding a shield needs a one-handed gun, and stealth needs a quiet one. Check that your loadout covers the first job before every drop.
8.1Spawner closers
Bug holes, Automaton fabricators and Illuminate warp-ship doors and gateways take only explosive hits through the opening: demolition 20 or more closes one from inside, and 40 or more destroys a bug hole or a Bile Titan's hole from its rim. Guns never close them, whatever their damage.
- From inside the opening. Primaries: the R-36 Eruptor, CB-9 Exploding Crossbow, GL-15 Evictor and the AR/GL-21 One-Two's grenade. Secondaries: the GP-31 Grenade Pistol, P-33 Missile Pistol and P-34 Breacher. Throwables: the G-12 High Explosive, G-6 Frag, G-7 Pineapple, G-16 Impact, G-10 Incendiary, G-13 Incendiary Impact, G-142 Pyrotech, G-4 Gas, G-123 Thermite and TM-1 Lure Mine. Support: the AC-8 Autocannon, GL-21 and GL-28 grenade launchers, RL-77 Airburst, EAT-17, EAT-700 Expendable Napalm, GR-8 Recoilless, LAS-99 Quasar, MLS-4X Commando, StA-X3 W.A.S.P., PLAS-45 Epoch, S-11 Speargun and CQC-20 Breaching Hammer.
- Also from outside (a bug hole's rim, a Bile Titan hole, a Fabricator's shell or a Warp Gateway; a Grounded Warp Ship or a Bulk Fabricator needs more). The GP-20 Ultimatum; the TED-63 Dynamite, G-48 Giga Grenade, G-60 Anti-Tank Seeker and G/40-K Melta Mine; the B/MD C4 Pack, EAT-411 Leveller, MS-11 Solo Silo and FAF-14 Spear.
- Can't close them. The G-50 Seeker (it homes on enemies instead), the P/40-K Bolt Pistol (its blast is too weak), and anything that isn't explosive, such as the Laser Cannon's beam, the Anti-Materiel Rifle, arcs and the Meltagun (one exception: the CQC-9 Defoliation Tool can saw through a Fabricator or a Grounded Warp Ship).
Fabricators have a second way down: one hit from an EAT-17, Quasar, Recoilless or Spear to the shell destroys one (Fabricators and structures). In a bug nest, standing on the nest's edge and firing into each hole with a grenade launcher, the Autocannon, the Crossbow or the Grenade Pistol is faster and safer than walking into the bowl (Nests and holes).
8.2One-handed weapons
These fire while you carry an objective item or hold the Ballistic or Directional Shield: every secondary, the CQC-72 Entrenchment Tool and the CQC-1 One True Flag among support weapons, and these primaries: the MP-98 Knight, SMG-37 Defender, SMG-72 Pummeler, StA-11 SMG, M7S SMG, SMG/FLAM-34 Stoker, SMG-203 Gallant, CB-9 Exploding Crossbow and LAS-12 Sai. The Defender behind a shield is the classic pairing, and the Crossbow is the only one-handed primary that closes spawners.
8.3Quiet weapons
For stealth and Commando missions: the AR-59 Suppressor, R-72 Censor, M7S SMG and M6C/SOCOM Pistol are suppressed (enemies hear them only close by and search instead of locking on), the P-35 Re-Educator is nearly silent and the K-2 Throwing Knife silent. Patch 5.0.2 (January 2026) cut suppressed noise by about half.
8.4Weapons that never need an ammo pickup
Heat-sink lasers cool between bursts, arcs need no ammo and the Quasar recharges: the LAS-5 Scythe, LAS-16 Sickle, LAS-17 Double-Edge Sickle, LAS-13 Trident, LAS-12 Sai and ARC-12 Blitzer among primaries; the LAS-7 Dagger and LAS-58 Talon among secondaries; the LAS-98 Laser Cannon, ARC-3 Arc Thrower and LAS-99 Quasar Cannon among support weapons; and every melee weapon except the CQC-20 Breaching Hammer, whose breaching charges run out and need resupply. They suit long missions, Commando drops and squads short on resupply.
8.5Crowd control by effect
- Stun: the AR-32 Pacifier, SMG-72 Pummeler, SG-20 Halt, ARC-12 Blitzer, CQC-19 Stun Lance, CQC-30 Stun Baton, G-23 Stun, G-109 Urchin, G-31 Arc, ARC-3 Arc Thrower, CQC-1 One True Flag, GL-52 De-Escalator and CQC-9 Defoliation Tool.
- Gas: the P-35 Re-Educator, G-4 Gas, TX-41 Sterilizer and S-11 Speargun.
- Fire: the AR-2 Coyote, R-4 Hyena, SMG/FLAM-34 Stoker, SG-225IE Breaker Incendiary, SG-451 Cookout, LAS-5 Scythe, FLAM-66 Torcher, LAS-7 Dagger, P-72 Crisper, P-34 Breacher, G-10 Incendiary, G-123 Thermite, G-13 Incendiary Impact, G-142 Pyrotech, G-8 Immolation, FLAM-40 Flamethrower, LAS-98 Laser Cannon, EAT-700 Expendable Napalm and B/FLAM-80 Cremator.
- Stagger of 35 or more per hit (enough for Overseers, Devastators and everything smaller): the AR-23C Liberator Concussive, SG-8 Punisher, SG-451 Cookout, DBS-2 Double Freedom, M90A Shotgun, R-36 Eruptor, JAR-5 Dominator, P-69 Veto, CQC-19 Stun Lance, CQC-30 Stun Baton, GP-31 Grenade Pistol, SG-22 Bushwhacker, GP-20 Ultimatum, P-33 Missile Pistol, P/40-K Bolt Pistol, TED-63 Dynamite, G-23 Stun, K-2 Throwing Knife, G-142 Pyrotech, G-109 Urchin, G-48 Giga Grenade, G/40-K Melta Mine, G-8 Immolation, G-60 Anti-Tank Seeker, EAT-17, GR-8 Recoilless Rifle, MLS-4X Commando, RL-77 Airburst, FAF-14 Spear, RS-422 Railgun, StA-X3 W.A.S.P., ARC-3 Arc Thrower, LAS-99 Quasar Cannon, CQC-1 One True Flag, S-11 Speargun, EAT-700 Expendable Napalm, CQC-20 Breaching Hammer, EAT-411 Leveller, MS-11 Solo Silo and 40-K Meltagun.
Sources: wiki: Demolition (revised September 25, 2026) and the wiki's datamine module (explosive demolition, stagger and status effects per attack); the weapon pages' trait lists (one-handed, suppressed); 5.0.2 notes (suppressor noise).
Community tiers, dated
Four weapons top u.gg's lists on all three fronts: the R-36 Eruptor, the PLAS-101 Purifier, the G-123 Thermite and the AC-8 Autocannon. No secondary is S+ everywhere; the GP-31 Grenade Pistol is the only one both dated lists rate S or better on every front. Tier lists are opinions: use them to break ties, never to overrule what the penetration rule says a weapon can hurt.community-tested
Two lists rate the whole armory front by front. u.gg's were read on September 26, 2026: its primary list says it was updated for patch 7.1.1, its support list is stamped patch 7.0.2, and its secondary and throwable lists carry no date. GamesRadar's primary, secondary and support lists were updated on August 14, 2026, before patch 7.1.0 added the newest weapons. Every weapon's u.gg letters are on its line in the slot chapters above.
9.1S+ on u.gg, front by front
Explosives and anti-tank
Primary: R-36 Eruptor, CB-9 Exploding Crossbow, SG-8P Punisher Plasma, PLAS-101 Purifier. Secondary: GP-20 Ultimatum, P-34 Breacher. Throwable: G-123 Thermite, G/40-K Melta Mine. Support: GR-8 Recoilless Rifle, AC-8 Autocannon, B/MD C4 Pack, EAT-411 Leveller, 40-K Meltagun.
Fire, explosives and head-shot anti-tank
Primary: AR-2 Coyote, R-36 Eruptor, CB-9 Exploding Crossbow, PLAS-101 Purifier. Secondary: GP-31 Grenade Pistol, GP-20 Ultimatum, P-34 Breacher. Throwable: G-10 Incendiary, G-123 Thermite, G-13 Incendiary Impact. Support: EAT-17, GR-8 Recoilless Rifle, AC-8 Autocannon, B/FLAM-80 Cremator, 40-K Meltagun.
Fire, gas and volume
Primary: AR-2 Coyote, R-36 Eruptor, SG-8P Punisher Plasma, PLAS-101 Purifier. Secondary: GP-31 Grenade Pistol, P-72 Crisper, PLAS-15 Loyalist, LAS-58 Talon. Throwable: G-10 Incendiary, G-123 Thermite, G-13 Incendiary Impact, G-4 Gas. Support: M-105 Stalwart, FLAM-40 Flamethrower, AC-8 Autocannon, RL-77 Airburst Rocket Launcher, StA-X3 W.A.S.P. Launcher, B/FLAM-80 Cremator, MGX-42 Bullet Storm.
9.2Where the two lists agree
Weapons that both u.gg and GamesRadar rate S or better (GamesRadar has no throwable list). Agreement between two independent lists is the strongest community signal on this tab.
- Terminids: the PLAS-101 Purifier and AR-2 Coyote; the GP-31 Grenade Pistol and GP-20 Ultimatum; the LAS-99 Quasar Cannon, S-11 Speargun and B/FLAM-80 Cremator.
- Automatons: the PLAS-101 Purifier, R-36 Eruptor, PLAS-1 Scorcher and R-72 Censor; the GP-31 Grenade Pistol, GP-20 Ultimatum, LAS-58 Talon and P-4 Senator; the GR-8 Recoilless Rifle, EAT-17, EAT-411 Leveller, B/MD C4 Pack, 40-K Meltagun, MLS-4X Commando, RS-422 Railgun and S-11 Speargun.
- Illuminate: the PLAS-101 Purifier, AR-2 Coyote and SMG/FLAM-34 Stoker; the GP-31 Grenade Pistol and PLAS-15 Loyalist; no support weapon.
9.3Where they disagree
- AC-8 Autocannon: S+ on every front on u.gg; B against Terminids and Automatons and C against the Illuminate on GamesRadar. This manual's research sides with u.gg against Devastators, Gunships and Harvester shields.
- Anti-tank against the Illuminate: u.gg gives the EAT-17, Recoilless, Quasar and Railgun a C; GamesRadar gives the EAT-17, Quasar, Commando, Railgun and Leveller an A. One anti-tank hit is still the clean answer to Harvester joints, Gatekeepers and Leviathan turrets, so carry one either way.
- MS-11 Solo Silo: S against Terminids and Automatons and A against the Illuminate on u.gg; A against Automatons and D against the other two on GamesRadar.
- StA-X3 W.A.S.P.: B against Terminids and Automatons and S+ against the Illuminate on u.gg; D against Terminids and B against the other two on GamesRadar.
- RL-77 Airburst: A against Automatons, B against Terminids and S+ against the Illuminate on u.gg; B against Terminids and C against the other two on GamesRadar.
9.4Patterns that follow the mechanics
- Marksman rifles (the Diligence, the Censor) rate S only against Automatons, whose infantry have small, soft heads at range.
- Fire weapons (the Coyote, the incendiary grenades, the flamethrowers, the Crisper) rate highest against Terminids and the Illuminate and lower against Automatons, which ignite slowly.
- u.gg drops the dedicated anti-tank launchers to C against the Illuminate and lifts crowd weapons (the Stalwart, MG-43, Airburst, W.A.S.P. and Bullet Storm) to S or S+; this manual's reading is that the Illuminate roster has fewer heavily armored targets.
9.5The newest weapons
Six weapons arrived on September 22, 2026: the AR-11 Arbitrator, GL-15 Evictor, P-34 Breacher, G-8 Immolation, G-60 Anti-Tank Seeker and LAS-12 Sai.new u.gg has already rated all six (their letters are on their lines above); GamesRadar's lists predate them. A written review from Power Up Gaming (Hannan Mundia, September 24, 2026) ranks the five Ironclad Democracy weapons with the G-60 Anti-Tank Seeker first, then the P-34 Breacher, GL-15 Evictor and AR-11 Arbitrator, and the G-8 Immolation last. Their reload and fuse figures come from wiki pages revised within days of release, so the data grades those rows likely rather than confirmed.
9.6Which lists to trust
- u.gg (Outplayed Inc.; primary, secondary, throwables, support): the only per-front list covering almost every weapon (not the Missile Pistol, the Bolt Pistol or the two map pickups). Editorial, with no published method.
- GamesRadar (primary, secondary, support; updated August 14, 2026): the independent second opinion.
- The "Helldivers 2 Tier Lists" Steam guide by The Pelvic Girdle (updated August 19, 2026) is built from u.gg's data, so it is not a second opinion; its warbond table also swaps the Control Group and Dust Devils items.
- Power Up Gaming (September 24, 2026): a written review of the Ironclad Democracy weapons only.
- Game8's primary list (last updated March 12, 2024) is obsolete: it predates both big balance passes.
- Undated "tier list 2026" sites were not used: they contradict each other, and one cites an Eruptor nerf in a "Patch 6.0.2" that was never released.
- Reddit could not be read for this manual, and Arrowhead publishes no weapon usage rates, so every "meta" claim on this tab is somebody's opinion with a date on it. A list older than patch 4.1.0 (October 23, 2025) describes a different game.
Balance history
The long trend is up. Since the armor overhaul of September 17, 2024, almost every change to primaries, sidearms, throwables and melee has been a buff; the exceptions were reverts, fixes and two reworks (the Ultimatum in May 2025, and the Dynamite's carry count in October 2025, restored in June 2026). Treat any weapon guide older than patch 4.1.0 (October 23, 2025) as describing a different game. The newest patch, 7.1.1 (September 24, 2026), changed no weapon.
10.1Patch by patch
Weapon changes only; the full patch list is in Patch history. Changes marked undocumented appear in the game data and on the wiki but not in Arrowhead's notes.
10.2The picks on this tab, patch by patch
- AR-23 Liberator: damage 55 → 70 in 2024, 80 in March 2025 and 90 in 4.1.0 (October 2025), with durable damage raised alongside; more short-magazine spares in 7.0.0.
- R-36 Eruptor: shrapnel removed and restored in 2024; the round became heavy penetration in March 2025; faster cycling and better handling in May 2025 (1.003.000), its last balance change. Reports of a "Patch 6.0.2" Eruptor nerf are false: Arrowhead never released a 6.0.2.
- PLAS-101 Purifier: medium penetration since June 2024, and the charge mechanic with a stronger charged blast since October 2024; untouched since.
- P-4 Senator: heavy penetration since October 2024; 225 damage since 4.1.0 (undocumented).
- GP-20 Ultimatum: reworked in May 2025 (impact 3,500 → 1,000, explosion 1,000 → 2,000, AP8 → AP6, demolition 50 → 40), which is why it no longer destroys Stratagem Jammers or shielded warp ships.
- G-123 Thermite: explosion 100 → 2,000 and one fewer carried in September 2024; a stronger burn in May 2025.
- AC-8 Autocannon: hurts heavies since September 2024; flak mode since October 2024; damage 260 → 325 in 4.1.0; about a second faster to reload since 6.1.0 (March 2026).
- EAT-17, Recoilless Rifle and Quasar Cannon: anti-tank damage roughly tripled in September 2024; the Recoilless gained its HE round in October 2024, and the Quasar's recharge went from 10 to 15 seconds in April 2024.
- MG-43 Machine Gun: more damage and durable damage in June 2024, more stagger in September 2024, a bigger box and a reload fix in October 2024.
Sources: the change-history sections of the wiki's weapon pages (read September 26, 2026; they record the datamined changes the notes left out), spot-checked against the full text of every official post; build dates from the wiki's Game Version table; each patch's official notes are linked above.
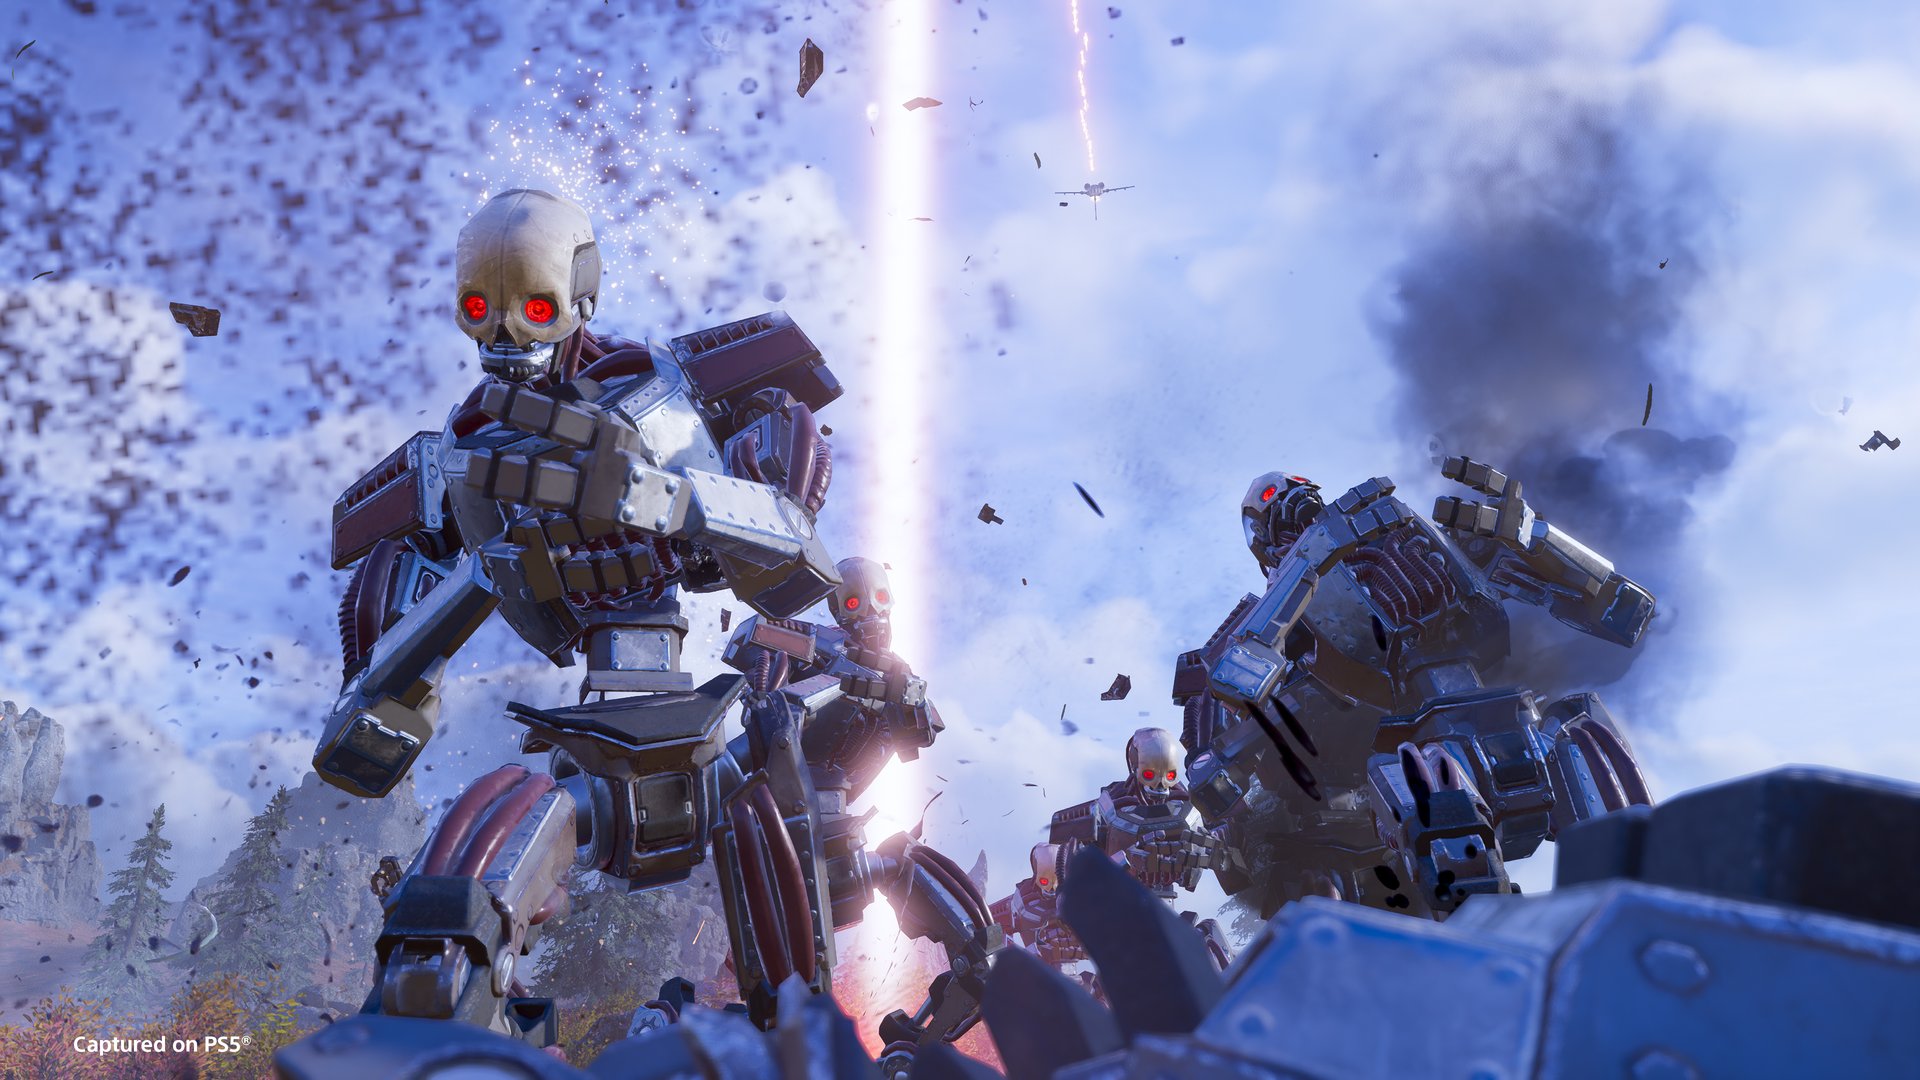
Armory06
Stratagems
Every stratagem with its code, cooldown, uses and unlock, grouped by permit type, with what each one answers and the ship modules that improve it.
On this page10 chapters
What to unlock and bring first
Fill your 4 stratagem slots with one answer to heavy armor, one Eagle, one orbital and one pick for the mission. You start with the Orbital Precision Strike and MG-43 Machine Gun; spend your first Requisition on the Eagle Airstrike, then the EAT-17 once it unlocks at level 3, and from difficulty 4 up never drop without an anti-tank answer.
1.1The four-slot shape
Something that kills heavies
The EAT-17 from level 3, then the Recoilless Rifle or the Quasar Cannon. Every front fields armor your primary can't crack: Chargers and Bile Titans, Hulks and tanks, Harvesters.
The Airstrike, later the 500kg
Several strikes per rearm, a short gap between calls and a fast arrival. The Eagle Airstrike handles patrols, bug holes and fabricators from level 1; the Eagle 500kg Bomb (level 15) kills most heavies.
Precision Strike first, Railcannon later
The free Orbital Precision Strike closes spawners and deletes a heavy that stands still; the Gatling Barrage stops a bug breach; the Railcannon (level 20) one-shots most heavies without any aiming.
Whatever the mission asks for
A sentry for defense missions and extraction, a shield backpack against Automatons, a Supply Pack for an ammo-hungry squad, or a second strike when you are clearing nests and bases.
1.2What changes by front
Eagles, fire and anti-tank
Eagles shine here: Airstrike, 500kg and Napalm. Chargers and Bile Titans need the EAT-17, then the Recoilless or Quasar. Stop breaches with the Gatling Barrage or a Napalm or Cluster Eagle; take a Supply, Jump or Warp Pack. See the Terminid playbook.
Anti-tank, shields and smoke
Hulks, tanks and Striders call for the Recoilless, EAT-17, Quasar or Spear. Take Eagles on open maps and orbitals where anti-air guns ground the Eagle. Smoke blinds bots; the Shield Generator Pack is the survival backpack. See the Automaton playbook.
Volume first, then one big hit
Voteless crowds want the MG-43 or Stalwart, the Strafing Run and chaff sentries. Harvesters (once their shield drops) and Leviathan turrets want one EAT or Quasar hit; the Precision Strike and Orbital Laser take out grounded Warp Ships. The 500kg is weak against Harvesters. See the Illuminate playbook.
Full loadouts by front and difficulty, with dated community builds, are on Loadouts by front; Beginner loadouts keeps to free and Requisition gear.
1.3Unlock in this order
Requisition stratagems unlock by player level and are bought with Requisition at the ship's terminal. You start with about 1,000 Requisition and your wallet holds at most 50,000, so play a few missions, then spend as you level. This order follows the numbers on this tab (unlock level, price, cooldown and what each one kills); it is this manual's call, not a community ranking.
- Eagle AirstrikeLevel 1, 4,000 Requisition. The all-rounder: patrols, crowds, bug holes and fabricators, with real damage to Chargers and Bile Titans.
- Orbital Gatling BarrageLevel 1, 1,500 Requisition, a cheap extra while you wait for the EAT-17. The cheapest answer to a bug breach or a bot drop, back every 70 seconds.
- EAT-17 Expendable Anti-TankLevel 3, 3,000 Requisition. Your first real anti-tank: two launchers per call, back every 70 seconds, no backpack.
- GR-8 Recoilless RifleLevel 5, 6,000 Requisition. Reusable anti-tank; a squadmate can load it for you.
- A/G-16 Gatling Sentry or Orbital EMS StrikeThe sentry at level 5 for 4,000 Requisition, the EMS Strike at level 5 for 6,000. For holding objectives: the sentry shreds chaff, the EMS Strike freezes a breach or a charge.
- AC-8 Autocannon or Eagle 110mm Rocket PodsThe Autocannon at level 10 for 7,000 Requisition, the Rocket Pods at level 10 for 7,500. The Autocannon handles mediums, fabricators and flyers; the Rocket Pods kill single heavies on the Eagle's short cycle.
- Eagle 500kg BombLevel 15, 10,000 Requisition. Kills Chargers, Hulks, tanks and Bile Titans and levels structures.
- A/MLS-4X Rocket SentryLevel 15, 7,500 Requisition. A sentry that goes for heavies first.
- LAS-99 Quasar CannonLevel 18, 7,500 Requisition. Anti-tank with no ammo and no backpack.
- Orbital Railcannon Strike and SH-32 Shield Generator PackThe Railcannon at level 20 for 10,000 Requisition, the Shield Generator Pack at level 20 for 10,000. A heavy-killer you don't aim, and the best survival backpack against Automatons.
- EXO-45 Patriot ExosuitLevel 25, 20,000 Requisition. A walking gatling and rocket pod, 3 per mission.
Arrowhead puts the level by which everything that matters for a loadout unlocks at about 25; only the TD-220 Bastion tank may come later (level 30 on wiki.gg, 25 on the Fandom wiki). Buying every Requisition stratagem costs 449,000 Requisition in all. Warbond stratagems cost Medals instead and have no level gate; the ranked purchase order fits them into your Medal spending, and Levels and unlocks shows what each level opens.
The unlock levels on this tab are wiki.gg's. The Fandom wiki's level table puts eight of the level-1 stratagems at level 2, among them the Eagle Airstrike, the Gatling Barrage and the MG Sentry, and no official source settles it.unverified
Four divers with four Recoilless Rifles leave the chaff to nobody. Aim for at least two anti-tank weapons, one crowd-clear specialist and one diver with a Supply Pack or a team weapon to share, and bring four different boosters. Each diver's Eagle is separate, so two divers with Eagles double the squad's strikes. See Roles and loadout coordination and Squad compositions.
How stratagems work
Hold Ctrl, tap the code, throw the beacon and get clear: every stratagem lands where its beacon sticks, and every one of them can kill you and your squad.
2.1Calling one down on PC
- Open the menuHold Ctrl, the default key on PC. The menu lists your 4 picks, the standard-issue ones (Reinforce, Resupply, Eagle Rearm when you carry an Eagle, and for the host the SOS Beacon) and any the mission provides.
- Enter the codeTap the arrows shown on the direction keys, W A S D by default. A wrong press resets the code; closing the menu cancels it.
- Throw the beaconIt sticks to whatever it hits, enemies and divers included. A hellpod follows a beacon stuck to a moving enemy, and the Orbital Laser, the Orbital Railcannon Strike and the Eagle 110mm Rocket Pods pick their own targets near it; every other strike lands where the beacon stuck.
- Wait for the call-inShells, bombs or a hellpod arrive after the call-in time in the tables below, and the cooldown starts. An orbital's cooldown starts when the strike reaches the ground.
Beacons can still bounce off cliffs and odd surfaces; Arrowhead hopes to have that fixed by the end of 2026, a goal rather than a promise. Practice the codes at the Stratagem Hero cabinet on your Super Destroyer, which gained a leaderboard per Destroyer in patch 7.1.0. Key bindings and other PC settings are in PC settings and controls.
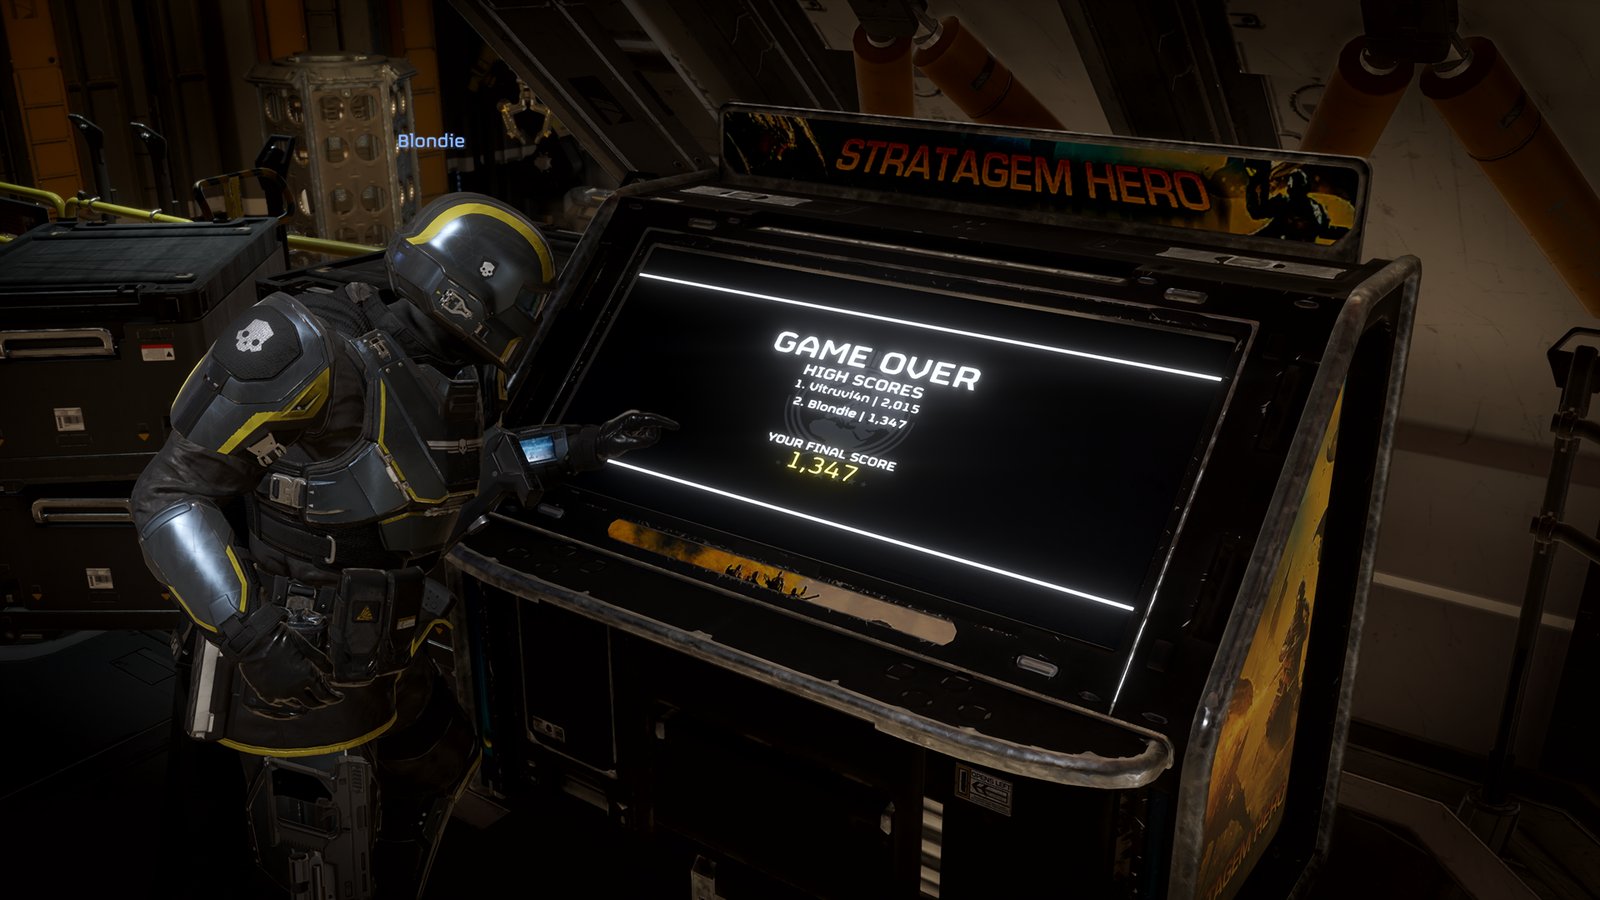
2.2Permits, colors and cooldowns
The menu colors each stratagem's icon by its permit: red for offensive (orbitals and Eagles), blue for supply (support weapons, backpacks, vehicles and exosuits), green for defensive (sentries, emplacements and mines) and yellow for mission stratagems. The beam of a thrown beacon is simpler: red for Eagle and orbital strikes and for minefields, blue for everything a hellpod delivers, according to an older datamine.
Each family recharges its own way, which is what makes a loadout feel fast or slow:
- Orbitals each run their own cooldown, from 70 seconds for the Gatling Barrage to 300 for the Orbital Laser, and ignore anti-air.
- Eagles share one aircraft: 15 seconds between calls, a few strikes each, then a 150-second rearm (Eagle strikes).
- Support weapons and backpacks mostly come back after 480 seconds; the expendables much sooner, such as the EAT-17 after 70.
- Sentries and emplacements run from 90 seconds (the MG Sentry) to 180 (the mortars).
- Vehicles and exosuits: 420 seconds for an exosuit (limited to 3 per mission), 480 for an FRV and 780 for a tank, the longest of all.
- Resupply is shared by the whole squad: one pod every 180 seconds.
2.3Every stratagem can kill you
Hellpods crush whatever they land on, divers and sentries included, and a hellpod landing inside a Shield Generator Relay's dome wears it down. Airburst, Cluster and barrage strikes kill teammates as readily as enemies. Throw strikes away from your squad, say what you are throwing, and give barrages room: about 50 m from a 120mm beacon and 60 m or more from a 380mm one.approx Friendly fire accounts for about 11.6% of all Helldiver deaths since launch in the official war statistics on September 26, 2026. The same physics works for you: a reinforcing diver can steer the pod onto an enemy for a free kill. The squad habits that prevent team kills are in Etiquette and unwritten rules.
2.4When stratagems are blocked or slowed
- Stratagem Jammer (an Automaton structure): no beacons within 150 m of it, Reinforce included, until you destroy it; SEAF Artillery still fires. Fabricators and structures covers how to kill one.
- Anti-air emplacements (Automaton): they ground your Eagle within 150 m and can shoot her down, which forces a rearm. On Megafactory maps and near anti-air sites, lean on orbitals.
- Ion storms: every stratagem, Reinforce included, is jammed while the storm lasts; if the whole squad is dead during one, the mission is lost.
- Caves on Hive Worlds: the Destroyer can't give full support underground, holes in the cave roof let stratagems through, and the Orbital Laser ignores enemies in caves (Hive Worlds and the Gloom).
- Commando missions: the Destroyer supports you for 60 seconds after the drop, and each diver's Call In Super Destroyer brings it back once (Operations and Commando missions).
- The mission timer: when it runs out, your chosen stratagems and Reinforce stop working.
- Operation modifiers: Complex Stratagem Plotting adds 50% to call-in times, and Orbital Fluctuations adds 25% to cooldowns (an event effect of the same name hits orbitals only). Call sentries and support weapons before the fight under the first; lean on what you carry under the second. See Modifiers and hazards.
- The Gloom: a Gloom Source brings reinforcements -20%, Eagle rearm +30% and ammunition from pickups -50%; Moderate and Heavy Gloom slow the Eagle's rearm by 20% and 30%, and a "Slower Eagle Rearm" event effect adds 25%.
- Cities and factory worlds: the Destroyer may have to reposition before an orbital fires, which adds to the call-in.
Arrowhead's known-issues list (updated September 26, 2026) says some stratagem weapons show the wrong call-in time on the ship's screens; the real call-in is unaffected.
Sources: the wiki's Stratagems page (permits, four slots, orbital cooldown start), Reinforce (ion storms, the timer) and Operation Modifiers; Arrowhead's Into the Unjust (caves) and 5.0.2 (Commando missions) posts. The beam colors rest on an older datamine.
Orbital strikes
Keep the free Precision Strike until something better fits: it closes spawners and deletes a heavy that stands still, every 80 seconds. Add the Gatling Barrage for breaches, then the Railcannon or the Laser when heavies and bases take over.
Orbitals come from your Super Destroyer, so each keeps its own cooldown and no anti-air gun can stop it; that makes them the pick on maps where the Eagle can't fly. The barrages scatter, the Railcannon and the Laser find their own targets, and in cities the ship may reposition first.
3.1Bring it when
- Orbital Precision Strike (free): you need a bug hole, fabricator, jammer, detector tower or objective structure gone (demolition 50), or a heavy that has stopped moving. Skip it for anything that moves.
- Orbital Gatling Barrage: you fight bugs or Voteless. It is the cheapest breach and bot-drop answer, lands fastest of the barrages and is back in 70 seconds. Not a heavy-killer.
- Orbital Gas Strike: hordes and breaches, above all Terminids and Voteless. The cloud keeps damaging and confuses what's inside it, and gas-confused enemies are slowed by 25%. Bile Titans, the Impaler and the Hive Lord ignore the confusion; keep your squad out of the cloud.
- Orbital 120mm HE Barrage: an outpost or a nest to soften before you walk in. Throw it from outside and stay well back.
- Orbital Airburst Strike: light and medium crowds in the open, such as bot infantry, Voteless and Fleshmobs. It kills any diver under it, so never throw it near the squad.
- Orbital EMS Strike: defense missions and heavy fights. It stuns nearly everything but the largest enemies, freezing a breach, a bot drop or a charging heavy for your killers. It deals no damage by itself.
- Orbital Smoke Strike: Automatons. Bots can't shoot what they can't see, so it covers terminals, revives and extractions. Bugs and Voteless walk straight through it.
- Orbital 380mm HE Barrage: fortresses, big outposts and heavy nests you can shell from a distance. Too wild for fights near your squad.
- Orbital Walking Barrage: a long outpost or an advancing line. Its salvos walk across the ground in steps, covering far more length than a single barrage.
- Orbital Laser: heavy outposts, Vox Engines and emergencies. It hunts on its own, favoring heavies and fabricators, but you get only 3 per mission, and it ignores enemies in caves.
- Orbital Napalm Barrage: breaches, bot drops and warp-ship waves you want to deny for a while. The fire can also block your own route or objective.
- Orbital Railcannon Strike: one big heavy is the problem. It arrives almost at once and one-shots most of them (Bile Titan, Charger, Hulk, tank, Impaler, Dragonroach, Vox Engine), but not a Factory Strider, Hive Lord or Leviathan.
3.2Every orbital
Sorted by unlock level. Cooldowns and call-ins are base values before ship modules; the Railcannon's call-in of 0 is the wiki's figure for a near-instant shot, which the Fandom wiki simply calls instant. The Good and bad against column is the short version of each "bring it when" above.
| Stratagem | Input | Cooldown (s) | Uses | Call-in (s) | Level | Requisition | Good and bad against | Source |
|---|---|---|---|---|---|---|---|---|
| Orbital Gas Strike | → → ↓ → | 75 | unlimited | 4.45 | 1 | 4,000 | Good: hordes and breaches (gas cloud damages about 15 s and confuses enemies). Bad: heavies; teammates in the cloud | wiki |
| Orbital Gatling Barrage | → ↓ ← ↑ ↑ | 70 | unlimited | 3.05 | 1 | 1,500 | Good: bug breaches, bot drops and chaff crowds in about a 20 m circle; fast call-in. Bad: heavy armor (only huge targets take real damage) | wiki |
| Orbital Precision Strike | → → ↑ | 80 | unlimited | 4.45 | 1 | Free | Good: spawners and objective structures (demolition 50), stationary heavies on a direct hit, bunched patrols. Bad: moving targets, spread-out groups | wiki |
| Orbital 120mm HE Barrage | → → ↓ ← → ↓ | 180 | unlimited | 7.45 | 5 | 4,000 | Good: outposts, bases and bot drops from a distance. Bad: moving targets; scatter hits allies (about 50 m safe distance) | wiki |
| Orbital Airburst Strike | → → → | 100 | unlimited | 4.45 | 5 | 4,000 | Good: light and medium crowds in the open (4 shrapnel bursts over about 40 m). Bad: heavy armor and most structures; kills any diver inside | wiki |
| Orbital EMS Strike | → → ← ↓ | 75 | unlimited | 4.45 | 5 | 6,000 | Good: stuns nearly everything except the largest units for about 15 s: rushes, breaches, drops, setting up heavies. Bad: deals no damage by itself | wiki |
| Orbital 380mm HE Barrage | → ↓ ↑ ↑ ← ↓ ↓ | 240 | unlimited | 8.45 | 8 | 7,500 | Good: softening heavy outposts and fortresses from range (15 OPS-strength shells). Bad: precision work; huge scatter (about 60 m safe distance) | wiki |
| Orbital Smoke Strike | → → ↓ ↑ | 75 | unlimited | 4.45 | 8 | 4,000 | Good: blocking Automaton line of sight, covering terminals, revives and extraction. Bad: melee swarms (bugs, Voteless) | wiki |
| Orbital Walking Barrage | → ↓ → ↓ → ↓ | 240 | unlimited | 5.45 | 10 | 7,500 | Good: breaking an advancing line or a long outpost (5 salvos that walk about 25 m each). Bad: single targets | wiki |
| Orbital Laser | → ↓ ↑ → ↓ | 300 | 3 per mission | 2 | 15 | 10,000 | Good: heavy outposts and heavies (prioritizes Hulks, Tanks, fabricators) plus hordes. Bad: only 3 uses per mission; no targets inside caves | wiki |
| Orbital Napalm Barrage | → → ↓ ← → ↑ | 240 | unlimited | 7.45 | 18 | 10,000 | Good: bug breaches, bot drops and warp-ship waves (lasting fire). Bad: heavies; can block your own route or objective | wiki |
| Orbital Railcannon Strike | → ↑ ↓ ↓ → | 180 | unlimited | 0 | 20 | 10,000 | Good: one-shots most heavies (Bile Titan, Charger, Hulk, Tank, Impaler, Dragonroach, Vox Engine, cannon turrets). Bad: crowds; does not kill Factory Striders, Hive Lords or Leviathans | wiki |
GamesRadar's stratagem tier list (updated January 9, 2026) rates the Precision Strike, Gas Strike, 380mm Barrage and Laser S and the Railcannon only B, but it predates the 6.3.0 orbital buffs. The Orbital Laser is the most-picked stratagem in u.gg's dated builds: 12 of the 15 posted from November 2025 to May 2026.community-tested
Eagle strikes
Bring the Eagle Airstrike from level 1 and add the 500kg Bomb at level 15. Eagles hit fast and carry several strikes, and all your Eagle stratagems share one rearm, so two of them give you more strikes before the wait.
4.1How the Eagle works
- One Eagle carries every Eagle stratagem in your loadout, each with its own charges (the Uses column below). Calls are 15 seconds apart.
- When her payload is spent she flies home and rearms for 150 seconds. Call Eagle Rearm (↑ ↑ ← ↑ →) to send her early whenever a charge is missing.
- Bombs fall in a line across your throw direction, while the Strafing Run and the 500kg fly along it: aim the line across the target, never through your squad.
- Anti-air emplacements ground her within 150 m, so take orbitals on anti-air maps; Gloom planets slow her rearm, so expect fewer strikes there.
- Three ship modules are worth it early: the Liquid-Ventilated Cockpit halves the gap between calls, Expanded Weapons Bay adds a charge to every Eagle and Pit Crew Hazard Pay shortens the rearm (Ship modules).
4.2Bring it when
- Eagle Airstrike: almost always. Patrols and crowds; bug holes, fabricators and mortar emplacements (demolition 40); and real damage to Chargers and Bile Titans.
- Eagle Strafing Run: you want the cheapest, quickest Eagle (2.4 s to arrive). It rakes chaff and medium enemies along a line and carries more charges than most Eagles. Not a heavy-killer.
- Eagle Cluster Bomb: big groups of small and medium enemies: breaches, bot drops, Voteless. Mind the wide blast around your squad.
- Eagle Napalm Airstrike: bug breaches and Voteless hordes; it leaves a wide fire field. Weak against Automatons and heavies.
- Eagle Smoke Strike: Automatons, to break their line of sight while you reposition or hold a terminal. Of little use against melee fronts.
- Eagle 110mm Rocket Pods: single heavies on the Eagle's short cycle. Since 6.3.0 the rockets kill Chargers, Hulks, tanks, turrets and unshielded Harvesters. It picks its own target near the beacon, and fast movers can dodge.
- Eagle 500kg Bomb: heavies and structures: Chargers, Hulks, tanks, Bile Titans, fabricators, jammers and detector towers. One per rearm, so throw it precisely. Weak against Harvesters, whose shell shrugs off explosions.
- Eagle Gas Airstrike: crowds and breaches, with a wider gas area than the Orbital Gas Strike. Its demolition is higher than Arrowhead intends (a listed known issue), so expect that to change. Where it comes from: Campaign reward: Counterdissident Hammer (Aug-Sep 2026).
4.3Every Eagle
For Eagles, the Cooldown column is the gap between two calls, and the Uses column holds the charges per rearm and the rearm time. The Gas Airstrike's call-in is disputed between the two wikis, as its cell says.
| Stratagem | Input | Cooldown (s) | Uses | Call-in (s) | Level | Requisition | Good and bad against | Source |
|---|---|---|---|---|---|---|---|---|
| Eagle Airstrike | ↑ → ↓ → | 15 | 2 per rearm (3 with Expanded Weapons Bay); rearm 150 s | 4.1 | 1 | 4,000 | Good: all-rounder: patrols, crowds, bug holes, fabricators, mortar emplacements; hurts Chargers and Titans. Bad: fast movers; bombs fall in a line across the throw, so aim it | wiki |
| Eagle Strafing Run | ↑ → → | 15 | 4 per rearm (5 with Expanded Weapons Bay); rearm 150 s | 2.4 | 1 | 1,500 | Good: chaff and medium units along a 50 m line; fastest Eagle (2.4 s). Bad: heavies (inconsistent) | wiki |
| Eagle Cluster Bomb | ↑ → ↓ ↓ → | 15 | 4 per rearm (5 with Expanded Weapons Bay); rearm 150 s | 4.1 | 3 | 4,000 | Good: large groups of small and medium enemies (breaches, drops). Bad: armor and structures; wide friendly-fire zone | wiki |
| Eagle Napalm Airstrike | ↑ → ↓ ↑ | 15 | 2 per rearm (3 with Expanded Weapons Bay); rearm 150 s | 4.1 | 5 | 5,000 | Good: bug breaches and Voteless hordes, area denial (10 m radius since 7.0.0). Bad: heavies; only bug holes and fabricators among structures | wiki |
| Eagle Smoke Strike | ↑ → ↑ ↓ | 15 | 2 per rearm (3 with Expanded Weapons Bay); rearm 150 s | 4.4 | 8 | 4,000 | Good: cutting Automaton line of sight to reposition or hold a terminal. Bad: melee enemies; no damage except a direct bomb hit | wiki |
| Eagle 110mm Rocket Pods | ↑ → ↑ ← | 15 | 3 per rearm (4 with Expanded Weapons Bay); rearm 150 s | 3.4 | 10 | 7,500 | Good: single heavies: Chargers, Hulks, Tanks, cannon turrets, unshielded Harvesters (heavy pen since 6.3.0). Bad: fast movers can dodge; crowds | wiki |
| Eagle 500kg Bomb | ↑ → ↓ ↓ ↓ | 15 | 1 per rearm (2 with Expanded Weapons Bay); rearm 150 s | 3.45 | 15 | 10,000 | Good: heavies (Charger, Hulk, Tank, Bile Titan) and structures (fabricators, bug holes, jammers, detector towers). Bad: only 1 per rearm; needs an accurate throw | wiki |
| Eagle Gas Airstrike | ↑ → ← → | 15 | 2 per rearm (3 with Expanded Weapons Bay); rearm 150 s | 4.1 (wiki.gg) or 6.15 (Fandom); unverified | -- | -- | Good: crowds and breaches (gas plus confusion over a larger area than the Orbital Gas Strike). Bad: heavies; line can be blocked by trees or rocks | wiki |
The Steam guide by The Pelvic Girdle (updated August 19, 2026, built from u.gg data) rates the Eagle Airstrike and the 500kg S+ against Terminids and Automatons, the Strafing Run S or better on all three fronts, and the 500kg only B against the Illuminate. GamesRadar's January 2026 list rates the Rocket Pods C, from before their 6.3.0 buff. The 500kg appears in 6 of u.gg's 15 dated builds.community-tested
Support weapons and backpacks
Carry one support weapon that kills heavies unless a squadmate already does, and choose it together with your backpack: a backpack-fed weapon takes the backpack slot. The EAT-17 unlocks first and leaves that slot free.
Most support weapons drop in a hellpod 7.75 seconds after the beacon lands and come back every 480 seconds, so dying with one means a walk back to your body or a long wait. Damage, penetration and ammo, with what each weapon is best and worst at, are on the weapons tab: Support weapons. Since 7.0.0 the loadout screen marks which ones need a backpack and which can't be reloaded.
5.1Pick by the job
- Anti-tank: bring one whenever you are the squad's heavy answer, and from difficulty 4 up every diver should carry some answer to heavies. The EAT-17 keeps your backpack free; the GR-8 Recoilless Rifle is reusable and fast with a loader; the LAS-99 Quasar Cannon needs no ammo and no backpack, which suits Commando missions; the FAF-14 Spear locks on at range; the MLS-4X Commando fires guided missiles at turrets and Gunships; the EAT-411 Leveller and MS-11 Solo Silo deliver one huge hit for the biggest targets; the B/MD C4 Pack handles bosses and objectives; and the CQC-20 Breaching Hammer and 40-K Meltagun kill heavies at arm's length.
- Armored infantry, precision and flyers: the APW-1 Anti-Materiel Rifle, MG-206 Heavy Machine Gun, AC-8 Autocannon, RS-422 Railgun, StA-X3 W.A.S.P. Launcher, PLAS-45 Epoch, S-11 Speargun and GL-28 Belt-Fed Grenade Launcher. Bring one when Devastators, Hive Guards, Overseers, Gunships or Stingrays are the problem.
- Crowd clearing: the MG-43 Machine Gun, M-105 Stalwart, MGX-42 Bullet Storm, M-1000 Maxigun, FLAM-40 Flamethrower, B/FLAM-80 Cremator, ARC-3 Arc Thrower, GL-21 Grenade Launcher, RL-77 Airburst Rocket Launcher, EAT-700 Expendable Napalm and GL-52 De-Escalator. Bring one when a squadmate already covers heavies, above all against bugs and the Illuminate; fire does less to Automatons (Damage rules against bots).
- Anti-air: the LAS-98 Laser Cannon, and the Autocannon and Airburst in flak mode, when Gunships, Shriekers or Stingrays hunt the squad.
- Crowd control without kills: the TX-41 Sterilizer's gas slows and confuses; bring it only beside a squadmate who does the killing.
- Melee: the CQC-9 Defoliation Tool and the CQC-1 One True Flag are for fun and niche roles; both dated community lists rate them near the bottom (Community tiers).community-tested
5.2Backpacks and the one-slot rule
You wear one backpack. Nine support weapons arrive with a backpack of their own for ammo, fuel or charges: the Recoilless Rifle, Autocannon, Airburst, Spear, W.A.S.P., Belt-Fed Grenade Launcher, Maxigun, Cremator and C4 Pack. Pair a backpack stratagem with an expendable, the Quasar or another backpack-free weapon. The Recoilless Rifle, Autocannon, Airburst, Spear and W.A.S.P. are team weapons: a squadmate can load them for you, and since 7.0.0 that works when either of you wears the backpack (Roles and loadout coordination has the reload times). The Belt-Fed Grenade Launcher and the Maxigun feed straight from their backpacks and never need a reload, so a loader has nothing to do.
- B-1 Supply Pack: your squad runs ammo-hungry weapons, you fight on Gloom planets where ammunition pickups give less, or you are the squad's support diver. You carry supply boxes and can resupply a teammate on the move.
- LIFT-850 Jump Pack: mobility: cliffs, escapes and dodging Chargers.
- SH-20 Ballistic Shield Backpack: Automaton gunfire, with a one-handed weapon in your hands. It blocks bullets and melee but not rockets, and a Veracitor's melee breaks it. Useless against swarms.
- AX/AR-23 Guard Dog: a rifle drone to pick off chaff and mediums around you; against the Illuminate it tracks Obtruders and Elevated Overseers well.
- AX/LAS-5 Rover: bugs. A laser drone that never runs out of ammo, though it can clip you.
- SH-32 Shield Generator Pack: the Automaton front. A bubble that stops bullets, explosions and melee until sustained fire breaks it.
- SH-51 Directional Shield: ranged enemies while you aim a one-handed weapon. A frontal energy shield that stops projectiles, not melee.
- AX/FLAM-75 Hot Dog: close swarms. The drone flies at nearby enemies and burns them; watch its fire pools.
- B-100 Portable Hellbomb: the structures that need demolition 60 (Gunship Facilities, Gazer Spires, Monoliths), which only a Hellbomb or the SEAF Artillery Mini-Nuke can break, and anything big within its blast. Plan your exit: the carrier starts inside the blast.
- AX/ARC-3 K-9: crowds and stunning heavies, if your squad keeps its distance, because its arcs chain into divers.
- LIFT-860 Hover Pack: floating above melee swarms and reaching high ground; ranged fire still finds you.
- AX/TX-13 Dog Breath: crowd control. A gas drone that confuses enemies around you but does little damage.
- LIFT-182 Warp Pack: escapes. It teleports you through terrain and enemy lines; never warp into a large enemy.
5.3Every support weapon
Sorted by unlock level, with the warbond weapons last: they have no level gate, and the Requisition column shows their Medal price instead. The Uses column says how many launchers or guns an expendable call delivers, and the One True Flag's call-in rests on the Fandom wiki alone.
| Stratagem | Input | Cooldown (s) | Uses | Call-in (s) | Level | Requisition | Good and bad against | Source |
|---|---|---|---|---|---|---|---|---|
| APW-1 Anti-Materiel Rifle | ↓ ← → ↑ ↓ | 480 | unlimited | 7.75 | 1 | 5,000 | Good: medium targets at range: Devastators, Overseers, Hulk eyes, Gunship engines (AP4, 450). Bad: swarms; heavy recoil | wiki |
| M-105 Stalwart | ↓ ← ↓ ↑ ↑ ← | 480 | unlimited | 7.75 | 1 | 3,500 | Good: swarms of light enemies (Terminids, Voteless), big magazine, reload on the move. Bad: anything armored (AP2) | wiki |
| MG-43 Machine Gun | ↓ ← ↓ ↑ → | 480 | unlimited | 7.75 | 1 | Free | Good: chaff and medium hordes, especially Illuminate Voteless (AP3). Bad: armor above medium; poor close-range handling; stationary reload | wiki |
| EAT-17 Expendable Anti-Tank | ↓ ↓ ← ↑ → | 70 | unlimited (2 launchers per call) | 6.75 | 3 | 3,000 | Good: heavies and turrets (AP6, 2,000 damage); two launchers per call every 70 s. Bad: crowds; single shot, no reload | wiki |
| GL-21 Grenade Launcher | ↓ ← ↑ ← ↓ | 480 | unlimited | 7.75 | 5 | 6,000 | Good: crowds and medium units (400 explosive, AP3), bug holes and fabricators. Bad: heavies; arcing shots at range | wiki |
| GR-8 Recoilless Rifle | ↓ ← → → ← | 480 | unlimited | 7.75 | 5 | 6,000 | Good: heavies (AP6 HEAT 3,200): Chargers, Tanks, Hulks, Titan heads, Gunships, fabricators. Bad: stationary reload; swarms up close | wiki |
| LAS-98 Laser Cannon | ↓ ← ↓ ↑ ← | 480 | unlimited | 7.75 | 5 | 4,000 | Good: flyers (Gunships, Shriekers, Elevated Overseers), weak points, no ammo needed (heat). Bad: slow damage on heavy armor | wiki |
| AC-8 Autocannon | ↓ ← ↓ ↑ ↑ → | 480 | unlimited | 7.75 | 10 | 7,000 | Good: medium and some heavy targets (AP4), flak mode for flyers and crowds, fabricators. Bad: heaviest armor; stationary reload | wiki |
| FLAM-40 Flamethrower | ↓ ← ↑ ↓ ↑ | 480 | unlimited | 7.75 | 10 | 6,000 | Good: Terminid and Voteless hordes (AP4 flame, 10 m splash); flames panic enemies (6.1.0). Bad: 20 m range; ranged Automatons; self-burns | wiki |
| MG-206 Heavy Machine Gun | ↓ ← ↑ ↓ ↓ | 480 | unlimited | 7.75 | 12 | 6,000 | Good: medium armor at mid range (AP4): Devastators, Hive Guards, Bile Spewers, Hulks. Bad: close and fast targets (ergonomics 0) | wiki |
| ARC-3 Arc Thrower | ↓ → ↓ ↑ ← ← | 480 | unlimited | 7.75 | 15 | 7,000 | Good: chaff and medium crowds (chains), stun-locks Chargers and Hulks; AP7, no ammo. Bad: long range; team-kills in melee | wiki |
| MLS-4X Commando | ↓ ← ↑ ↓ → | 120 | unlimited (1 launcher, 4 missiles) | 7.75 | 15 | 8,000 | Good: heavies and structures with 4 laser-guided AP6 missiles per launcher. Bad: crowds; 120 s cooldown, no reload | wiki |
| RL-77 Airburst Rocket Launcher | ↓ ↑ ↑ ← → | 480 | unlimited | 7.75 | 15 | 8,000 | Good: light and medium crowds and patrols, flyers (flak or cluster mode). Bad: armor (AP3); lethal near allies | wiki |
| LAS-99 Quasar Cannon | ↓ ↓ ↑ ← → | 480 | unlimited | 7.75 | 18 | 7,500 | Good: heavies with infinite ammo (AP6, 2,000); strong in Commando missions. Bad: several heavies at once (3 s charge, 15 s recharge) | wiki |
| FAF-14 Spear | ↓ ↓ ↑ ↓ ↓ | 480 | unlimited | 7.75 | 20 | 9,000 | Good: heavies and structures at range with lock-on (AP7, 4,000): Tanks, Titans, Harvesters, spawners; 4 missiles per pack. Bad: close range; needs clear line of sight | wiki |
| RS-422 Railgun | ↓ → ↓ ↑ ← → | 480 | unlimited | 7.75 | 20 | 10,000 | Good: precise single heavies and mediums (AP5, up to 1,500 charged): Hulk eyes, Devastators. Bad: crowds; 21 rounds; unsafe mode can explode | wiki |
| StA-X3 W.A.S.P. Launcher | ↓ ↓ ↑ ↓ → | 480 | unlimited | 7.75 | 20 | 12,000 | Good: medium enemies and flyers at long range (locks up to 300 m; AP6 salvos, 42 missiles). Bad: cannot lock small enemies; poor tracking up close | wiki |
| 40-K Meltagun | ↓ ← ↑ ← ← ↓ | 480 | unlimited | 7.75 | -- | 110 Medals | Good: heavies at close range (AP7 beam, about 2,600 per s, 15 m max). Bad: range (40% damage falloff at 15 m); 15 bursts total | wiki |
| B/FLAM-80 Cremator | ↓ ↓ → ↓ ↑ ↑ | 480 | unlimited | 7.75 | -- | 110 Medals | Good: hordes with a longer (25 m), stronger double flame. Bad: ranged Automatons; needs its backpack tank | wiki |
| B/MD C4 Pack | ↓ → ↑ ↑ → ↑ | 480 | unlimited | 9.75 | -- | 110 Medals | Good: heavies and bosses (6 AP7 charges, 2,000 each): Bile Titans, Vox Engines, Hive Lords, spawners. Bad: ranged fights; you must get close | wiki |
| CQC-1 One True Flag | ↓ ← → → ↑ | 480 | unlimited | 11.65 (Fandom only); unverified | -- | 110 Medals | Good: melee thrust (AP3, 200) and draws enemy aggro to the bearer; pairs with a shield. Bad: real threat removal | wiki |
| CQC-20 Breaching Hammer | ↓ ← → ← ↑ | 480 | unlimited | 7.75 | -- | 75 Medals | Good: heavies up close with a charge (AP6 explosion, 2,200): Chargers, Hulks, Tanks, War Striders. Bad: anything you cannot reach safely | wiki |
| CQC-9 Defoliation Tool | ↓ ← → → ↓ | 480 | unlimited | 7.75 | -- | 85 Medals | Good: melee heavy-killer (saw ramps to AP5, 450 per s) and mediums. Bad: ranged enemies; you must stay in contact | wiki |
| EAT-411 Leveller | ↓ ↓ ← ↑ ↓ | 140 | unlimited (1 launcher per call) | 7.75 | -- | 85 Medals | Good: one huge shot (AP6, 2,500 blast, demolition 40): heavies, crowds, spawners. Bad: one launcher per call, 140 s | wiki |
| EAT-700 Expendable Napalm | ↓ ↓ ← ↑ ← | 140 | unlimited (2 launchers per call) | 7.75 | -- | 85 Medals | Good: area denial vs hordes and breaches (bomblets plus napalm); two launchers per call. Bad: heavies | wiki |
| GL-28 Belt-Fed Grenade Launcher | ↓ ← ↑ ← ↑ ↑ | 480 | unlimited | 7.75 | -- | 110 Medals | Good: sustained fire into hordes (120 AP4 grenades) and stagger-locking fast enemies. Bad: single heavies take a long burst | wiki |
| GL-52 De-Escalator | ↓ → ↑ ← → | 480 | unlimited | 7.75 | -- | 85 Medals | Good: stuns and kills crowds (10 AP4 arcs per grenade), Hulks and Bile Titans with focused fire. Bad: arcs can hit you inside 12 m | wiki |
| M-1000 Maxigun | ↓ ← → ↓ ↑ ↑ | 480 | unlimited | 7.75 | -- | 110 Medals | Good: hordes with a 1,000-round backpack at very high rpm (AP3). Bad: armor; heavy recoil; eats ammo | wiki |
| MGX-42 Bullet Storm | ↓ ← ↓ → ↑ ← | 70 | unlimited (2 guns per call) | 6.75 | -- | 75 Medals | Good: Terminid and Illuminate hordes (1,300 rpm, 100 damage); two guns every 70 s. Bad: Automaton armor and small weak points (AP2) | wiki |
| MS-11 Solo Silo | ↓ ↑ → ↓ ↓ | 180 | unlimited (1 silo per call) | 7.75 | -- | 110 Medals | Good: the biggest targets anywhere in line of sight (AP9 impact, 2,500 blast): Factory Striders, Vox Engines, Titans. Bad: crowds; 180 s, single missile | wiki |
| PLAS-45 Epoch | ↓ ← ↑ ← → | 480 | unlimited | 7.75 | -- | 75 Medals | Good: clustered heavy infantry (Heavy Devastators, Alpha Commanders), AP5 charged bolts. Bad: large crowds; limited ammo; holding the charge too long explodes it | wiki |
| S-11 Speargun | ↓ → ↓ ← ↑ → | 480 | unlimited | 7.75 | -- | 85 Medals | Good: staggering heavies (interrupts Chargers and Titan spew), Hulk eyes, gas confuses. Bad: crowds; one shot per reload | wiki |
| TX-41 Sterilizer | ↓ ← ↑ ↓ ← | 480 | unlimited | 7.75 | -- | 85 Medals | Good: crowd control: gas slows 25% and confuses out to 47 m. Bad: killing anything fast (low damage); pair it with a killer | wiki |
5.4Every backpack
Sorted by unlock level, with the seven warbond backpacks last and their Medal price in the Requisition column. Only the drones and the Portable Hellbomb fight for you; the rest protect you, carry supplies or move you.
| Stratagem | Input | Cooldown (s) | Uses | Call-in (s) | Level | Requisition | Good and bad against | Source |
|---|---|---|---|---|---|---|---|---|
| B-1 Supply Pack | ↓ ← ↓ ↑ ↑ ↓ | 480 | unlimited | 9.75 | 1 | 4,000 | Good: keeping the squad in ammo, stims and grenades on the move; ammo-hungry builds. Bad: no combat value by itself | wiki |
| LIFT-850 Jump Pack | ↓ ↑ ↑ ↓ ↑ | 480 | unlimited | 9.75 | 8 | 6,000 | Good: mobility: cliffs, escapes, dodging Chargers (15 s recharge). Bad: jumping while slowed | wiki |
| AX/AR-23 Guard Dog | ↓ ↑ ← ↑ → ↓ | 480 | unlimited | 9.75 | 10 | 7,500 | Good: chaff and mediums around you (AP3 rifle drone, 30 m). Bad: heavies; returns to reload | wiki |
| AX/LAS-5 Rover | ↓ ↑ ← ↑ → → | 480 | unlimited | 9.75 | 10 | 7,500 | Good: chaff, especially Terminids (laser, never needs ammo). Bad: medium armor; can hit you | wiki |
| SH-20 Ballistic Shield Backpack | ↓ ← ↓ ↓ ↑ ← | 240 | unlimited | 9.75 | 12 | 6,000 | Good: frontal cover vs Automaton fire (1,000 HP since 6.2.2). Bad: Terminid swarms; needs a one-handed weapon | wiki |
| SH-32 Shield Generator Pack | ↓ ↑ ← → ← → | 480 | unlimited | 9.75 | 20 | 10,000 | Good: 360-degree bubble vs projectiles, explosions and melee; very strong vs Automatons. Bad: sustained damage breaks it (12 s recharge) | wiki |
| AX/ARC-3 K-9 | ↓ ↑ ← ↑ → ← | 480 | unlimited | 9.75 | -- | 110 Medals | Good: crowds (arcs chain to many targets) and stunning heavies. Bad: very high friendly-fire risk | wiki |
| AX/FLAM-75 Hot Dog | ↓ ↑ ← ↑ ← ← | 480 | unlimited | 9.75 | -- | 75 Medals | Good: close swarms (flies to targets and burns them, 20 m). Bad: fire pools near the squad | wiki |
| AX/TX-13 Dog Breath | ↓ ↑ ← ↑ → ↑ | 480 | unlimited | 9.75 | -- | 110 Medals | Good: crowd control (gas confusion, 20 m). Bad: no direct damage | wiki |
| B-100 Portable Hellbomb | ↓ → ↑ ↑ ↑ | 300 | unlimited | 9.75 | -- | 110 Medals | Good: anything within about 17 to 25 m and every structure (demolition 60); only Hive Lords survive. Bad: the carrier (it is a suicide run without an exit) | wiki |
| LIFT-182 Warp Pack | ↓ ← → ↓ ← → | 480 | unlimited | 9.75 | -- | 110 Medals | Good: teleporting through terrain, doors and enemies' lines (damages the destination). Bad: warping into a large enemy kills you | wiki |
| LIFT-860 Hover Pack | ↓ ↑ ↑ ↓ ← → | 480 | unlimited | 9.75 | -- | 110 Medals | Good: hovering above melee swarms and reaching high ground. Bad: Hunters and Automaton fire still reach you; poor air accuracy | wiki |
| SH-51 Directional Shield | ↓ ↑ ← → ↑ ↑ | 300 | unlimited | 9.75 | -- | 75 Medals | Good: frontal energy shield vs projectiles while aiming a one-handed weapon; Automatons. Bad: melee (nearly useless vs Terminids) | wiki |
The Pelvic Girdle's Steam guide (August 19, 2026) rates the Supply Pack, Warp Pack and Hot Dog S+ on all three fronts and the Shield Generator Pack and Jump Pack S on all three; GamesRadar (January 9, 2026) rates the Jump Pack, Shield Generator Pack and Warp Pack S and the K-9 and Dog Breath D. Support-weapon ratings from u.gg and GamesRadar are compared on Community tiers.community-tested
Sentries, emplacements and mines
Bring a sentry for defense missions and extraction, not for patrols, and drop it before the wave arrives, where it can see the approach. The MG Sentry is cheap and back every 90 seconds; the Autocannon and Rocket Sentries handle heavies.
Sentries and emplacements arrive by hellpod (7.75 seconds) and stay until they are destroyed or out of ammo; manned emplacements can't be reloaded. Turret and mortar sentries have 400 health since patch 6.3.0 doubled it, and the Tesla Tower more. Call sentries and Resupply before a Shield Generator Relay, because hellpods landing inside wear its dome down; and tell your squad where you lay mines.
6.1Sentries: bring it when
- A/MG-43 Machine Gun Sentry: you want a sentry ready at all times. Cheap, quick to come back, good against chaff on every front.
- A/G-16 Gatling Sentry: dense chaff waves on defense missions, above all bugs and Voteless. It burns ammo fast and sweeps its whole arc, so stay out of it.
- A/AC-8 Autocannon Sentry: big targets. Its bursts stagger-lock Chargers, Hulks and Harvesters.
- A/M-12 Mortar Sentry: the Automaton front, where enemies stay at range. Mortars hit everything near their target, so they punish divers in melee against bugs and the Illuminate.
- A/MLS-4X Rocket Sentry: heavies. It targets them first and outranges the gun sentries, but enemies right next to it stop it firing.
- A/ARC-3 Tesla Tower: a chokepoint full of chaff, above all Voteless and Fleshmobs. It zaps any diver who isn't prone, so place it off your own path.
- A/M-23 EMS Mortar Sentry: pinning enemies for your killers on defense missions. It deals no damage.
- A/LAS-98 Laser Sentry: chaff with no ammo limit. It overheats and destroys itself under heavy load.
- A/FLAM-40 Flame Sentry: short-range horde denial against bugs and Voteless; not for Automatons.
- A/GM-17 Gas Mortar Sentry: gassing and confusing crowds from range. Keep squadmates out of the clouds.
6.2Emplacements and mines: bring it when
- MD-6 Anti-Personnel Minefield: chokepoints and defense lanes against small and medium enemies.
- MD-I4 Incendiary Mines: breach paths and Voteless lanes. The fire burns allies too.
- MD-17 Anti-Tank Mines: heavies on a known path; only large enemies set them off. Patch 7.0.0 raised their demolition so they break colony walls and bug holes, but the current datamine still shows the old value.unverified
- FX-12 Shield Generator Relay: ranged fronts (Automatons, Illuminate plasma). A dome that stops projectiles for a short while; melee enemies walk straight in.
- E/MG-101 HMG Emplacement: holding an objective against mediums and Gunships.
- E/GL-21 Grenadier Battlement: holding an objective against crowds from behind half cover; it fires only across a limited arc to its front.
- MD-8 Gas Mines: area control. A field of mines that poisons and confuses crowds.
- E/AT-12 Anti-Tank Emplacement: a defense that will face big heavies. A manned rapid anti-tank cannon that kills even the largest enemies.
6.3Every sentry
The Requisition sentries first by unlock level, then the three warbond sentries with their Medal price. Their cooldowns are short next to a support weapon's, so plan a sentry for each wave, not one per mission.
| Stratagem | Input | Cooldown (s) | Uses | Call-in (s) | Level | Requisition | Good and bad against | Source |
|---|---|---|---|---|---|---|---|---|
| A/MG-43 Machine Gun Sentry | ↓ ↑ → → ↑ | 90 | unlimited | 7.75 | 1 | 1,500 | Good: chaff and small mediums (75 m, AP3); cheap and fast cooldown. Bad: wastes ammo on heavies | wiki |
| A/G-16 Gatling Sentry | ↓ ↑ → ← | 150 | unlimited | 7.75 | 5 | 4,000 | Good: dense chaff waves (1,600 rpm). Bad: overkill burns ammo fast; team-kills across its arc | wiki |
| A/M-12 Mortar Sentry | ↓ ↑ → → ↓ | 180 | unlimited | 7.75 | 8 | 7,000 | Good: indirect fire on groups at 15 to 125 m. Bad: melee fights near allies; minimum range 15 m | wiki |
| A/AC-8 Autocannon Sentry | ↓ ↑ → ↑ ← ↑ | 150 | unlimited | 7.75 | 13 | 6,000 | Good: big targets (bursts stagger-lock Chargers, Hulks, Harvesters). Bad: swarms (slow turn) | wiki |
| A/ARC-3 Tesla Tower | ↓ ↑ → ↑ ← → | 120 | unlimited | 7.75 | 15 | 8,000 | Good: chokepoints vs chaff and mediums (20 m arcs). Bad: zaps Helldivers who are not prone | wiki |
| A/MLS-4X Rocket Sentry | ↓ ↑ → → ← | 150 | unlimited | 7.75 | 15 | 7,500 | Good: heavies first (AP5, 100 m), Automaton ranged units. Bad: enemies inside 10 m stop it firing | wiki |
| A/M-23 EMS Mortar Sentry | ↓ ↑ → ↓ → | 180 | unlimited | 7.75 | 20 | 8,000 | Good: stun and slow clouds that pin enemies for your killers. Bad: no damage | wiki |
| A/FLAM-40 Flame Sentry | ↓ ↑ → ↓ ↑ ↑ | 100 | unlimited | 7.75 | -- | 85 Medals | Good: short-range horde denial (34 m since 6.2.2, panics enemies). Bad: ranged Automatons | wiki |
| A/GM-17 Gas Mortar Sentry | ↓ ↑ → ↓ ← | 180 | unlimited | 7.75 | -- | 85 Medals | Good: indirect gas that damages and confuses crowds up to 125 m. Bad: heavies; gas near allies | wiki |
| A/LAS-98 Laser Sentry | ↓ ↑ → ↓ ↑ → | 150 | unlimited | 7.75 | -- | 85 Medals | Good: chaff and mediums with no ammo limit (heat). Bad: overheats and self-destructs under heavy load | wiki |
6.4Every emplacement and minefield
The MD-8 Gas Mines' call-in is left blank on purpose: the wiki's figure doesn't match the other minefields and is probably an entry error. The MD-17's demolition 40 is the patch notes' figure; the datamine still reads 30 (see above).
| Stratagem | Input | Cooldown (s) | Uses | Call-in (s) | Level | Requisition | Good and bad against | Source |
|---|---|---|---|---|---|---|---|---|
| MD-6 Anti-Personnel Minefield | ↓ ← ↑ → | 120 | unlimited | 7.75 | 1 | 1,500 | Good: chokepoints vs small and medium enemies (48 mines). Bad: heavies; teammates forget where it is | wiki |
| MD-I4 Incendiary Mines | ↓ ← ← ↓ | 120 | unlimited | 7.75 | 8 | 4,000 | Good: chaff denial with lingering fire. Bad: heavies; burns allies | wiki |
| E/MG-101 HMG Emplacement | ↓ ↑ ← → → ← | 180 | unlimited | 7.75 | 10 | 10,000 | Good: manned 360-degree twin HMG (600 rounds) for holding objectives vs mediums. Bad: fixed position; no reload | wiki |
| FX-12 Shield Generator Relay | ↓ ↓ ← → ← → | 90 | unlimited | 7.75 | 10 | 9,000 | Good: 15 m dome that stops projectiles for 40 s; great vs Automatons and Illuminate fire. Bad: melee enemies walk in | wiki |
| E/GL-21 Grenadier Battlement | ↓ → ↓ ← → | 120 | unlimited | 7.75 | 15 | 10,000 | Good: manned grenade launcher with half-cover for defense vs crowds. Bad: only a 170-degree firing arc | wiki |
| MD-17 Anti-Tank Mines | ↓ ← ↑ ↑ | 120 | unlimited | 7.75 | 15 | 7,000 | Good: heavies only (18 mines triggered by large units; demolition 40 since 7.0.0). Bad: small enemies do not trigger them | wiki |
| MD-8 Gas Mines | ↓ ← ← → | 120 | unlimited | -- | 20 | 12,000 | Good: area control: 48 mines that poison and confuse crowds. Bad: heavies; gas near allies | wiki |
| E/AT-12 Anti-Tank Emplacement | ↓ ↑ ← → → → | 180 | unlimited | 7.75 | -- | 110 Medals | Good: manned rapid anti-tank cannon that kills even the largest enemies. Bad: fixed position; no reload | wiki |
The Pelvic Girdle's Steam guide (August 19, 2026) rates the Autocannon Sentry and the HMG Emplacement S+ on all three fronts, the Anti-Tank Emplacement and Rocket Sentry S+ against Automatons, and the Tesla Tower S+ against bugs and the Illuminate but E against bots.community-tested
Vehicles and exosuits
Bring an exosuit when you want a heavy answer you can walk around in: the Patriot unlocks at level 25, one diver runs it alone, and you get 3 per mission. Treat the FRVs and tanks as squad plans: one diver drives, the others shoot, and a tank comes back only every 780 seconds.
7.1Bring it when
- EXO-45 Patriot Exosuit: you want a heavy answer that walks: a gatling for chaff and rockets for heavies.
- EXO-49 Emancipator Exosuit: mediums, heavies, bug nests and fabricators, with twin autocannons.
- EXO-55 Breakthrough Exosuit: close heavy fights behind a shield arm, with a flak cannon that must fully reload before it fires again.
- EXO-51 Lumberer Exosuit: a flamethrower for hordes and an anti-tank cannon for heavies; its flamethrower damage is on Arrowhead's known-issues list.
- M-102 Gunner FRV: big maps where the squad needs to move. A fast transport with a heavy machine gun turret whose ammo can't be refilled.
- TD-220 Bastion MK XVI: outposts and heavies, when the squad can crew a tank. Its main cannon reaches penetration AP8.
- M-103 Supply FRV: a squad transport with resupply charges and an auto-turret. So far a campaign reward, it becomes a Requisition purchase for everyone in October 2026, at a price not yet announced.
- TD-110 Maelstrom: an infantry fighting vehicle with gatlings, guided missiles and smoke; its data is still incomplete. Where it comes from: Campaign reward: Armored Eagle (campaign running since 2026-09-22) unverified.
- M-104 Incinerator FRV: in the game's files, but no campaign or store offers it.
The 6.3.0 patch notes say exosuit cooldowns went from 10 to 8 minutes. The game data and every exosuit page on the wiki give 420 seconds (7 minutes), and the wiki records the official note as an error, so this manual uses the game data.
Since 6.2.2 an exosuit is destroyed only when its main health pool empties, and 6.3.0 raised that pool again (to 1,800) while re-tuning many enemies to hurt vehicles more. Since 7.1.0 enemies ignore vehicles nobody is sitting in. A campaign reward such as the Supply FRV or the Maelstrom goes to the divers who logged in while the campaign ran, if the community wins a majority of the campaign's Major Orders (Rewards for taking part).
7.2Every vehicle
A Pelican delivers each vehicle. Only the Gunner FRV and the Bastion are Requisition purchases; the other three are campaign rewards or can't be obtained, and the Maelstrom's row rests on a wiki page still marked work in progress.
| Stratagem | Input | Cooldown (s) | Uses | Call-in (s) | Level | Requisition | Good and bad against | Source |
|---|---|---|---|---|---|---|---|---|
| M-102 Gunner FRV | ← ↓ → ↓ → ↓ ↑ | 480 | unlimited | 10.5 | 25 | 25,000 | Good: fast transport with an HMG turret for repositioning and escapes. Bad: turret ammo cannot be refilled | wiki |
| TD-220 Bastion MK XVI | ← ↓ → ↓ ← ↓ ↑ ↓ ↑ | 780 | unlimited | 10.5 | 30 | 35,000 | Good: tank: AP8 120 mm cannon (31 shells) plus coaxial HMG; outposts and heavies. Bad: 780 s cooldown; unlocks at level 30 | wiki |
| M-103 Supply FRV | ← ↓ ← ← ↓ ↑ → | 480 | unlimited | 10.5 | -- | -- | Good: squad transport with 8 resupply charges and an auto-turret. Bad: heavy fire; turret needs reloading from the rack | wiki |
| M-104 Incinerator FRV | ← ↓ → ← ↓ ↑ ↑ | 480 | unlimited | 10.5 | -- | -- | Good: flamethrower FRV with heavier armor and a ram. Bad: only 3 seats; explodes like a 500kg when destroyed; not obtainable | wiki |
| TD-110 Maelstrom unverified | ← ↓ → ↓ ← ↓ ↑ ← → | 780 | unlimited | 10.5 | -- | -- | Good: infantry fighting vehicle: twin gatlings (highest DPS in the game), laser-guided AP5 missiles, smoke. Bad: data still incomplete (new) | wiki |
7.3Every exosuit
All four share the 420-second cooldown and the limit of 3 per mission; the two warbond exosuits show their Medal price in the Requisition column.
| Stratagem | Input | Cooldown (s) | Uses | Call-in (s) | Level | Requisition | Good and bad against | Source |
|---|---|---|---|---|---|---|---|---|
| EXO-45 Patriot Exosuit | ← ↓ → ↑ ← ↓ ↓ | 420 | 3 per mission | 10.5 | 25 | 20,000 | Good: gatling vs chaff plus rockets vs heavies (one rocket to a Charger's head). Bad: limited rockets; 3 uses per mission | wiki |
| EXO-49 Emancipator Exosuit | ← ↓ → ↑ ← ↓ ↑ | 420 | 3 per mission | 10.5 | 25 | 20,000 | Good: medium and heavy targets with twin AP5 autocannons, bug nests, fabricators. Bad: shooting downhill; 3 uses per mission | wiki |
| EXO-51 Lumberer Exosuit | ← ↓ → ↑ → ← ↑ | 420 | 3 per mission | 10.5 | -- | 50 Medals | Good: flamethrower (500 fuel) for hordes plus anti-tank cannon for heavies and Factory Striders. Bad: no ammo refills; flamethrower damage bug (known issue) | wiki |
| EXO-55 Breakthrough Exosuit | ← ↓ → ← → ↓ ↑ | 420 | 3 per mission | 10.5 | -- | 50 Medals | Good: shield arm plus AP4 flak cannon (40 pellets, 3,600 total): Chargers in 2 to 3 shots. Bad: must fully reload before firing again | wiki |
Mission stratagems
Every loadout carries Reinforce and Resupply, Eagle Rearm when you bring an Eagle, and the host also has the SOS Beacon. Learn their codes first; the rest appear only when an objective needs them.
- Reinforce (↑ ↓ → ← ↑): any living diver brings back dead squadmates from a shared budget of 5 per diver (20 in a full squad). Once it's spent, one returns every 120 seconds, and if the whole squad dies with none left before the main objective is done, the mission fails. Call it near the fallen diver's gear unless that spot is overrun; the diver in the pod can steer it onto an enemy.
- Resupply (↓ ↓ ↑ →): one pod of 4 boxes for the whole squad every 180 seconds. The cooldown is shared, so call it when the squad needs it and share the boxes.
- SOS Beacon (↑ ↓ → ↑): host only. It opens your mission to quickplay so strangers can join (Joining and hosting).
- Eagle Rearm (↑ ↑ ← ↑ →): sends your Eagle home early to rearm.
- Call In Super Destroyer: Commando missions only; each diver can bring the ship back once per mission.
- NUX-223 Hellbomb: the mission's own bomb for objective structures. Arm it, then run.
- Objective stratagems (drills, probes, uploads, the Super Earth Flag, SEAF Artillery and the rest): the mission tells you when to call each one; the codes are in the table.
Reinforce stops once any diver boards the extraction shuttle and when the mission timer runs out. The multiplayer tab has the squad's rules for samples, reinforcements and Resupply, and Mission types covers the missions themselves.
8.1Every mission stratagem
Mission stratagems carry no level or price. Three rows are thin: the SOS Beacon's call-in is disputed between the two wikis; the wiki shows the Reinforcement Pods with the same code as Upload Data, which may be a copy error; and the free Portable Hellbomb of the Destroy Spore Lung objective rests on one datamine key.
| Stratagem | Input | Cooldown (s) | Uses | Call-in (s) | Level | Requisition | Good and bad against | Source |
|---|---|---|---|---|---|---|---|---|
| Activate E-711 Extraction Drill | ↓ ↓ ← ← ↓ ↓ | 0 | unlimited | 0 | -- | -- | Starts the GATER drill at a drill site | wiki |
| Aquifer Drill | ← ← ← ↑ ↓ → ↓ ↓ | 0 | 1 | 10 | -- | -- | Infiltrate Illuminate Lair: Cleanse Foul Shrine objective | wiki |
| B-100 Portable Hellbomb (mission-provided) unverified | ↓ → ↑ ↑ ↓ | 300 | unlimited during the objective | -- | -- | -- | Destroy Spore Lung (cave objective): free Portable Hellbomb granted in place of the NUX-223 Hellbomb | wiki |
| Call In Super Destroyer | ↑ ↑ ↓ ↓ ← → ← → | -- | 1 per mission | -- | -- | -- | Commando missions only: brings the Destroyer back for 1 minute, once per mission | wiki |
| Cargo Container | ↑ ↑ ↓ ↓ → ↓ | 0 | 1 | 10 | -- | -- | Confiscate Assets and Rapid Acquisition: container for Fusion Batteries and platinum; indestructible cover | wiki |
| Dark Fluid Vessel | ↑ ← → ↓ ↑ ↑ | 30 | 12 jumps per vessel | 10 | -- | -- | Deploy Dark Fluid event mission: backpack that jumps 12 times before it destabilizes | wiki |
| Eagle Rearm | ↑ ↑ ← ↑ → | 0 | unlimited | 0 | -- | -- | Sends Eagle-1 back to rearm before her payload is spent (150 s; 120 s with Pit Crew Hazard Pay) | wiki |
| Hive Breaker Drill | ← ↑ ↓ → ↓ ↓ | 0 | 1 | 10 | -- | -- | Nuke Nursery (Hive Worlds): burrows the nuclear device | wiki |
| NUX-223 Hellbomb | ↓ ↑ ← ↓ ↑ → ↓ ↑ | 30 | unlimited during the objective | 10 | -- | -- | Destroys objective structures; must be armed; about 25 m blast | wiki |
| Portable Comms Relay | ↑ ↑ ↓ ↓ ← ← ↓ | 0 | 1 | 10 | -- | -- | Infiltrate Illuminate Lair: uploads the Tactical Video Camera recordings | wiki |
| Prospecting Drill | ↓ ↓ ← → ↓ ↓ | 0 | 1 | 10 | -- | -- | Conduct Geological Survey: starts the main objective | wiki |
| Reinforce | ↑ ↓ → ← ↑ | 0 | 5 per diver per mission (20 in a full squad), then 1 every 120 s | -- | -- | -- | Brings back dead squadmates (5 per diver, 20 per full squad); the pod crushes what it lands on | wiki |
| Reinforcement Pods unverified | ← → ↑ ↑ ↑ | -- | 1 per pod site | -- | -- | -- | Commando optional objective: links pods to grant 3 extra reinforcements | wiki |
| Resupply | ↓ ↓ ↑ → | 180 | unlimited (shared squad cooldown) | 8 | -- | -- | Drops 4 supply boxes (ammo, grenades, stims); shared cooldown | wiki |
| SEAF Artillery | → ↑ ↑ ↓ | 0 | 5 (one per loaded shell) | -- | -- | -- | Optional objective reward: 5 shells loaded by hand, fired as a stratagem | wiki |
| Seismic Probe | ↑ ↑ ← → ↓ ↓ | 0 | 1 | 10 | -- | -- | Conduct Geological Survey: starts the Deploy Seismic Probe step | wiki |
| SoS Beacon | ↑ ↓ → ↑ | 0 | 1 | 1 (wiki.gg) or 6 (Fandom); unverified | -- | -- | Makes your mission public to quickplay so strangers can join (host only) | wiki |
| SSSD Delivery | ↓ ↓ ↓ ↓ ↓ ↑ ↑ | 0 | 1 | 4 | -- | -- | Retrieve Valuable Data and related missions: one hard-drive delivery per mission | wiki |
| Super Earth Flag | ↓ ↑ ↓ ↑ | 0 | 1 | 10 | -- | -- | Spread Democracy, Free Colony and Democratize the Void: raise it (salutes speed it up) | wiki |
| Tactical Video Camera | → ↓ ↓ ↑ ← ← ↑ | 0 | -- | -- | -- | -- | Commando: Acquire Evidence (and one Illuminate Lair objective): records evidence within 15 m | wiki |
| Tectonic Drill | ↑ ↓ ↑ ↓ ↑ ↓ | 0 | unlimited | 10 | -- | -- | Deploy Dark Fluid event mission: drill for the Dark Fluid Vessel | wiki |
| Upload Data | ← → ↑ ↑ ↑ | 0 | 1 | 4 | -- | -- | Upload Escape Pod Data objective: starts the upload | wiki |
Ship modules that change them
Buy the cheap first-tier modules for the stratagems you use most: the Liquid-Ventilated Cockpit halves the gap between Eagle calls for 80 common samples, and four other first-tier modules cost about as little.
Of the 30 ship modules, 28 change stratagems; they cost samples and, at the higher tiers, Requisition. Rare samples start dropping at difficulty 4 and super samples at 6. The full list with every price is in Ship modules.
9.1Buy these first
- Liquid-Ventilated CockpitEagle stratagem cooldown -50% (15 to 7.5 s between calls; rearm unchanged). 80 common samples.
- Targeting Software UpgradeOrbital stratagem call-in time -1 s. 60 common samples.
- Donation Access LicenseSupport weapons deploy with the maximum carriable magazines (e.g. MG-43 2 to 3 spares, Railgun 10 to 20 rounds). 60 common samples.
- Synthetic SupplementationSentry, emplacement and Resupply cooldown -10%. 60 common and 10 rare samples.
- Dynamic TrackingSentries launch immediately once called in (about 3 s faster). 60 common and 20 rare samples.
After those, follow your loadout: Expanded Weapons Bay and Pit Crew Hazard Pay if you live on Eagles, Zero-G Breech Loading for orbitals, Streamlined Request Process for support weapons.
9.2Every module that touches stratagems
Grouped by the stratagems they change, cheapest tier first in each group; the five above are not repeated.
- Orbitals
- Exploding Shrapnel: Less damage falloff on orbital explosions (inner radius +50%)
- More Guns: Barrage orbitals (Gatling, 120mm, 380mm, Walking, Napalm) fire 1 extra salvo
- Zero-G Breech Loading: Orbital stratagem cooldown -10%
- Atmospheric Monitoring: Orbital 120mm and 380mm HE Barrage spread -15%
- High-Density Explosives: Orbital explosion radius +10% (inner and outer)
- Eagles
- Pit Crew Hazard Pay: Eagle Rearm time -20% (150 to 120 s)
- Expanded Weapons Bay: +1 use of every Eagle stratagem per rearm
- XXL Weapons Bay: Eagles that drop several bombs drop 1 more (Airstrike, Cluster Bomb, Napalm, Smoke)
- Advanced Crew Training: Eagle Rearm a further -10% when called with uses left (120 to 108 s); super cost 25 per the summary table, Fandom and GamesRadar+, 20 on its own wiki page
- Support weapons and backpacks
- Streamlined Request Process: Support weapon stratagem cooldown -10%
- Hand Carts: Backpack stratagem cooldown -10%
- Superior Packing Methodology: Your Resupply boxes refill support weapons to the maximum carriable magazines (about half without it); squadmates benefit; the Supply Pack is not affected
- Payroll Management System: Support weapon reload time -10%
- Streamlined Launch Process: Support weapons launch immediately once called in (about 3 s faster); super cost 25 per both wiki records and Fandom, 20 per GamesRadar+
- Sentries and emplacements
- Advanced Construction: Sentry health +50%
- Shock Absorption Gel: Sentry ammo +50%
- Rapid Launch System: Emplacements launch immediately once called in (about 3 s faster)
- High-Quality Lubricant: Sentries turn to new targets faster (about 50-60%)
- Blast Absorption: Sentries take 50% less damage from explosions
- Circuit Expansion: Arcs from weapons and turrets jump to 1 additional enemy (in-game text per 4 sources; one wiki page says 2 since a 2025-09-14 edit)
- Cross-Platform Compatibility: Mortar sentries prioritize the targets you mark (your own pings only)
- Every stratagem
- Enhanced Combustion: Fire damage from stratagems +25% (direct and burn)
- Morale Augmentation: Every stratagem cooldown -5% (mission stratagems included)
The other two modules, Nuclear Radar and Power Steering, don't touch stratagems, and no module shortens vehicles or exosuits except Morale Augmentation.
The wiki combines two cooldown cuts both ways on different pages, multiplying them for the Orbital Railcannon Strike and adding them for the Grenadier Battlement and the exosuits, and no official source says which the game does. This manual lists single-module effects only.unverified
9.3Galactic War effects
- Exosuit Reserves (a Democracy Space Station action): Patriot and Emancipator cooldowns are 35% shorter on the planet the station orbits.
- Heavy Ordnance Distribution (a 24-hour station action): a free extra Orbital 380mm HE Barrage for every diver on its planet, used after your own.
- Orbital Blockade (a 24-hour station action): everyone on its planet gets Hellpod Space Optimization without equipping it.
- Arsenal augmentation: for some events High Command adds a free stratagem to every loadout without taking a slot, as it did with the Portable Hellbomb during 2025 Major Orders.
- Campaign rewards can arrive with a short-lived cooldown cut: the TD-110 Maelstrom's cooldown is 120 seconds shorter for three days after it is awarded.
These are the wiki's descriptions, not checkable on September 26, 2026, when the station was docked and ran no actions.unverified How the station and campaigns work is in How the war works.
Sources: the wiki's Ship Modules page (effects and costs; the Fandom wiki agrees on all 28 prices), Orbital Railcannon Strike and Grenadier Battlement (the two stacking methods), and Democracy Space Station.
What changed in 2025 and 2026
Check any stratagem advice older than the summer of 2026 against this list: patch 6.3.0 made the orbitals and the Rocket Pods hit much harder, and 7.1.0 shortened the Precision Strike. Guides from before October 23, 2025 describe weapons that have since changed too.
Every patch since launch, not only the stratagem lines, is in Patch history.
Armory07
Armor, Passives & Boosters
Light, medium and heavy armor, every passive by the job it does and the sets that carry it, and every booster with how it stacks in a squad.
On this page7 chapters
What to wear and bring first
Wear the free B-01 Tactical until one front becomes your regular, then buy that front's passive: Fortified on heavy armor against Automatons, Med-Kit on light or medium armor against Terminids and the Illuminate. Your first booster is Hellpod Space Optimization.
1.1Start here
The armor you already own
The B-01 Tactical's Extra Padding lifts it to a rating of 150 at medium speed, so it takes damage like heavy armor and moves like medium. Your next buys are cheap: Democracy Protects on the DP-40 Hero of the Federation (Helldivers Mobilize! p5, 25 Medals) forgives mistakes, and Med-Kit on the CM-09 Bonesnapper (Helldivers Mobilize! p4, 15 Medals) carries more stims.
Hellpod Space Optimization first
Every diver in your squad drops and reinforces with full ammo, grenades and stims (Helldivers Mobilize! p3, 15 Medals). Vitality Enhancement (Helldivers Mobilize! p4, 20 Medals) comes next. In a squad, bring one nobody else has: a duplicate adds nothing (Boosters in a squad).
1.2By front
Heavy armor, Fortified
Rockets, cannons and mortars deal explosive damage, and Fortified cuts it. The FS-05 Marksman (Helldivers Mobilize! p2, 6 Medals) is the cheapest set that carries it; add the Shield Generator Pack at level 20.
Speed over rating
Melee swarms punish slow divers, so wear light or medium armor with Med-Kit or Engineering Kit (the CE-35 Trench Engineer, Helldivers Mobilize! p3, 10 Medals). Switch to Acclimated, Desert Stormer or Inflammable when acid and fire keep catching you.
Medium armor, stims, arc resistance
Med-Kit or Democracy Protects on medium armor. Electrical Conduit (the EX-03 Prototype 3, Cutting Edge p1, 18 Medals) blunts Harvester and Watcher arcs and Lightning Spires; Fortified helps against the Appropriators' plasma.
These picks are this manual's reading of the mechanics below and of the dated community builds; full loadouts by front are on Loadouts by front and difficulty.
1.3Five useful passives on the free warbond
Helldivers Mobilize! sells the cheapest set for five of the passives a new diver wants; The short answer on the warbonds tab puts them in its Medal spending order.
- Scout on the SC-34 Infiltrator (Light), Helldivers Mobilize! p1, 3 Medals
- Fortified on the FS-05 Marksman (Heavy), Helldivers Mobilize! p2, 6 Medals
- Engineering Kit on the CE-35 Trench Engineer (Medium), Helldivers Mobilize! p3, 10 Medals
- Med-Kit on the CM-09 Bonesnapper (Medium), Helldivers Mobilize! p4, 15 Medals
- Democracy Protects on the DP-40 Hero of the Federation (Medium), Helldivers Mobilize! p5, 25 Medals
Only the body armor's weight class and passive do anything. Helmets show a rating, speed and stamina of 100 but change nothing, so wear the helmet and cape you like.
Armor classes
Pick the weight for the front: heavy against Automatons, light or medium against the melee swarms of the Terminids and the Illuminate. A rating passive buys heavy-armor protection without the heavy-armor slowdown.
2.1The three classes
- Light: rating 50, speed 550 and stamina regeneration 125. It takes 25% more damage than medium armor. Wear it where speed saves you: bug swarms, Voteless, Blitz missions and stealth.
- Medium: rating 100, speed 500 and stamina regeneration 100. The baseline, and the usual compromise against the Illuminate, whose fleets mix melee hordes with explosive plasma.
- Heavy: rating 150, speed 450 and stamina regeneration 50. It takes 25% less damage than medium armor. Wear it where you fight from cover against gunfire and explosions, which means the Automatons.
The game has 110 body armors across the three classes; Every armor set lists them all.
2.2What the rating does
Your body armor's rating sets how much damage you take. Up to a rating of 150, incoming damage is multiplied by 1.5 minus the rating divided by 200: 1.25 at 50, 1.00 at 100 and 0.75 at 150. Above 150 the curve flattens to 1.05 minus the rating divided by 500: 0.70 at 175 and 0.65 at 200. A body rating above 100 also cuts headshot damage, which matters because a headshot deals 50% extra damage to a diver.
Speed and stamina follow the armor's own rating, before any passive: speed is 600 minus that rating, and stamina regeneration is 200 minus it from 100 up, or 150 minus half of it below 100. These are the wiki's formulas, derived from game data rather than stated by Arrowhead.
2.3Rating passives: protection without the slowdown
Extra Padding (+50 armor rating) and four other passives raise the rating without touching speed or stamina: Concussive Padding, Reinforced; Unflinching; Blunt-Force Mitigation; and Supplementary Adrenaline. That is why:
- the free B-01 Tactical (Medium, rating 150) moves at medium speed and takes damage like heavy armor;
- the B-08 Light Gunner (Light, rating 100, Superstore for 150 SC) runs at light speed (550) and takes damage like medium armor;
- the B-27 Fortified Commando (Heavy, rating 200) takes 35% less damage than medium armor, and the CPR-80 Bulwark (Heavy, rating 180) adds explosive resistance on top.
Sources: the wiki's Armor page (class tables and formulas); Arrowhead's patch 1.001.104 (heavy armor 25% less damage, light 25% more) and patch 1.000.300 (ratings above 100 cut headshot damage).
Passives by job
Choose the passive for the job and the weight for the front. Until you know what kills you, wear Med-Kit or Democracy Protects; the moment you fight Automatons, switch to Fortified.
Every body armor carries exactly one of the 31 passives. The lists below group them by the job they do, each with its effect, when to bring it and the cheapest set that carries it (Medals on a warbond page unless it says Superstore).
3.1Stay alive: the safe defaults
- Democracy Protects: 50% chance to survive a hit that would kill you; no bleed damage from a chest hemorrhage. Bring it while you learn a front; it gives you a coin flip on every hit that would kill you. Cheapest: DP-40 Hero of the Federation (Medium), Helldivers Mobilize! p5, 25 Medals.
- Med-Kit: +2 stims (start with 4, carry 6); stims you use last 2.0 s longer. Bring it on any front, and above all against Terminids and the Illuminate, where it is the passive dated community builds pick most. Cheapest: CM-09 Bonesnapper (Medium), Helldivers Mobilize! p4, 15 Medals.
- Extra Padding: +50 armor rating. Bring it when you want heavier protection without the speed cost (Armor classes). You own one already: the B-01 Tactical you start with.
- Adreno-Defibrillator: One-time short last stand on death if the body is intact (health refills, then drains about 20% per second); stims last 2.0 s longer; 50% arc resistance. Bring it solo and against Illuminate arcs. The last stand buys a few seconds to throw a grenade or a strike, or to board a nearby extraction shuttle; a stim only stretches it, because the health drain never stops. Cheapest: AD-26 Bleeding Edge (Medium), Control Group p1, 45 Medals.
- Supplementary Adrenaline: Taking damage restores some stamina (amount not documented); +25 armor rating. Bring it when you trade hits up close and keep running dry on stamina. Cheapest: SA-7 Headfirst (Medium), Siege Breakers p1, 45 Medals.
3.2Survive explosions: the Automaton front
- Fortified: Recoil -30% when crouched or prone; 50% explosive resistance. Bring it against Automatons (rockets, cannons, mortars), the Hive Lord's bile, Stingray strafes and your own ordnance. Cheapest: FS-05 Marksman (Heavy), Helldivers Mobilize! p2, 6 Medals.
- Concussive Padding, Grenadier: 50% explosive resistance; +2 throwables (starting and carried). Bring it on the bot front with a grenade build. Only set: CPG-48 Sapper (Medium), Entrenched Division p1, 45 Medals.
- Concussive Padding, Hazmat: 50% explosive resistance; 25% gas resistance; sidearm recoil -30%. Bring it on the bot front with a sidearm or gas build. Only set: CPH-26 Commandant (Light), Entrenched Division p2, 55 Medals.
- Concussive Padding, Reinforced: 50% explosive resistance; +30 armor rating. Bring it on the bot front and against the Appropriators, whose plasma counts as explosive per the wiki; it pairs a high rating with explosive resistance in one set. Only set: CPR-80 Bulwark (Heavy), Superstore, 250 SC.
- Ballistic Padding: 25% less chest damage; 25% less explosive damage (whole body); no bleed damage from a chest hemorrhage. Bring it against Automaton gunfire aimed at your chest; it does less against explosions than Fortified. Cheapest: BP-20 Correct Officer (Medium), Force of Law p1, 45 Medals.
3.3Fire, gas, acid and arc
- Inflammable: 75% fire damage resistance. Bring it with fire builds, against the Incineration Corps and on Dragonroach planets. Cheapest: I-09 Heatseeker (Light), Freedom's Flame p1, 18 Medals.
- Advanced Filtration: 80% resistance to gas damage and effects. Bring it with gas builds, so you can stand in your own clouds. Cheapest: AF-50 Noxious Ranger (Light), Chemical Agents p1, 40 Medals.
- Electrical Conduit: 95% arc resistance. Bring it against the Illuminate's Harvesters, Watchers and Lightning Spires, or beside a squadmate with an Arc Thrower. Cheapest: EX-03 Prototype 3 (Medium), Cutting Edge p1, 18 Medals.
- Acclimated: 50% resistance to fire, gas, acid and arc damage. Bring it against Terminid acid and fire, and wherever the hazards mix. Cheapest: AC-1 Dutiful (Medium), Righteous Revenants p1 (a legendary warbond), 45 Medals.
- Desert Stormer: 40% resistance to fire, gas, acid and arc damage; throw range +20% (beacons too). Bring it against Terminids; the longer throw puts beacons where you want them. Cheapest: DS-42 Federation's Blade (Heavy), Dust Devils p1, 45 Medals.
3.4Reload, ammo and handling
- Siege-Ready: Primary reload 30% faster; +20% ammo for all weapons (not weapon backpacks, underbarrels or the Ultimatum). Bring it with ammo-hungry primaries and on Hive Worlds. Cheapest: SR-24 Street Scout (Light), Urban Legends p1, 40 Medals.
- Reinforced Epaulettes: Primary reload 30% faster; 50% chance to avoid a limb injury; melee damage +20% (50% before 6.0.1). Bring it when your primary reloads often and you want limbs that hold. Cheapest: RE-2310 Honorary Guard (Medium), Masters of Ceremony p1, 45 Medals.
- True Grit: Support weapon reload 30% faster (not assisted reloads); weapon handling +20 ergonomics. Bring it with a support weapon you reload yourself. Cheapest: TG-8 Sharpshooter (Medium), Castellan's Creed p1 (a legendary warbond), 45 Medals.
- Gunslinger: Sidearm reload 40% faster; sidearm draw and holster 50% faster; sidearm recoil -70%. Bring it for builds that lean on the sidearm. Cheapest: GS-17 Frontier Marshal (Medium), Borderline Justice p1, 45 Medals.
- Peak Physique: Melee damage +40% (100% before 6.0.1); weapon handling +30 ergonomics. Bring it with heavy support weapons that handle poorly, such as the Heavy Machine Gun and the Maxigun, or for melee. Cheapest: PH-9 Predator (Light), Viper Commandos p1, 40 Medals.
3.5Grenades and throws
- Engineering Kit: Recoil -30% when crouched or prone; +2 throwables (starting and carried). Bring it on any front for grenade-heavy builds and support weapons you fire crouched. Cheapest: CE-35 Trench Engineer (Medium), Helldivers Mobilize! p3, 10 Medals.
- Integrated Explosives: The armor explodes 1.5 s after the wearer dies (2,000 damage, AP5, demolition 30); +2 throwables. Bring it for grenade builds, and warn your squad: your armor explodes when you die. Cheapest: IE-3 Martyr (Medium), Servants of Freedom p1, 45 Medals.
- Servo-Assisted: Throw range +30% (beacons too); limb health +50% (arms 35 -> 52, legs 45 -> 67). Bring it to throw stratagems and grenades farther and keep your limbs whole on long missions. Cheapest: SA-25 Steel Trooper (Medium), Steeled Veterans p1, 18 Medals.
3.6Stealth and scouting
- Scout: Map markers trigger a radar scan every 2.0 s; enemies detect you from 30% less range. Bring it for stealth, solo play and Commando missions. Cheapest: SC-34 Infiltrator (Light), Helldivers Mobilize! p1, 3 Medals.
- Reduced Signature: Movement noise -50%; enemies detect you from 40% less range. Bring it for stealth against Automatons and the Illuminate, and for Commando missions. Cheapest: RS-89 Shadow Paragon (Light), Redacted Regiment p1, 45 Medals.
- Feet First: Movement noise -50%; points of interest spotted 30% farther away; legs cannot be injured. Bring it for stealth and against Rupture Strain ambushes. Cheapest: A-9 Helljumper (Medium), Obedient Democracy Support Troopers (Halo: ODST) p1, a legendary warbond, 45 Medals.
3.7Stagger, impacts and limbs
- Rock Solid: Melee damage +40% (100% before 6.0.1), melee weapons included; harder to knock down (30% less incoming stagger). Bring it against the Cyborg Legion, whose Radicals kick divers over, and for melee builds. Cheapest: RS-20 Constrictor (Light), Python Commandos p1, 45 Medals.
- Blunt-Force Mitigation: Harder to knock down (30% less incoming stagger); 30% less damage from impacts and collisions; +25 armor rating. New in 7.1.0 and not yet widely tested; bring it against knockdowns from bots and Crushers. Cheapest: BFM-16 Tanker (Light), Ironclad Democracy p1, 45 Medals.
- Unflinching: Almost no flinch when hit (95% less aim disruption); +25 armor rating; map markers trigger a radar scan every 2.0 s. Bring it against sustained Automaton fire, when flinching ruins your aim. Cheapest: UF-50 Bloodhound (Medium), Truth Enforcers p2, 45 Medals.
- Kinetic Displacement Mitigation: 50% fire resistance; 50% chance to avoid a limb injury; 30% less damage from impacts and collisions. Bring it against the Incineration Corps. Only set: the KDM-500 Outrider (Heavy), which isn't sold. Where it comes from: Campaign reward: Permanent Enclosure (body, Aug 2026); helmet from Lightning Intercept (Jul 2026).
3.8Speed
- Oxygenator: Walking and running speed +10%; faster, longer slides (about +50% distance). Bring it on big maps and Blitz missions. Cheapest: O-3 Free Spirit (Light), Exo Experts p1, 45 Medals.
The Steam guide by The Pelvic Girdle (updated August 19, 2026, built from u.gg data) rates Med-Kit and True Grit S+ on all three fronts; Fortified and the three Concussive Paddings S+ against Automatons, with Fortified only C against Terminids; Acclimated, Desert Stormer and Inflammable S+ against Terminids; Reduced Signature S+ against Automatons; and Engineering Kit, Siege-Ready and Oxygenator S on all three. In u.gg's 15 dated builds (November 2025 to May 2026), Fortified appears in 6 of the 7 Automaton builds and Med-Kit in 4 of the 7 Terminid and Illuminate builds.community-tested
3.9Every passive
All 31, A to Z, with the exact effect and a few example sets each. Every armor set lists every set that carries each passive.
| Passive | Effect | Example sets | Source |
|---|---|---|---|
| Acclimated | 50% resistance to fire, gas, acid and arc damage | AC-1 Dutiful (medium, Righteous Revenants p1); AC-2 Obedient (light, Righteous Revenants p2) | wiki |
| Adreno-Defibrillator | One-time short last stand on death if the body is intact (health refills, then drains about 20% per second); stims last 2.0 s longer; 50% arc resistance | AD-26 Bleeding Edge (medium, Control Group p1); AD-49 Apollonian (heavy, Control Group p2); AD-11 Livewire (light, Superstore 300 SC) | wiki |
| Advanced Filtration | 80% resistance to gas damage and effects | AF-50 Noxious Ranger (light, Chemical Agents p1); AF-02 Haz-Master (medium, Chemical Agents p2); AF-91 Field Chemist (medium, Superstore 250 SC); AF-52 Lockdown (heavy, Superstore 400 SC) | wiki |
| Ballistic Padding | 25% less chest damage; 25% less explosive damage (whole body); no bleed damage from a chest hemorrhage | BP-20 Correct Officer (medium, Force of Law p1); BP-32 Jackboot (light, Force of Law p2); BP-77 Grand Juror (heavy, Superstore 250 SC) | wiki |
| Blunt-Force Mitigation | Harder to knock down (30% less incoming stagger); 30% less damage from impacts and collisions; +25 armor rating | BFM-16 Tanker (light, Ironclad Democracy p1); BFM-220 Ironclad (heavy, Ironclad Democracy p2); BFM-77 Reformer (medium, Superstore 250 SC) | wiki |
| Concussive Padding, Grenadier | 50% explosive resistance; +2 throwables (starting and carried) | CPG-48 Sapper (medium, Entrenched Division p1) | wiki |
| Concussive Padding, Hazmat | 50% explosive resistance; 25% gas resistance; sidearm recoil -30% | CPH-26 Commandant (light, Entrenched Division p2) | wiki |
| Concussive Padding, Reinforced | 50% explosive resistance; +30 armor rating | CPR-80 Bulwark (heavy, Superstore 250 SC) | wiki |
| Democracy Protects | 50% chance to survive a hit that would kill you; no bleed damage from a chest hemorrhage | DP-40 Hero of the Federation (medium, Helldivers Mobilize! p5); DP-11 Champion of the People (medium, Helldivers Mobilize! p10); DP-53 Savior of the Free (medium, Super Citizen Edition) | wiki |
| Desert Stormer | 40% resistance to fire, gas, acid and arc damage; throw range +20% (beacons too) | DS-42 Federation's Blade (heavy, Dust Devils p1); DS-191 Scorpion (medium, Dust Devils p2); DS-10 Big Game Hunter (light, Superstore 300 SC) | wiki |
| Electrical Conduit | 95% arc resistance | EX-03 Prototype 3 (medium, Cutting Edge p1); EX-16 Prototype 16 (medium, Cutting Edge p2); EX-00 Prototype X (light, Cutting Edge p3) | wiki |
| Engineering Kit | Recoil -30% when crouched or prone; +2 throwables (starting and carried) | CE-35 Trench Engineer (medium, Helldivers Mobilize! p3); CE-27 Ground Breaker (medium, Democratic Detonation p1); CE-07 Demolition Specialist (light, Democratic Detonation p2); plus 7 Superstore sets | wiki |
| Extra Padding | +50 armor rating | B-01 Tactical (medium, starter armor); B-08 Light Gunner (light, Superstore 150 SC); CW-9 White Wolf (medium, Superstore 300 SC); B-27 Fortified Commando (heavy, Superstore 400 SC) | wiki |
| Feet First | Movement noise -50%; points of interest spotted 30% farther away; legs cannot be injured | A-9 Helljumper (medium, Obedient Democracy Support Troopers p1); A-35 Recon (medium, Obedient Democracy Support Troopers p2) | wiki |
| Fortified | Recoil -30% when crouched or prone; 50% explosive resistance | FS-05 Marksman (heavy, Helldivers Mobilize! p2); FS-23 Battle Master (heavy, Helldivers Mobilize! p6); FS-55 Devastator (heavy, Democratic Detonation p3); CW-22 Kodiak (heavy, Polar Patriots p2); plus 4 Superstore sets | wiki |
| Gunslinger | Sidearm reload 40% faster; sidearm draw and holster 50% faster; sidearm recoil -70% | GS-17 Frontier Marshal (medium, Borderline Justice p1); GS-66 Lawmaker (heavy, Borderline Justice p2); GS-11 Democracy's Deputy (light, Superstore 300 SC) | wiki |
| Inflammable | 75% fire damage resistance | I-09 Heatseeker (light, Freedom's Flame p1); I-102 Draconaught (medium, Freedom's Flame p2); I-92 Fire Fighter (medium, Superstore 250 SC); I-44 Salamander (heavy, Superstore 250 SC) | wiki |
| Integrated Explosives | The armor explodes 1.5 s after the wearer dies (2,000 damage, AP5, demolition 30); +2 throwables | IE-3 Martyr (medium, Servants of Freedom p1); IE-12 Righteous (medium, Servants of Freedom p2); IE-57 Hell-Bent (light, Superstore 250 SC) | wiki |
| Kinetic Displacement Mitigation | 50% fire resistance; 50% chance to avoid a limb injury; 30% less damage from impacts and collisions | KDM-500 Outrider (heavy, campaign reward: Permanent Enclosure, Aug 2026) | wiki |
| Med-Kit | +2 stims (start with 4, carry 6); stims you use last 2.0 s longer | CM-09 Bonesnapper (medium, Helldivers Mobilize! p4); CM-14 Physician (medium, Helldivers Mobilize! p9); CM-21 Trench Paramedic (light, Superstore 250 SC); CM-17 Butcher (heavy, Superstore 250 SC) | wiki |
| Oxygenator | Walking and running speed +10%; faster, longer slides (about +50% distance) | O-3 Free Spirit (light, Exo Experts p1); O-2 Heavy Operator (heavy, Exo Experts p2); O-44 Bonded Pilot (medium, Superstore 250 SC) | wiki |
| Peak Physique | Melee damage +40% (100% before 6.0.1); weapon handling +30 ergonomics | PH-9 Predator (light, Viper Commandos p1); PH-202 Twigsnapper (heavy, Viper Commandos p2); PH-56 Jaguar (medium, Superstore 150 SC) | wiki |
| Reduced Signature | Movement noise -50%; enemies detect you from 40% less range | RS-89 Shadow Paragon (light, Redacted Regiment p1); RS-67 Null Cipher (medium, Redacted Regiment p2); RS-100 Sanctioner (light, Superstore 250 SC) | wiki |
| Reinforced Epaulettes | Primary reload 30% faster; 50% chance to avoid a limb injury; melee damage +20% (50% before 6.0.1) | RE-2310 Honorary Guard (medium, Masters of Ceremony p1); RE-1861 Parade Commander (light, Masters of Ceremony p2); RE-824 Bearer of the Standard (heavy, Superstore 400 SC) | wiki |
| Rock Solid | Melee damage +40% (100% before 6.0.1), melee weapons included; harder to knock down (30% less incoming stagger) | RS-20 Constrictor (light, Python Commandos p1); RS-40 Beast of Prey (heavy, Python Commandos p2); RS-6 Fiend Destroyer (medium, Superstore 300 SC) | wiki |
| Scout | Map markers trigger a radar scan every 2.0 s; enemies detect you from 30% less range | SC-34 Infiltrator (light, Helldivers Mobilize! p1); SC-30 Trailblazer Scout (light, Helldivers Mobilize! p7); SA-04 Combat Technician (medium, Helldivers Mobilize! p8); CW-4 Arctic Ranger (light, Polar Patriots p3) | wiki |
| Servo-Assisted | Throw range +30% (beacons too); limb health +50% (arms 35 -> 52, legs 45 -> 67) | SA-25 Steel Trooper (medium, Steeled Veterans p1); SA-12 Servo Assisted (medium, Steeled Veterans p2); SA-32 Dynamo (heavy, Steeled Veterans p3); CW-36 Winter Warrior (heavy, Polar Patriots p1) | wiki |
| Siege-Ready | Primary reload 30% faster; +20% ammo for all weapons (not weapon backpacks, underbarrels or the Ultimatum) | SR-24 Street Scout (light, Urban Legends p1); SR-18 Roadblock (heavy, Urban Legends p2); DP-8 Mountain-Scaled (medium, Superstore 250 SC); SR-64 Cinderblock (heavy, Superstore 250 SC) | wiki |
| Supplementary Adrenaline | Taking damage restores some stamina (amount not documented); +25 armor rating | SA-7 Headfirst (medium, Siege Breakers p1); SA-8 Ram (heavy, Siege Breakers p2) | wiki |
| True Grit | Support weapon reload 30% faster (not assisted reloads); weapon handling +20 ergonomics | TG-8 Sharpshooter (medium, Castellan's Creed p1); TG-122 Demo-Trooper (heavy, Castellan's Creed p2) | wiki |
| Unflinching | Almost no flinch when hit (95% less aim disruption); +25 armor rating; map markers trigger a radar scan every 2.0 s | UF-50 Bloodhound (medium, Truth Enforcers p2); UF-16 Inspector (light, Truth Enforcers p3); UF-84 Doubt Killer (medium, Superstore 400 SC) | wiki |
Every armor set
Pick the passive first, then the weight, then the cheapest set that carries both. Most passives come in more than one weight class; warbond sets cost Medals and Superstore sets cost Super Credits.
All 110 body armors, one table per weight class, each sorted by passive so the sets that share one sit together. The rating includes rating passives; speed and stamina regeneration don't. Cost is Medals on a warbond page or Super Credits in the Superstore, where every set stays on sale (rotation: none since April 28, 2026); a dash means the set isn't sold (starter, pre-order, edition, event and campaign items). Warbond pages and prices are in Every warbond, page by page, and the Superstore in Superstore and free gear.
4.1Light armor
A light set rated above the class's standard rating carries a rating passive or sits off the standard grid (see the flags below); the B-08 Light Gunner is the fast set with medium protection.
| Armor | Rating | Speed | Stamina regen | Passive | Cost | Where to get it |
|---|---|---|---|---|---|---|
| AC-2 Obedient | 50 | 550 | 125 | Acclimated | 55 Medals | Righteous Revenants p2 |
| AD-11 Livewire | 50 | 550 | 125 | Adreno-Defibrillator | 300 SC | Superstore |
| AF-50 Noxious Ranger | 50 | 550 | 125 | Advanced Filtration | 40 Medals | Chemical Agents p1 |
| BP-32 Jackboot | 50 | 550 | 125 | Ballistic Padding | 55 Medals | Force of Law p2 |
| BFM-16 Tanker | 75 | 550 | 125 | Blunt-Force Mitigation | 45 Medals | Ironclad Democracy p1 |
| CPH-26 Commandant | 50 | 550 | 125 | Concussive Padding, Hazmat | 55 Medals | Entrenched Division p2 |
| DS-10 Big Game Hunter | 50 | 550 | 125 | Desert Stormer | 300 SC | Superstore |
| EX-00 Prototype X | 50 | 550 | 125 | Electrical Conduit | 64 Medals | Cutting Edge p3 |
| CE-07 Demolition Specialist | 64 | 536 | 118 | Engineering Kit | 45 Medals | Democratic Detonation p2 |
| CE-67 Titan | 79 | 521 | 111 | Engineering Kit | 150 SC | Superstore |
| CE-74 Breaker | 50 | 550 | 125 | Engineering Kit | 250 SC | Superstore |
| FS-37 Ravager | 50 | 550 | 125 | Engineering Kit | 250 SC | Superstore |
| B-08 Light Gunner | 100 | 550 | 125 | Extra Padding | 150 SC | Superstore |
| FS-38 Eradicator | 50 | 550 | 125 | Fortified | 250 SC | Superstore |
| GS-11 Democracy's Deputy | 50 | 550 | 125 | Gunslinger | 300 SC | Superstore |
| I-09 Heatseeker | 50 | 550 | 125 | Inflammable | 18 Medals | Freedom's Flame p1 |
| IE-57 Hell-Bent | 50 | 550 | 125 | Integrated Explosives | 250 SC | Superstore |
| CM-21 Trench Paramedic | 64 | 536 | 118 | Med-Kit | 250 SC | Superstore |
| O-3 Free Spirit | 50 | 550 | 125 | Oxygenator | 45 Medals | Exo Experts p1 |
| PH-9 Predator | 50 | 550 | 125 | Peak Physique | 40 Medals | Viper Commandos p1 |
| RS-100 Sanctioner | 50 | 550 | 125 | Reduced Signature | 250 SC | Superstore |
| RS-89 Shadow Paragon | 50 | 550 | 125 | Reduced Signature | 45 Medals | Redacted Regiment p1 |
| RE-1861 Parade Commander | 50 | 550 | 125 | Reinforced Epaulettes | 55 Medals | Masters of Ceremony p2 |
| RS-20 Constrictor | 50 | 550 | 125 | Rock Solid | 45 Medals | Python Commandos p1 |
| CW-4 Arctic Ranger | 50 | 550 | 125 | Scout | 64 Medals | Polar Patriots p3 |
| SC-30 Trailblazer Scout | 50 | 550 | 125 | Scout | 50 Medals | Helldivers Mobilize! p7 |
| SC-34 Infiltrator | 70 | 530 | 115 | Scout | 3 Medals | Helldivers Mobilize! p1 |
| SC-37 Legionnaire | 50 | 550 | 125 | Servo-Assisted | 150 SC | Superstore |
| SR-24 Street Scout | 50 | 550 | 125 | Siege-Ready | 40 Medals | Urban Legends p1 |
| UF-16 Inspector | 75 | 550 | 125 | Unflinching | 65 Medals | Truth Enforcers p3 |
4.2Medium armor
The medium sets rated 150, the free B-01 Tactical among them, carry Extra Padding: heavy-armor protection at medium speed.
| Armor | Rating | Speed | Stamina regen | Passive | Cost | Where to get it |
|---|---|---|---|---|---|---|
| AC-1 Dutiful | 100 | 500 | 100 | Acclimated | 45 Medals | Righteous Revenants p1 |
| AD-26 Bleeding Edge | 100 | 500 | 100 | Adreno-Defibrillator | 45 Medals | Control Group p1 |
| AF-02 Haz-Master | 100 | 500 | 100 | Advanced Filtration | 45 Medals | Chemical Agents p2 |
| AF-91 Field Chemist | 100 | 500 | 100 | Advanced Filtration | 250 SC | Superstore |
| BP-20 Correct Officer | 100 | 500 | 100 | Ballistic Padding | 45 Medals | Force of Law p1 |
| BFM-77 Reformer | 125 | 500 | 100 | Blunt-Force Mitigation | 250 SC | Superstore |
| CPG-48 Sapper | 100 | 500 | 100 | Concussive Padding, Grenadier | 45 Medals | Entrenched Division p1 |
| B-22 Model Citizen | 100 | 500 | 100 | Democracy Protects | -- | Anniversary Gift (not purchasable) |
| DP-00 Tactical | 100 | 500 | 100 | Democracy Protects | -- | Liberty Day |
| DP-11 Champion of the People | 100 | 500 | 100 | Democracy Protects | 100 Medals | Helldivers Mobilize! p10 |
| DP-40 Hero of the Federation | 100 | 500 | 100 | Democracy Protects | 25 Medals | Helldivers Mobilize! p5 |
| DP-53 Savior of the Free | 100 | 500 | 100 | Democracy Protects | Super Citizen Edition upgrade | Super Citizen Edition |
| TR-9 Cavalier of Democracy | 100 | 500 | 100 | Democracy Protects | -- | Pre-Order Bonus (not purchasable) |
| DS-191 Scorpion | 100 | 500 | 100 | Desert Stormer | 55 Medals | Dust Devils p2 |
| EX-03 Prototype 3 | 100 | 500 | 100 | Electrical Conduit | 18 Medals | Cutting Edge p1 |
| EX-16 Prototype 16 | 100 | 500 | 100 | Electrical Conduit | 45 Medals | Cutting Edge p2 |
| CE-27 Ground Breaker | 100 | 500 | 100 | Engineering Kit | 18 Medals | Democratic Detonation p1 |
| CE-35 Trench Engineer | 100 | 500 | 100 | Engineering Kit | 10 Medals | Helldivers Mobilize! p3 |
| CE-81 Juggernaut | 100 | 500 | 100 | Engineering Kit | 250 SC | Superstore |
| SC-15 Drone Master | 100 | 500 | 100 | Engineering Kit | 250 SC | Superstore |
| B-01 Tactical | 150 | 500 | 100 | Extra Padding | -- | Starter Equipment |
| CW-9 White Wolf | 150 | 500 | 100 | Extra Padding | 300 SC | Superstore |
| TR-40 Gold Eagle | 150 | 500 | 100 | Extra Padding | -- | Escalation of Freedom (not purchasable) |
| TR-7 Ambassador of the Brand | 150 | 500 | 100 | Extra Padding | -- | Pre-Order Bonus (not purchasable) |
| A-35 Recon | 100 | 500 | 100 | Feet First | 55 Medals | Obedient Democracy Support Troopers (Halo: ODST) p2 |
| A-9 Helljumper | 100 | 500 | 100 | Feet First | 45 Medals | Obedient Democracy Support Troopers (Halo: ODST) p1 |
| B-24 Enforcer | 129 | 471 | 71 | Fortified | 150 SC | Superstore |
| FS-34 Exterminator | 100 | 500 | 100 | Fortified | 400 SC | Superstore |
| GS-17 Frontier Marshal | 100 | 500 | 100 | Gunslinger | 45 Medals | Borderline Justice p1 |
| I-102 Draconaught | 100 | 500 | 100 | Inflammable | 45 Medals | Freedom's Flame p2 |
| I-92 Fire Fighter | 100 | 500 | 100 | Inflammable | 250 SC | Superstore |
| IE-12 Righteous | 100 | 500 | 100 | Integrated Explosives | 55 Medals | Servants of Freedom p2 |
| IE-3 Martyr | 100 | 500 | 100 | Integrated Explosives | 45 Medals | Servants of Freedom p1 |
| CM-09 Bonesnapper | 100 | 500 | 100 | Med-Kit | 15 Medals | Helldivers Mobilize! p4 |
| CM-10 Clinician | 100 | 500 | 100 | Med-Kit | 250 SC | Superstore |
| CM-14 Physician | 100 | 500 | 100 | Med-Kit | 70 Medals | Helldivers Mobilize! p9 |
| TR-117 Alpha Commander | 100 | 500 | 100 | Med-Kit | -- | Downloadable Content |
| O-44 Bonded Pilot | 100 | 500 | 100 | Oxygenator | 250 SC | Superstore |
| PH-56 Jaguar | 100 | 500 | 100 | Peak Physique | 150 SC | Superstore |
| RS-67 Null Cipher | 100 | 500 | 100 | Reduced Signature | 55 Medals | Redacted Regiment p2 |
| RE-2310 Honorary Guard | 100 | 500 | 100 | Reinforced Epaulettes | 45 Medals | Masters of Ceremony p1 |
| RS-6 Fiend Destroyer | 100 | 500 | 100 | Rock Solid | 300 SC | Superstore |
| SA-04 Combat Technician | 100 | 500 | 100 | Scout | 60 Medals | Helldivers Mobilize! p8 |
| SA-12 Servo Assisted | 100 | 500 | 100 | Servo-Assisted | 45 Medals | Steeled Veterans p2 |
| SA-25 Steel Trooper | 100 | 500 | 100 | Servo-Assisted | 18 Medals | Steeled Veterans p1 |
| DP-8 Mountain-Scaled | 100 | 500 | 100 | Siege-Ready | 250 SC | Superstore |
| SA-7 Headfirst | 125 | 500 | 100 | Supplementary Adrenaline | 45 Medals | Siege Breakers p1 |
| TG-8 Sharpshooter | 100 | 500 | 100 | True Grit | 45 Medals | Castellan's Creed p1 |
| UF-50 Bloodhound | 125 | 500 | 100 | Unflinching | 45 Medals | Truth Enforcers p2 |
| UF-84 Doubt Killer | 125 | 500 | 100 | Unflinching | 400 SC | Superstore |
4.3Heavy armor
Heavy armor holds the most Fortified sets, and the two highest ratings in the game: the B-27 Fortified Commando (Extra Padding) and the CPR-80 Bulwark (Concussive Padding, Reinforced).
| Armor | Rating | Speed | Stamina regen | Passive | Cost | Where to get it |
|---|---|---|---|---|---|---|
| AD-49 Apollonian | 150 | 450 | 50 | Adreno-Defibrillator | 55 Medals | Control Group p2 |
| AF-52 Lockdown | 150 | 450 | 50 | Advanced Filtration | 400 SC | Superstore |
| BP-77 Grand Juror | 150 | 450 | 50 | Ballistic Padding | 250 SC | Superstore |
| BFM-220 Ironclad | 175 | 450 | 50 | Blunt-Force Mitigation | 55 Medals | Ironclad Democracy p2 |
| CPR-80 Bulwark | 180 | 450 | 50 | Concussive Padding, Reinforced | 250 SC | Superstore |
| DS-42 Federation's Blade | 150 | 450 | 50 | Desert Stormer | 45 Medals | Dust Devils p1 |
| CE-101 Guerilla Gorilla | 150 | 450 | 50 | Engineering Kit | 250 SC | Superstore |
| CE-64 Grenadier | 150 | 450 | 50 | Engineering Kit | 300 SC | Superstore |
| B-27 Fortified Commando | 200 | 450 | 50 | Extra Padding | 400 SC | Superstore |
| CW-22 Kodiak | 150 | 450 | 50 | Fortified | 45 Medals | Polar Patriots p2 |
| FS-05 Marksman | 150 | 450 | 50 | Fortified | 6 Medals | Helldivers Mobilize! p2 |
| FS-11 Executioner | 150 | 450 | 50 | Fortified | 150 SC | Superstore |
| FS-23 Battle Master | 150 | 450 | 50 | Fortified | 35 Medals | Helldivers Mobilize! p6 |
| FS-55 Devastator | 150 | 450 | 50 | Fortified | 64 Medals | Democratic Detonation p3 |
| GS-66 Lawmaker | 150 | 450 | 50 | Gunslinger | 55 Medals | Borderline Justice p2 |
| I-44 Salamander | 150 | 450 | 50 | Inflammable | 250 SC | Superstore |
| KDM-500 Outrider | 150 | 450 | 50 | Kinetic Displacement Mitigation | -- | Campaign reward: Permanent Enclosure (body, Aug 2026); helmet from Lightning Intercept (Jul 2026) |
| CM-17 Butcher | 150 | 450 | 50 | Med-Kit | 250 SC | Superstore |
| O-2 Heavy Operator | 150 | 450 | 50 | Oxygenator | 55 Medals | Exo Experts p2 |
| PH-202 Twigsnapper | 150 | 450 | 50 | Peak Physique | 45 Medals | Viper Commandos p2 |
| RE-824 Bearer of the Standard | 150 | 450 | 50 | Reinforced Epaulettes | 400 SC | Superstore |
| RS-40 Beast of Prey | 150 | 450 | 50 | Rock Solid | 55 Medals | Python Commandos p2 |
| CW-36 Winter Warrior | 150 | 450 | 50 | Servo-Assisted | 18 Medals | Polar Patriots p1 |
| FS-61 Dreadnought | 150 | 450 | 50 | Servo-Assisted | 250 SC | Superstore |
| SA-32 Dynamo | 150 | 450 | 50 | Servo-Assisted | 64 Medals | Steeled Veterans p3 |
| TR-62 Knight | 150 | 450 | 50 | Servo-Assisted | -- | Pre-Order Bonus (not purchasable) |
| SR-18 Roadblock | 150 | 450 | 50 | Siege-Ready | 45 Medals | Urban Legends p2 |
| SR-64 Cinderblock | 150 | 450 | 50 | Siege-Ready | 250 SC | Superstore |
| SA-8 Ram | 175 | 450 | 50 | Supplementary Adrenaline | 55 Medals | Siege Breakers p2 |
| TG-122 Demo-Trooper | 150 | 450 | 50 | True Grit | 55 Medals | Castellan's Creed p2 |
4.4Rows to read with care
Seven sets carry a flag in the data. The off-grid ratings rest on one wiki, and no official figure exists for any of them.unverified
- SC-34 Infiltrator: Off-grid 70 / 530 / 115 from wiki.gg; Fandom's out-of-date Armory page gives 75 / 525 / 113; no official number.
- CM-21 Trench Paramedic: Off-grid 64 / 536 / 118 from wiki.gg; Fandom's out-of-date Armory page gives 69 / 531 / 116; no official number.
- CE-07 Demolition Specialist: Off-grid rating 64 from wiki.gg; no official number.
- CE-67 Titan: Off-grid rating 79 from wiki.gg; no official number.
- B-24 Enforcer: Off-grid rating 129 from wiki.gg; no official number.
- AC-1 Dutiful: The official Steam and PlayStation Blog posts call it heavy armor; both wikis list medium, 100; this manual follows the wikis.
- BFM-16 Tanker: The wiki infobox says 45 Medals for the body; the same page's prose says 30 (body) and 45 (helmet).
Sources: the wiki's Armor page (the rendered light, medium and heavy tables, read September 26, 2026); the Fandom wiki's Armory page for the disputed ratings.
Boosters
Buy Hellpod Space Optimization first: it sits on page 3 of the free warbond for 15 Medals, and it drops every diver in your squad fully stocked. Vitality, Stamina and Muscle Enhancement, also on the free warbond, are the other three boosters GameRant rates S (February 5, 2026).community-tested
You equip one booster, and it works for the whole squad for the whole mission; a duplicate adds nothing (Boosters in a squad). All 20 come from warbonds, so you buy them with Medals. Take the first group, add from the second for the mission, and leave the third in the locker.
5.1Take these first
- Hellpod Space Optimization: Divers leave every hellpod (first drop and each reinforce) with full ammo, grenades and stims, up to their armor's capacity. Bring it whenever nobody else has; it is the most-picked booster in u.gg's dated builds (9 of 15). Helldivers Mobilize! p3, 15 Medals.
- Vitality Enhancement: Minor damage reduction for all divers (about 10% per the wiki) and fewer limb injuries. Bring it on any mission; it also softens burning in fire builds and pairs with Dead Sprint. Helldivers Mobilize! p4, 20 Medals.
- Stamina Enhancement: More maximum stamina and faster stamina regen for all divers (wiki.gg: +22.5% and +40%; Fandom lists 30% and 23%) unverified. Bring it on big maps, Blitz missions and the bug and Voteless fronts, where you run all mission. Helldivers Mobilize! p7, 75 Medals.
- Muscle Enhancement: Less slowdown in snow, mud, water, foliage, barbed wire, blizzards, sandstorms and acid (not slopes or tremors). Bring it on snow, swamp and jungle planets and against acid-heavy bug fronts. Helldivers Mobilize! p9, 70 Medals.
- Experimental Infusion: Stims also grant +10% movement speed and +10% damage resistance while active (aim sway +25%). Bring it for stim-heavy squads, above all Med-Kit wearers. Viper Commandos p3, 80 Medals.
5.2Bring for the mission
- Surplus EAT Allocation: Two free EAT-17 call-ins per mission (two launchers each, one per diver in a full squad); cannot be rearmed. Bring it when nobody in the lobby brought anti-tank. Ironclad Democracy p2, 55 Medals.
- Increased Reinforcement Budget: +1 reinforcement per diver (5 -> 6 each; 20 -> 24 in a full squad). Bring it for a new squad that dies a lot. Helldivers Mobilize! p10, 150 Medals.
- Flexible Reinforcement Budget: Once the budget runs out, each new reinforcement comes 25% sooner (120 -> 90 s). Bring it for solo and duo play. Steeled Veterans p3, 75 Medals.
- Integrated Extinguishers: Burning divers are put out sooner (official); wiki.gg says about 1 s instead of about 3 s, Fandom says afterburn is limited to 3 s unverified. Bring it against the Incineration Corps or in a flamethrower-heavy squad. Ironclad Democracy p3, 65 Medals.
- Expert Extraction Pilot: Extraction shuttle arrives 30% faster (2:00 -> 1:24). Bring it when extractions keep going wrong, or for speed runs. Democratic Detonation p2, 55 Medals.
- Concealed Insertion: Every hellpod releases a smokescreen on landing. Bring it for stealth and Commando missions, above all against Automatons. Redacted Regiment p3, 40 Medals.
- Armed Resupply Pods: Resupply pods carry an automatic turret, a modified AR-23 Liberator (30 m range, 140 rounds). Bring it for defense missions. Urban Legends p2, 55 Medals.
- Sample Scanner: 15% chance to double the samples from a pickup (all rarities). Bring it while you farm samples for ship modules. Masters of Ceremony p3, 65 Medals.
- Sample Extricator: Large enemies can drop common samples on death (capped at 10 per mission). Bring it while you still need common samples. Borderline Justice p3, 65 Medals.
- Dead Sprint: Sprint at zero stamina by draining about 3.6% health per second (about 1% with Vitality Enhancement); stops at 5% health and cannot kill. Bring it for kiting, ideally with Vitality in the squad. Truth Enforcers p1, 35 Medals.
- UAV Recon Booster: Radar range about +50% for all divers (also widens Scout and Unflinching marker scans); no effect under Atmospheric Spores. Bring it for scouting, above all with Scout or Unflinching wearers. Helldivers Mobilize! p6, 40 Medals.
5.3Usually skip
- Firebomb Hellpods: Every hellpod explodes in fire on landing, igniting anything nearby, teammates included. That includes your squad's Resupply pods and reinforcements, and it can destroy nearby sentries. Freedom's Flame p3, 60 Medals.
- Localization Confusion: Longer cooldown between enemy reinforcement calls (wiki measured about +15%; Fandom says 10%); patrols unchanged unverified. A small effect for stealth runs. Cutting Edge p1, 18 Medals.
- Motivational Shocks: Faster recovery from slows and stuns (most stuns halved; tremor and ice-plant slows -25%); not EMS clouds. Small and narrow: tremor planets and acid. Polar Patriots p1, 15 Medals.
- Stun Pods: Every hellpod stuns enemies around its landing point. A small help when you reinforce into a crowd. Force of Law p2, 55 Medals.
GameRant (Jake Fillery, updated February 5, 2026) rates Hellpod Space Optimization, Vitality, Stamina and Muscle Enhancement S; Experimental Infusion, Sample Scanner and Concealed Insertion A; Dead Sprint, Armed Resupply Pods and Sample Extricator B; and the other eight C. The Pelvic Girdle's Steam guide (August 19, 2026) rates Stamina and Experimental Infusion S+ on all three fronts and Hellpod Space Optimization S+ against Terminids and Automatons. Neither list has rated the two boosters that arrived with Ironclad Democracy on September 22, 2026.community-tested
5.4Every booster
A to Z, with the warbond page and Medal price of each. Rows tagged unverified have numbers the two wikis disagree on, or none that Arrowhead has stated.
| Booster | Effect | Where to get it | Source |
|---|---|---|---|
| Armed Resupply Pods | Resupply pods carry an automatic turret, a modified AR-23 Liberator (30 m range, 140 rounds) | Urban Legends p2, 55 Medals | wiki |
| Concealed Insertion | Every hellpod releases a smokescreen on landing | Redacted Regiment p3, 40 Medals | wiki |
| Dead Sprint | Sprint at zero stamina by draining about 3.6% health per second (about 1% with Vitality Enhancement); stops at 5% health and cannot kill | Truth Enforcers p1, 35 Medals | wiki |
| Experimental Infusion | Stims also grant +10% movement speed and +10% damage resistance while active (aim sway +25%) | Viper Commandos p3, 80 Medals | wiki |
| Expert Extraction Pilot | Extraction shuttle arrives 30% faster (2:00 -> 1:24) | Democratic Detonation p2, 55 Medals | wiki |
| Firebomb Hellpods | Every hellpod explodes in fire on landing, igniting anything nearby, teammates included | Freedom's Flame p3, 60 Medals | wiki |
| Flexible Reinforcement Budget | Once the budget runs out, each new reinforcement comes 25% sooner (120 -> 90 s) | Steeled Veterans p3, 75 Medals | wiki |
| Hellpod Space Optimization | Divers leave every hellpod (first drop and each reinforce) with full ammo, grenades and stims, up to their armor's capacity | Helldivers Mobilize! p3, 15 Medals | wiki |
| Increased Reinforcement Budget | +1 reinforcement per diver (5 -> 6 each; 20 -> 24 in a full squad) | Helldivers Mobilize! p10, 150 Medals | wiki |
| Integrated Extinguishers unverified | Burning divers are put out sooner (official); wiki.gg says about 1 s instead of about 3 s, Fandom says afterburn is limited to 3 s | Ironclad Democracy p3, 65 Medals | wiki |
| Localization Confusion unverified | Longer cooldown between enemy reinforcement calls (wiki measured about +15%; Fandom says 10%); patrols unchanged | Cutting Edge p1, 18 Medals | wiki |
| Motivational Shocks | Faster recovery from slows and stuns (most stuns halved; tremor and ice-plant slows -25%); not EMS clouds | Polar Patriots p1, 15 Medals | wiki |
| Muscle Enhancement | Less slowdown in snow, mud, water, foliage, barbed wire, blizzards, sandstorms and acid (not slopes or tremors) | Helldivers Mobilize! p9, 70 Medals | wiki |
| Sample Extricator | Large enemies can drop common samples on death (capped at 10 per mission) | Borderline Justice p3, 65 Medals | wiki |
| Sample Scanner | 15% chance to double the samples from a pickup (all rarities) | Masters of Ceremony p3, 65 Medals | wiki |
| Stamina Enhancement unverified | More maximum stamina and faster stamina regen for all divers (wiki.gg: +22.5% and +40%; Fandom lists 30% and 23%) | Helldivers Mobilize! p7, 75 Medals | wiki |
| Stun Pods | Every hellpod stuns enemies around its landing point | Force of Law p2, 55 Medals | wiki |
| Surplus EAT Allocation | Two free EAT-17 call-ins per mission (two launchers each, one per diver in a full squad); cannot be rearmed | Ironclad Democracy p2, 55 Medals | wiki |
| UAV Recon Booster | Radar range about +50% for all divers (also widens Scout and Unflinching marker scans); no effect under Atmospheric Spores | Helldivers Mobilize! p6, 40 Medals | wiki |
| Vitality Enhancement | Minor damage reduction for all divers (about 10% per the wiki) and fewer limb injuries | Helldivers Mobilize! p4, 20 Medals | wiki |
Sources: each row's Source link; the wiki's Boosters page and booster pages; Arrowhead's Ironclad Democracy announcement (the two newest boosters).
Boosters in a squad
Read the loadout screen before you ready up and pick a booster nobody else has: every booster works for the whole squad, and a second copy adds nothing.
6.1The rules
- One each, for everyone. Each diver equips one booster, and its effect applies to every diver in the mission.
- Four different at most. A full squad runs up to 4 different boosters; a duplicate adds nothing. The loadout screen has shown who brought which since patch 1.001.201.
- Solo, you get one. A diver alone has only their own booster.
- When a diver leaves. Their booster's effect leaves with them, per the Fandom wiki; wiki.gg adds that the reinforcements Increased Reinforcement Budget already added stay, and that it adds none for a diver who hot-joins after the budget ran out.unverified
- Commando missions. Reinforcement boosters can't be chosen.
- A free one. On the planet under the Democracy Space Station's Orbital Blockade, everyone has Hellpod Space Optimization without equipping it.
6.2A squad's four
A strong default for four divers: Hellpod Space Optimization, Stamina Enhancement, Vitality Enhancement and Experimental Infusion, or Muscle Enhancement if nobody owns Viper Commandos. Three of the four are on the free warbond, so any squad can field them. Swap one out when the mission calls for it:
- Muscle Enhancement for Stamina or Vitality on snow, swamp and acid-heavy bug planets.
- Surplus EAT Allocation when nobody brought anti-tank.
- Increased Reinforcement Budget when the squad is new and dies often: a full squad's 20 reinforcements become 24.
- Integrated Extinguishers against the Incineration Corps.
- Sample Scanner or Sample Extricator while the squad still needs samples for ship modules.
This set is this manual's reading of the two dated lists above and of the mechanics; say which booster you are bringing in chat so the lobby can fill the gaps. Squad roles and the rest of the lobby routine are in Roles and loadout coordination and Squad compositions.
6.3Solo and duo
Alone you get one booster, so take the one that keeps you going. Flexible Reinforcement Budget helps most when nobody else can call you back: once the budget runs out, you return every 90 seconds instead of every 120. Hellpod Space Optimization restocks you on every reinforcement; Stamina Enhancement covers big maps. In a duo, Flexible Reinforcement Budget and a second different booster make the pair.
Sources: the wiki's Boosters page ("four unique" per mission) and Increased Reinforcement Budget; the Fandom wiki's Boosters page (owner leaving); Arrowhead's patch 1.001.201 (who brought which).
What changed in 2025 and 2026
Passives change less than weapons: patch 6.0.1 cut the melee passives, and each new warbond since has added a passive or a booster. Guides from before February 2026 may still quote the old melee numbers.
Two older rules still shape every set: patch 1.001.104 (2024-10-15) set heavy armor to 25% less damage and light armor to 25% more, and patch 1.000.300 (2024-04-29) made ratings above 100 cut headshot damage. Every patch since launch is in Patch history.
Matchup matrix08
What Kills What
Can your weapon hurt it? The penetration ladder for every unit of every front, the minimum penetration per enemy, and each enemy's counters in one place.
On this page11 chapters
The rule in three lines
Before you ask what kills something, ask whether your gun can hurt it at all. Every attack has an armor penetration (AP) and every body part an armor value (AV), on the same scale from 0 to 10, and one comparison decides every shot. Checked against patch 7.1.1 (September 24, 2026).
Full damage
All of the shot's damage lands and the hitmarker turns red. Against a heavy, this is the tier you want.
65% damage
The shot lands at reduced damage and the hitmarker turns white. It works, slowly: a Heavy weapon on Heavy armor is chip damage.
No damage
The shot ricochets and you see the ricochet icon. Stop spending ammo: aim for a weak point, switch slots or call a strike.
1.1The tiers, as the game names them
Weapon traits in the armory name the tiers: AP2 Light, AP3 Medium, AP4 Heavy and AP5 to AP10 Anti-Tank. The wiki numbers the anti-tank tiers I to VI, a convention of its own rather than in-game text, and names armor with the same words (wiki Template:Armor), so a Light weapon against Light armor is the equal case. Read the table across from your weapon's tier:
| Your penetration | Full damage against | 65% against | Bounces off |
|---|---|---|---|
| AP2 · Light | unarmored and very light parts (AV 0-1) | Light armor (AV 2) | Medium armor and up (AV 3+) |
| AP3 · Medium | everything up to Light armor (AV 0-2) | Medium armor (AV 3) | Heavy armor and up (AV 4+) |
| AP4 · Heavy | everything up to Medium armor (AV 0-3) | Heavy armor (AV 4) | tank armor (AV 5+) |
| AP5 to AP10 · Anti-Tank | every armor below its own number | armor at its own number | armor above its number |
1.2Three rules of thumb
- Bring one anti-tank answer once heavies spawnChargers join the bug front's regular spawns at difficulty 4, Hulk Bruisers join the bots' at 4, and Harvesters appear from difficulty 3 in their own missions. From there every diver needs an answer at AP5 or better: a launcher, a Thermite, an Ultimatum or a strike (Heavy-killers by slot).
- Your primary will not do itPrimaries top out at Medium penetration. The only ones labeled Heavy are the R-36 Eruptor (AP4), the FLAM-66 Torcher (AP4) and the LAS-17 Double-Edge Sickle, which reaches AP4 only when it runs hot and burns you (the Stoker's underbarrel flamer also burns at Heavy). Anti-armor comes from your secondary, your throwable, your support weapon and your stratagems.
- Shoot the soft spotWeak points often sit far below the body armor: a Charger's butt, a Hulk's glowing back heatsink, a tank's turret heatsink, a Harvester's hip joints. The right answer is often a lower tier aimed well, not a bigger gun. Each faction tab lists every part with its armor: Terminids, Automatons, Illuminate.
1.3The fine print
- Angles. Every weapon carries four penetration values by impact angle, and most lose penetration only at extreme angles, so glancing hits bounce. Shoot armor square-on.
- Explosions. A blast has one penetration value, and its outer radius loses one tier (never below Light). Blasts deal their full damage to durable parts, which is why launchers beat rifles on big soft targets.
- Durable parts. Big soft parts mostly take a weapon's second, durable damage number. The AR-23 Liberator deals 90 standard but only 22 durable damage, so it needs about 28 rounds for a Charger's buttapprox.
- Overpenetration. A round at least two tiers above a part's armor passes through into the next part or enemy, losing a tier each time: a Stalwart cleaves through a line of Scavengers.
- Breakable plates. Chargers, Bile Titans, Impalers, Overseers, Harvesters, Factory Striders and the Hive Lord wear plates with their own health; damage does not carry through until the plate breaks, unless the round's penetration is at least three times the plate's armor.
- Explosion-immune parts. Some parts ignore blasts; the blast then reaches the main health pool once, if its penetration equals or beats that pool's armor. That is why explosives kill Overseers through their shields, and why blasts below Heavy do nothing to a Harvester until its armor breaks.
Sources: wiki Damage (revision of September 18, 2026: the rule, angles, explosions, durability, overpenetration, plates); patch 1.001.100 notes (the equal-penetration rate); weapon values from the wiki's weapons datamine (September 25, 2026).
Patch 1.001.100 on September 17, 2024 raised the equal-penetration rate from 50% to 65% and sharply raised anti-tank damage, and patch 4.1.0 on October 23, 2025 gave Light and Medium penetration distinct jobs (4.1.0 notes). Ignore penetration advice from before the first date and weapon tier lists from before the second.
Penetration ladder: every unit, front by front
The ladder puts all 83 enemy units on one scale, front by front, from the least penetration it takes to kill each one to the most (structures are in Spawners and structures). Hold your weapon's tier against two columns: if it is above the Body armor, the weapon does full damage to the body, though a shield or an armored part can still sit higher; if it only reaches the Min. penetration, it kills through a weak point, so aim (Reading the matrix explains both). From difficulty counts Eliminate missions, which can bring a unit two to four levels before its regular spawns (Heavy and Rocket Devastators, the Charger Behemoth, the Factory Strider), and a row tagged unverified has a disputed value in its record, often only that difficulty. A later build of this manual turns the ladder into an interactive matrix of every front against every penetration tier, with filters for front and subfaction and a view of the weapons you own; without scripting, and in print, this table remains the content.
| Front | Unit | Class | Min. penetration | Body armor | From difficulty | Source |
|---|---|---|---|---|---|---|
| Automatons | Agitator | medium | 2 | 1 | 1 | wiki |
| Automatons | Assault Raider | small | 2 | 0 | 1 | wiki |
| Automatons | Berserker | medium | 2 | 0 | 2 | wiki |
| Automatons | Brawler | small | 2 | 0 | 1 | wiki |
| Automatons | Commissar | small | 2 | 1 | 1 | wiki |
| Automatons | Conflagration Devastator | medium | 2 | 2 | 1 | wiki |
| Automatons | Devastator | medium | 2 | 2 | 2 | wiki |
| Automatons | Heavy Devastator | medium | 2 | 2 | 1 | wiki |
| Automatons | Incendiary MG Devastator | medium | 2 | 2 | 3 | wiki |
| Automatons | Incendiary Rocket Raider | small | 2 | 0 | 1 | wiki |
| Automatons | Jet Brigade Commissar | small | 2 | 0 | 1 | wiki |
| Automatons | Jet Brigade Devastator | medium | 2 | 2 | 2 | wiki |
| Automatons | Jet Brigade MG Raider | small | 2 | 0 | 2 | wiki |
| Automatons | Jet Brigade Trooper | small | 2 | 0 | 3 | wiki |
| Automatons | Marauder | small | 2 | 0 | 5 | wiki |
| Automatons | MG Raider | small | 2 | 0 | 2 | wiki |
| Automatons | Pyro Trooper | small | 2 | 0 | 1 | wiki |
| Automatons | Radical | medium | 2 | 1 | 1 | wiki |
| Automatons | Reinforced Scout Strider | medium | 2 | 4 | 8 | wiki |
| Automatons | Rocket Devastator | medium | 2 | 2 | 1 | wiki |
| Automatons | Rocket Raider | small | 2 | 0 | 2 | wiki |
| Automatons | Scout Strider | medium | 2 | 4 | 3 | wiki |
| Automatons | Trooper | small | 2 | 0 | 1 | wiki |
| Automatons | Barrager Tank | heavy | 3 | 5 | 7 | wiki |
| Automatons | Gunship | air | 3 | 3 | 5 | wiki |
| Automatons | Jet Brigade Hulk Bruiser | heavy | 3 | 4 | 4 | wiki |
| Automatons | Jet Brigade Hulk Scorcher | heavy | 3 | 4 | 4 | wiki |
| Automatons | War Strider | heavy | 3 | 4 | 6 | wiki |
| Automatons | Factory Strider | heavy | 4 | 5 | 4 | wiki |
| Automatons | Hulk Bruiser | heavy | 4 | 4 | 4 | wiki |
| Automatons | Hulk Firebomber | heavy | 4 | 4 | 4 | wiki |
| Automatons | Hulk Obliterator | heavy | 4 | 4 | 3 | wiki |
| Automatons | Hulk Scorcher | heavy | 4 | 4 | 4 | wiki |
| Automatons | Vox Engine | heavy | 4 | 5 | 7 | wiki |
| Automatons | Annihilator Tank | heavy | 5 | 5 | 3 | wiki |
| Automatons | Dropship | air | 5 | 5 | 1 | wiki |
| Automatons | Shredder Tank | heavy | 5 | 5 | 3 | wiki |
| Illuminate | Crescent Overseer | medium | 2 | 0 | 3 | wiki |
| Illuminate | Crusher | heavy | 2 | 1 | 4 | wiki |
| Illuminate | Elevated Overseer | medium | 2 | 0 | 3 | wiki |
| Illuminate | Fleshmob | heavy | 2 | 0 | 1 | wiki |
| Illuminate | Gatekeeper | heavy | 2 | 4 | 4 | wiki |
| Illuminate | Obtruder | medium | 2 | 0 | 1 | wiki |
| Illuminate | Overseer | medium | 2 | 0 | 1 | wiki |
| Illuminate | Veracitor | heavy | 2 | 3 | 4 | wiki |
| Illuminate | Voteless | small | 2 | 0 | 1 | wiki |
| Illuminate | Watcher | medium | 2 | 0 | 1 | wiki |
| Illuminate | Wretch | medium | 2 | 1 | 1 | wiki |
| Illuminate | Harvester | heavy | 3 | 4 | 3 | wiki |
| Illuminate | Stingray | air | 3 | 3 | 4 | wiki |
| Illuminate | Leviathan | air | 5 | 5 | 8 | wiki |
| Illuminate | Warp Ship | air | 5 | 5 | 1 | wiki |
| Illuminate | Illuminate Overship | air | 10 | 10 | 1 | wiki |
| Terminids unverified | Alpha Commander | medium | 2 | 2 | 8 | wiki |
| Terminids | Alpha Warrior | medium | 2 | 1 | 8 | wiki |
| Terminids | Bile Spewer | medium | 2 | 2 | 3 | wiki |
| Terminids | Bile Spitter | small | 2 | 0 | 1 | wiki |
| Terminids | Bile Warrior | medium | 2 | 1 | 4 | wiki |
| Terminids | Brood Commander | medium | 2 | 2 | 1 | wiki |
| Terminids | Hive Guard | medium | 2 | 2 | 2 | wiki |
| Terminids unverified | Hunter | small | 2 | 0 | 2 | wiki |
| Terminids | Impaler | heavy | 2 | 4 | 5 | wiki |
| Terminids | Nursing Spewer | medium | 2 | 2 | 3 | wiki |
| Terminids | Pouncer | small | 2 | 0 | 2 | wiki |
| Terminids | Predator Hunter | small | 2 | 0 | 2 | wiki |
| Terminids | Predator Stalker | medium | 2 | 1 | 4 | wiki |
| Terminids | Rupture Spewer | medium | 2 | 2 | 6 | wiki |
| Terminids | Rupture Warrior | medium | 2 | 1 | 6 | wiki |
| Terminids | Scavenger | small | 2 | 0 | 1 | wiki |
| Terminids unverified | Shrieker | small | 2 | 0 | 4 | wiki |
| Terminids | Spore Burst Hunter | small | 2 | 0 | 2 | wiki |
| Terminids | Spore Burst Scavenger | small | 2 | 0 | 2 | wiki |
| Terminids | Spore Burst Warrior | medium | 2 | 1 | 2 | wiki |
| Terminids | Stalker | medium | 2 | 1 | 4 | wiki |
| Terminids | Warrior | medium | 2 | 1 | 1 | wiki |
| Terminids | Bile Titan | heavy | 4 | 4 | 4 | wiki |
| Terminids | Charger | heavy | 4 | 4 | 4 | wiki |
| Terminids | Charger Behemoth | heavy | 4 | 4 | 3 | wiki |
| Terminids unverified | Dragonroach | heavy | 4 | 4 | 5 | wiki |
| Terminids unverified | Rupture Charger | heavy | 4 | 4 | 6 | wiki |
| Terminids unverified | Spore Burst Bile Titan | heavy | 4 | 4 | 5 | wiki |
| Terminids | Spore Charger | heavy | 4 | 4 | 7 | wiki |
| Terminids | Hive Lord | heavy | 5 | 5 | 7 | wiki |
Reading the ladder and the matrix
Each cell of the matrix answers one question: can this penetration tier hurt this unit, and where? There are four answers, and for the parts a unit shows you in a normal fight, the ladder's two columns give all four (3.2 covers the soft spots you have to flank for).
Above the body armor
Your penetration beats the armor over the unit's main health pool: full damage to the body. A shield or an armored part can still sit higher (every Devastator's Medium-armored torso, a Heavy Devastator's Heavy-armored shield, both over a Light-armored body), so shoot past them. Aim to have this tier against every heavy.
Equal to the body armor
65% damage to the body, and full damage on any softer weak point. It works, slowly: think of an Autocannon on a Hulk's body.
Between the minimum and the body armor
The body shrugs it off but the soft spots do not: heads, eyes, vents, joints, stomachs. You have to aim, and sometimes to flank.
Below every weak point
Every hit bounces. Switch slots, reposition for a softer part, or call a strike.
3.1A worked example: the Hulk
A Hulk Bruiser's body armor is 4 and its minimum penetration is 4, because its eye slit is armored like its body. Your starting AR-23 Liberator (AP2) bounces off it from the front, which is the ladder's Nothing, but from behind it chews through the glowing back heatsink in about 19 roundsapprox: the matrix counts that as weak points only. An AC-8 Autocannon (AP4) is equal: 65% on the body and the eye slit, two shells to the eye slit, and full damage on the heatsink. An EAT-17 (AP6) is full: one rocket to the body kills it, though a hit on an arm does not. Every part is listed on the Automatons tab.
3.2How the matrix counts
- Your best penetration counts. A weapon sits at its headline penetration or its blast's, whichever is higher: the PLAS-1 Scorcher's bolt is AP2, but its blast is AP3.
- AP7 and up share a column. Above AP7 every unit reacts the same way, except the Illuminate Overship, which only the Planetary Defense Cannon can destroy; the Hive Lord's crown is armored as high, but its plates are the way in.
- Plates count as body armor. Where breakable plates cover the main pool, the body armor is the plates': the Factory Strider's reads 5 although the pool beneath is softer.
- Flanking counts too. The ladder's minimum is measured on the parts a unit shows you in a normal fight; the matrix also counts soft spots you have to flank for, such as a Hulk's heatsink or a tank's turret heatsink.
- Whether, not how fast. A cell says a tier can hurt a unit, not how quickly: health, durable damage, shields and regeneration decide that, and so do fire and gas. A Harvester's shield soaks a whole rocket before any of this applies. The counter cards below and the faction tabs cover the speed.
3.3What the interactive version adds
Above the matrix, a strip counts for each front and tier how many units that tier hurts in the body and how many only through weak points, and each count filters the rows. A second view swaps the tiers for up to six of your own weapons, and a star marks the tiers and weapons a dossier names as a unit's counters. Until then, the ladder above carries the same information for the parts a unit shows you.
Minimum penetration by enemy
The minimum is the least penetration that can kill a unit through the parts it shows you, however slowly: a floor, not a recommendation. For most small and medium enemies it is Light, so any gun works through a head, a mouth or a soft limb. What decides a loadout is the handful of higher floors, and the heavies whose floor hides the real answer. Every unit's floor is on the Penetration ladder.
4.1What each tier opens
- Light (AP2): anything softFull damage on unarmored and very light parts: every small bug, bot and Voteless, and the heads, stomachs, mouths and legs of most medium units. It bounces off Medium plates: Devastator torsos, Hive Guard and Overseer heads, Bile Spewer heads from difficulty 6.
- Medium (AP3): infantry armorLight armor now takes full damage (Hive Guard bodies, Devastator legs), and every Medium part takes 65%: Devastator torsos, Hive Guard and Overseer heads, Scout Strider waists, Gunship thrusters, Stingrays and Harvester hip joints. It still bounces off the Heavy or tank armor over most heavies' bodies; the exceptions are the Veracitor, whose Medium-armored body takes 65%, and the barely armored Crusher and Fleshmob (below).
- Heavy (AP4): weak points on heaviesFull damage on every Medium part, from tank turret heatsinks to War Strider and Harvester hip joints; 65% on Heavy armor: Charger, Bile Titan and Hulk bodies, Hulk eye slits, War Strider eyes, Crusher helmets, a Gatekeeper's horn. Chip damage on a heavy's body, a real answer on its weak points.
- Anti-Tank I (AP5): every Heavy part at fullFull damage on every Heavy part; tank hulls and turrets, Dropship thrusters, Fabricator shells, Warp Ships, Leviathan fins and the Hive Lord's plates at 65%.
- Anti-Tank II and up (AP6+): almost everythingAlmost every unit and structure takes full damage, and the big single rockets one-shot most heads and joints. The exceptions: Command Bunkers and the Hive Lord's jaws take 65% from AP6, and a few targets sit beyond ordinary weapons: the Hive Lord's crown and the Illuminate Overship wear armor at the top of the scale (only the Planetary Defense Cannon destroys the Overship), and Gazer Spires and Monoliths fall only to demolition 60, which Hellbombs and the SEAF Artillery Mini-Nuke reach.
4.2Where the floor misleads you
Impaler
Its floor is Light because its very lightly armored head is exposed while the tentacles are buried; its armor plates are Heavy. Hit that head with anti-tank: one EAT-17, Quasar or Recoilless shot kills it. Full entry: Terminids tab, heavies.
Crusher
Its floor is Light because its body is very lightly armored, but every limb and its main pool regenerate, so Light fire barely keeps up. Break the Heavy helmet, then shoot the head. Full entry: Illuminate tab, fleets.
Fleshmob
No armor at all and no fatal part: any gun hurts it, but you are grinding a huge health pool, so volume, explosions and fire decide the fight. Shoot the faces. Full entry: Illuminate tab, heavies.
Hulk
Its floor is Heavy because the eye slit is armored like the body. From behind, the glowing heatsink takes any gun, and a Hulk that loses it goes down and bleeds out. Full entry: Automatons tab, heavies.
Factory Strider
Tank plates cover a Heavy body pool, so its body armor reads higher than its floor: the eye and the legs are Heavy. Take the chin gatlings off first; one Recoilless to the eye kills it. Full entry: Automatons tab, heavies.
Rupture Charger
Its floor is Heavy through the side and rear legs, but its head and front plates are Tank armor, so Heavy weapons bounce off the face it shows you. Bring true anti-tank. Full entry: Terminids tab, strains.
Gatekeeper
Its floor is Light because any tier can empty the pilot's Light-armored shield and then hit the Light-armored pilot, very slowly; the Veracitor's floor works the same way, and its hips and upper legs are Light-armored too. The real answers from the front are a Heavy hit on the horn to drop the pilot's shield for good and anti-tank to the cockpit stump; from behind, two very lightly armored weak spots take any gun. Full entry: Illuminate tab, fleets.
Harvester
Its floor is Medium at the hip joints, but its shield absorbs any single hit first, and its exterior shrugs off blasts below Heavy until the armor breaks. Full entry: Illuminate tab, heavies.
Sources: research dossiers 05 (section 1.3), 06 and 07 (their minimum-penetration definitions) with the verifiers' corrections to the Terminid floors; the anatomy on the unit pages of the wiki, revised September 2026.
Heavy-killers by slot
The short answer: buy the EAT-17 at level 3 and the GR-8 Recoilless Rifle at level 5 with Requisition, keep the Orbital Precision Strike you start with, and add G-123 Thermite as soon as you can (Democratic Detonation p1, 15 Medals). That covers the standard heavy of every front: anti-tank to a bug's head, to a Hulk's body, to a tank's turret, to a Harvester's hip once its shield is down.
Shot counts on this page assume a clean hit at point blank; they come from the dossiers' arithmetic on the game's datamined values, checked against the wiki's own counts, and falloff, angles and misses add shotsapprox.
5.1Support weapons: the reusable answers
- EAT-17 Expendable Anti-Tank (AP6): calls are unlimited (2 launchers per call), every 70 seconds, and it needs no backpack. One head shot kills a Charger of any kind, a Bile Titan or a Dragonroach; one hit to the body kills a Hulk (a hit on an arm does not); two turret hits kill a tank. Get it: Ship Management (PAC), level 3, 3,000 Req.
- GR-8 Recoilless Rifle (AP6): reloads from its backpack, much faster with a squadmate. One head shot kills any Charger, Bile Titan (the Spore Burst Titan included), Impaler or Dragonroach; one turret shot kills a tank; one eye shot kills a Factory Strider or a Harvester. Get it: Ship Management (PAC), level 5, 6,000 Req.
- LAS-99 Quasar Cannon (AP6): no ammo; it charges, fires, then recharges. The EAT-17's one-shots all mission without a resupply. Get it: Ship Management (Engineering Bay), level 18, 7,500 Req.
- FAF-14 Spear (AP7): locks on at range and misses up close. One torso hit kills a Charger, one head hit a Bile Titan, one missile a Vox Engine cannon (two kill it); it also locks onto Gunships and anti-air sites. Get it: Ship Management (PAC), level 20, 9,000 Req.
- MLS-4X Commando (AP6): 4 missiles per call every 120 seconds; two per Charger or Bile Titan head, one per Harvester hip joint. Get it: Ship Management (PAC), level 15, 8,000 Req.
- EAT-411 Leveller (AP6) and MS-11 Solo Silo (AP9 on impact): either kills a Bile Titan, a Factory Strider or a Vox Engine wherever it hits, and both blasts endanger your own squad. Get them: Siege Breakers p2, 85 Medals; Dust Devils p3, 110 Medals.
- AC-8 Autocannon (AP4) and APW-1 Anti-Materiel Rifle (AP4): not anti-tank, but they reach weak points. One rifle shot or two shells take a Hulk's eye, two per Gunship thruster, two to break a Crusher's helmet, four per Harvester hip joint. u.gg's support list (stamped patch 7.0.2, read September 26, 2026) rates the AC-8 Autocannon S+ on all three fronts, the only support weapon it does, while GamesRadar (August 14, 2026) rates it B, B and C (u.gg, GamesRadar)community-tested.
5.2Throwables: anti-tank in your pocket
- G-123 Thermite (AP7): sticks, burns, then explodes. One on the head kills a Charger (on the torso too, except a Behemoth), and one anywhere kills a Hulk, a tank or a Crusher. Get it: Democratic Detonation p1, 15 Medals. u.gg rates the G-123 Thermite S+ on all three fronts, the only throwable it does (undated list, read September 26, 2026: u.gg)community-tested.
- G/40-K Melta Mine (AP7): a mine for medium and heavy enemies that kills Hulks and Chargers walking over it. Get it: Castellan's Creed p2, 50 Medals.
- G-48 Giga Grenade (AP5) and G-60 Anti-Tank Seeker (AP5): the Giga carries only 2 but also closes bug holes (Bile Titan holes included), Fabricators and Warp Gateways from outside; the Seeker homes in and kills one Hulk per grenade but is unreliable on Bile Titans, and it is too new (September 22, 2026) for a settled community verdict. Get them: Entrenched Division p2, 50 Medals; Ironclad Democracy p3, 65 Medals.
- G-23 Stun: no damage, but it freezes a Charger or a Hulk for a follow-up shot or strike; it does not affect tanks, Factory Striders, Impalers or Bile Titans. Get it: Cutting Edge p2, 25 Medals.
5.3Secondaries
- GP-20 Ultimatum (AP6): 1 shell plus 1 spare and a very short range, but one hit kills most heavies and closes bug holes (Bile Titan holes included), Fabricators and Warp Gateways from outside; a Bulk Fabricator needs more demolition than one shell carries, and a Grounded Warp Ship needs its shield down first. Get it: Servants of Freedom p2, 40 Medals.
- P-34 Breacher (AP7): a sticky charge that one-shots Hulks, Cannon Turrets and Charger rears; 1 charge loaded plus 2 spares, and a resupply returns only one. New on September 22, 2026. Get it: Ironclad Democracy p2, 50 Medals.
- P-33 Missile Pistol (AP5): for Gunships, Stingrays and War Striders (two missiles kill a War Strider), with 1 missile loaded plus 3 spares; a resupply returns only one. Get it: Exo Experts p2, 50 Medals.
- P-4 Senator (AP4) and P/40-K Bolt Pistol (AP4): Heavy penetration in the holster. Three Senator shots or two bolts break a Crusher's helmet, and three Senator shots take a Hulk's eye. Get them: Steeled Veterans p1, 15 Medals; Castellan's Creed p2, 50 Medals.
5.4Primaries: weak points only
No primary is anti-tank. The R-36 Eruptor (AP4) takes a Hulk's eye in two rounds and closes holes, the FLAM-66 Torcher (AP4) burns through a Charger's armor at flame range, and a hot LAS-17 Double-Edge Sickle reaches Heavy at the cost of your own health. Pair any of them with one of the answers above.
5.5Stratagems that kill heavies
- Orbital Precision Strike: yours from the start, every 80 seconds since 7.1.0. A direct hit kills Hulks and tanks, it is a standard Charger and Bile Titan answer, and it knocks out Detector Towers and other demolition-50 structures; it kills a Harvester only while its shield is down or not yet raised.
- Orbital Railcannon Strike (level 20, every 180 seconds): aims itself at the largest enemy near the beacon. It kills Bile Titans, tanks, Hulks and War Striders, and since 6.3.0 one-shots a Vox Engine; it does not one-shot a Factory Strider or the Hive Lord.
- Eagle 500kg Bomb (level 15): for Chargers, Bile Titans, Hulks, War Striders and holes; wasted on a shielded Harvester, whose shield soaks the whole hit. Uses: 1 per rearm (2 with Expanded Weapons Bay); rearm 150 s.
- Eagle Airstrike (level 1): the wiki's first pick against tanks, and good on Hulks, Devastator lines and fabricators. Uses: 2 per rearm (3 with Expanded Weapons Bay); rearm 150 s.
- Eagle 110mm Rocket Pods (level 10): the pods aim themselves at the biggest enemy, and since 6.3.0 they are tuned to one-shot smaller heavies such as Chargers and unshielded Harvesters, though not every time (6.3.0 notes). Uses: 3 per rearm (4 with Expanded Weapons Bay); rearm 150 s.
- Orbital Laser (level 15, 3 per mission): burns through a Harvester's shield, kills Vox Engines and clears outposts; it does not fire into caves.
A Harvester's shield absorbs any single hit in full, so a rocket or a strike on a shielded Harvester is wasted: strip the shield first. A Crusher survives a Recoilless or Meltagun hit and regenerates, so single-shot anti-tank is not a Crusher answer. The dated tier lists split here: u.gg rates the EAT-17, Recoilless, Quasar and Railgun C on this front, while GamesRadar rates the EAT-17, Quasar, Commando and Railgun A (support lists stamped patch 7.0.2 and updated August 14, 2026)community-tested.
Sources: research dossiers 03 (sections 2-6), 05 (sections 3 and 8), 06 (sections 5-12) and 07 (sections 5-11), with the verifiers' corrections (the Vox Engine takes four EAT-17 or Quasar hits; the Railcannon does not one-shot a Factory Strider); weapon and stratagem values from the wiki's datamine (September 25, 2026).
Enemy lookup
The interactive lookup, planned for a later build of this manual, opens any enemy as a card: its body parts with their armor and weak points, its minimum penetration and ladder row, the dossier's counters and the difficulty it first appears at, with a link to its full entry. Until then, every unit's counters follow on this page (Terminids, Automatons, Illuminate), and these links open each front's unit chapters, where every part is listed with its armor:
- Terminids: small bugs · Warriors, Hive Guards, Commanders, Spewers and Stalkers · heavies · strains · nests and holes
- Automatons: infantry and Scout Striders · Hulks, striders and tanks · air and bot drops · Cyborg Legion · subfactions · fabricators and structures
- Illuminate: Voteless and Watchers · Overseers · Fleshmob and Harvester · air and ships · fleets · structures and objectives
Terminids: what kills each bug
Stop breach calls, carry anti-tank for heads, and close holes with explosives. Bugs are a melee swarm with a few armored heavies, so Light penetration handles most of them and the fight is about volume, stagger and not getting surrounded. The front fields 30 units: the base roster plus the Predator Strain, Spore Burst Strain and Rupture Strain.
In a mixed fight: any bug calling a breach in orange mist, then a Dragonroach overhead (the wiki rates it the highest-priority target), then Stalkers, Hunters and Pouncers, then Bile Spewers from difficulty 6 and Commanders. The anti-tank divers take the heavies while everyone else keeps the chaff off them. This order is the dossier's synthesis of the wiki's per-unit notes; the full version is on the Terminids tab.
How to read the cards: the label gives the unit's minimum penetration and the difficulty it first appears at (Eliminate-mission targets included); then come the weapons and stratagems its dossier names, one tactic, and a link to its full entry. The unverified tag marks a disputed value in the unit's record, often only its first difficulty. The counters are the dossiers' synthesis of the wiki's tactics notes, the arithmetic and dated tier lists: strong suggestions, not the only answers.
7.1Small bugs
Scavenger
Weapons: any primary: AR-23 Liberator, SG-225 Breaker, P-19 Redeemer, M-105 Stalwart; one melee hit to the head kills a lone one
Stratagems: A/MG-43 Machine Gun Sentry, A/ARC-3 Tesla Tower, Eagle Cluster Bomb, AX/AR-23 Guard Dog
Tactic: It strikes, backs off and comes back, and out of reach it can burrow and surface under you. Kill any Scavenger standing in orange mist first: it is calling a breach. Full entry: Terminids tab, small bugs.
Bile Spitter
Weapons: any primary at range: AR-23 Liberator, SG-225 Breaker, R-63 Diligence
Stratagems: A/MG-43 Machine Gun Sentry, Eagle Cluster Bomb
Tactic: It spits acid from short range and bursts into acid when it dies, and the burst chains through packed bugs and divers alike. Shoot it before it reaches you. Full entry: Terminids tab, small bugs.
Pouncer
Weapons: any primary; shotguns and SMGs track leaping targets: SG-225 Breaker, SMG-37 Defender, P-19 Redeemer
Stratagems: A/MG-43 Machine Gun Sentry, AX/AR-23 Guard Dog
Tactic: Pouncers leap long distances straight at a diver and can overshoot. Shoot them before other small bugs; a kill mid-leap is the cleanest. Full entry: Terminids tab, small bugs.
Hunter
Weapons: SG-225 Breaker, SG-451 Cookout or AR-2 Coyote (fire kills it in seconds), M-105 Stalwart, SMG-37 Defender; LAS-5 Scythe ignites a pack at range unverified
Stratagems: A/MG-43 Machine Gun Sentry, A/G-16 Gatling Sentry, Eagle Cluster Bomb, AX/AR-23 Guard Dog unverified
Tactic: Fast flankers that pounce and slow you with an acid tongue: the first target inside any swarm. Shoot the legs or wings to stop the pounce; a melee hit knocks one back. Full entry: Terminids tab, small bugs.
Shrieker
Weapons: hitscan lasers LAS-5 Scythe and LAS-7 Dagger, LAS-13 Trident, SG-8 Punisher, AC-8 Autocannon (flak), ARC-3 Arc Thrower, MG-43 Machine Gun unverified
Stratagems: A/MG-43 Machine Gun Sentry, A/G-16 Gatling Sentry; kill its Shrieker Nest from beyond about 130 m unverified
Tactic: Shriekers pour out of a Shrieker Nest once a diver is detected within about 130 m. Go prone, keep a rock between you and the flock, and step aside after a kill mid-dive: the corpse falls on you. Full entry: Terminids tab, small bugs.
7.2Warriors and Hive Guards
Warrior
Weapons: Light AP to the head: AR-23 Liberator, AR-23P Liberator Penetrator, R-63 Diligence, SG-225 Breaker; explosives for groups: CB-9 Exploding Crossbow, R-36 Eruptor, GL-21 Grenade Launcher, G-12 High Explosive
Stratagems: Eagle Airstrike, Eagle Cluster Bomb, Orbital Gatling Barrage, A/MG-43 Machine Gun Sentry
Tactic: Warriors strafe to cut off your retreat, and a headless Warrior goes berserk and can still call a breach while it bleeds out. Finish it, or break a leg to stop the berserk sprint. Full entry: Terminids tab, medium bugs.
Bile Warrior
Weapons: as Warrior, from 5 m or more: AR-23 Liberator, AR-23P Liberator Penetrator, R-63 Diligence; explosives at range
Stratagems: Eagle Airstrike, Eagle Cluster Bomb, Orbital Gatling Barrage, A/MG-43 Machine Gun Sentry
Tactic: Killed through the body it bursts into acid, so take the head at the range the weapons line gives and let it bleed out. Full entry: Terminids tab, medium bugs.
Alpha Warrior
Weapons: as Warrior; destroy a leg to slow it
Stratagems: Eagle Airstrike, Eagle Cluster Bomb, Orbital Gatling Barrage, A/MG-43 Machine Gun Sentry
Tactic: Faster than a Warrior and summoned in threes by Alpha Commanders. Finish the headless body: it can reach you before it bleeds out. Full entry: Terminids tab, medium bugs.
Hive Guard
Weapons: Medium AP to the head: MG-43 Machine Gun, AR-23P Liberator Penetrator, SMG-32 Reprimand, M-1000 Maxigun; fire (Heavy AP) through its plates: FLAM-40 Flamethrower, SG-451 Cookout, SG-225IE Breaker Incendiary, G-10 Incendiary, G-13 Incendiary Impact
Stratagems: Eagle Napalm Airstrike, Eagle Airstrike, Orbital Gatling Barrage
Tactic: When shot it crouches behind its Medium-armored front plates. Keep it crouched from the front while a squadmate hits the body and rear legs from the side. Guides that call its head Heavy predate patch 6.2.3 (May 6, 2026). Full entry: Terminids tab, medium bugs.
7.3Commanders, Spewers and Stalkers
Brood Commander
Weapons: Medium AP and explosives: AR-23P Liberator Penetrator, JAR-5 Dominator, R-36 Eruptor, CB-9 Exploding Crossbow, MG-43 Machine Gun; a melee hit staggers a headless one until it bleeds out
Stratagems: Eagle Airstrike, Orbital Precision Strike, A/MG-43 Machine Gun Sentry
Tactic: It summons three Warriors and can call a breach even headless: kill it first. Its bull rush knocks you down; every leg it loses slows it. Full entry: Terminids tab, medium bugs.
Alpha Commander
Weapons: Medium AP and explosives: AR-23P Liberator Penetrator, JAR-5 Dominator, R-36 Eruptor, CB-9 Exploding Crossbow, MG-43 Machine Gun; a melee hit staggers a headless one until it bleeds out unverified
Stratagems: Eagle Airstrike, Orbital Precision Strike, A/MG-43 Machine Gun Sentry unverified
Tactic: It takes the Brood Commander's place on the highest difficulties, brings Alpha Warriors and, since 6.3.0, never retreats. The wiki's claim that breaking both claws kills it is disputed. Full entry: Terminids tab, medium bugs.
Nursing Spewer
Weapons: any gun to the head or mouth; explosives to the butt: G-16 Impact (can kill two), GL-21 Grenade Launcher, R-36 Eruptor, CB-9 Exploding Crossbow, PLAS-101 Purifier; SG-8 Punisher or ARC-3 Arc Thrower staggers the spew
Stratagems: Eagle Airstrike, Eagle Cluster Bomb, Orbital Gatling Barrage
Tactic: No artillery, but its thin spore cloud hides small bugs until it dies. The mouth takes any gun; an explosive under the butt bursts it and can chain to its neighbors. Full entry: Terminids tab, medium bugs.
Bile Spewer
Weapons: Medium AP to the head: MG-43 Machine Gun, AR-23P Liberator Penetrator, JAR-5 Dominator, R-63CS Diligence Counter Sniper; explosives to the butt: G-16 Impact, GL-21 Grenade Launcher, R-36 Eruptor, CB-9 Exploding Crossbow, PLAS-101 Purifier; SG-8 Punisher or ARC-3 Arc Thrower staggers the spew
Stratagems: Eagle Airstrike, Eagle Cluster Bomb, Orbital Gatling Barrage
Tactic: From difficulty 6 its head and plates harden to Medium armor and it lobs bile bombs that ragdoll divers into the melee: kill it early in the fight. Full entry: Terminids tab, medium bugs.
Stalker
Weapons: SG-8 Punisher, SG-451 Cookout (fire +25%), AR-2 Coyote, SG-20 Halt or AR-32 Pacifier (stun), MG-43 Machine Gun
Stratagems: close the Stalker Lair (explosive into each hole, or Eagle 500kg Bomb, Eagle Airstrike, Orbital Precision Strike); A/MG-43 Machine Gun Sentry watches your back
Tactic: A camouflaged flanker that retreats after taking damage and heals while hidden. The real counter is its lair: close the holes and the Stalkers stop coming. Fire, gas or bile leave one partly visible, and burning counters its healing. Full entry: Terminids tab, medium bugs.
7.4Heavies
Charger
Weapons: EAT-17, LAS-99 Quasar Cannon, GR-8 Recoilless Rifle (head one-shot); FAF-14 Spear (torso hit kills); G-123 Thermite on head or torso; APW-1 Anti-Materiel Rifle, MG-206 Heavy Machine Gun, AC-8 Autocannon, LAS-98 Laser Cannon on the legs; FLAM-40 Flamethrower (1.5x fire)
Stratagems: Orbital Precision Strike, Eagle 500kg Bomb, Eagle Airstrike, Orbital Railcannon Strike; G-23 Stun or G-109 Urchin stops it for a strike
Tactic: It charges past its target: wait, dive sideways at the last moment, then hit the butt during its one-second recovery. Anti-tank to the head is the clean kill; do not let it drag you away from the Hunters. Full entry: Terminids tab, heavies.
Charger Behemoth
Weapons: EAT-17, LAS-99 Quasar Cannon, GR-8 Recoilless Rifle (head one-shot); FAF-14 Spear (torso hit kills); G-123 Thermite on the head; Heavy AP support weapons are slower than against a Charger
Stratagems: Orbital Precision Strike, Eagle 500kg Bomb, Eagle Airstrike, Orbital Railcannon Strike; G-23 Stun or G-109 Urchin stops it for a strike
Tactic: A tougher Charger: anti-tank to the head still kills it in one hit, but Thermite has to land on the head and Heavy support weapons take longer on its legs. On difficulty 10 it replaces ordinary Chargers. Full entry: Terminids tab, heavies.
Spore Charger
Weapons: EAT-17, LAS-99 Quasar Cannon, GR-8 Recoilless Rifle (head one-shot); FAF-14 Spear; G-123 Thermite; spore flesh takes any gun but passes only 20% to Main
Stratagems: Orbital Railcannon Strike and Eagle 110mm Rocket Pods auto-target it through its fog; Orbital Precision Strike, Eagle 500kg Bomb; ping it to mark it
Tactic: It hides in its own spore fog; kill it at range, because it can burst into acid when killed (a bleed-out kill does not). On difficulty 10 it replaces ordinary Chargers. Full entry: Terminids tab, heavies.
Impaler
Weapons: GR-8 Recoilless Rifle, EAT-17, LAS-99 Quasar Cannon, AC-8 Autocannon, R-36 Eruptor, CB-9 Exploding Crossbow on the exposed head; MG-43 Machine Gun or M-105 Stalwart on broken legs; SG-8 Punisher, JAR-5 Dominator or SG-22 Bushwhacker interrupt the tentacles; fire makes them retract
Stratagems: Eagle 500kg Bomb, Eagle Strafing Run, Orbital Railcannon Strike, Orbital Precision Strike; sentries shoot tentacles and force them back
Tactic: It buries its head and drives tentacles up at any diver it can see. Wait for the head to lift, or walk up and bait its close slam, then hit the head. Throw strikes early: tentacle hits knock you down mid-input. Full entry: Terminids tab, heavies.
Bile Titan
Weapons: EAT-17, LAS-99 Quasar Cannon, GR-8 Recoilless Rifle, FAF-14 Spear (head one-shot); MS-11 Solo Silo or EAT-411 Leveller (kill on any hit); any gun on the Unarmored bile sacs
Stratagems: Orbital Railcannon Strike (auto-targets the largest enemy, 10,000 damage), Eagle 500kg Bomb, Orbital Precision Strike, Eagle 110mm Rocket Pods; a Hellpod landing on it
Tactic: Never stand in front of it or under it. Fight from its flank beyond the spew, and pop both bile sacs with any gun to stop the spew. Full entry: Terminids tab, heavies.
Dragonroach
Weapons: EAT-17, LAS-99 Quasar Cannon, GR-8 Recoilless Rifle (head one-shot); homing FAF-14 Spear or StA-X3 W.A.S.P. Launcher; GP-20 Ultimatum, EAT-411 Leveller or MS-11 Solo Silo (one-shot on a body hit); AC-8 Autocannon flak on the wings; PLAS-45 Epoch unverified
Stratagems: Orbital Railcannon Strike (reliable one-shot); SH-20 Ballistic Shield Backpack blocks its fire; armor with Inflammable, Acclimated or Desert Stormer unverified
Tactic: The wiki calls it the highest-priority target whenever it is on the field. Watch the sky, go prone when it dives, and shoot it while it hovers low after a pass. Full entry: Terminids tab, heavies.
Hive Lord
Weapons: GR-8 Recoilless Rifle, EAT-17, FAF-14 Spear to break plates; AR-61 Tenderizer, M-105 Stalwart, M-1000 Maxigun, MG-43 Machine Gun on exposed flesh (no explosives there)
Stratagems: Eagle Strafing Run and Orbital Gatling Barrage (Anti-Tank I, hit many plates), EXO-45 Patriot Exosuit, TD-220 Bastion, B-100 Portable Hellbomb during its bile rain
Tactic: A roaming Hive World boss you are not forced to fight: spread out, stand on rock and bait it away with explosions. To kill it, break plates with Anti-Tank I or better, then pour fast fire into the flesh, never explosives. Full entry: Terminids tab, heavies.
7.5Predator Strain
Predator Hunter
Weapons: SG-8 Punisher (stagger), SG-451 Cookout, SG-225IE Breaker Incendiary, AR-2 Coyote, ARC-12 Blitzer; shoot legs to stop pounces
Stratagems: AX/TX-13 Dog Breath, A/MG-43 Machine Gun Sentry, A/G-16 Gatling Sentry, MD-8 Gas Mines
Tactic: It cloaks like a Stalker, spits acid and hunts in aggressive packs: stay grouped, stagger it, and reveal it with fire or gas. Full entry: Terminids tab, strains.
Predator Stalker
Weapons: SG-451 Cookout (fire +25%), SG-8 Punisher, AR-2 Coyote, MG-43 Machine Gun; explosives are risky once it closes in
Stratagems: A/MG-43 Machine Gun Sentry, A/G-16 Gatling Sentry, A/FLAM-40 Flame Sentry, AX/TX-13 Dog Breath
Tactic: No camouflage and no lair, but it comes in numbers and never retreats: stagger plus fire, and sentries with a clear view. Full entry: Terminids tab, strains.
7.6Spore Burst Strain
Spore Burst Scavenger
Weapons: fire and lasers so it dies without bursting: SG-451 Cookout, SG-225IE Breaker Incendiary, LAS-5 Scythe, FLAM-40 Flamethrower, AR-2 Coyote; avoid melee
Stratagems: MD-8 Gas Mines, A/M-23 EMS Mortar Sentry, A/FLAM-40 Flame Sentry, A/ARC-3 Tesla Tower
Tactic: Its death burst speeds up the Spore Burst bugs around it, so pick a weapon from the line above that kills it without the burst. Full entry: Terminids tab, strains.
Spore Burst Hunter
Weapons: fire and lasers so it dies without bursting: SG-451 Cookout, SG-225IE Breaker Incendiary, LAS-5 Scythe, FLAM-40 Flamethrower, AR-2 Coyote; avoid melee; shoot legs to stop pounces
Stratagems: MD-8 Gas Mines, A/M-23 EMS Mortar Sentry, A/FLAM-40 Flame Sentry, A/ARC-3 Tesla Tower
Tactic: Kill it while it burns so it releases no spores, and shoot the legs to stop the pounce. No melee. Full entry: Terminids tab, strains.
Spore Burst Warrior
Weapons: fire and lasers so it dies without bursting: SG-451 Cookout, SG-225IE Breaker Incendiary, LAS-5 Scythe, FLAM-40 Flamethrower, AR-2 Coyote; avoid melee; a headshot left to bleed out also prevents the burst
Stratagems: MD-8 Gas Mines, A/M-23 EMS Mortar Sentry, A/FLAM-40 Flame Sentry, A/ARC-3 Tesla Tower
Tactic: Burn it, or take the head and let it bleed out: neither releases spores. Full entry: Terminids tab, strains.
Spore Burst Bile Titan
Weapons: GR-8 Recoilless Rifle or FAF-14 Spear (head one-shot); EAT-17 and LAS-99 Quasar Cannon need two head hits; MS-11 Solo Silo, EAT-411 Leveller; any gun on the 1,000-HP sacs unverified
Stratagems: Orbital Railcannon Strike, Eagle 500kg Bomb, Orbital Precision Strike, Eagle 110mm Rocket Pods; Rock Solid armor stops the spew's ragdoll unverified
Tactic: Its head survives one EAT-17 or Quasar hit, so bring a Recoilless or Spear, or two anti-tank tools. Its spore spew ragdolls you unless you wear Rock Solid armor. Full entry: Terminids tab, strains.
7.7Rupture Strain
Rupture Warrior
Weapons: AR-23P Liberator Penetrator, AR-2 Coyote, BR-14 Adjudicator, JAR-5 Dominator, MG-43 Machine Gun; explosives force it up (CB-9 Exploding Crossbow, PLAS-1 Scorcher, PLAS-101 Purifier, GP-31 Grenade Pistol; G-23 Stun surfaces it stunned)
Stratagems: MD-8 Gas Mines and Orbital Gas Strike (hurt it underground), A/G-16 Gatling Sentry
Tactic: It burrows and erupts under your feet, hitting twice. Wait until it has been underground a few seconds, then sprint over and past it. Full entry: Terminids tab, strains.
Rupture Spewer
Weapons: MG-43 Machine Gun, AR-23P Liberator Penetrator, JAR-5 Dominator on the head; R-36 Eruptor, GL-21 Grenade Launcher, CB-9 Exploding Crossbow on the butt; any gun on the small mouth; S-11 Speargun or ARC-3 Arc Thrower can interrupt the spew
Stratagems: MD-8 Gas Mines, Orbital Gas Strike (hurt it underground), Eagle Airstrike
Tactic: Hit and run: it surfaces to breathe acid up close or fire a bile burst from range. Explosives force it up, and gas, fire and explosions hurt it underground. Full entry: Terminids tab, strains.
Rupture Charger
Weapons: EAT-17, LAS-99 Quasar Cannon, GR-8 Recoilless Rifle (head one-shot); FAF-14 Spear; G-123 Thermite; to make it surface: CB-9 Exploding Crossbow, PLAS-1 Scorcher, PLAS-101 Purifier, GP-31 Grenade Pistol, most grenades unverified
Stratagems: Orbital Precision Strike or Eagle 500kg Bomb once it surfaces, Eagle Airstrike; G-23 Stun pins it unverified
Tactic: Its head and front plates are Tank I armor, so Heavy weapons bounce off the face it shows you. Sprint past it so it surfaces at a bad angle, then use true anti-tank or hit the side and rear legs. Full entry: Terminids tab, strains.
Automatons: what kills each bot
Kill flare-callers before they call a drop, carry Medium penetration or explosives for Devastators, and bring anti-tank for Hulks, tanks and striders. Bots fight at range with rockets and cannons, so cover, smoke and explosive resistance keep you alive. The front fields 37 units: the standard roster plus the Jet Brigade, Incineration Corps and Cyborg Legion.
First whatever knocks you down or one-shots you: Rocket Devastators, Rocket Raiders, a Reinforced Scout Strider about to fire, Cannon Turrets, Barragers and Mortars, Gunships. Then the force multipliers (Agitators, Detector Towers), then the units that close on you (Hulk Scorchers and Firebombers, Berserkers, Radicals, Jet Brigade units), then the rest; any light bot drawing a flare jumps the queue. This order is the dossier's reading of the mechanics; the playbook is on the Automatons tab.
The cards read like the Terminid ones (how to read them), and their difficulty counts Eliminate-mission targets too: Heavy and Rocket Devastators and Factory Striders appear in their Eliminate missions two or three levels before their regular spawns, and the Hulk Obliterator appears only there.
8.1Light infantry
Trooper
Weapons: any primary (head 1 shot); AR-23 Liberator; SG-8 Punisher; PLAS-1 Scorcher; M-105 Stalwart
Stratagems: Eagle Cluster Bomb; Orbital Airburst Strike; A/G-16 Gatling Sentry
Tactic: It keeps its distance and throws grenades behind cover. Every light bot can fire a red flare that calls a bot drop: kill it during the long draw and the drop never comes. Full entry: Automatons tab, infantry.
Commissar
Weapons: any primary (head 1 shot); AR-23 Liberator; SG-8 Punisher; PLAS-1 Scorcher; M-105 Stalwart; kill it before it flares
Stratagems: Eagle Cluster Bomb; Orbital Airburst Strike; A/G-16 Gatling Sentry
Tactic: It leads patrols. Its armor is very light all over, so a Light rifle does full damage anywhere; it flares like any light bot, no more often. Full entry: Automatons tab, infantry.
Brawler
Weapons: any primary (head 1 shot); AR-23 Liberator; SG-8 Punisher; PLAS-1 Scorcher; M-105 Stalwart; drop it before melee range
Stratagems: Eagle Cluster Bomb; Orbital Airburst Strike; A/G-16 Gatling Sentry
Tactic: It runs straight at you with heat blades that injure limbs and chain-hit so you cannot stim. Its head shares the main pool, so body shots kill it as fast. Full entry: Automatons tab, infantry.
MG Raider
Weapons: any primary (head 1 shot); AR-23 Liberator; SG-8 Punisher; PLAS-1 Scorcher; M-105 Stalwart; shoot the backpack (explodes)
Stratagems: Eagle Cluster Bomb; Orbital Airburst Strike; A/G-16 Gatling Sentry
Tactic: The most dangerous light bot at medium range. Suppress it, or shoot its finned backpack: it explodes and burns the bots around it. Full entry: Automatons tab, infantry.
Rocket Raider
Weapons: any primary (head 1 shot); AR-23 Liberator; SG-8 Punisher; PLAS-1 Scorcher; M-105 Stalwart; priority (rockets ragdoll)
Stratagems: Eagle Cluster Bomb; Orbital Airburst Strike; A/G-16 Gatling Sentry
Tactic: It fires a ragdolling rocket from long range once alerted: a priority target, and shooting near it ruins its aim. Full entry: Automatons tab, infantry.
Marauder
Weapons: head (AV0) with any primary; AP3 through the AV2 torso: R-63CS; JAR-5 Dominator; BR-14 Adjudicator
Stratagems: Eagle Cluster Bomb; Orbital Airburst Strike; A/G-16 Gatling Sentry
Tactic: A Trooper with a Light-armored torso: aim for the head, or bring Medium penetration. Full entry: Automatons tab, infantry.
8.2Devastators and Berserkers
Devastator
Weapons: head or stomach (AV1): R-63CS Diligence Counter Sniper; JAR-5 Dominator; PLAS-1 Scorcher; CB-9 Exploding Crossbow
Stratagems: Eagle Airstrike; Eagle Cluster Bomb; Orbital Gatling Barrage; A/AC-8 Autocannon Sentry
Tactic: It walks at you while firing and flinches when hit, so sustained fire ruins its aim. Missed head shots glance off the Medium-armored torso: aim for the head, or the larger stomach. Full entry: Automatons tab, infantry.
Heavy Devastator
Weapons: head over the shield; AC-8 or APW-1 break the 800-HP shield; explosives stagger it; JAR-5 Dominator; flank the backpack
Stratagems: Eagle Airstrike; Eagle Cluster Bomb; Orbital Gatling Barrage; A/AC-8 Autocannon Sentry
Tactic: They cover each other from behind shields that can be broken since 6.2.2. Shoot over the rim at the head, stagger it with explosives, or flank to the backpack: destroying it kills. Full entry: Automatons tab, infantry.
Rocket Devastator
Weapons: head or stomach (AV1): R-63CS Diligence Counter Sniper; JAR-5 Dominator; PLAS-1 Scorcher; CB-9 Exploding Crossbow; rocket pods disarm it
Stratagems: Eagle Airstrike; Eagle Cluster Bomb; Orbital Gatling Barrage; A/AC-8 Autocannon Sentry
Tactic: The top infantry target: four-rocket salvos that ragdoll. Any weapon destroys the rocket pods and leaves a plain Devastator; or waste its rockets while you peek from solid cover. Full entry: Automatons tab, infantry.
Berserker
Weapons: head or stomach (AV1) with stagger: JAR-5 Dominator; SG-8 Punisher; MG-43 Machine Gun; M-105 Stalwart; G-23 Stun
Stratagems: Eagle Cluster Bomb; Orbital Airburst Strike; A/G-16 Gatling Sentry
Tactic: Chainsaw packs of three or more that force you out of cover. Back up while you fire into the glowing stomach; a stun grenade stops the pack. Blasts reach only its main pool, so explosives pay off on a clump. Full entry: Automatons tab, infantry.
8.3Scout Striders
Scout Strider
Weapons: legs (AV2): AC-8 1, GL-21 1, CB-9 1; waist (AV3): JAR-5 2, R-63CS 3; the pilot from behind: any gun
Stratagems: Eagle Strafing Run; Eagle Airstrike; Orbital Gatling Barrage
Tactic: Fast, with a Heavy-armored front plate: explosives on the legs, Medium penetration on the waist, or the exposed pilot from behind or above. A waist kill ejects the pilot. Full entry: Automatons tab, infantry.
Reinforced Scout Strider
Weapons: a side rocket (100 HP, AV2): most primaries in 1-2 shots; waist (AV3): R-63CS, JAR-5; AC-8 1 per leg
Stratagems: Eagle Strafing Run; Eagle Airstrike; Orbital Gatling Barrage
Tactic: Its side rockets kill any diver who is not prone or in Fortified heavy armor. It stops and vents before each rocket: dive then, or shoot a side rocket to kill it. Full entry: Automatons tab, infantry.
8.4Hulks
Hulk Obliterator
Weapons: APW-1 or RS-422 Railgun (1 head); AC-8 (2 head); EAT-17 / LAS-99 / GR-8 (1 body); flank the AV1 heatsink; Eliminate Hulks missions only
Stratagems: Eagle 500kg Bomb; Orbital Precision Strike; Eagle Airstrike; Orbital Railcannon Strike
Tactic: Twin rocket launchers in alternating salvos; it appears only as the target of Eliminate Automaton Hulks. Same weak points as every Hulk: the eye slit and the back heatsink. Full entry: Automatons tab, heavies.
Hulk Bruiser
Weapons: APW-1 or RS-422 Railgun (1 head); AC-8 (2 head); EAT-17 / LAS-99 / GR-8 (1 body); flank the AV1 heatsink
Stratagems: Eagle 500kg Bomb; Orbital Precision Strike; Eagle Airstrike; Orbital Railcannon Strike
Tactic: Destroying one leg cripples and staggers it; its eye slit dies to one Anti-Materiel Rifle, Railgun or Speargun shot. From behind, any gun reaches the heatsink, and a Hulk that loses it goes down and bleeds out. Full entry: Automatons tab, heavies.
Hulk Scorcher
Weapons: APW-1 or RS-422 Railgun (1 head); AC-8 (2 head); EAT-17 / LAS-99 / GR-8 (1 body); flank the AV1 heatsink; cripple a leg (it sprints)
Stratagems: Eagle 500kg Bomb; Orbital Precision Strike; Eagle Airstrike; Orbital Railcannon Strike
Tactic: It sprints and saws without a windup, and its flamer reaches about 25 m: never run from it in a straight line, cripple a leg, and dive to put out flames. Full entry: Automatons tab, heavies.
8.5Striders and tanks
War Strider
Weapons: EAT-17 / LAS-99 / GR-8 (1 crotch, hip or leg); FAF-14 Spear or GP-20 (1); AC-8 or APW-1 (3 per eye or hip joint)
Stratagems: Eagle 500kg Bomb; Eagle Airstrike; Eagle 110mm Rocket Pods; Orbital Railcannon Strike
Tactic: Slow and rarely chases, but its grenade salvos arc over cover and ignore shield packs and relays. Strafe sideways, keep an exit, and put anti-tank into a hip joint or the crotch. Full entry: Automatons tab, heavies.
Factory Strider
Weapons: EAT-411 Leveller or MS-11 Solo Silo (1); GR-8 (1 eye); EAT-17 / LAS-99 (2 eye); AC-8 or APW-1 on gatlings and belly
Stratagems: Eagle 500kg Bomb; Orbital Precision Strike; Orbital 380mm HE Barrage; MD-17 Anti-Tank Mines (convoys)
Tactic: Destroy the chin gatlings first, then anti-tank to the eye or legs. It drops four Devastators about once a minute, and the Orbital Railcannon Strike does not one-shot it. Full entry: Automatons tab, heavies.
Annihilator Tank
Weapons: GR-8 (1 turret); FAF-14 Spear (1); EAT-17 / LAS-99 (2 turret); flank the turret heatsink: AC-8 3; G-123 Thermite
Stratagems: Eagle Airstrike; Eagle 110mm Rocket Pods; Orbital Railcannon Strike; Orbital Precision Strike (direct hit)
Tactic: Its cannon glows red about two seconds before it fires, and the turret turns slowly: circle to the turret heatsink while it tracks a teammate. A diver standing on its turret cannot be hit. Full entry: Automatons tab, heavies.
Shredder Tank
Weapons: GR-8 (1 turret); FAF-14 Spear (1); EAT-17 / LAS-99 (2 turret); flank the turret heatsink: AC-8 3; G-123 Thermite
Stratagems: Eagle Airstrike; Eagle 110mm Rocket Pods; Orbital Railcannon Strike; Orbital Precision Strike (direct hit)
Tactic: Its quad cyclers turn fast enough to track divers beside it: never climb it. Anti-tank to the turret, or the turret heatsink from behind. Full entry: Automatons tab, heavies.
Barrager Tank
Weapons: launch tubes (AV3, front and back): AC-8 5, EAT-17 / LAS-99 / GR-8 1; hull: GR-8, FAF-14 Spear
Stratagems: Eagle Strafing Run (tubes); Eagle Airstrike; Eagle 110mm Rocket Pods; Orbital Railcannon Strike
Tactic: Its rocket volleys fall as artillery that ignores cover: kill it early through its launch tubes, which face you front and back. Full entry: Automatons tab, heavies.
8.6Air
Gunship
Weapons: one thruster: AC-8 2; APW-1 2; R-36 Eruptor 2; MG-206 8; any anti-tank 1; W.A.S.P. or Spear lock on
Stratagems: E/MG-101 HMG Emplacement; SEAF SAM Site; Hellbomb the Gunship Facility
Tactic: It hovers at range and strafes around your cover: focus one thruster. The lasting fix is a Hellbomb on its Gunship Facility. Full entry: Automatons tab, air and bot drops.
Dropship
Weapons: EAT-411, FAF-14 Spear, MS-11 or Bastion cleave the fuselage; 1 thruster: EAT-17 / LAS-99 / GR-8 1; GL-21 on cargo
Stratagems: MS-11 Solo Silo; SEAF SAM Site
Tactic: Drops arrive from the same direction all mission. An anti-tank hit on a thruster can crash it onto its own cargo; otherwise pre-aim explosives where the load will land. Full entry: Automatons tab, air and bot drops.
8.7Jet Brigade
Assault Raider
Weapons: any primary (head 1 shot); AR-23 Liberator; SG-8 Punisher; PLAS-1 Scorcher; M-105 Stalwart; shoot the jump pack at range (explodes)
Stratagems: Eagle Cluster Bomb; Orbital Airburst Strike; A/G-16 Gatling Sentry
Tactic: A jump pack closes the distance. Shoot the pack at range: it explodes and can chain through a group or a whole dropship load. Full entry: Automatons tab, subfactions.
Jet Brigade Trooper
Weapons: any primary (head 1 shot); AR-23 Liberator; SG-8 Punisher; PLAS-1 Scorcher; M-105 Stalwart; shoot the jump pack at range (explodes)
Stratagems: Eagle Cluster Bomb; Orbital Airburst Strike; A/G-16 Gatling Sentry
Tactic: It leaps into close range when you keep your distance. Kill it at range and dive backward; damage that reaches the pack can set it off even after death. Full entry: Automatons tab, subfactions.
Jet Brigade MG Raider
Weapons: any primary (head 1 shot); AR-23 Liberator; SG-8 Punisher; PLAS-1 Scorcher; M-105 Stalwart; shoot the jump pack at range (explodes)
Stratagems: Eagle Cluster Bomb; Orbital Airburst Strike; A/G-16 Gatling Sentry
Tactic: An MG Raider on a jump pack: pop the pack at range with an explosive primary before it lands beside you. Full entry: Automatons tab, subfactions.
Jet Brigade Commissar
Weapons: any primary (head 1 shot); AR-23 Liberator; SG-8 Punisher; PLAS-1 Scorcher; M-105 Stalwart; shoot the jump pack at range (explodes)
Stratagems: Eagle Cluster Bomb; Orbital Airburst Strike; A/G-16 Gatling Sentry
Tactic: Unlike the regular Commissar it is unarmored; pop the pack at range. Full entry: Automatons tab, subfactions.
Jet Brigade Devastator
Weapons: head or stomach (AV1): R-63CS Diligence Counter Sniper; JAR-5 Dominator; PLAS-1 Scorcher; CB-9 Exploding Crossbow; jump pack explodes
Stratagems: Eagle Airstrike; Eagle Cluster Bomb; Orbital Gatling Barrage; A/AC-8 Autocannon Sentry
Tactic: It fires six bursts, cools briefly and jump-packs across open ground. Shoot the pack at range: it explodes and burns, though the Devastator can survive it. Full entry: Automatons tab, subfactions.
Jet Brigade Hulk Bruiser
Weapons: jump pack (AV3; kills it and explodes): AC-8 2; R-36 Eruptor 3; APW-1 (1 head); EAT-17 / LAS-99 / GR-8 (1)
Stratagems: Eagle 500kg Bomb; Orbital Precision Strike; Eagle Airstrike; Orbital Railcannon Strike
Tactic: Its heavy jump pack replaces the heatsink and shows over the shoulders: explosive fire into the pack kills it from the front, with a fiery blast. Full entry: Automatons tab, subfactions.
Jet Brigade Hulk Scorcher
Weapons: jump pack (AV3; kills it and explodes): AC-8 2; R-36 Eruptor 3; APW-1 (1 head); EAT-17 / LAS-99 / GR-8 (1)
Stratagems: Eagle 500kg Bomb; Orbital Precision Strike; Eagle Airstrike; Orbital Railcannon Strike
Tactic: The same jump pack on a Scorcher: pop it from range and never let it close to flamer distance. Full entry: Automatons tab, subfactions.
8.8Incineration Corps
Pyro Trooper
Weapons: any primary (head 1 shot); AR-23 Liberator; SG-8 Punisher; PLAS-1 Scorcher; M-105 Stalwart; shoot the fuel tank from beyond 4 m
Stratagems: Eagle Cluster Bomb; Orbital Airburst Strike; A/G-16 Gatling Sentry
Tactic: A portable flamer fired in short bursts. The fuel tank above its head bursts when shot, so keep the distance the weapons line gives; dive or go prone to put yourself out. Full entry: Automatons tab, subfactions.
Incendiary Rocket Raider
Weapons: any primary (head 1 shot); AR-23 Liberator; SG-8 Punisher; PLAS-1 Scorcher; M-105 Stalwart; priority (bolt ragdolls)
Stratagems: Eagle Cluster Bomb; Orbital Airburst Strike; A/G-16 Gatling Sentry
Tactic: Its fusion bolt trips divers every few seconds: a priority target, so suppress it and take the head. Full entry: Automatons tab, subfactions.
Conflagration Devastator
Weapons: head over the shield; AC-8 or APW-1 break the 800-HP shield; explosives stagger it; JAR-5 Dominator; no backpack
Stratagems: Eagle Airstrike; Eagle Cluster Bomb; Orbital Gatling Barrage; A/AC-8 Autocannon Sentry
Tactic: An incendiary scattergun behind a shield: stay out of close range, shoot over the shield, and go prone at once if you catch fire. Full entry: Automatons tab, subfactions.
Incendiary MG Devastator
Weapons: head over the shield; AC-8 or APW-1 break the 800-HP shield; explosives stagger it; JAR-5 Dominator
Stratagems: Eagle Airstrike; Eagle Cluster Bomb; Orbital Gatling Barrage; A/AC-8 Autocannon Sentry
Tactic: An incendiary machine gun behind a shield (breakable, per the wiki's change history): fight it like a Heavy Devastator. Full entry: Automatons tab, subfactions.
Hulk Firebomber
Weapons: APW-1 or RS-422 Railgun (1 head); AC-8 (2 head); EAT-17 / LAS-99 / GR-8 (1 body); flank the AV1 heatsink; keep moving
Stratagems: Eagle 500kg Bomb; Orbital Precision Strike; Eagle Airstrike; Orbital Railcannon Strike
Tactic: It lobs two white-phosphorus shells over cover, then switches to its flamer at close range. Keep moving; Inflammable armor resists most fire damage. Full entry: Automatons tab, subfactions.
8.9Cyborg Legion
Radical
Weapons: head (AV1): R-63 Diligence, JAR-5 Dominator, APW-1 1 shot; explosives (PLAS-101 Purifier, SG-8P, GL-21); stagger
Stratagems: Eagle Cluster Bomb; Orbital Airburst Strike; A/G-16 Gatling Sentry
Tactic: It throws smoke, then sprints into kicks that ragdoll you unless you wear Rock Solid armor. The smoke marks where it is coming from: dive aside as it commits. Full entry: Automatons tab, Cyborg Legion.
Agitator
Weapons: kill first; helmet then head: R-63 Diligence (2-3 + 1); SG-8P Punisher Plasma; PLAS-101 Purifier; GP-31 (1 impact)
Stratagems: Eagle Cluster Bomb; Orbital Airburst Strike; A/G-16 Gatling Sentry
Tactic: It speeds up and commands the bots around it from behind them. Kill it first: its death stuns every bot under its command for a few seconds. Full entry: Automatons tab, Cyborg Legion.
Vox Engine
Weapons: 3 vents then a throwable in the hatch; FAF-14 Spear 1 per cannon (2 kill); EAT-411 or MS-11 1; GR-8 3 body; C4 2-3
Stratagems: Orbital Railcannon Strike (1); Orbital Laser; Eagle Strafing Run (2 uses); E/AT-12 Anti-Tank Emplacement
Tactic: Only on Cyborg Legion planets, at most three at once. Kill the side miniguns to flank it, then break three vents and throw a grenade into the hatch, or call a Railcannon. Full entry: Automatons tab, Cyborg Legion.
Illuminate: what kills each unit
Kill Watchers on sight, bring damage per second before penetration, and break shields with sustained fire before the big hit. Only a handful of Illuminate wear Heavy armor, but their shields and plates cancel single big shots. The faction fields 16 units across its fleets: the Invasion Fleet, Mindless Masses, Appropriators and Vote Snatchers.
Watchers about to call, then Harvesters and Leviathan turrets (they kill in a sweep), then Crushers and Veracitors closing to melee, then Elevated Overseers and Gatekeepers, Crescent Overseers shelling you, and Stingrays as they slow to strafe; Overseers, Wretch packs, Fleshmobs and Voteless come after. Never shoot an Overship with small arms. This order is the dossier's synthesis; the playbook is on the Illuminate tab.
The cards read like the Terminid ones (how to read them); a Harvester's difficulty counts its own Destroy Harvesters missions, a level before its regular spawns.
9.1The horde
Voteless
Weapons: any primary (head 1 shot: 40-60 HP at AV1); one leg shot downs it; M-105 Stalwart; AR-23A Liberator Carbine; CB-9 Exploding Crossbow; SG-8P Punisher Plasma; FLAM-66 Torcher; LAS-5 Scythe or SG-451 Cookout (fire kills them outright)
Stratagems: Eagle Cluster Bomb; Eagle Napalm Airstrike; Orbital Gas Strike; A/ARC-3 Tesla Tower; A/FLAM-40 Flame Sentry; A/G-16 Gatling Sentry
Tactic: Slower than small bugs and unable to leap, so a light diver can often run past. Fire alone burns them to death, and gas damages and confuses a crowd. Full entry: Illuminate tab, the horde.
Watcher
Weapons: APW-1 Anti-Materiel Rifle or RS-422 Railgun (1 body shot); JAR-5 Dominator, SG-8S Slugger, P-4 Senator, AC-8 (2); ARC-12 Blitzer or ARC-3 Arc Thrower stun it and cancel the call; aim center mass, not the fins
Stratagems: none needed: shoot it first; A/G-16 Gatling Sentry; A/MG-43 Machine Gun Sentry; AX/AR-23 Guard Dog
Tactic: The only Illuminate unit that calls reinforcements: kill it on sight. Its corpse explodes where it lands. Full entry: Illuminate tab, the horde.
9.2Overseers
Overseer
Weapons: explosives bypass its hand shield (PLAS-1 Scorcher 4, PLAS-101 Purifier 2, CB-9 Exploding Crossbow 2, R-36 Eruptor 2, GP-31 Grenade Pistol 2); AP3+ head shot (JAR-5 Dominator, SG-8S Slugger, P-4 Senator, APW-1: 1); MG-43 or AR-23 Liberator at the legs or chest (10 rounds); CQC-19 Stun Lance or CQC-30 Stun Baton stun it
Stratagems: Eagle Cluster Bomb; Orbital Airburst Strike; Orbital Gas Strike; A/G-16 Gatling Sentry; E/GL-21 Grenadier Battlement
Tactic: Under heavy fire it raises a hand shield, but its legs are never covered and explosions pass the shield to its main pool. Its staff knocks you down: break contact before melee range. Full entry: Illuminate tab, Overseers.
Elevated Overseer
Weapons: P-92 Warrant (tracking rounds); stun it with ARC-12 Blitzer, ARC-3 Arc Thrower or SG-20 Halt, then a head shot (P-4 Senator or APW-1: 1); shoot the jetpack (fatal; SG-8S Slugger 1, R-63 Diligence 3); AX/AR-23 Guard Dog or AX/LAS-5 Rover strip its armor
Stratagems: A/G-16 Gatling Sentry; A/MG-43 Machine Gun Sentry; Orbital Airburst Strike
Tactic: It hovers about 10 m away and dodges. Stun it and it stops strafing and drops the grenade it was about to throw; its jetpack explodes when it dies, sometimes late. Full entry: Illuminate tab, Overseers.
Crescent Overseer
Weapons: as the Overseer: explosive primaries (PLAS-1 Scorcher, PLAS-101 Purifier, CB-9 Exploding Crossbow, R-36 Eruptor) and AP3+ head shots (JAR-5 Dominator, SG-8S Slugger, P-4 Senator: 1); R-72 Censor, SG-20 Halt, SG-97 Sweeper or R-2124 Constitution stagger its flesh; find it by its arcing shots and flank
Stratagems: Orbital Airburst Strike or Eagle Airstrike on a bombard group; Eagle Cluster Bomb; Orbital Precision Strike
Tactic: The artillery Overseer. It has no shield, so it is the easiest Overseer to kill once found; spread out against its splash. Full entry: Illuminate tab, Overseers.
9.3Heavies
Fleshmob
Weapons: RL-77 Airburst Rocket Launcher; AC-8 Autocannon flak; GL-21 Grenade Launcher (4); StA-X3 W.A.S.P. (4 missiles); R-36 Eruptor; CB-9 Exploding Crossbow; MG-206, MP-98 Knight, PLAS-1 Scorcher or AR-23A Liberator Carbine at the faces (150% to Main); flamethrowers (x1.8 fire); VG-70 Variable TOTAL salvo; EAT-17 / LAS-99 2, GR-8 2, FAF-14 Spear 1
Stratagems: Orbital Airburst Strike; Eagle Napalm Airstrike; Orbital Napalm Barrage; Orbital Gas Strike (pulls it off you); Orbital EMS Strike or G-109 Urchin (the only stuns that stop a charge); A/FLAM-40 Flame Sentry
Tactic: No fatal part: you grind its main pool, fastest through the faces. Dive sideways out of its charge; the stratagem line names the only stuns that stop one in progress. Full entry: Illuminate tab, heavies.
Harvester
Weapons: break the shield first (MG-43 17 rounds, M-105 Stalwart, LAS-98 Laser Cannon, GL-21 4, R-36 Eruptor or AC-8 flak 1-2 through shrapnel) or break one AV3 generator prong; then one anti-tank rocket to a hip joint (MLS-4X Commando, EAT-17, LAS-99 Quasar Cannon, GR-8, FAF-14 Spear) or a GR-8 to the eye; APW-1 or AC-8 4 per joint; RS-422 3; MG-206 15; ARC-3 Arc Thrower stun-locks it once the shield is down
Stratagems: Orbital Laser; E/AT-12 Anti-Tank Emplacement; Eagle 110mm Rocket Pods on an unshielded Harvester; Orbital Railcannon Strike or Orbital Precision Strike before it is alerted (the shield soaks one hit); A/AC-8 Autocannon Sentry
Tactic: Its shield eats any single hit in full: strip it with sustained fire or shrapnel, or snap a generator prong, then land one anti-tank hit on a hip joint. Break line of sight from its beam and stay out of arc range. Full entry: Illuminate tab, heavies.
9.4Air and ships
Stingray
Weapons: hit it while it slows to strafe: AC-8 Autocannon, APW-1 or RS-422 Railgun (3); MLS-4X Commando, EAT-17 or GR-8 (1); MG-43 Machine Gun (30 rounds); LAS-98 Laser Cannon reaches it even in flight (hitscan, 1,000 m); FAF-14 Spear and StA-X3 W.A.S.P. lock on
Stratagems: activate a SEAF SAM Site; SH-32 Shield Generator Pack; step sideways out of the blue strafe line or go prone (Fortified armor)
Tactic: It circles the map before it attacks, then strafes along a blue line it paints on the ground: that line is your warning. Full entry: Illuminate tab, air and ships.
Warp Ship
Weapons: kill the Watcher before it calls; empty the 2,500 shield (MG fire, explosives), then FAF-14 Spear or GR-8 (1) or EAT-17 / LAS-99 (2) into the beamer underneath; splash the troops while they hang in the beam (GL-21, grenades); never hit the armored sides
Stratagems: SEAF SAM Site (one missile breaks the shield, a second kills; a hit on the antigravity ring can kill at once); lure a Stingray strafe onto it
Tactic: It answers a Watcher's call and lowers troops in a beam: shield first, beamer second. Full entry: Illuminate tab, air and ships.
Leviathan
Weapons: EAT-17 or LAS-99 Quasar Cannon to each of the four beam turrets (1 each; AC-8 or APW-1 9); GR-8 Recoilless Rifle or FAF-14 Spear on the body; once a fin or the tail breaks, the AV4 internals take APW-1 and LAS-98 fire; get out from under the falling wreck
Stratagems: E/AT-12 Anti-Tank Emplacement; the Planetary Defense Cannon in Take Down Overship; Eagle Smoke Strike or Orbital Smoke Strike to break its sight; Eagle Strafing Run or Orbital Gatling Barrage with exact placement; keep exosuits, FRVs and emplacements away from it
Tactic: City maps only. Kill the four beam turrets first, use smoke to stop it locking on, and keep exosuits and vehicles away. Full entry: Illuminate tab, air and ships.
Illuminate Overship
Weapons: none: since 6.1.0 only the Planetary Defense Cannon (AP10) in Take Down Overship can destroy it; small-arms fire only brings Warp Ships down on you
Stratagems: the Planetary Defense Cannon (Take Down Overship): the first shell breaks the 10,000 shield, a second into the nearest glowing port kills it; a broken shield returns 60 s after it fell (the 20-s delay, then 500/s, applies only to a damaged, unbroken shield)
Tactic: Not a loadout target: shooting it calls Warp Ships onto you. Full entry: Illuminate tab, air and ships.
9.5Appropriators
Veracitor
Weapons: EAT-17, GR-8 or LAS-99 (1) at the unshielded cockpit; MLS-4X Commando (1-2); AC-8 or APW-1 (3) on the AV1 cockpit weak spot at its back (easiest from high ground); break the AV3 head (300) to switch the pilot shield off for good; MG-43 Machine Gun or M-1000 Maxigun on the AV3 arms; RL-77 Airburst Rocket Launcher at the cockpit; flamethrowers
Stratagems: Orbital Precision Strike or Eagle 500kg Bomb (its limbs are explosion-immune, so only big AP blasts matter); Orbital EMS Strike, G-23 Stun or A/M-23 EMS Mortar Sentry to freeze it; SH-20 Ballistic Shield Backpack blocks its melee (ragdolls you; breaks after about 15 hits)
Tactic: It detects divers from 100 m, charges through obstacles, and its melee counts as anti-tank since 7.0.0. Keep your distance, put a wall between you and its charge, and freeze it with EMS or a stun grenade. Full entry: Illuminate tab, fleets.
Gatekeeper
Weapons: AC-8 Autocannon (1 shot to the AV4 horn kills the pilot shield for good; 3 per hip); EAT-17 or GR-8 (1) to the cockpit stump; APW-1 3 per hip; RS-422 Railgun 2; MG-206 Heavy Machine Gun 9 per hip; R-36 Eruptor 5; its two AV1 weak spots (rear and cockpit, both on its back) take any weapon
Stratagems: Orbital Precision Strike; Eagle 500kg Bomb; Orbital Railcannon Strike; Orbital EMS Strike to stun
Tactic: One Heavy hit on the horn switches the pilot's shield off for good; one anti-tank hit to the cockpit stump kills it. Close in and circle during its long volley. Full entry: Illuminate tab, fleets.
Obtruder
Weapons: high rate of fire with good handling (AR-23A Liberator Carbine, AR-61 Tenderizer, MP-98 Knight, SMG-203 Gallant, LAS-16 Sickle); SG-97 Sweeper, SG-20 Halt or Punisher variants; LAS-58 Talon (1-2); AC-8 Autocannon flak; arc weapons; AX/AR-23 Guard Dog, AX/LAS-5 Rover, AX/ARC-3 K-9
Stratagems: A/G-16 Gatling Sentry; A/MG-43 Machine Gun Sentry; Orbital Airburst Strike
Tactic: Swarms of Watcher-like drones that never call reinforcements. Bring fast-handling, high-rate fire, and never melee one overhead: it falls on you and explodes. Full entry: Illuminate tab, fleets.
9.6Vote Snatchers
Wretch
Weapons: shoot the legs or the blade arms, not the head; MGX-42 Bullet Storm; MG-43 Machine Gun; M-105 Stalwart; AR-2 Coyote; LAS-16 Sickle; AR-23P Liberator Penetrator; LAS-13 Trident; PLAS-1 Scorcher; SG-451 Cookout; fire (P-72 Crisper, SMG/FLAM-34 Stoker, FLAM-66 Torcher, FLAM-40 Flamethrower, B/FLAM-80 Cremator)
Stratagems: Eagle Napalm Airstrike; Orbital Gas Strike; AX/TX-13 Dog Breath or TX-41 Sterilizer (gas); AX/FLAM-75 Hot Dog; a sentry or emplacement as bait (Wretches go for them first)
Tactic: Its head is a decoy. Slide, crouch or go prone as it pounces, or kill it mid-leap. Full entry: Illuminate tab, fleets.
Crusher
Weapons: AP4+ on the helmet, then the head: RS-422 Railgun (1 + 1), P/40-K Bolt Pistol (2 + 1), AC-8 Autocannon (2 + 1; also staggers its slam), APW-1 (2 + 1), MG-206 (4 + 2); one G-123 Thermite or one B/MD C4 charge kills it; GL-21, RL-77 Airburst Rocket Launcher, StA-X3 W.A.S.P.; B/FLAM-80 Cremator (steady fire stops the regeneration)
Stratagems: Orbital Railcannon Strike; TD-220 Bastion MK XVI; A/AC-8 Autocannon Sentry; EXO-49 Emancipator Exosuit; Orbital EMS Strike or Orbital Gas Strike to buy time; SH-20 Ballistic Shield Backpack blocks about 5 swings
Tactic: It regenerates every limb and its main pool from half a second after the last hit, but not the helmet or the head. Break the helmet with Heavy penetration, then shoot the head, or stick one Thermite; a single rocket to the body is wasted. Full entry: Illuminate tab, fleets.
Spawners and structures
Every diver carries one explosive that closes spawners. Structures check demolition force: an explosive of demolition 20 or more that goes off inside the opening closes a bug hole, a Fabricator, a Warp Ship or a Warp Gateway, and demolition 40 or more closes bug holes (Bile Titan holes included), Fabricators and Warp Gateways from outside, though a Bulk Fabricator needs more. Fabricators and Warp Gateways also have armored shells that anti-tank launchers destroy. Bullets, lasers and arcs never close one, however strong.
Inside the opening
A bug hole, a Fabricator vent or open door, a Warp Ship's bay door, a Warp Gateway's aperture: any explosive with demolition 20 or more, going off inside.
From outside
Any bug hole from its rim, a Bile Titan hole, a Fabricator's shell, a Warp Gateway, a colony wall: no explosive requirement, but demolition 40 or more.
Hellbomb only
Gunship Facilities, Gazer Spires and Monoliths: only the NUX-223 Hellbomb, the B-100 Portable Hellbomb or the SEAF Artillery Mini-Nuke reaches demolition 60.
10.1What closes them
- Inside the opening: the free G-12 High Explosive and most damaging grenades, the GP-31 Grenade Pistol, P-33 Missile Pistol and P-34 Breacher, the R-36 Eruptor, CB-9 Exploding Crossbow, AR/GL-21 One-Two and GL-15 Evictor, and the AC-8 Autocannon, GL-21 Grenade Launcher and every anti-tank launcher. The Grenade Pistol frees your grenade slot for Thermite, and u.gg rates it S+ against bugs and the Illuminate and S against bots (undated list, read September 26, 2026: u.gg)community-tested.
- From outside: the GP-20 Ultimatum, TED-63 Dynamite, G-48 Giga Grenade, G-60 Anti-Tank Seeker, G/40-K Melta Mine, B/MD C4 Pack, EAT-411 Leveller, FAF-14 Spear and MS-11 Solo Silo; the Eagle Airstrike, Cluster Bomb and 500kg Bomb and most orbital strikes; and, per the 7.0.0 notes, MD-17 Anti-Tank Mines, although the game data still lists their old valueunverified (7.0.0 notes).
- Never: bullets, lasers and arcs of any power (the LAS-98 Laser Cannon has the demolition but is not explosive), the G-3 Smoke, G-23 Stun and K-2 Throwing Knife, and the GL-52 De-Escalator.
Sources: wiki Demolition (revision of September 25, 2026); research dossiers 03 (section 6.2), 05 (section 5), 06 (section 10) and 07 (section 9) with their verifiers' corrections.
10.2Terminid spawners and nests
Bug Hole
Weapons: any explosive grenade thrown in (not G-3 Smoke, G-23 Stun or K-2 Throwing Knife), TM-1 Lure Mine (must detonate inside), GP-31 Grenade Pistol, GL-21 Grenade Launcher, R-36 Eruptor, CB-9 Exploding Crossbow, AC-8 Autocannon, GR-8 Recoilless Rifle, EAT-17, CQC-20 Breaching Hammer (its explosion)
Stratagems: Eagle Airstrike, Eagle Cluster Bomb, Eagle 500kg Bomb, Eagle Napalm Airstrike, Eagle Smoke Strike, Orbital Precision Strike, Orbital Gas Strike, Orbital Laser, Orbital 120mm or 380mm or Walking Barrage, B-100 Portable Hellbomb, any Hellpod landing on it
Tactic: A grenade has to go off inside the hole: from inside, any explosive with demolition 20 or more closes it, and from the rim only demolition 40 or more works. Full entry: Terminids tab, nests and holes.
Bile Titan Bug Hole
Weapons: GP-20 Ultimatum, EAT-411 Leveller, FAF-14 Spear, MS-11 Solo Silo, TED-63 Dynamite, G/40-K Melta Mine, G-48 Giga Grenade, G-60 Anti-Tank Seeker, B/MD C4 Pack; a Bile Titan corpse falling on it unverified
Stratagems: Eagle Airstrike, Eagle Cluster Bomb, Eagle 500kg Bomb, Eagle Napalm Airstrike, Orbital Precision Strike, Orbital Gas Strike, Orbital Laser, Orbital 120mm or 380mm or Walking Barrage, B-100 Portable Hellbomb, any Hellpod landing on it unverified
Tactic: It needs demolition 40, so no ordinary grenade closes it, and it spawns Bile Titans (Chargers on Dragonroach planets). Full entry: Terminids tab, nests and holes.
Stalker Lair
Weapons: an explosive into each hole (G-12 High Explosive, G-16 Impact, GP-31 Grenade Pistol, GL-21 Grenade Launcher); TED-63 Dynamite can close two holes; GP-20 Ultimatum from outside
Stratagems: Eagle 500kg Bomb, Eagle Airstrike, Orbital Precision Strike
Tactic: The only source of Stalkers: close its holes first and the invisible flankers stop coming. It wakes only once an enemy has spotted you. Full entry: Terminids tab, nests and holes.
Shrieker Nest
Weapons: from beyond 130 m: GR-8 Recoilless Rifle, FAF-14 Spear, AC-8 Autocannon (flak); EAT-17 plus a few seconds of MG fire per tower; E/MG-101 HMG Emplacement (three towers); EXO-49 Emancipator Exosuit or TD-220 Bastion
Stratagems: Orbital Precision Strike, Eagle 500kg Bomb (same armor and health as a Spore Spewer); a NUX-223 Hellbomb pod can snag on the cap
Tactic: Shriekers pour out once you are detected within about 130 m: hit the towers from beyond that range. Full entry: Terminids tab, nests and holes.
Spore Spewer
Weapons: one shot: GR-8 Recoilless Rifle, FAF-14 Spear, EAT-411 Leveller, MS-11 Solo Silo, GP-20 Ultimatum; two: EAT-17, LAS-99 Quasar Cannon, MLS-4X Commando; R-36 Eruptor 3-4; AC-8 Autocannon flak 3-4
Stratagems: Orbital Precision Strike, Eagle Strafing Run, Eagle 500kg Bomb, Eagle Airstrike, Orbital Railcannon Strike (targets it) -- one call each
Tactic: Its fog hides bugs, and samples lie around it: destroy it before you fight inside the fog. Full entry: Terminids tab, nests and holes.
10.3Automaton spawners and defenses
Automaton Fabricator
Weapons: grenade or explosive (demolition 20+) into a vent; AP5+ to the shell: EAT-17 / LAS-99 / GR-8 / Spear 1, MLS-4X 2
Stratagems: Eagle Strafing Run; Eagle Airstrike; Orbital Precision Strike; orbital barrages on outposts
Tactic: A grenade through a vent or the open door ends it; then step back, because it explodes violently. Full entry: Automatons tab, fabricators and structures.
Bulk Fabricator
Weapons: explosive (demolition 20+) into a vent (R-36 Eruptor 1); FAF-14 Spear 1; EAT-17 / LAS-99 / GR-8 2
Stratagems: Eagle Strafing Run; Orbital Gas Strike (direct); Orbital Precision Strike
Tactic: It builds Devastators, Hulks, tanks and War Striders in city and Megafactory outposts; the same vent rule applies. Full entry: Automatons tab, fabricators and structures.
Gunship Facility
Weapons: demolition 60 only: NUX-223 Hellbomb, B-100 Portable Hellbomb or a SEAF Mini-Nuke within about 17 m
Stratagems: Hellbomb (Eagles and orbitals cannot destroy it)
Tactic: Until you Hellbomb it, it keeps launching Gunships once it has spotted a diver nearby: bring the Hellbomb in first, then fight. Full entry: Automatons tab, fabricators and structures.
Detector Tower
Weapons: demolition 50: Eagle 500kg Bomb, Orbital Precision Strike, SEAF artillery, or bait a Cannon Turret into it; prone divers are invisible to it
Stratagems: Hellbomb (the objective); Eagle 500kg Bomb; Orbital Precision Strike
Tactic: While it sees a diver it keeps calling bot drops onto your last position: take it down before you fight inside its view. Full entry: Automatons tab, fabricators and structures.
Stratagem Jammer
Weapons: disable it at its terminal, then demolition 50; Portable Hellbomb or SEAF artillery work without disabling it; bait a cannon
Stratagems: Hellbomb; Eagle 500kg Bomb or Orbital Precision Strike after disabling; SEAF artillery
Tactic: No stratagems within 150 m except SEAF artillery, Reinforce included: fight your way in with what you carry. Full entry: Automatons tab, fabricators and structures.
Anti-Air Emplacement
Weapons: AP4: AC-8, APW-1, LAS-98; anti-tank 1; FAF-14 Spear locks on; G-123 Thermite; rear vent with AP3
Stratagems: Orbital Precision Strike; Orbital Railcannon Strike; Hellbomb (no Eagles within 150 m)
Tactic: It grounds every Eagle within 150 m: take it out before you count on Eagles. Full entry: Automatons tab, fabricators and structures.
Mortar Emplacement
Weapons: AP4: AC-8, APW-1, LAS-98; anti-tank 1; G-123 Thermite; rear vent with AP3
Stratagems: Orbital Precision Strike; Eagle 500kg Bomb; Hellbomb
Tactic: It shells divers that other bots have spotted, and Mission Control warns you when you are in range of enemy artillery: kill the spotters or stay unseen, then take it out before you fight in its reach. Full entry: Automatons tab, fabricators and structures.
Cannon Turret
Weapons: rear heatsink (AV3): AC-8 3, R-36 Eruptor 3, anti-tank 1; hug the base of a tall tower
Stratagems: Eagle 500kg Bomb; Orbital Precision Strike; Compromise Automaton Defenses
Tactic: The Annihilator's cannon on a tower, with a very long reach and a short red flash before each shot: break line of sight, then work around to the rear heatsink. Full entry: Automatons tab, fabricators and structures.
Command Bunker
Weapons: EAT-411, FAF-14 Spear, MS-11 or Bastion (1); EAT-17 / LAS-99 / GR-8 / GP-20 (2); C4 or Thermite (2)
Stratagems: Hellbomb (objective); Compromise Automaton Defenses silences its turrets
Tactic: A mission target whose casemates and turrets open fire from long range without being provoked; aim your anti-tank at the bunker itself, not its walls. Full entry: Automatons tab, fabricators and structures.
10.4Illuminate spawners and structures
Grounded Warp Ship
Weapons: empty the 2,500 shield (MG-43, M-105 Stalwart, LAS-16 Sickle), then any explosive of demolition 20+ through the bay door (grenades, GL-21, CB-9, R-36 Eruptor, GP-31, AC-8); a G-123 Thermite or B/MD C4 charge anywhere destroys it even shielded (the GP-20 Ultimatum needs the shield down per the 1.003.000 notes); anti-tank to the hull after the shield (x2.5 explosion damage)
Stratagems: demolition 50 destroys it even shielded: Orbital Precision Strike, Eagle 500kg Bomb, Orbital Railcannon Strike, Orbital Gas Strike, Orbital Laser, 120mm, 380mm or Walking Barrage, SEAF Artillery; throw the beacon onto the ramp
Tactic: A spawner. If the shield comes back while your grenade is inside, the demolition fails. Full entry: Illuminate tab, structures and objectives.
Warp Gateway
Weapons: an explosive of demolition 20+ into the aperture when it opens; G-123 Thermite (no wait); GR-8, FAF-14 Spear or LAS-99 from range (AV5, 1,500); run when it dies (its delayed blast ragdolls)
Stratagems: Eagle Strafing Run; Orbital Gatling Barrage; any demolition-40 stratagem from outside (Eagle Airstrike, Orbital Precision Strike)
Tactic: It spawns without pause, so close it before anything else on the objective. Full entry: Illuminate tab, structures and objectives.
Gazer Spire
Weapons: none: demolition 60 only (NUX-223 Hellbomb, B-100 Portable Hellbomb, SEAF Artillery Mini-Nuke); stay out of its roughly 250 m sight; destroy the Warp Gateways around it
Stratagems: NUX-223 Hellbomb (the objective); B-100 Portable Hellbomb
Tactic: Its beam is lethal to vehicles and exosuits, so leave them behind, and only demolition 60 destroys it: plan the Hellbomb before you approach. Full entry: Illuminate tab, structures and objectives.
Monolith
Weapons: none: NUX-223 Hellbomb, B-100 Portable Hellbomb or a SEAF Artillery Mini-Nuke inside the 17 m inner radius
Stratagems: NUX-223 Hellbomb (Free Colony objective)
Tactic: Only demolition 60 destroys it, and touching it kills a diver without explosion resistance. Full entry: Illuminate tab, structures and objectives.
Lightning Spire
Weapons: any explosive of demolition 20+ (G-6 Frag, GP-31 Grenade Pistol, CB-9 Exploding Crossbow, AC-8, R-36 Eruptor); or 200 HP of fire (MG-43 6 rounds); crawl into range prone (it will not target you); switch guard dogs off near it
Stratagems: any explosive stratagem; Electrical Conduit armor shrugs off its arc
Tactic: One arc kills most divers, and it chains through Illuminate units and guard dogs to reach you: clear it before you fight near it. Full entry: Illuminate tab, structures and objectives.
Cognitive Disruptor
Weapons: the tower cannot be destroyed: break its power taps (PSUs) on nearby generators with explosives or high durable damage
Stratagems: Orbital Napalm, 120mm or 380mm HE Barrage thrown at it clears the PSUs; within 200 m every stratagem code is scrambled, so read the codes before inputting
Tactic: Some scrambled codes are joke codes, so a practiced input fails; break the power taps first when you can. Full entry: Illuminate tab, structures and objectives.
Fire, gas, arc and stun by front
Pick your crowd tool by front: fire is one of the best against bugs and the Illuminate but weak against bots, gas works everywhere, arcs shine against the Illuminate, and stuns buy the anti-tank diver a clean shot.
Read across a row to see where an effect earns its slot; the verdicts are the dossiers' synthesis of the mechanics below and the unit pages' damage multipliers.
| Effect | Terminids | Automatons | Illuminate |
|---|---|---|---|
| Fire | Strong: burning hurts every bug below the Hive Lord, flamed bugs panic, and a burning Stalker stops healing | Weak: small bots take half fire damageunverified and robots are slow to ignite; flamed small and medium bots still panic | Strong: Fleshmobs take 1.8 times fire damage, Wretches, Crushers and Harvesters 1.5 times, and fire alone kills Voteless |
| Gas | Good: confusion and a 25% slow; Bile Titans, the Impaler and the Hive Lord are never confused | Good: confuses bot groups | Strong: kills Voteless in seconds, pulls Fleshmobs off you, slows Wretches |
| Arc | Good against clumps, but arcs jump to divers too | Poor: short range against a front that fights at range | Strong: Fleshmobs take 1.8 times arc damage, and arcs stun Watchers mid-call and Elevated Overseers |
| Stun | Good: a stun grenade stops a Charger (not a Bile Titan or Impaler), and EMS freezes a breach | Good: Berserker packs, Hulks, fresh bot drops | Good: Elevated Overseers and the piloted constructs; only EMS or an Urchin stops a charging Fleshmob |
| Explosions | Good: close holes, burst spewer butts and bile sacs | Strong: Devastators, Scout Strider legs, jump packs | Strong on Overseers (through the shield) and Fleshmobs; weak on a Harvester until its armor breaks |
11.1How each effect works
- Fire deals damage over time to the main health pool only, at Heavy penetration: it burns every bug below the Hive Lord, at 65% against Chargers and Bile Titans. Bigger enemies take more burn damage but ignite more slowly. Since 6.1.0, being flamed (by a flamethrower-type weapon or the Meltagun) makes small and medium enemies of every front, and large bugs, panic and attack at random (6.1.0 notes).
- Gas deals damage over time and confuses its targets, which since 6.2.2 also slows them 25%. Bile Titans, the Impaler and the Hive Lord are never confused but still take the damage.
- Arc weapons throw bolts that chain between nearby targets, teammates included, and apply a short stun; arcs can ground on corpses and cover.
- Stun freezes an enemy and interrupts its attack. The G-23 Stun grenade does not affect tanks, Factory Striders, Impalers or Bile Titans; against a charging Fleshmob only the Orbital EMS Strike and a stuck G-109 Urchin work.
11.2What protects you
- Explosions: you take half damage from blasts by default, and going prone cuts damage from a blast's outer radius by 90%. The bot front and the Appropriators' plasma are mostly explosions. Fortified armor: Recoil -30% when crouched or prone; 50% explosive resistance.
- Fire: the Incineration Corps, Dragonroaches and your own flamers set you alight; dive or go prone to put yourself out. Inflammable armor: 75% fire damage resistance.
- Acid: Terminid acid slows you 30% for 4 seconds, though you can still sprint. Acclimated armor: 50% resistance to fire, gas, acid and arc damage. Desert Stormer armor: 40% resistance to fire, gas, acid and arc damage; throw range +20% (beacons too).
- Gas: divers take 1.3 times gas damage. Advanced Filtration armor: 80% resistance to gas damage and effects, enough to stand in your own clouds.
- Arc: arcs from Harvesters and Lightning Spires hit hard. Electrical Conduit armor: 95% arc resistance, which turns them from lethal to minor.
Every passive and the armor that carries it is on the Armor tab; loadouts that combine these picks by front are on the Loadouts tab.
Sources: wiki Status Effects (revision of September 13, 2026) and wiki Damage; research dossiers 03 (section 1.7), 05 (section 1.1), 06 (section 2.2), 07 (sections 2.4-2.6) and 10 (sections 1.4 and 8.2), with the verifiers' corrections (only direct flame causes panic; a Harvester's chassis and exposed internals do take blasts).
Threat dossier09
Terminids
Every bug and strain from Scavenger to Hive Lord: armor by part, weak points, the attacks that kill squads, and the weapons, stratagems and tactics that kill each one.
On this page11 chapters
The bug front today
Bugs are a melee swarm with a few armored heavies, and three habits beat them at every difficulty: kill the bug that is calling a breach before it finishes, carry anti-tank for heads, and close holes with explosives. Everything below is the detail behind those three rules, checked against patch 7.1.1 (September 24, 2026).
Kill the caller first
Most small and medium bugs that spot you (not spewers, Stalkers or Shriekers) can stop, call and release an orange cloud; when the call completes, a new wave erupts from the ground. Any gun kills the caller, and breaking line of sight before you are seen stops the call from starting. See Breaches and detection.
Anti-tank for heads
One EAT-17, LAS-99 Quasar Cannon or GR-8 Recoilless Rifle hit to the head kills a Charger, a Bile Titan or a Dragonroach. Chargers arrive at difficulty 4; from then on every diver needs an answer. See Heavies.
Explosives close holes
A hole closes to an explosive with demolition 20 or more that goes off inside it, or to any hit of demolition 40 or more on its rim. Bullets, lasers and arcs never close one. See Nests and holes.
1.1What to shoot first
In a mixed fight, work down this list. It is this manual's synthesis of the wiki's per-unit tactics notes (September 2026), not a community ranking.
- Any bug calling a breachA bug standing still in orange mist is calling reinforcements. Any gun kills it, and nothing else on the field matters more.
- A Dragonroach overheadThe wiki calls it the highest-priority target whenever it is on the field. Whoever carries anti-tank takes it; everyone else goes prone when it dives.
- Stalkers, Pouncers and HuntersThe wiki singles out all three: Stalkers once spotted, Pouncers before other small bugs, Hunters first within a swarm. They flank, pounce and pin you down for everything else.
- Bile Spewers from difficulty 6, and CommandersSpewer artillery throws divers into the melee; Brood and Alpha Commanders summon Warriors and call breaches.
- Chargers, Impalers and Bile TitansThe anti-tank divers take the heavies while everyone else keeps the chaff off them.
- Warriors and the restThe wiki rates Warriors among the lowest-priority targets, unless one is calling a breach.
1.2Every unit at a glance
The front fields 30 units, a base roster plus the Predator Strain, Spore Burst Strain and Rupture Strain, and a set of nests and structures you have to destroy. Strain units appear only on planets their strain has invaded (Strains); Hive Worlds in the Gloom add caves, Dragonroaches and the Hive Lord (Hive Worlds and the Gloom).
Read the table as a ladder. Body armor is the armor of the unit's main health pool, from 0 for the small bugs to 5 for the Hive Lord. Min. penetration is the lowest penetration with which one diver can kill it in a normal fight, through a part it shows from the front or side (equal penetration counts, at 65%), however slowly: a floor, not a recommendation. From difficulty counts Eliminate-mission targets, so some heavies turn up a level or two before they join regular patrols. A unit or structure carries the unverified tag when one of its values is disputed: a body part, or the difficulty it first appears at (the Hunter, the Rupture Charger, the Spore Burst Bile Titan and the Bile Titan Bug Hole).
| Unit | Class | Subfaction | Body armor | Min. penetration | From difficulty | Source |
|---|---|---|---|---|---|---|
| Bile Spitter | small | -- | 0 | 2 | 1 | wiki |
| Hunter unverified | small | -- | 0 | 2 | 2 | wiki |
| Pouncer | small | -- | 0 | 2 | 2 | wiki |
| Predator Hunter | small | Predator Strain | 0 | 2 | 2 | wiki |
| Scavenger | small | -- | 0 | 2 | 1 | wiki |
| Shrieker unverified | small | -- | 0 | 2 | 4 | wiki |
| Spore Burst Hunter | small | Spore Burst Strain | 0 | 2 | 2 | wiki |
| Spore Burst Scavenger | small | Spore Burst Strain | 0 | 2 | 2 | wiki |
| Alpha Commander unverified | medium | -- | 2 | 2 | 8 | wiki |
| Alpha Warrior | medium | -- | 1 | 2 | 8 | wiki |
| Bile Spewer | medium | -- | 2 | 2 | 3 | wiki |
| Bile Warrior | medium | -- | 1 | 2 | 4 | wiki |
| Brood Commander | medium | -- | 2 | 2 | 1 | wiki |
| Hive Guard | medium | -- | 2 | 2 | 2 | wiki |
| Nursing Spewer | medium | -- | 2 | 2 | 3 | wiki |
| Predator Stalker | medium | Predator Strain | 1 | 2 | 4 | wiki |
| Rupture Spewer | medium | Rupture Strain | 2 | 2 | 6 | wiki |
| Rupture Warrior | medium | Rupture Strain | 1 | 2 | 6 | wiki |
| Spore Burst Warrior | medium | Spore Burst Strain | 1 | 2 | 2 | wiki |
| Stalker | medium | -- | 1 | 2 | 4 | wiki |
| Warrior | medium | -- | 1 | 2 | 1 | wiki |
| Bile Titan | heavy | -- | 4 | 4 | 4 | wiki |
| Charger | heavy | -- | 4 | 4 | 4 | wiki |
| Charger Behemoth | heavy | -- | 4 | 4 | 3 | wiki |
| Dragonroach unverified | heavy | -- | 4 | 4 | 5 | wiki |
| Hive Lord | heavy | -- | 5 | 5 | 7 | wiki |
| Impaler | heavy | -- | 4 | 2 | 5 | wiki |
| Rupture Charger unverified | heavy | Rupture Strain | 4 | 4 | 6 | wiki |
| Spore Burst Bile Titan unverified | heavy | Spore Burst Strain | 4 | 4 | 5 | wiki |
| Spore Charger | heavy | -- | 4 | 4 | 7 | wiki |
| Bile Titan Bug Hole unverified | structure | -- | -- | -- | 6 | wiki |
| Bug Hole | structure | -- | -- | -- | 1 | wiki |
| Bug Mine | structure | -- | -- | 2 | -- | wiki |
| Bug Nest | structure | -- | -- | -- | 2 | wiki |
| Infested Tower | structure | -- | 2 | 2 | 4 | wiki |
| Shrieker Nest | structure | -- | 2 | 2 | 4 | wiki |
| Spore Lung | structure | -- | 2 | 2 | 3 | wiki |
| Spore Spewer | structure | -- | 2 | 2 | 2 | wiki |
| Stalker Lair | structure | -- | -- | -- | 4 | wiki |
| Terminid Egg | structure | -- | 0 | 2 | 2 | wiki |
Quickplay is likely to put a new squad player on this front: in a snapshot of the official war status on September 26, 2026, about two thirds of the divers on campaign planets were fighting bugsapprox. Bring one anti-tank answer and one grenade that closes holes, say your role when you join, and stay with the squad: since 7.1.0 enemy spawns are balanced per diver, but a lone diver still gets swarmed. The squad basics are in the first-night checklist; which planets are live today is on the live war maps.
What changed lately. Patch 6.2.3 restored the Hive Guard's Medium head (guides that call it Heavy are out of date), 6.3.0 made Chargers easier to dodge and let bug attacks hurt vehicles, 7.0.0 softened the Impaler's rear, and 7.1.0 balanced enemy spawns per diver and cut the Spore Lung's health. The full list is in What changed for bugs.
Damage rules against bugs
The rule of thumb: a Light-penetration gun kills every small bug, and Warriors and Stalkers through the head. Medium penetration is needed for Hive Guard heads, Rupture Warrior and Rupture Spewer heads, and Bile Spewer heads from difficulty 6. Heavies need anti-tank to the head, explosives on a soft rear, or a lot of Heavy fire on armor you have already broken.
2.1Penetration against armor
Every body part has an armor value (AV) and every weapon an armor penetration (AP) on the same scale. AP above the part's AV deals full damage, AP equal to it deals 65%, and AP below it bounces off for nothing. The game names the tiers AP2 Light, AP3 Medium, AP4 Heavy and AP5 to AP10 Anti-Tank. Bug armor runs from 0 (Unarmored) and 1 (Very Light) through Light, Medium and Heavy to the Tank classes of the Rupture Charger's head and the Hive Lord's plates. A shallow, glancing hit can lose penetration.
- Light (AP 2): AR-23 Liberator, SG-225 Breaker, R-63 Diligence, P-19 Redeemer, M-105 Stalwart. Kills every small bug, and Warriors and Stalkers through the head; Commanders and the Hive Guard's body take reduced damage.
- Medium (AP 3): AR-23P Liberator Penetrator, AR-2 Coyote, MG-43 Machine Gun, JAR-5 Dominator, CB-9 Exploding Crossbow. Adds Hive Guard heads, Rupture Warrior and Rupture Spewer heads, and the heads of Bile Spewers from difficulty 6.
- Heavy (AP 4): AC-8 Autocannon, APW-1 Anti-Materiel Rifle, MG-206 Heavy Machine Gun, R-36 Eruptor, flamethrowers, G-12 High Explosive. Only 65% against the plates of Chargers, Impalers, Bile Titans and Dragonroaches: chip damage, and the tool for breaking leg armor.
- Anti-Tank (AP 5 and up): EAT-17, GR-8 Recoilless Rifle, LAS-99 Quasar Cannon, MLS-4X Commando, GP-20 Ultimatum, FAF-14 Spear, G-123 Thermite, the Eagle 500kg Bomb and the Orbital Railcannon and Precision Strikes. From AP 6, full damage on the head of every Charger, Impaler, Bile Titan and Dragonroach (AP 5 weapons such as the RS-422 Railgun deal 65% to the Rupture Charger's Tank-class head), and the only answer to that head and the Hive Lord's plates.
Every weapon's penetration is in the weapon comparator, and the same rule across all three fronts is on What Kills What.
2.2Durable parts: why explosives beat bullets on soft spots
Most bug parts are partly durable: that share of every hit lands as the weapon's durable damage, which for bullets is far lower than their normal damage. The AR-23 Liberator deals 90 normal but 22 durable damage per round, so it needs close to 30 rounds to break a Charger's buttapprox. Explosions carry their full durable damage, which is why explosives are the answer for durable soft spots: spewer butts, the Charger's butt, Bile Titan sacs and every structure. The unit tables give each part's durable share.
2.3Explosions, fire, gas, stun and acid
- Explosions hit with full penetration in the inner radius and one tier less in the outer radius (never below Light). A part marked explosion-immune in the tables passes a blast to the main pool instead, once, and only if the blast can pierce the main pool's armor. Going prone cuts outer-radius blast damage to you by 90%.
- Fire burns the main pool with Heavy penetration, so it hurts every bug below the Hive Lord, at 65% against the Heavy-armored Chargers and Titans. Bigger bugs take more burn damage (Warriors x0.8, Brood Commanders x1, Stalkers x1.25, Chargers x1.5, Bile Titans x1.7) but catch fire more slowly, and since 6.1.0 a bug flamed in the face panics and attacks at random.
- Gas confuses bugs and, since 6.2.2, slows the confused ones by 25%. Bile Titans, the Impaler and the Hive Lord are never confused, but gas still damages them.
- Stun (stun grenades, EMS strikes) stops Chargers and anything smaller; Bile Titans and the Hive Lord are immune.
- Overpenetration: a round whose penetration is two or more tiers above a part's armor passes through and hits the next bug, so a Stalwart cleaves through a line of Scavengers.
- Acid (against you) burns and slows you 30% for 4 seconds; you can still sprint.
The attack figures quoted on this tab (a Charger's crush, a Titan's slam) are the wiki's in-game records for patch 7.1.1, and they move with balance patches. How weapons deal damage in general: How damage works; fire, gas, arc and stun on every front: Fire, gas, arc and stun. The rules come from the wiki's Damage page (revision of September 18, 2026).
2.4How to read the unit tables
Every unit below ends with its anatomy, one row per body part, generated from the data layer with a source link per row. Armor is the part's AV. Health is the part's own pool on difficulty 4 and up; "Main" means it shares the main pool. In Weak point, fatal means destroying the part kills the bug, % to Main is the share of damage it passes to the main pool, durable is the share it takes as durable damage, ExDR is explosive damage resistance, explosion-immune parts pass blasts to the main pool, and a bleed-out pool starts a death timer once the part breaks. Rows the data grades unverified carry the tag.
Small bugs: Scavengers, Spitters, Pouncers, Hunters, Shriekers
Any gun kills a small bug; what kills you is the one you did not see. Shoot Pouncers and Hunters first, Spitters at range, and anything releasing orange mist at once. A crowd tool (a machine gun, a shotgun, a sentry, a cluster bomb) does the rest.
3.1Scavenger
Fragile scouts that claw for 40, back off a few meters and come again; out of reach, some burrow and pop up under you. Any hit kills one, and a melee strike to the head saves ammunition on a lone Scavenger. It can call a breach, so shoot the one that stops and releases orange mist. For packs: M-105 Stalwart, A/MG-43 Machine Gun Sentry, A/ARC-3 Tesla Tower, AX/AR-23 Guard Dog, Eagle Cluster Bomb.
Everything on a Scavenger is Unarmored, and the head is fatal:
| Part | Armor | Health | Weak point | Source |
|---|---|---|---|---|
| Main | 0 | 60 | kill route: any hit kills it; kill it before it releases the orange breach-call cloud; main health pool | wiki |
| Head | 0 | 20 | WEAK POINT -- any gun; fatal; 100% to Main; explosion-immune | wiki |
| Limbs (6) | 0 | 30 | not a kill zone; 30% to Main; explosion-immune | wiki |
3.2Bile Spitter
Walks in and spits acid inside about 15 m (15 damage every 3 seconds), then bursts into an 85-damage acid cloud when it dies, a burst that chains through clumped bugs and divers. Shoot it at range with any primary (AR-23 Liberator, SG-225 Breaker, R-63 Diligence), and never finish one at arm's length. It can call a breach.
The same soft body as a Scavenger, except that its limbs are fatal too:
| Part | Armor | Health | Weak point | Source |
|---|---|---|---|---|
| Main | 0 | 60 | kill route: any hit kills it; shoot it from range because it bursts into acid (85) on death; main health pool | wiki |
| Head | 0 | 20 | WEAK POINT -- any gun; fatal; 100% to Main; explosion-immune | wiki |
| Limbs (6) | 0 | 30 | fatal; 30% to Main; explosion-immune | wiki |
3.3Pouncer
Leaps long distances straight at a diver, then claws for 40. The wiki's advice is to shoot Pouncers before any other small bug; shotguns and SMGs track a leaping target best (SG-225 Breaker, SMG-37 Defender, P-19 Redeemer), and an A/MG-43 Machine Gun Sentry or AX/AR-23 Guard Dog covers your back. It can call a breach. In some spawn tables Scavengers, Spitters and Pouncers stand in for one another.
Any hit anywhere kills it:
| Part | Armor | Health | Weak point | Source |
|---|---|---|---|---|
| Main | 0 | 60 | kill route: any hit kills it; shoot it first when it starts to leap; main health pool | wiki |
| Head | 0 | 20 | WEAK POINT -- any gun; fatal; 100% to Main; explosion-immune | wiki |
| Limbs (6) | 0 | 30 | fatal; 30% to Main; explosion-immune | wiki |
3.4Hunter
The first target inside any mixed swarm, by the wiki's advice. Hunters flank and strafe, pounce from 15-20 m for 35 and a knockdown, slow you with an acid tongue, and call breaches. Volume wins: SG-225 Breaker, SMG-37 Defender, M-105 Stalwart, P-19 Redeemer. One ignition kills a Hunter within seconds (SG-451 Cookout, AR-2 Coyote, SG-225IE Breaker Incendiary), and the LAS-5 Scythe sets a whole pack alight at range. Shoot the legs or wings to stop the pounce; a melee hit knocks one back, even in mid-air. A/MG-43 and A/G-16 sentries and the Eagle Cluster Bomb thin the packs.
Patch 6.3.0 cut the damage Hunters do to durable targets and, by the patch notes, left them unable to hurt the Bastion or an exosuit's hull (an exosuit's Medium-armored arms and legs still take reduced damage); since 7.0.0 they can claw the FRV. The data layer lists Hunters from difficulty 2 unverified, the value on the Hunter's own wiki page; the wiki's Difficulty page and the Fandom wiki say 3. On Predator and Spore Burst planets the strain versions replace them (Strains).
Legs and wings are the pounce-stoppers; the notes give the lower health on difficulties 1-3:
| Part | Armor | Health | Weak point | Source |
|---|---|---|---|---|
| Main | 0 | 160 | kill route: head or body with any gun; legs or wings stop the pounce; main health pool; 130 HP on D1-D3 | wiki |
| Head | 0 | 40 | WEAK POINT -- one or two shots; fatal; 100% to Main; explosion-immune | wiki |
| Claws (2) | 0 | 60 | 40% to Main; explosion-immune; 45 HP on D1-D3 | wiki |
| Legs (4) | 0 | 60 | destroying legs stops the pounce; 50% to Main; explosion-immune; 45 HP on D1-D3 | wiki |
| Wings (2) | 0 | 20 | destroying wings stops the pounce; 30% to Main; explosion-immune | wiki |
3.5Shrieker
Flying bugs that pour out of Shrieker Nests, which appear from difficulty 4: a Shrieker marks a diver, circles, dives for a 50-damage slash and climbs away. Shriekers stopped calling breaches in 2024, so the danger is the flock itself. Anything that tracks fast movers kills them: the hitscan LAS-5 Scythe and LAS-7 Dagger, the LAS-13 Trident, SG-8 Punisher, AC-8 Autocannon on flak, ARC-3 Arc Thrower and MG-43 Machine Gun, and an A/MG-43 or A/G-16 sentry shreds a flock. Go prone (you are harder to hit), put a rock between you and them, and step aside after you kill one mid-dive: the body keeps falling and knocks you down.
The lasting fix is the nest (Nests and holes). Roving flocks also come with the Roving Shriekers operation modifier from difficulty 5, always on Hive Worlds from 5, and since 7.1.0 in Evacuate High-Value Assets missions.
The head and the wings are fatal; the wiki and an independent datamine snapshot disagree on the head's health, so that row is unverified:
| Part | Armor | Health | Weak point | Source |
|---|---|---|---|---|
| Main | 0 | 80 | kill route: any hit kills it; the wings are fatal too; kill the nest to stop the flow; main health pool | wiki |
| Head unverified | 0 | 30 | WEAK POINT (the datamine snapshot lists 20 HP); fatal; 100% to Main; explosion-immune | wiki |
| Limbs | 0 | 30 | 40% to Main; explosion-immune | wiki |
| Wings (2) | 0 | 20 | WEAK POINT; fatal; 30% to Main; 100% durable; explosion-immune | wiki |
Medium bugs: Warriors, Hive Guards, Commanders, Spewers, Stalkers
A Light-penetration gun still kills Warriors and Stalkers through the head and every spewer through the mouth, but Hive Guard heads, and Bile Spewer heads from difficulty 6, bounce Light rounds. Carry a Medium-penetration primary (AR-23P Liberator Penetrator, JAR-5 Dominator) or the MG-43 Machine Gun, and explosives for packs.
4.1Warrior
The backbone of every patrol and breach, and a breach caller. Light penetration to the head is enough (AR-23 Liberator, R-63 Diligence, SG-225 Breaker); explosives handle packs (CB-9 Exploding Crossbow, R-36 Eruptor, GL-21 Grenade Launcher, G-12 High Explosive), and an Eagle Airstrike, Eagle Cluster Bomb, Orbital Gatling Barrage or A/MG-43 sentry clears a wave. Warriors claw for 55, hard enough since 6.3.0 to scratch exosuits and the Bastion, and strafe sideways to cut off a retreat.
A headless Warrior goes berserk, runs faster and bleeds out, and it can still call a breach while it bleeds: finish it or back off. Shooting off a leg stops the speed-up.
Every part is Very Light; the head is fatal and passes all its damage to the main pool (the notes give the lower health on difficulties 1-3):
| Part | Armor | Health | Weak point | Source |
|---|---|---|---|---|
| Main | 1 | 325 | kill route: head with any Light AP gun; a headless Warrior charges faster until it bleeds out, so finish it or back off; main health pool; 20% durable; 250 HP on D1-D3 | wiki |
| Head | 1 | 150 | WEAK POINT -- fastest kill; fatal; 100% to Main; 20% durable; explosion-immune; bleed-out pool 200 (decays 70/s); 110 HP on D1-D3 | wiki |
| Claws (2) | 1 | 100 | 40% to Main; explosion-immune; 75 HP on D1-D3 | wiki |
| Legs (4) | 1 | 100 | a lost leg stops the headless speed-up; 40% to Main; explosion-immune; 75 HP on D1-D3 | wiki |
4.2Bile Warrior
A Warrior, from difficulty 4, that bursts into an 85-damage acid cloud when it is killed through the body. Shoot it from 5 m or more and aim for the head: a headless Bile Warrior bleeds out without bursting. Otherwise it dies like a Warrior.
A Warrior's anatomy; only the death burst differs:
| Part | Armor | Health | Weak point | Source |
|---|---|---|---|---|
| Main | 1 | 325 | kill route: headshot and let it bleed out (no acid burst); a body kill bursts for 85 acid; main health pool; 20% durable | wiki |
| Head | 1 | 150 | WEAK POINT -- bleed-out kills do not burst; fatal; 100% to Main; 20% durable; explosion-immune; bleed-out pool 200 (decays 70/s) | wiki |
| Claws (2) | 1 | 100 | 40% to Main; explosion-immune | wiki |
| Legs (4) | 1 | 100 | 40% to Main; explosion-immune | wiki |
4.3Alpha Warrior
A faster Warrior that Alpha Commanders summon in threes from difficulty 8; it pings as a plain Warrior. After the headshot, finish the body, because it is fast enough to reach you before it bleeds out, or take a leg to slow it.
The same Very Light armor, but its head passes less damage to the main pool than a Warrior's does:
| Part | Armor | Health | Weak point | Source |
|---|---|---|---|---|
| Main | 1 | 325 | kill route: head, then finish the headless body: it is fast enough to reach you before it bleeds out; main health pool; 20% durable | wiki |
| Head | 1 | 150 | WEAK POINT -- finish the headless body; fatal; 50% to Main; 20% durable; explosion-immune; bleed-out pool 200 (decays 70/s) | wiki |
| Claws (2) | 1 | 100 | 50% to Main; explosion-immune | wiki |
| Legs (4) | 1 | 100 | 50% to Main; explosion-immune | wiki |
4.4Hive Guard
Bring Medium penetration or fire. Its head and front plates are Medium armor, so Light rounds bounce off the front: shoot the head with an MG-43 Machine Gun, AR-23P Liberator Penetrator, SMG-32 Reprimand or M-1000 Maxigun, or burn it, because burn damage goes straight to its Light-armored main pool (FLAM-40 Flamethrower, SG-451 Cookout, SG-225IE Breaker Incendiary, G-10 Incendiary, G-13 Incendiary Impact). An Eagle Napalm Airstrike, Eagle Airstrike or Orbital Gatling Barrage handles a group. With Light guns only, flank it: one diver keeps it crouched with fire at the head while another shoots the body and the Very Light rear legs from the side.
A quiet walker, from difficulty 2, that slashes for 55 and can call a breach. When shot it crouches behind its front plates for about 3 seconds, and it keeps crouching under sustained fire; the gap between its front legs and its head still exposes the body.
Patch 6.2.2 (late April 2026) left the Hive Guard with a Heavy head, and 6.2.3 restored the Medium head and the Light body eight days later (6.2.3 notes). A guide written that week, or copied from one, tells you to bring Heavy penetration, and the Fandom wiki's Hive Guard page still showed the Heavy head in September 2026. Medium is enough.
The front (head and tarsal plates) is Medium; everything you can reach from the side is Light or Very Light:
| Part | Armor | Health | Weak point | Source |
|---|---|---|---|---|
| Main | 2 | 500 | kill route: head with Medium AP, or flank to the Light-armor body and Very Light rear legs; main health pool; 30% durable | wiki |
| Head | 3 | 250 | WEAK POINT for Medium AP; Light AP bounces; fatal; 75% to Main; 35% durable; explosion-immune; bleed-out pool 200 (decays 75/s) | wiki |
| Claws (2) | 1 | 100 | 25% to Main; explosion-immune | wiki |
| Frontal tarsal plates (2) | 3 | 125 | the armor shield it crouches behind; 45% to Main; explosion-immune | wiki |
| Front legs (2) | 1 | 125 | the soft limbs behind the plates; 45% to Main; explosion-immune | wiki |
| Rear legs (2) | 1 | 125 | WEAK POINT for Light AP when flanking; 35% to Main; explosion-immune | wiki |
4.5Brood Commander
Kill it before it summons. A Brood Commander calls three Warriors, calls breaches even with its head shot off, and since 6.1.0 also summons when it spots a diver who is not the host. Its head, body and claws are Light armor, so Light guns deal only 65% there: Medium penetration and explosives work best (AR-23P Liberator Penetrator, JAR-5 Dominator, R-36 Eruptor, CB-9 Exploding Crossbow, MG-43 Machine Gun), with an Eagle Airstrike, Orbital Precision Strike or A/MG-43 sentry for a group. Its legs are Very Light, and each lost leg slows it and its charge. A headless Commander lives longer than a Warrior; a melee hit staggers it long enough to bleed out.
It claws for 55 and bull-rushes from 15-20 m for 70 with a knockdown, a charge that ends early if it hits terrain or a larger bug. It first appears at difficulty 1 as the target of Eliminate Brood Commanders missions and joins regular patrols from 3; on the highest difficulties the Alpha Commander replaces it.
Light armor everywhere but the legs; the head is fatal but leaves a long bleed-out:
| Part | Armor | Health | Weak point | Source |
|---|---|---|---|---|
| Main | 2 | 800 | kill route: head and body with Medium AP or explosives; the Very Light legs slow it and its charge; main health pool; 60% durable | wiki |
| Head | 2 | 200 | WEAK POINT -- but it lives longer headless than a Warrior; fatal; 50% to Main; 60% durable; explosion-immune; bleed-out pool 300 (decays 75/s) | wiki |
| Claws (2) | 2 | 200 | 50% to Main; 50% durable; explosion-immune | wiki |
| Legs (4) | 1 | 170 | WEAK POINT -- each lost leg slows it; 60% to Main; 40% durable; explosion-immune | wiki |
4.6Alpha Commander
Replaces the Brood Commander on the highest difficulties, arriving with its Alpha Warriors (from difficulty 8): it has more health, summons Alpha Warriors in threes (sometimes Hive Guards, which the wiki calls unintended), and since 6.3.0 it no longer retreats. Kill it exactly like a Brood Commander, with more ammunition. The wiki's tactics text says destroying both claws kills it, but its anatomy table marks the claws as not fatalunverified.
A Brood Commander's layout with bigger pools:
| Part | Armor | Health | Weak point | Source |
|---|---|---|---|---|
| Main | 2 | 1,000 | kill route: as Brood Commander (the wiki also reports that destroying both claws kills it); main health pool; 70% durable | wiki |
| Head | 2 | 250 | WEAK POINT; fatal; 100% to Main; 70% durable; explosion-immune; bleed-out pool 300 (decays 100/s) | wiki |
| Claws (2) unverified | 2 | 200 | the wiki reports that losing both claws kills it (the anatomy table marks them not fatal); 50% to Main; 50% durable; explosion-immune | wiki |
| Legs (4) | 1 | 200 | WEAK POINT -- slows it; 60% to Main; 50% durable; explosion-immune | wiki |
4.7Nursing Spewer
No artillery: an acid stream up close and a thin spore cloud that hides nearby small bugs until it dies. Any gun kills it through the Unarmored mouth or the Light head. Explosives on the butt make it burst, and the burst chains: a G-16 Impact thrown under one can kill two (the GL-21 Grenade Launcher, R-36 Eruptor, CB-9 Exploding Crossbow and PLAS-101 Purifier work too). Stagger interrupts the spew (SG-8 Punisher, ARC-3 Arc Thrower). Up close it claws for 55, and a bursting butt sprays 300 damage of acid, so don't stand beside one you are about to pop. First seen at difficulty 3.
The mouth and the butt are Unarmored and fatal; the butt is fully durable, which is why it wants explosives:
| Part | Armor | Health | Weak point | Source |
|---|---|---|---|---|
| Main | 2 | 750 | kill route: head or mouth with any gun; explosives on the butt make it burst; main health pool; 50% durable | wiki |
| Head | 2 | 300 | WEAK POINT; fatal; 100% to Main; explosion-immune | wiki |
| Mouth | 0 | 250 | WEAK POINT -- any gun; fatal; 100% to Main; explosion-immune | wiki |
| Spinal plates | 2 | 500 | explosive target; fatal; 20% to Main; 80% durable | wiki |
| Butt | 0 | 750 | WEAK POINT for explosives -- bursts on death; fatal; 60% to Main; 100% durable | wiki |
| Front legs (2) | 2 | 200 | 50% to Main; explosion-immune | wiki |
| Rear legs (2) | 2 | 250 | 50% to Main; 30% durable; explosion-immune | wiki |
4.8Bile Spewer
Kill Bile Spewers early in a fight from difficulty 6: from 6 their head, body, spinal plates and front legs are Medium armor, and they lob two bile bombs at about 30 m (500 damage each, with a ragdoll) that throw divers into the melee. The mouth stays Unarmored at every difficulty and is the Light-penetration answer, which is why the data puts its minimum penetration at 2; from 6 the head needs Medium penetration (MG-43 Machine Gun, AR-23P Liberator Penetrator, JAR-5 Dominator, R-63CS Diligence Counter Sniper). Explosives on the butt or spinal plates kill fastest, and the burst chains through neighbors (G-16 Impact, GL-21 Grenade Launcher, R-36 Eruptor, CB-9 Exploding Crossbow, PLAS-101 Purifier). Stagger interrupts the spew (SG-8 Punisher, ARC-3 Arc Thrower, S-11 Speargun), and an Eagle Airstrike, Eagle Cluster Bomb or Orbital Gatling Barrage clears a patrol.
Its acid stream reaches 11-20 m and, since 6.3.0, pierces vehicle armor. First seen at difficulty 3.
The first seven rows are the bug below difficulty 6; from difficulty 6 the four rows marked D6+ replace its Main, Head, Spinal plates and Front legs rows (the mouth, butt and rear legs do not change):
| Part | Armor | Health | Weak point | Source |
|---|---|---|---|---|
| Main | 2 | 750 | D3-D5 variant; kill route: mouth with any gun; head with Medium AP from D6 (Light AP below D6); butt or spinal plates with explosives; main health pool; 50% durable | wiki |
| Head | 2 | 300 | WEAK POINT -- Light AP works only below D6; fatal; 100% to Main; explosion-immune | wiki |
| Mouth | 0 | 250 | WEAK POINT -- any gun; fatal; 100% to Main; explosion-immune | wiki |
| Spinal plates | 2 | 500 | explosive target (D3-D5 armor); fatal; 20% to Main; 80% durable | wiki |
| Butt | 0 | 750 | WEAK POINT for explosives -- bursts on death; fatal; 60% to Main; 100% durable | wiki |
| Front legs (2) | 2 | 200 | D3-D5 armor; 50% to Main; explosion-immune | wiki |
| Rear legs (2) | 2 | 250 | 50% to Main; 30% durable; explosion-immune | wiki |
| Main (D6+ variant) | 3 | 750 | Medium armor on D6 and above; 50% durable | wiki |
| Head (D6+ variant) | 3 | 300 | WEAK POINT for Medium AP; fatal; 100% to Main | wiki |
| Spinal plates (D6+ variant) | 3 | 500 | fatal; 20% to Main; 80% durable | wiki |
| Front legs (D6+ variant) (2) | 3 | 200 | 50% to Main | wiki |
4.9Stalker
Close the lair and the Stalkers stop coming: they come only from Stalker Lairs, from difficulty 4 (Nests and holes). A Stalker stays camouflaged until about 20 m, knocks you down with its tongue from range, impales for 55, retreats after losing about half its health and regenerates while hidden; the wiki calls it a priority target once spotted. Stagger or stun it, then shoot the small head: the SG-8 Punisher, SG-451 Cookout or M90A Shotgun stagger it, the SG-20 Halt or AR-32 Pacifier stun it, and an MG-43 Machine Gun works too. Stalkers take 25% more fire damage and burning stops the regeneration; fire, gas or bile on a camouflaged Stalker leaves it partly visible. Since 1.003.101 a lair wakes only after an enemy has spotted you, not merely because you walked within 200 m.
The head is small, fatal and has no durability, so any gun kills it once the Stalker holds still:
| Part | Armor | Health | Weak point | Source |
|---|---|---|---|---|
| Main | 1 | 800 | kill route: stagger or stun it, then hit the 175-HP head; close its lair to stop the respawns; main health pool; 50% durable | wiki |
| Head | 1 | 175 | WEAK POINT -- low health, no durability; fatal; 100% to Main; explosion-immune | wiki |
| Body armor | 2 | Main | Light armor; not a kill zone; 100% to Main; 50% durable; explosion-immune; shares the Main pool | wiki |
| Underbelly | 1 | Main | fatal soft spot; fatal; 100% to Main; 50% durable; explosion-immune; shares the Main pool | wiki |
| Claws (2) | 1 | Main | 100% to Main; 50% durable; explosion-immune; shares the Main pool | wiki |
| Legs (4) | 1 | Main | 100% to Main; 50% durable; explosion-immune; shares the Main pool | wiki |
| Wings | 0 | 125 | not a kill zone; 30% to Main; 50% durable; explosion-immune | wiki |
Heavies: Chargers, Impaler, Bile Titan, Dragonroach, Hive Lord
One anti-tank hit to the head kills most of them. The EAT-17, LAS-99 Quasar Cannon and GR-8 Recoilless Rifle one-shot the head of a Charger, a Charger Behemoth, a Spore Charger, a Bile Titan, a Dragonroach and an exposed Impaler; the FAF-14 Spear does too, and a G-123 Thermite stuck to a Charger's head kills it. Heavy-penetration weapons deal only 65% to the Heavy-armored heads of the Charger, Behemoth, Spore Charger, Bile Titan and Dragonroach, so there they are chip damage, not an answer; the exposed Impaler's Very Light head is the exception. Strikes do the rest: the Orbital Railcannon Strike, Orbital Precision Strike and Eagle 500kg Bomb.
The MLS-4X Commando needs two missiles on each of those heads. The Spore Burst Bile Titan's bigger head survives one EAT-17 or Quasar hit, while the Recoilless and Spear still kill it with one. The RS-422 Railgun, APW-1 Anti-Materiel Rifle and AC-8 Autocannon need several to many hits on any heavy's head, and the Anti-Materiel Rifle and Autocannon bounce off the Rupture Charger's. The counts are arithmetic on the wiki's anatomy and the September 2026 datamine, rechecked by an independent verifier; falloff, angle and hit location vary in a real fight. Heavy-killers for every slot and front: Heavy-killers by slot.
5.1Charger
Kill it with anti-tank to the head (one EAT-17, Quasar or Recoilless hit), a Spear hit anywhere on the torso, or a G-123 Thermite stuck to its head or torso. Without anti-tank, break a leg's armor with Heavy penetration (APW-1 Anti-Materiel Rifle, MG-206 Heavy Machine Gun, AC-8 Autocannon, LAS-98 Laser Cannon) and kill the Light flesh beneath, about eight Anti-Materiel Rifle shots in allapprox. A FLAM-40 Flamethrower works if you survive flame range (Chargers take 1.5x fire damage), and after a dodged charge any gun can hit the Unarmored butt during its one-second recovery; explosives are best there, because the butt is durable.
Strikes: Orbital Precision Strike (80-second cooldown since 7.1.0), Eagle 500kg Bomb, Eagle Airstrike, Orbital Railcannon Strike. A G-23 Stun or G-109 Urchin holds it still so the strike lands. Patch 6.3.0 made the Eagle 110mm Rocket Pods kill "smaller heavies like Chargers" more reliably, though not every time.
What kills divers: the charge (9 m/s since 6.3.0) tramples for 90 with a ragdoll, and a crush on a downed diver deals 350, nearly three times a diver's 125 health. A Charger idles until it hears or sees you, roars, fixates on one diver and charges past its target until it hits terrain; since 6.3.0 it turns less sharply and needs a second to recover. Wait, then dive sideways at the last moment; lead it into rocks (ramming one stuns it briefly); bait it so a teammate gets a clean shot at the head. Don't let it drag you away from the squad: the Hunters and Warriors around a Charger fight are what usually kill the diver it chases.
Chargers join regular patrols at difficulty 4; on difficulty 10, Behemoths and Spore Chargers replace them.
Heavy armor almost everywhere. The head and the leg flesh under broken leg armor are the fatal routes, and broken plates expose Very Light inner flesh:
| Part | Armor | Health | Weak point | Source |
|---|---|---|---|---|
| Main | 4 | 2,400 | kill route: Anti-Tank to the head (one shot); or break leg armor with Heavy AP and shoot the flesh; or any gun on the butt after a dodged charge; main health pool; 100% durable; ExDR 25%; bleed-out pool 750 (decays 100/s) | wiki |
| Head | 4 | 1,200 | WEAK POINT for Anti-Tank (one shot); fatal; 70% to Main; 75% durable; ExDR 25% | wiki |
| Torso armor (2) | 4 | 800 | breaks to expose the inner flesh; 100% to Main; 85% durable; ExDR 25% | wiki |
| Inner flesh | 1 | Main | WEAK POINT -- exposed when torso or rear plates break; fatal; 300% to Main; 30% durable; explosion-immune; shares the Main pool | wiki |
| Underside | 2 | Main | belly; fatal; 100% to Main; 100% durable; explosion-immune; shares the Main pool | wiki |
| Rear armor plates | 4 | 2,200 | breaks to expose the inner flesh; fatal; 75% to Main; 75% durable; explosion-immune | wiki |
| Butt | 0 | 950 | WEAK POINT for any gun after a dodge -- explosives best; fatal (downs it, then it bleeds out); 150% to Main; 80% durable; ExDR 25% | wiki |
| Claws (2) | 4 | 500 | 70% to Main; 70% durable; explosion-immune | wiki |
| Front leg armor (2) | 4 | 800 | 60% to Main; 70% durable; ExDR 25% | wiki |
| Rear leg armor (2) | 4 | 800 | 50% to Main; 70% durable; ExDR 25% | wiki |
| Leg flesh (4) | 2 | 800 | WEAK POINT -- exposed when its leg armor breaks; fatal; 50% to Main; 70% durable; ExDR 25% | wiki |
5.2Charger Behemoth
A heavier Charger with bigger health pools and thicker leg armor, so Heavy-penetration leg work takes much longer. Anti-tank to the head still one-shots it and a Spear hit to the torso still kills it; Thermite must go on the head. It first appears at difficulty 3, where the Eliminate Chargers target is always a Behemoth, and joins regular patrols from 7.
A Charger's layout with more health in the head, torso and legs:
| Part | Armor | Health | Weak point | Source |
|---|---|---|---|---|
| Main | 4 | 3,000 | kill route: as Charger: Anti-Tank to the 1,600-HP head still one-shots it; Thermite must go on the head; main health pool; 100% durable; ExDR 25%; bleed-out pool 1000 (decays 100/s) | wiki |
| Head | 4 | 1,600 | WEAK POINT for Anti-Tank (one shot); fatal; 70% to Main; 100% durable; ExDR 25% | wiki |
| Torso armor (2) | 4 | 1,000 | 100% to Main; 85% durable; ExDR 25% | wiki |
| Inner flesh | 1 | Main | WEAK POINT -- exposed when plates break; fatal; 300% to Main; 30% durable; explosion-immune; shares the Main pool | wiki |
| Underside | 2 | Main | belly; fatal; 100% to Main; 100% durable; explosion-immune; shares the Main pool | wiki |
| Rear armor plates | 4 | 2,200 | fatal; 75% to Main; 75% durable; explosion-immune | wiki |
| Butt | 0 | 950 | WEAK POINT after a dodge -- explosives best; fatal; 50% to Main; 100% durable; ExDR 25%; destroying it starts a bleed-out | wiki |
| Claws (2) | 4 | 500 | 70% to Main; 70% durable; explosion-immune | wiki |
| Front leg armor (2) | 4 | 1,000 | 60% to Main; 80% durable; ExDR 25% | wiki |
| Rear leg armor (2) | 4 | 1,000 | 50% to Main; 80% durable; ExDR 25% | wiki |
| Leg flesh (4) | 2 | 800 | WEAK POINT -- exposed when its leg armor breaks; fatal; 50% to Main; 70% durable; ExDR 25% | wiki |
5.3Spore Charger
A Charger wrapped in its own spore fog, from difficulty 7, that can burst into 300 damage of acid spores when it dies (though not when it bleeds out). Ping it to mark it through the fog, kill it at range with anti-tank to the head or Thermite, and keep clear of the body. The Orbital Railcannon Strike and Eagle 110mm Rocket Pods auto-target it through the fog. Its six spore-flesh pods take any gun but pass little damage to the main pool.
A Charger's anatomy plus the spore-flesh pods:
| Part | Armor | Health | Weak point | Source |
|---|---|---|---|---|
| Main | 4 | 2,400 | kill route: as Charger, but from range: it can burst into acid spores when killed (not when it bleeds out); main health pool; 100% durable; ExDR 25%; bleed-out pool 750 (decays 100/s) | wiki |
| Head | 4 | 1,200 | WEAK POINT for Anti-Tank (one shot); fatal; 70% to Main; 75% durable; ExDR 25% | wiki |
| Torso armor (2) | 4 | 800 | 100% to Main; 85% durable; ExDR 25% | wiki |
| Inner flesh | 1 | Main | WEAK POINT -- behind the plates; fatal; 300% to Main; 100% durable; explosion-immune; shares the Main pool | wiki |
| Underside | 2 | Main | fatal; 100% to Main; 100% durable; explosion-immune; shares the Main pool | wiki |
| Rear armor plates | 4 | 2,200 | fatal; 75% to Main; 75% durable; explosion-immune | wiki |
| Butt | 0 | 950 | 150% to Main; 100% durable; ExDR 25%; destroying it starts a bleed-out | wiki |
| Spore flesh (6) | 1 | 500 | any gun, but a poor kill route; 20% to Main; 100% durable; explosion-immune | wiki |
| Claws (2) | 4 | 500 | 70% to Main; 70% durable; explosion-immune | wiki |
| Front leg armor (2) | 4 | 800 | 60% to Main; 70% durable; ExDR 25% | wiki |
| Rear leg armor (2) | 4 | 800 | 50% to Main; 70% durable; ExDR 25% | wiki |
| Leg flesh (4) | 2 | 800 | WEAK POINT -- after leg armor breaks; fatal; 50% to Main; 70% durable; ExDR 25% | wiki |
5.4Impaler
Hit the head while its tentacles are buried. A Recoilless, EAT-17 or Quasar hit kills it outright, the AC-8 Autocannon, R-36 Eruptor and CB-9 Exploding Crossbow work too, and the exposed head is soft enough that any gun hurts it, which is why the data puts its minimum penetration at 2. If it keeps its head down, walk in and bait the close slam: it lifts its head and shows its mouth. Otherwise break a leg's armor with Heavy penetration and finish the Unarmored flesh with an MG-43 Machine Gun or M-105 Stalwart. Stagger weapons (SG-8 Punisher, JAR-5 Dominator, SG-22 Bushwhacker, AR-23C Liberator Concussive) interrupt the tentacles, and flames and sentries make them retract. Throw strikes early (Eagle 500kg Bomb, Eagle Strafing Run, Orbital Railcannon Strike, Orbital Precision Strike): tentacle hits knock you down mid-input.
What kills divers: it buries its head and drives three tentacles out of the ground near any diver in its line of sight (150-damage explosive hits), and up close it slams, with a shockwave since 7.0.0. It is especially dangerous to the FRV and exosuits, and gas does not confuse it. First seen at difficulty 5 as the Eliminate Impaler target, it joins breaches and patrols from 6 and guards the mega nests of difficulty 10. Patch 7.0.0 quietly dropped its butt to Very Light armor (an undocumented change the wiki recorded).
A Very Light head that passes extra damage to the main pool; the rest is Heavy plate over Unarmored flesh:
| Part | Armor | Health | Weak point | Source |
|---|---|---|---|---|
| Main | 4 | 4,000 | kill route: hit the head while its tentacles are buried (any gun, Anti-Tank fastest); otherwise break leg armor and shoot the flesh; main health pool; 100% durable | wiki |
| Head | 1 | 1,250 | WEAK POINT -- exposed only while the tentacles are buried; fatal; 150% to Main; 75% durable | wiki |
| Tentacle armor (3) | 4 | Main | 100% to Main; 75% durable; shares the Main pool | wiki |
| Tentacle flesh (3) | 1 | 500 | damage makes a tentacle retract; 50% to Main; 70% durable | wiki |
| Crest armor | 4 | 1,000 | breaking it also strips the right torso armor; 75% to Main; 80% durable | wiki |
| Torso armor (2) | 4 | 1,000 | 75% to Main; 75% durable | wiki |
| Inner flesh | 0 | Main | WEAK POINT -- behind torso armor; fatal; 150% to Main; 90% durable; explosion-immune; shares the Main pool | wiki |
| Underside | 2 | Main | belly; fatal; 150% to Main; 100% durable; explosion-immune; shares the Main pool | wiki |
| Rear armor plates | 4 | 1,000 | 75% to Main; 75% durable | wiki |
| Butt | 1 | 1,100 | Very Light since 7.0.0 (was Medium); 140% to Main; 85% durable | wiki |
| Leg armor (4) | 4 | 1,000 | 50% to Main; 70% durable | wiki |
| Leg flesh (4) | 0 | 1,000 | WEAK POINT -- after leg armor breaks; fatal; 50% to Main; 70% durable | wiki |
5.5Bile Titan
Kill it with anti-tank to the head (one EAT-17, Quasar, Recoilless or Spear hit) or one hit anywhere from an MS-11 Solo Silo or EAT-411 Leveller. The Orbital Railcannon Strike auto-targets the largest enemy near its beacon and has dealt 10,000 damage since 6.3.0; the Eagle 500kg Bomb, Orbital Precision Strike and Eagle 110mm Rocket Pods work too, and so does a Hellpod landing on it (the Power Steering ship module helps you steer it). With any gun, pop both bile sacs to stop the spew; the Light-armored belly can be shot from underneath, dangerously.
What kills divers: an acid spew at 25-30 m (60 plus acid burn, about 10 seconds apart) that kills anything smaller than a Charger in its path, other bugs included; a 1,000-damage slam on anyone in front of it or under it; its legs as it walks; and its body when it falls. Never stand in front of it or under it, fight from beyond its spew or from its flank, and shoot when it is targeting someone else. It is immune to stun and confusion, but gas still damages it.
It first appears at difficulty 4 as the Eliminate Bile Titans target and joins regular patrols at 5 (the wiki's Difficulty page) or 6 (its own page); it guards heavy nests from 7 and mega nests on 10, sometimes with a Bile Titan Bug Hole. It never spawns on missions with Dragonroaches (a Charger comes instead), except on Spore Burst planets, where the Spore Burst Bile Titan replaces it (Strains).
The head is Heavy and fatal; the sacs and the belly are the soft parts, and the leg flesh is Heavy and no practical route:
| Part | Armor | Health | Weak point | Source |
|---|---|---|---|---|
| Main | 4 | 6,500 | kill route: Anti-Tank to the 1,500-HP head (one shot) or heavy stratagems; pop the sacs to stop the spew; the belly from underneath; main health pool; 100% durable; ExDR 50% | wiki |
| Head | 4 | 1,500 | WEAK POINT for Anti-Tank (one shot); fatal; 100% to Main; 95% durable; ExDR 50% | wiki |
| Torso armor (2) | 4 | 1,500 | 100% to Main; 100% durable; ExDR 50% | wiki |
| Inner flesh | 0 | Main | WEAK POINT -- exposed when torso armor breaks; fatal; 100% to Main; 70% durable; ExDR 50%; shares the Main pool | wiki |
| Butt armor | 4 | 3,500 | rear armor block; fatal; 100% to Main; 100% durable; ExDR 50% | wiki |
| Upper bile sac | 0 | 750 | pop it to stop the spew (not fatal); 100% to Main; 100% durable; ExDR 50% | wiki |
| Lower bile sac | 0 | 750 | pop it to stop the spew (not fatal); 100% to Main; 100% durable; ExDR 50% | wiki |
| Underside | 2 | 4,000 | WEAK POINT -- the belly, for any gun from below; fatal; 60% to Main; 80% durable | wiki |
| Claws (2) | 4 | 1,000 | 100% to Main; ExDR 50% | wiki |
| Leg armor (12) | 4 | 1,000 | 100% to Main; 100% durable; ExDR 50% | wiki |
| Front-left leg flesh | 4 | 2,000 | Heavy-armored; not a practical kill route; fatal; 100% to Main; 100% durable; ExDR 50%; bleed-out pool 1500 (no decay) | wiki |
| Leg flesh (3) | 4 | 2,000 | Heavy-armored; not a practical kill route; fatal; 100% to Main; 100% durable; ExDR 50%; bleed-out pool 2000 (no decay) | wiki |
5.6Dragonroach
Drop what you are doing when one appears: the wiki calls the Dragonroach the highest-priority target whenever it is on the field. Anti-tank to the head kills it in one hit; the homing FAF-14 Spear and StA-X3 W.A.S.P. Launcher ignore its evasive flight; the GP-20 Ultimatum, EAT-411 Leveller and MS-11 Solo Silo kill it with a hit anywhere on the body; the AC-8 Autocannon on flak strips its wings; the PLAS-45 Epoch and MLS-4X Commando need two hits; and the Orbital Railcannon Strike kills it reliably. It staggers easily, so sustained explosive fire, such as an EXO-49 Emancipator's autocannons, can pin it in the air. Shoot it in the second it hovers after a dive.
What kills divers: it circles high, screeches when it picks a target, flaps once, then dives in a strafing fire-breath run (60 fire damage plus burning) and hovers low behind you, still breathing fire. The flame is wider than it looks, and sentries count as targets. Go prone when it is about to hit you and after you are hit (that puts the fire out, and burning puddles cannot relight you), wear fire resistance (Inflammable, Acclimated, Desert Stormer), or block the fire with an SH-20 Ballistic Shield Backpack.
It flies only as a solitary patrol, never from breaches or at objectives, from difficulty 5 unverified on planets where it is active (Hive Worlds and other Gloom planets); patch 4.1.0 cut its spawn rate by a third to a half.
The head is the anti-tank target. The wings are Unarmored and fatal but fully durable, with a deep bleed-out pool, so only high durable damage works there. The two innards rows are a known game issue (Heavy instead of the intended softer armor), and the leg-flesh row comes from a datamine snapshot alone:
| Part | Armor | Health | Weak point | Source |
|---|---|---|---|---|
| Main | 4 | 6,500 | kill route: Anti-Tank to the 1,500-HP head (one shot); or high durable damage into the Unarmored, fatal wings; main health pool; 100% durable; ExDR 50% | wiki |
| Head | 4 | 1,500 | WEAK POINT for Anti-Tank (one shot); fatal; 100% to Main; 95% durable; ExDR 50% | wiki |
| Carapace (2) | 4 | 1,500 | 100% to Main; 100% durable; ExDR 50% | wiki |
| Claws (2) | 4 | 1,000 | 100% to Main; ExDR 50% | wiki |
| Wings (4) | 0 | 1,500 | WEAK POINT -- Unarmored and fatal, but 100% durable; fatal; 30% to Main; 100% durable; ExDR 50%; bleed-out pool 2500 (no decay) | wiki |
| Thorax sac | 0 | 750 | not fatal; 100% to Main; 100% durable; ExDR 50% | wiki |
| Abdomen sac | 0 | 750 | not fatal; 100% to Main; 100% durable; ExDR 50% | wiki |
| Thorax innards unverified | 4 | 3,000 | known issue: meant to be Light armor; fatal; 60% to Main; 80% durable; explosion-immune | wiki |
| Abdomen innards unverified | 4 | Main | known issue: meant to be Unarmored; fatal; 100% to Main; 100% durable; explosion-immune; shares the Main pool | wiki |
| Abdomen armor | 4 | 3,500 | fatal; 100% to Main; 100% durable; ExDR 50% | wiki |
| Leg armor (12) | 4 | 1,000 | 100% to Main; ExDR 50% | wiki |
| Leg flesh (4) unverified | 4 | 2,000 | not in the wiki's anatomy table (SuperCalc snapshot only); Heavy-armored, not a practical kill route; fatal; 100% to Main; 100% durable; ExDR 50%; bleed-out pool 1500-2000 (no decay) | wiki |
5.7Hive Lord
You do not have to kill it. The Hive Lord is a roaming boss on Hive Worlds from difficulty 7, one per mission, which Arrowhead's design director calls a "force of nature" that players may try to kill but are not forced to (behind-the-scenes post, September 3, 2026). It tracks disturbances in the ground, can be baited with explosions and barrages (or finds you if you are loud), and does not move over rocky terrain.
To kill it, break its plates with anti-tank in volume: the Eagle Strafing Run and Orbital Gatling Barrage hit many plates at once; the Recoilless, Spear and EAT-17 break them between cooldowns; the EXO-45 Patriot Exosuit's rockets strip a plate and its gatling shreds the flesh; the TD-220 Bastion works if its driver keeps clear of eruptions; a B-100 Portable Hellbomb set during its bile rain does huge damage. Then pour high-rate fire into the exposed flesh (AR-61 Tenderizer, M-105 Stalwart, M-1000 Maxigun), never explosives, which that flesh ignores. It retreats when badly hurt and keeps its damage when it comes back; a kill pays XP and completes an optional objective.
To survive it, spread out (one attack can hit a clustered squad), stand on rocks, bait it away with explosions and stay mobile (LIFT-850 Jump Pack, LIFT-182 Warp Pack, light armor, the Experimental Infusion booster). Surfacing launches anyone close and throws rocks; it sweeps, slams (and lies exposed for a moment afterward) and rains bile in three sweeps or one long stream, mostly explosive damage, so the Fortified passive helps. It is immune to stun and confusion. The wiki says fire and gas still work on it, although by the penetration rule burn damage cannot pierce its body armorunverified.
Tank-class plates over Light inner flesh; the crown is all but immune, and the open mouth takes any gun:
| Part | Armor | Health | Weak point | Source |
|---|---|---|---|---|
| Main | 5 | 150,000 | kill route: break Tank I plates with Anti-Tank, then shoot the Light-armor flesh beneath; or avoid it (fighting it is optional); main health pool; ExDR 25% | wiki |
| Crown | 10 | 150,000 | immune to almost everything (armor 10); 25% to Main; explosion-immune | wiki |
| Jaws | 6 | 150,000 | Tank II armor; 50% to Main; explosion-immune | wiki |
| Mandibles (2) | 6 | 10,000 | Tank II armor; 50% to Main; explosion-immune | wiki |
| Mouth | 2 | 150,000 | WEAK POINT -- the open mouth takes Light AP; 100% to Main; explosion-immune | wiki |
| Dorsal armor plates (6) | 5 | 15,000 | break with sustained Anti-Tank fire (50,000 effective each); 10% to Main; ExDR 25%; bleed-out pool 35000 (no decay) | wiki |
| Sternal armor plates (6) | 5 | 15,000 | break with sustained Anti-Tank fire; 10% to Main; ExDR 25%; bleed-out pool 35000 (no decay) | wiki |
| Lower sternal plate | 5 | 20,000 | break with sustained Anti-Tank fire; 10% to Main; explosion-immune; bleed-out pool 35000 (no decay) | wiki |
| Inner flesh (6) | 2 | 150,000 | WEAK POINT -- exposed when a plate breaks; 100% to Main; explosion-immune | wiki |
| Fins (14) | 5 | 5,000 | not a kill route; 25% to Main; ExDR 50% | wiki |
Strains: Predator, Spore Burst, Rupture
Check the planet's strain before you pick a loadout. Predator planets want stagger, fire and sentries; Spore Burst planets want fire and lasers so bugs die without bursting; Rupture planets want a Medium-penetration primary and explosives that force burrowers up. Strain units appear only on planets their strain has invaded.
Predator Strain
Cloaking Predator Hunters replace Hunters, and relentless Predator Stalkers replace some Warriors and Hive Guards; the map gets more Stalker Lairs. Stay together, bring stagger (SG-8 Punisher, ARC-12 Blitzer), reveal them with fire or gas, and set sentries.
Spore Burst Strain
Scavengers, Hunters and Warriors burst into spores that speed up the rest; patrols are larger and come about twice as often, and on difficulty 10 every regular bug but the Hive Guard is replaced. Kill with fire and lasers, keep crowd control up (MD-8 Gas Mines, A/M-23 EMS Mortar Sentry, Orbital EMS Strike, A/ARC-3 Tesla Tower), never melee, and pop the Titan's sacs.
Rupture Strain
Burrowing ambushers: Rupture Warriors replace every Warrior, Rupture Spewers the Nursing and some Bile Spewers, and Rupture Chargers the Chargers, with Medium heads and a Charger head a class above Heavy. Bring Medium penetration, force them up with explosives, hurt them underground with gas, fire and explosions, and keep moving.
The wiki says the Spore Burst Strain has been marked on the Galactic War map since April 2026. Arrowhead's creative director has said every faction may get this kind of subfaction treatment (Steam, September 25, 2026), so plan bug loadouts per strain, not only per faction: Subfaction adjustments.
6.1Predator Hunter
A Hunter that cloaks like a Stalker, attacks more aggressively and adds a 50-damage acid spit that, since 6.3.0, can pierce vehicle armor. Stagger it (SG-8 Punisher, ARC-12 Blitzer), burn it (SG-451 Cookout, SG-225IE Breaker Incendiary, AR-2 Coyote), reveal the cloaked ones with fire or gas (AX/TX-13 Dog Breath, G-4 Gas, MD-8 Gas Mines), and let A/MG-43 and A/G-16 sentries cover the flanks; shoot the legs to stop a pounce. It calls breaches like a Hunter, from difficulty 2 on Predator planets.
A Hunter's soft anatomy with a slightly bigger main pool:
| Part | Armor | Health | Weak point | Source |
|---|---|---|---|---|
| Main | 0 | 175 | kill route: any hit kills it; stagger it; fire or gas reveals it when cloaked; main health pool | wiki |
| Head | 0 | 40 | WEAK POINT; fatal; 100% to Main; explosion-immune | wiki |
| Claws (2) | 0 | 60 | 40% to Main; explosion-immune | wiki |
| Legs (4) | 0 | 60 | destroying legs stops the pounce; 50% to Main; explosion-immune | wiki |
| Wings (2) | 0 | 20 | 30% to Main; explosion-immune | wiki |
6.2Predator Stalker
No camouflage, no tongue and no lair: Predator Stalkers spawn in the normal pool on Predator planets from difficulty 4, claw for 55, never retreat and come in numbers. Hold your ground behind sentries with a clear view (A/MG-43, A/G-16, A/FLAM-40 Flame Sentry) and meet them with stagger plus fire (SG-451 Cookout, SG-8 Punisher, AR-2 Coyote), an MG-43 Machine Gun or the AX/TX-13 Dog Breath; explosives get risky once they close in. Whether one can call a breach is not documented.
A Stalker's small, fatal head on a smaller main pool:
| Part | Armor | Health | Weak point | Source |
|---|---|---|---|---|
| Main | 1 | 650 | kill route: stagger it, then hit the 175-HP head; it never retreats, so hold your ground behind sentries; main health pool; 50% durable | wiki |
| Head | 1 | 175 | WEAK POINT -- no durability; fatal; 100% to Main; explosion-immune | wiki |
| Body armor | 2 | Main | 100% to Main; 50% durable; explosion-immune; shares the Main pool | wiki |
| Underbelly | 1 | Main | fatal soft spot; fatal; 100% to Main; 50% durable; explosion-immune; shares the Main pool | wiki |
| Claws (2) | 1 | 200 | 70% to Main; 50% durable; explosion-immune | wiki |
| Left legs (2) | 1 | 200 | 100% to Main; 50% durable; explosion-immune | wiki |
| Right legs (2) | 1 | 200 | 70% to Main; 50% durable; explosion-immune | wiki |
| Wings | 0 | 125 | 30% to Main; 50% durable; explosion-immune | wiki |
6.3Spore Burst Scavenger
A Scavenger that bursts into spores when it dies; since 6.2.2 the spores speed up nearby Spore Burst bugs. A kill while it burns releases no spores, so the answers are fire and lasers (SG-451 Cookout, SG-225IE Breaker Incendiary, LAS-5 Scythe, FLAM-40 Flamethrower, AR-2 Coyote) and crowd control (MD-8 Gas Mines, A/M-23 EMS Mortar Sentry, A/FLAM-40 Flame Sentry, A/ARC-3 Tesla Tower). Never melee one. First seen at difficulty 2 on Spore Burst planets.
A Scavenger's body:
| Part | Armor | Health | Weak point | Source |
|---|---|---|---|---|
| Main | 0 | 60 | kill route: any hit kills it; a burning kill releases no spores; main health pool | wiki |
| Head | 0 | 20 | WEAK POINT; fatal; 100% to Main; explosion-immune | wiki |
| Limbs (6) | 0 | 30 | 30% to Main; explosion-immune | wiki |
6.4Spore Burst Hunter
A Hunter with a partly durable body that bursts into 35-damage acid spores when it dies. Kill it while it burns, shoot the legs to stop the pounce, and never melee it.
A Hunter's layout, with a partly durable body and legs:
| Part | Armor | Health | Weak point | Source |
|---|---|---|---|---|
| Main | 0 | 160 | kill route: any hit kills it; a burning kill releases no spores; main health pool; 35% durable | wiki |
| Head | 0 | 40 | WEAK POINT; fatal; 100% to Main; explosion-immune | wiki |
| Claws (2) | 0 | 60 | 40% to Main; explosion-immune | wiki |
| Legs (4) | 0 | 60 | 50% to Main; 25% durable; explosion-immune | wiki |
| Wings (2) | 0 | 20 | 30% to Main; explosion-immune | wiki |
6.5Spore Burst Warrior
A Warrior with a more durable body that bursts for 50 when it dies. Burn it, or shoot the head and let it bleed out; neither releases spores.
A Warrior's Very Light anatomy with more durability:
| Part | Armor | Health | Weak point | Source |
|---|---|---|---|---|
| Main | 1 | 325 | kill route: headshot and let it bleed out, or burn it: neither releases spores; main health pool; 50% durable | wiki |
| Head | 1 | 150 | WEAK POINT -- bleed-out kills do not burst; fatal; 100% to Main; 40% durable; explosion-immune; bleed-out pool 200 (decays 65/s) | wiki |
| Claws (2) | 1 | 100 | 40% to Main; 25% durable; explosion-immune | wiki |
| Legs (4) | 1 | 100 | 40% to Main; 35% durable; explosion-immune | wiki |
6.6Spore Burst Bile Titan
Replaces the Bile Titan on Spore Burst planets from difficulty 5 unverified by its own wiki page (the wiki's Difficulty page and the Fandom wiki disagree). Its head holds more health, so only the GR-8 Recoilless Rifle and FAF-14 Spear kill it with one head hit; the EAT-17 and LAS-99 Quasar Cannon need two. The MS-11 Solo Silo and EAT-411 Leveller kill a regular Bile Titan with a hit anywhere, but no source yet confirms that against this bigger variantunverified. It spews spores instead of bile: low damage (35), but a ragdoll unless you wear the Rock Solid passive, and a cloud that speeds up every Spore Burst bug nearby. Pop both sacs to stop the spew and the speed boost. The Orbital Railcannon Strike, Eagle 500kg Bomb, Orbital Precision Strike and Eagle 110mm Rocket Pods still apply.
A Bile Titan's layout with more health in the main pool, the head and the sacs:
| Part | Armor | Health | Weak point | Source |
|---|---|---|---|---|
| Main unverified | 4 | 7,000 | kill route: Recoilless or Spear to the 2,500-HP head (one shot); pop both sacs to stop the spore spew; main health pool; 100% durable; ExDR 50% | wiki |
| Head | 4 | 2,500 | WEAK POINT -- Recoilless or Spear to one-shot; fatal; 100% to Main; 95% durable; ExDR 50% | wiki |
| Torso armor (2) | 4 | 1,500 | 100% to Main; 100% durable; ExDR 50% | wiki |
| Inner flesh | 0 | Main | WEAK POINT -- exposed when torso armor breaks; fatal; 100% to Main; 70% durable; ExDR 50%; shares the Main pool | wiki |
| Butt armor | 4 | 3,500 | fatal; 100% to Main; 100% durable; ExDR 50% | wiki |
| Upper bile sac | 0 | 1,000 | pop it to stop the spew and its speed buff; 100% to Main; 100% durable; ExDR 50% | wiki |
| Lower bile sac | 0 | 1,000 | pop it to stop the spew and its speed buff; 100% to Main; 100% durable; ExDR 50% | wiki |
| Underside | 2 | 4,000 | WEAK POINT -- the belly, from below; fatal; 60% to Main; 80% durable | wiki |
| Claws (2) | 4 | 1,000 | 100% to Main; ExDR 50% | wiki |
| Leg armor (12) | 4 | 1,000 | 100% to Main; 100% durable; ExDR 50% | wiki |
| Front-left leg flesh | 4 | 2,000 | fatal; 100% to Main; 100% durable; ExDR 50%; bleed-out pool 1500 (no decay) | wiki |
| Leg flesh (3) | 4 | 2,000 | fatal; 100% to Main; 100% durable; ExDR 50%; bleed-out pool 2000 (no decay) | wiki |
6.7Rupture Warrior
Replaces every Warrior on Rupture planets from difficulty 6. It burrows, surfaces within about 3 m, often under your feet, and hits twice (front claws, then hind legs); run as it surfaces and it lunges after you. To dodge, wait until it has been underground for 3-4 seconds, then sprint over and past it. Its head and claws are Medium armor, so Light guns only work on its Very Light body and legs, which is why its minimum penetration is 2: carry a Medium-penetration primary (AR-23P Liberator Penetrator, AR-2 Coyote, BR-14 Adjudicator, JAR-5 Dominator) or an MG-43. Explosives force it up (CB-9 Exploding Crossbow, PLAS-1 Scorcher, PLAS-101 Purifier, GP-31 Grenade Pistol, most grenades; a G-23 Stun surfaces it stunned), and explosions, gas and fire hurt it underground (MD-8 Gas Mines, Orbital Gas Strike). The wiki suggests heavy armor, the Feet First passive or an SH-32 Shield Generator Pack against the eruption. Whether it calls breaches is not documented.
A Medium head and claws on a Very Light body:
| Part | Armor | Health | Weak point | Source |
|---|---|---|---|---|
| Main | 1 | 250 | kill route: Medium AP to the head as it surfaces; Light AP only on its body and legs; main health pool; 20% durable | wiki |
| Head | 3 | 110 | WEAK POINT for Medium AP; fatal; 100% to Main; 20% durable; explosion-immune; bleed-out pool 160 (decays 70/s) | wiki |
| Claws (2) | 3 | 75 | Medium armor; 40% to Main; explosion-immune | wiki |
| Legs (4) | 1 | 100 | Light AP works here; 40% to Main; explosion-immune | wiki |
6.8Rupture Spewer
Replaces the Nursing Spewer and some Bile Spewers from difficulty 6: it burrows, surfaces to breathe acid up close or fire a three-shot bile burst at range, lobs bile bombs and ducks under again. Its head is Medium armor, the small mouth takes any gun, and explosives flush it out and burst the butt (R-36 Eruptor, GL-21 Grenade Launcher, CB-9 Exploding Crossbow); the S-11 Speargun or ARC-3 Arc Thrower interrupts the spew, though an emergence with the head out ignores the ARC-12 Blitzer's stagger. Gas, fire and explosions hurt it underground (MD-8 Gas Mines, Orbital Gas Strike).
A spewer's anatomy with a Medium head and front legs:
| Part | Armor | Health | Weak point | Source |
|---|---|---|---|---|
| Main | 2 | 750 | kill route: Medium AP to the head when it surfaces; explosives flush it out and burst the butt; main health pool; 50% durable | wiki |
| Head | 3 | 300 | WEAK POINT for Medium AP; fatal; 100% to Main; explosion-immune | wiki |
| Mouth | 0 | 250 | WEAK POINT -- any gun, small target; fatal; 100% to Main; explosion-immune | wiki |
| Spinal plates | 2 | 500 | fatal; 20% to Main; 80% durable | wiki |
| Butt | 0 | 750 | WEAK POINT for explosives; fatal; 60% to Main; 100% durable | wiki |
| Front legs (2) | 3 | 200 | Medium armor; 50% to Main; explosion-immune | wiki |
| Rear legs (2) | 2 | 250 | 50% to Main; 30% durable; explosion-immune | wiki |
6.9Rupture Charger
Replaces the Charger on Rupture planets, from difficulty 6 unverified by the wiki (the Fandom wiki says 4). It burrows and erupts under a diver for 350 and a ragdoll, and its head and front plates are a class above Heavy, so Heavy-penetration weapons bounce off: use true anti-tank to the head (one EAT-17, Quasar, Recoilless or Spear hit, or a Thermite) or work Heavy fire on its side and rear leg armor. Its tunnel leaves bigger rubble than other Rupture bugs; sprint past it to make it surface at a bad angle. Explosives force it up, and underground only grenades, gas and sometimes fire reach it. Once it surfaces, an Orbital Precision Strike or Eagle 500kg Bomb lands; a G-23 Stun pins it.
A Charger with a Tank-class head and front plates:
| Part | Armor | Health | Weak point | Source |
|---|---|---|---|---|
| Main unverified | 4 | 2,400 | kill route: Anti-Tank to the Tank I head (one shot); Heavy AP only on the side and rear leg armor; explosives force it to surface; main health pool; 100% durable; ExDR 25%; bleed-out pool 750 (decays 100/s) | wiki |
| Head | 5 | 1,200 | WEAK POINT for Anti-Tank -- Tank I armor (Heavy AP bounces); fatal; 70% to Main; 75% durable; ExDR 25% | wiki |
| Torso armor (2) | 4 | 800 | 100% to Main; 85% durable; ExDR 25% | wiki |
| Inner flesh | 1 | Main | WEAK POINT -- behind the plates; fatal; 300% to Main; 30% durable; explosion-immune; shares the Main pool | wiki |
| Rear armor plates | 4 | 2,200 | fatal; 75% to Main; 75% durable; explosion-immune | wiki |
| Butt | 0 | 950 | 150% to Main; 80% durable; ExDR 25%; destroying it starts a bleed-out | wiki |
| Underside | 2 | Main | belly; fatal; 100% to Main; 100% durable; explosion-immune; shares the Main pool | wiki |
| Claws (2) | 4 | 500 | 70% to Main; 70% durable; explosion-immune | wiki |
| Frontal tarsal plates (2) | 5 | 800 | Tank I front plates; 60% to Main; 70% durable; ExDR 25% | wiki |
| Front leg armor (2) | 4 | 800 | 60% to Main; 70% durable; ExDR 25% | wiki |
| Rear leg armor (2) | 4 | 800 | 50% to Main; 70% durable; ExDR 25% | wiki |
| Leg flesh (4) | 2 | 800 | WEAK POINT -- after leg armor breaks; fatal; 50% to Main; 70% durable; ExDR 25% | wiki |
Nests, holes and what closes them
Every diver should carry one hole-closer, and an explosive grenade is enough: a hole closes to an explosive with demolition 20 or more that goes off inside it, or to any hit of demolition 40 or more on its rim. Bullets, lasers and arcs never close one, whatever their power.
7.1What closes a hole
Into the hole (an explosive, demolition 20 or more). Every explosive grenade, except the G-3 Smoke, G-23 Stun and K-2 Throwing Knife; the TM-1 Lure Mine counts only when it goes off inside. Launchers and explosive guns: GP-31 Grenade Pistol, GL-21 Grenade Launcher, GL-28 Belt-Fed Grenade Launcher, the AR/GL-21 One-Two's underbarrel, GL-15 Evictor, R-36 Eruptor, CB-9 Exploding Crossbow, P-33 Missile Pistol, P-34 Breacher, AC-8 Autocannon (both modes), GR-8 Recoilless Rifle, EAT-17, LAS-99 Quasar Cannon, MLS-4X Commando, PLAS-45 Epoch, S-11 Speargun, StA-X3 W.A.S.P. Launcher, RL-77 Airburst Rocket Launcher, EAT-700 Expendable Napalm and the CQC-20 Breaching Hammer's explosion. Explosive sentry, emplacement and exosuit rounds close a hole they land in.
From the rim (demolition 40 or more, explosive or not). GP-20 Ultimatum, EAT-411 Leveller, FAF-14 Spear, MS-11 Solo Silo, TED-63 Dynamite, G/40-K Melta Mine, G-48 Giga Grenade, G-60 Anti-Tank Seeker, B/MD C4 Pack, MD-17 Anti-Tank Mines (since 7.0.0) and the TD-220 Bastion's cannon. Among stratagems: the Eagle Airstrike, Cluster Bomb, 500kg Bomb, Napalm Airstrike and Smoke Strike; the Orbital Precision, Gas, EMS and Smoke Strikes; the Orbital Laser; the 120mm, 380mm and Walking Barrages; the B-100 Portable Hellbomb and NUX-223 Hellbomb; and any Hellpod that lands on it (which can cost you the pod's contents). The Orbital Railcannon Strike and Eagle 110mm Rocket Pods have the force but aim at the largest enemy, not at holes.
Never. Bullets, lasers and arcs of any power (the LAS-98 Laser Cannon has enough demolition but is not explosive), and the G-3 Smoke, G-23 Stun, K-2 Throwing Knife and GL-52 De-Escalator.
The lists follow the wiki's Demolition page (revision of September 25, 2026). Which weapons carry which demolition force: Special jobs: spawners; spawners on every front: Spawners and structures.
7.2Bug Hole
Every hole keeps spawning bugs until it is closed, and medium holes also send Commanders and spewers. Holes appear from difficulty 1. The two rows are the two ways to close one:
| Part | Armor | Health | Weak point | Source |
|---|---|---|---|---|
| Inner hole | -- | -- | structure: an explosive with demolition 20+ inside the hole closes it (bullets and arcs never do) | wiki |
| Outer rim | -- | -- | structure: demolition 40+ on the rim closes it, explosive or not (GP-20 Ultimatum, EAT-411 Leveller, TED-63 Dynamite, G/40-K Melta Mine, B/MD C4 Pack) | wiki |
7.3Bug Nest
A nest is an optional objective that clears when every hole in it is closed; it holds samples and sometimes a malfunctioning Hellpod. Clear it from the rim with fast explosive launchers (GL-21 Grenade Launcher, AC-8 Autocannon, CB-9 Exploding Crossbow, GP-31 Grenade Pistol, R-36 Eruptor), and dodge the bugs rather than fighting them in the bowl; note an exit before you go in, because heavy nests are bowl-shaped. The Orbital Laser moves between holes and can clear a heavy nest in one use, and an Eagle 500kg Bomb closes several holes that sit close together.
- A heavy nest with only three holes usually has a heavy, often a Charger, already waiting.
- Destroying half the map's nests raises the patrol spawn rate: on high difficulties, decide whether a nest near your route is worth it.
- The wiki's Difficulty page counts one heavy outpost from difficulty 4, one or two on 5-7, two or three on 8, up to four on 9, and a possible giant outpost on 10.
- The mega nests of difficulty 10 can hold Mutated Eggs; extracting with one pays 2 super and 4 rare samples.
Nest sizes by hole count, from the data layer:
| Part | Armor | Health | Weak point | Source |
|---|---|---|---|---|
| Nest (1-14 holes) | -- | -- | structure: light 1-3 holes, medium 4-5, heavy 3-10, mega 11-14 (D10); cleared when every hole is closed; clearing half the map's nests raises patrol spawns | wiki |
7.4Stalker Lair
The only source of Stalkers outside Predator planets, from difficulty 4: close it first, the way you close a Bug Hole (it has one or two holes). An explosive into each hole does it (G-12 High Explosive, G-16 Impact, GP-31 Grenade Pistol, GL-21 Grenade Launcher); TED-63 Dynamite can close both holes; a GP-20 Ultimatum works from outside; an Eagle 500kg Bomb, Eagle Airstrike or Orbital Precision Strike works from a distance. The wiki's lair page says a non-explosive hit with enough demolition also works inside, which its Demolition page contradictsunverified.
| Part | Armor | Health | Weak point | Source |
|---|---|---|---|---|
| Lair hole (1-2) | -- | -- | structure: closes like a Bug Hole; keeps spawning Stalkers while an alerted enemy has spotted a diver nearby; close it first | wiki |
7.5Bile Titan Bug Hole
A hole that spawns Bile Titans (Chargers on Dragonroach planets). It needs demolition 40, explosive or not: a GP-20 Ultimatum, EAT-411 Leveller, FAF-14 Spear, MS-11 Solo Silo, TED-63 Dynamite, G/40-K Melta Mine, G-48 Giga Grenade, G-60 Anti-Tank Seeker or B/MD C4 Pack, a Bile Titan's body falling on it, or the rim-closing strikes above. First seen at difficulty 6 unverified by the wiki's Bug Hole page (its Bug Nest page says 8).
| Part | Armor | Health | Weak point | Source |
|---|---|---|---|---|
| Hole unverified | -- | -- | structure: needs demolition 40 (no explosive requirement); spawns Bile Titans, or Chargers on Dragonroach planets | wiki |
7.6Shrieker Nest
Two or three mushroom towers, from difficulty 4, that send Shriekers once an enemy detects a diver within about 130 m (the wiki's Shrieker page says about 150). Engage from beyond that radius: a GR-8 Recoilless Rifle, FAF-14 Spear or AC-8 Autocannon on flak; an EAT-17 plus a few seconds of machine-gun fire per tower; one E/MG-101 HMG Emplacement has enough ammunition for three towers; the EXO-49 Emancipator and the TD-220 Bastion work too. An Orbital Precision Strike or Eagle 500kg Bomb takes a tower, and a NUX-223 Hellbomb pod can snag on the cap. The towers are fully durable, so primaries barely scratch them; a tower also falls to demolition 60, which only the Hellbombs and the SEAF artillery mini-nuke reach.
| Part | Armor | Health | Weak point | Source |
|---|---|---|---|---|
| Tower (2-3 per nest) | 2 | 2,500 | structure: 100% durable; spawns Shriekers once an enemy detects a diver within about 130 m; demolition 60 | wiki |
7.7Spore Spewer
A fog-spewing structure, from difficulty 2, that hides bugs and sits among samples; Mega City Restore Air Quality missions are built around them. It is fully durable, so primaries take forever: one hit from a GR-8 Recoilless Rifle, FAF-14 Spear, EAT-411 Leveller, MS-11 Solo Silo or GP-20 Ultimatum destroys it, two from an EAT-17, LAS-99 Quasar Cannon or MLS-4X Commando, three or four from an R-36 Eruptor or an AC-8 on flak, and one call of the Orbital Precision Strike, Eagle Strafing Run, Eagle 500kg Bomb, Eagle Airstrike or Orbital Railcannon Strike.
| Part | Armor | Health | Weak point | Source |
|---|---|---|---|---|
| Structure | 2 | 2,500 | structure: 100% durable, so primaries take very long; demolition 50 | wiki |
7.8Terminid eggs
Purge Hatcheries asks you to destroy most of the eggs in the marked hatchery nests before the bugs react. Eggs die to anything, but a bursting egg knocks back anyone touching it: flamethrowers, explosives (CB-9 Exploding Crossbow, R-36 Eruptor, GL-21 Grenade Launcher, AC-8 Autocannon) or melee weapons reach them safely, and a B-100 Portable Hellbomb or Eagle 500kg Bomb clears a whole hatchery.
| Part | Armor | Health | Weak point | Source |
|---|---|---|---|---|
| Egg | 0 | 10 | structure: the Purge Hatcheries objective; bursting eggs knock back anyone touching them | wiki |
7.9Infested Tower
A Mega Shrieker Nest skyscraper in Super Earth's mega cities, the target of Cleanse Infested District from difficulty 4. The mission's Hellbomb at its base is the intended answer; the TD-220 Bastion (four shots), the EXO-45 Patriot and EXO-49 Emancipator exosuits and the M-1000 Maxigun also bring one down.
| Part | Armor | Health | Weak point | Source |
|---|---|---|---|---|
| Tower (Mega Shrieker Nest) | 2 | 15,000 | structure: Cleanse Infested District (Super Earth mega cities); 100% durable; demolition 50 | wiki |
Breaches, patrols and detection
A breach is a call you can stop. The bug that spots you stands still, calls and releases a visible orange cloud; kill it before the call completes (any gun works) or break line of sight before anything sees you. If a breach opens anyway, do not fight in the middle of it: bomb the eruption and fall back.
8.1Who calls breaches
Scavengers, Bile Spitters, Pouncers, every kind of Hunter, Warriors, Bile Warriors, Alpha Warriors, Spore Burst Warriors, both Commanders and Hive Guards can call, by the wiki's Bug Breach page; whether Rupture Warriors and Predator Stalkers can is not documented. Heavies, spewers, Stalkers and flying bugs cannot, and Shriekers lost the ability in 2024. Headless Warriors and Commanders can still call while they bleed out. An internal cooldown limits how often breaches happen, and it is shorter on higher difficulties; the Localization Confusion booster lengthens the cooldown between enemy reinforcement calls (Boosters).
8.2When a breach opens
- Call it and ping itTell the squad where it is so nobody walks into it.
- Bomb the eruptionAn Orbital Gatling Barrage, Eagle Airstrike or Eagle Napalm Airstrike on the hole as the wave comes up, thrown ahead of the swarm and never onto squadmates.
- Fall back togetherPull back to high ground or a choke point, with sentries behind you. Don't stand and fight in the middle of it.
- Callers first, heavies to the anti-tank diversMost small and medium bugs in the wave can call again; the diver with anti-tank takes the Charger or Titan while the rest keep the chaff off them.
- Move onOnce the wave thins, leave; staying where the fight was invites the next call.
This drill is this manual's synthesis of the wiki's Bug Breach page and unit tactics notes.
8.3Detection and stealth
Since 1.003.101 (June 2025), Terminid spawners (holes, lairs, nests) no longer reveal you just because you walked within 200 m; they activate once an enemy has identified you. Chargers, Bile Titans and Impalers stand still until they notice you, so a squad can walk past them, and since 5.0.2 spewers, Chargers and the Impaler react to near-miss fire from a shorter distance. Stay out of sight lines and a quiet squad can pick its fights.
8.4Patrols and spawn balancing
Spore Burst patrols are larger and come about twice as often, and clearing half the map's nests raises patrol spawns. Since 7.1.0 the game measures enemy "pressure" per diver (how many enemies, and how close): when the global enemy cap is reached, a diver under low pressure gets spawns near them, and far-away enemies despawn when the count is over budget (7.1.0 notes). Splitting up is fairer than it was, but melee swarms still overwhelm a lone diver, so move in pairs. 7.1.0 also reworked the fog around bug outposts to blend with each planet and to improve visibility (not inside the Gloom or on Hive Worlds).
Squad rules that matter around breaches, from friendly fire to the shared reinforcement pool: Samples, reinforcements and friendly fire.
Hive Worlds and the Gloom
On a Gloom planet, bring weapons that need little ammunition and a B-1 Supply Pack, fewer Eagles, and a plan for the Dragonroach. On a Hive World, also expect caves where only reinforcements can be called in, and the Hive Lord from difficulty 7.
9.1What the Gloom does to your mission
- Light Gloom Cover, Moderate Gloom Blanket, Heavy Gloom Shroud: the extraction shuttle takes 20, 30 and 40 seconds longer respectively; Moderate also slows Eagle rearm by 20% and Heavy by 30%, and Heavy halves the ammunition you get from pickups.
- Gloom Source (Hive Worlds): reinforcements -20%, Eagle rearm +30% and ammunition from pickups -50%.
Lean on weapons that need little ammunition, carry a Supply Pack, and remember that every Eagle stratagem rides the same slow rearm. Loadouts for the bug front: By front and difficulty; extraction under pressure: Extraction.
9.2Caves and Hive World rules
Hive Worlds, added with Into the Unjust in September 2025, are Terminid-terraformed planets with deep cave systems (wiki Hive World). Inside a cave you can call only reinforcements, and the diver lands at the nearest cave entrance or roof opening; holes in the roof let other stratagems through, with the Super Destroyer positioned overhead so orbitals fire straight down. Vehicles may not fit through small openings. Bug Mines cover the surface and the caves, and Roving Shriekers are always present from difficulty 5. Minor points of interest (bones, Terminid rock) are rich in Super Credits, Requisition and Medals but poor in supplies.
9.3Hive World missions
Destroy Spore Lung sends you down into the hive to detonate the mission's B-100 Portable Hellbomb; since 7.1.0 the Lung has far less health, so exosuits or sustained anti-tank fire can also finish it. In Nuke Nursery you defend the Hive Breaker Drill, and an Orbital EMS Strike freezes the bugs attacking it. The GATER oil-rig escort (Conduct Mobile E-711 Extraction) can fail when a surfacing Hive Lord flings the rig; Extract E-711 and Restart Pumps round out the list. Every mission type: Mission types.
The Spore Lung's health since 7.1.0, an undocumented change the wiki recorded:
| Part | Armor | Health | Weak point | Source |
|---|---|---|---|---|
| Lung | 2 | 5,000 | structure: underground in Destroy Spore Lung missions; 100% durable; health cut from 30,000 in 7.1.0 (undocumented) | wiki |
9.4Bug Mines
Bile flowers that explode when you step on them or damage them, and release acid; shoot them from range with anything to set them off before you walk through.
| Part | Armor | Health | Weak point | Source |
|---|---|---|---|---|
| Mine | -- | -- | hazard (Terminid flora): explodes when stepped on or damaged and releases acid (slows 30% for 4 s; you can still sprint) | wiki |
9.5Who lives there
The Rupture Strain was born on the Hive Worlds; the Hive Lord and Dragonroaches roam them; Spore Burst and Predator units appear depending on the planet. The wiki's list of Gloom planets (revision of September 8, 2026) names Diaspora X, Omicron, Epsilon Phoencis VI, Zagon Prime, Enuliale, Gemstone Bluffs, Nabatea Secundus, Navi VII, Erson Sands, Socorro III and Eskerapprox. The front moves daily: The fronts explains it, and the live war maps show today's.
Playbook: what to bring, by difficulty
Bring light or medium armor, a Medium-penetration or explosive primary, a grenade that closes holes and a crowd tool for breaches; from difficulty 6, make sure at least two divers carry a reusable anti-tank weapon. The bands below say what each step up adds; the target order is in The bug front today.
10.1What to bring by difficulty
Each band lists what joins the fight in it (the roster table in chapter 1 gives every unit's first difficulty), the minimum answer, and a sound kit from free, Requisition and Helldivers Mobilize! items. Requisition unlock levels come from the stratagem data.
Chaff, Hive Guards, first nests
New: the small bugs, Warriors, Hive Guards, Hunters, spewers and Brood Commanders; a Charger Behemoth only as the Eliminate Chargers target.
Minimum: Light penetration, Medium for Hive Guard heads, and one explosive that closes holes.
Kit: AR-23 Liberator or SG-225 Breaker, P-19 Redeemer, G-12 High Explosive; MG-43 Machine Gun, Eagle Airstrike, Orbital Precision Strike, A/MG-43 Machine Gun Sentry.
The first heavies
New: Chargers (from 4), Stalkers and their lairs, Shriekers and their nests, Bile Warriors; Bile Titans as the Eliminate target (from 4) and then in patrols; the Impaler as the Eliminate target (from 5); Dragonroaches on Gloom planets; operation modifiers (one from difficulty 5, two from difficulty 8).
Minimum: an anti-tank head shot within reach of every diver.
Kit: add the EAT-17 (level 3), or the GR-8 Recoilless Rifle (level 5) or LAS-99 Quasar Cannon (level 18) once unlocked; the Eagle 500kg Bomb (level 15); a Medium-penetration primary.
Heavies in every breach
New: Impalers and Bile Titans in breaches and patrols; the Rupture Strain (from 6); Bile Spewers with Medium armor and artillery; Bile Titan Bug Holes; Behemoths and Spore Chargers in patrols (from 7); the Hive Lord on Hive Worlds (from 7).
Minimum: two or more divers with a reusable anti-tank weapon, demolition 40 for Titan holes, and Medium-penetration primaries.
Kit: Recoilless, Quasar or FAF-14 Spear (level 20) plus EAT-17s; Orbital Railcannon Strike (level 20); Eagle 500kg Bomb; an Orbital Gatling Barrage or Eagle Napalm Airstrike for breaches; sentries.
Everything, more often
New: Alpha Commanders and Alpha Warriors (from 8), a second operation modifier, more heavy nests, the mega nests of difficulty 10 with Impalers and Titan holes, and Charger variants in place of ordinary Chargers on 10.
Minimum: full anti-tank coverage, crowd control and mobility.
Kit: as for 6-7, plus a B-1 Supply Pack, the Stamina Enhancement or Experimental Infusion booster, and light or medium armor with Med-Kit or a resistance passive.
Warbond items that change the bug fight: the G-123 Thermite, R-36 Eruptor, CB-9 Exploding Crossbow and GP-31 Grenade Pistol (Democratic Detonation); the GP-20 Ultimatum and B-100 Portable Hellbomb (Servants of Freedom); the AR-2 Coyote and MS-11 Solo Silo (Dust Devils); the PLAS-101 Purifier (Polar Patriots); and the EAT-411 Leveller (Siege Breakers). The bug-front purchase order is under Variants: by front; dated community loadouts for bugs are under By front and difficulty, and the coverage check tests a loadout against this front's rules.
10.2What kills squads on the bug front
This list is this manual's synthesis from the unit data and the wiki's tactics notes, not a community ranking.
- Breach chains. Most small and medium bugs that spot you can call a breach (spewers, Stalkers and Shriekers cannot), and every breach brings more callers. Kill callers first, break line of sight, never fight inside a nest, bomb the breach and move.
- Hunter and Predator Hunter packs. Fast flankers whose pounces knock you down and whose tongues slow you. Shotguns, fire and sentries; stay grouped; shoot legs.
- Stalkers from an open lair. Camouflaged flankers with a knockdown tongue that heal while hidden. Find and close the lair first.
- Getting crushed while down. A Charger's crush and a Bile Titan's slam are lethal. Dive sideways, never into the path, and never stand in front of or under a Titan.
- Friendly fire in the melee. Strikes thrown onto a tangled fight, and sentries and machine guns firing through divers: friendly fire caused about 11.6% of all Helldiver deaths since launch, by the official war statistics. Throw strikes ahead of the swarm, call your throws, and place sentries behind the squad.
- Acid pinning. Spewer streams and Spitters slow you into the melee, and from difficulty 6 Bile Spewer artillery ragdolls you. Kill spewers early (mouth or explosives) and stim early.
- Spore Burst frenzy. Chains of bursts speed the swarm up and hide it. Fire, lasers and gas; no melee.
- Dragonroach dives. A wide fire breath across open ground. Watch the sky, ping it, go prone, wear fire resistance.
- Hive Lord eruptions. One attack can hit a whole clustered squad. Spread out, stand on rocks, bait it away.
- Running dry on Hive Worlds. A Gloom Source means reinforcements -20%, Eagle rearm +30% and ammunition from pickups -50%. Bring a B-1 Supply Pack, pick your objectives and skip optional fights.
- Splitting up. Spawns are balanced per diver since 7.1.0, but melee swarms still overwhelm a lone diver. Move in pairs.
10.3Squad roles against bugs
A four-diver split this manual suggests from the unit counters and the dated tier list below; no community source defines these roles. Everyone still carries a grenade that closes holes, one answer to a Bile Titan and light or medium armor, and says their role in chat on joining (Roles and loadout coordination).
Anti-tank
GR-8 Recoilless Rifle or LAS-99 Quasar Cannon, spare EAT-17s, Eagle 500kg Bomb. Takes the heads of Chargers, Titans and Dragonroaches.
Second anti-tank and heavy support
FAF-14 Spear or AC-8 Autocannon, Orbital Railcannon Strike. Titans, Impalers, holes and Shrieker Nests from range.
Crowd control
MG-43 Machine Gun, M-105 Stalwart or FLAM-40 Flamethrower; an A/MG-43 or A/G-16 sentry. Breach waves, Hunters, and keeping the chaff off the anti-tank divers.
Objectives and nests
GL-21 Grenade Launcher or AC-8 Autocannon, Eagle Airstrike, Orbital Laser. Closing holes, spewer packs, eggs.
The Recoilless, Autocannon and Spear each take the backpack slot, so their carriers cannot also wear a Supply Pack; give the pack to a diver whose weapon needs none.
10.4Armor, passives and boosters against bugs
- Weight: light or medium armor. Bugs punish slow divers.
- Resistances: Acclimated and Desert Stormer (acid, fire, gas and arc) and Inflammable (fire: the Dragonroach, and your own flamers). The wiki notes that resistances do little against Spore Burst bursts, which already deal little damage.
- Survival: Med-Kit (more stims); Rock Solid stops the Spore Burst Bile Titan's ragdoll, and Feet First helps against Rupture ambushes, per the wiki. True Grit (faster support-weapon reloads) suits the anti-tank diver.
- Fortified (explosive resistance) matters far less against bugs than against bots, though it helps against Bile Spewer artillery and the Hive Lord's bile.
- Boosters: Hellpod Space Optimization, Stamina Enhancement and Experimental Infusion are the S+ picks for bugs in The Pelvic Girdle's Steam tier list (updated August 19, 2026; see 10.6), with Increased Reinforcement Budget, Muscle Enhancement and Vitality Enhancement in its S tiercommunity-tested. Each diver brings a different one: 4 per squad at most, and a duplicate adds nothing.
Every passive and the sets that carry it: Passives by job; boosters in a squad: Boosters in a squad.
10.5Vehicles and sentries against bugs
Since 6.3.0, bug attacks hurt vehicles far more than they used to. The TD-220 Bastion is Heavy armor all over; exosuits are Heavy on the hull and hips but Medium on the arms and legs; the FRV is Medium.
- No damage to any vehicle: Scavenger and Pouncer claws.
- Only Medium parts (exosuit limbs, the FRV), at 65%: Hunter slashes and pounces, Shrieker dives, Stalker tongues and Impaler tentacles.
- 65% to Heavy plating, full damage to Medium parts: the claws of Warriors, Hive Guards and Commanders, the Stalker's strike, Bile Spitter spit and Dragonroach fire.
- Full damage everywhere: spewer acid streams and bile bombs, Bile Titan spew, Predator Hunter spit, Hive Lord bile, Charger tramples and crushes, Commander charges and the Titan's slam. Acid also deals 1.5x damage to exosuits and 3x to the Bastion, and a Charger's crush 3x to the Bastion.
Since 7.1.0 enemies ignore unoccupied vehicles. Vehicles are strong against heavies (the Bastion and exosuits against the Hive Lord, the EXO-49 Emancipator against Shrieker Nests and Dragonroaches) and weak where Impalers and Rupture Chargers ambush from below. Sentries have double health since 6.3.0 (400 for the turret and mortar sentries) to survive the bugs' harder hits. The stratagems: Vehicles and exosuits, Sentries, emplacements and mines.
10.6Community picks against bugs, dated
The most detailed dated list is the Steam guide "Helldivers 2 Tier Lists (Weapons, Stratagems)" by The Pelvic Girdle, built from u.gg data and updated August 19, 2026, before 7.1.0 and the Ironclad Democracy warbond (Steam guide). Its S+ picks against Terminidscommunity-tested:
- Primaries: AR-2 Coyote, CB-9 Exploding Crossbow, R-36 Eruptor, PLAS-101 Purifier.
- Support weapons: 40-K Meltagun, AC-8 Autocannon, B/FLAM-80 Cremator, EAT-17, GR-8 Recoilless Rifle.
- Eagles: Eagle 500kg Bomb, Eagle Airstrike.
- Sentries and emplacements: A/AC-8 Autocannon Sentry, A/ARC-3 Tesla Tower, A/MG-43 Machine Gun Sentry, E/MG-101 HMG Emplacement.
- Backpacks: AX/FLAM-75 Hot Dog, B-1 Supply Pack, LIFT-182 Warp Pack.
- Armor passives: Acclimated, Desert Stormer, Inflammable, Med-Kit, True Grit.
- Boosters: Experimental Infusion, Hellpod Space Optimization, Stamina Enhancement.
Its S tier adds the DBS-2 Double Freedom, SG-97 Sweeper, SG-8P Punisher Plasma, ARC-12 Blitzer and PLAS-1 Scorcher among primaries, and the LAS-99 Quasar Cannon, GL-21 Grenade Launcher, FLAM-40 Flamethrower, MS-11 Solo Silo, S-11 Speargun, EAT-700 Expendable Napalm, B/MD C4 Pack and CQC-20 Breaching Hammer among support weapons. The list rates no orbital strikes against bugs. Other dated rankings: Community tiers, dated.
What changed for bugs
Check a guide's date before you trust it: anything written before 6.2.3 may still call the Hive Guard's head Heavy, and anything before 6.3.0 describes an older Charger and bugs that could barely touch vehicles. The changes that matter for your loadout, newest first (every patch is in the patch history):
Before these, the Predator and Spore Burst Strains first appeared in February 2025. The official notes behind the biggest entries: 6.3.0, 6.2.2, 7.0.0, Into the Unjust.
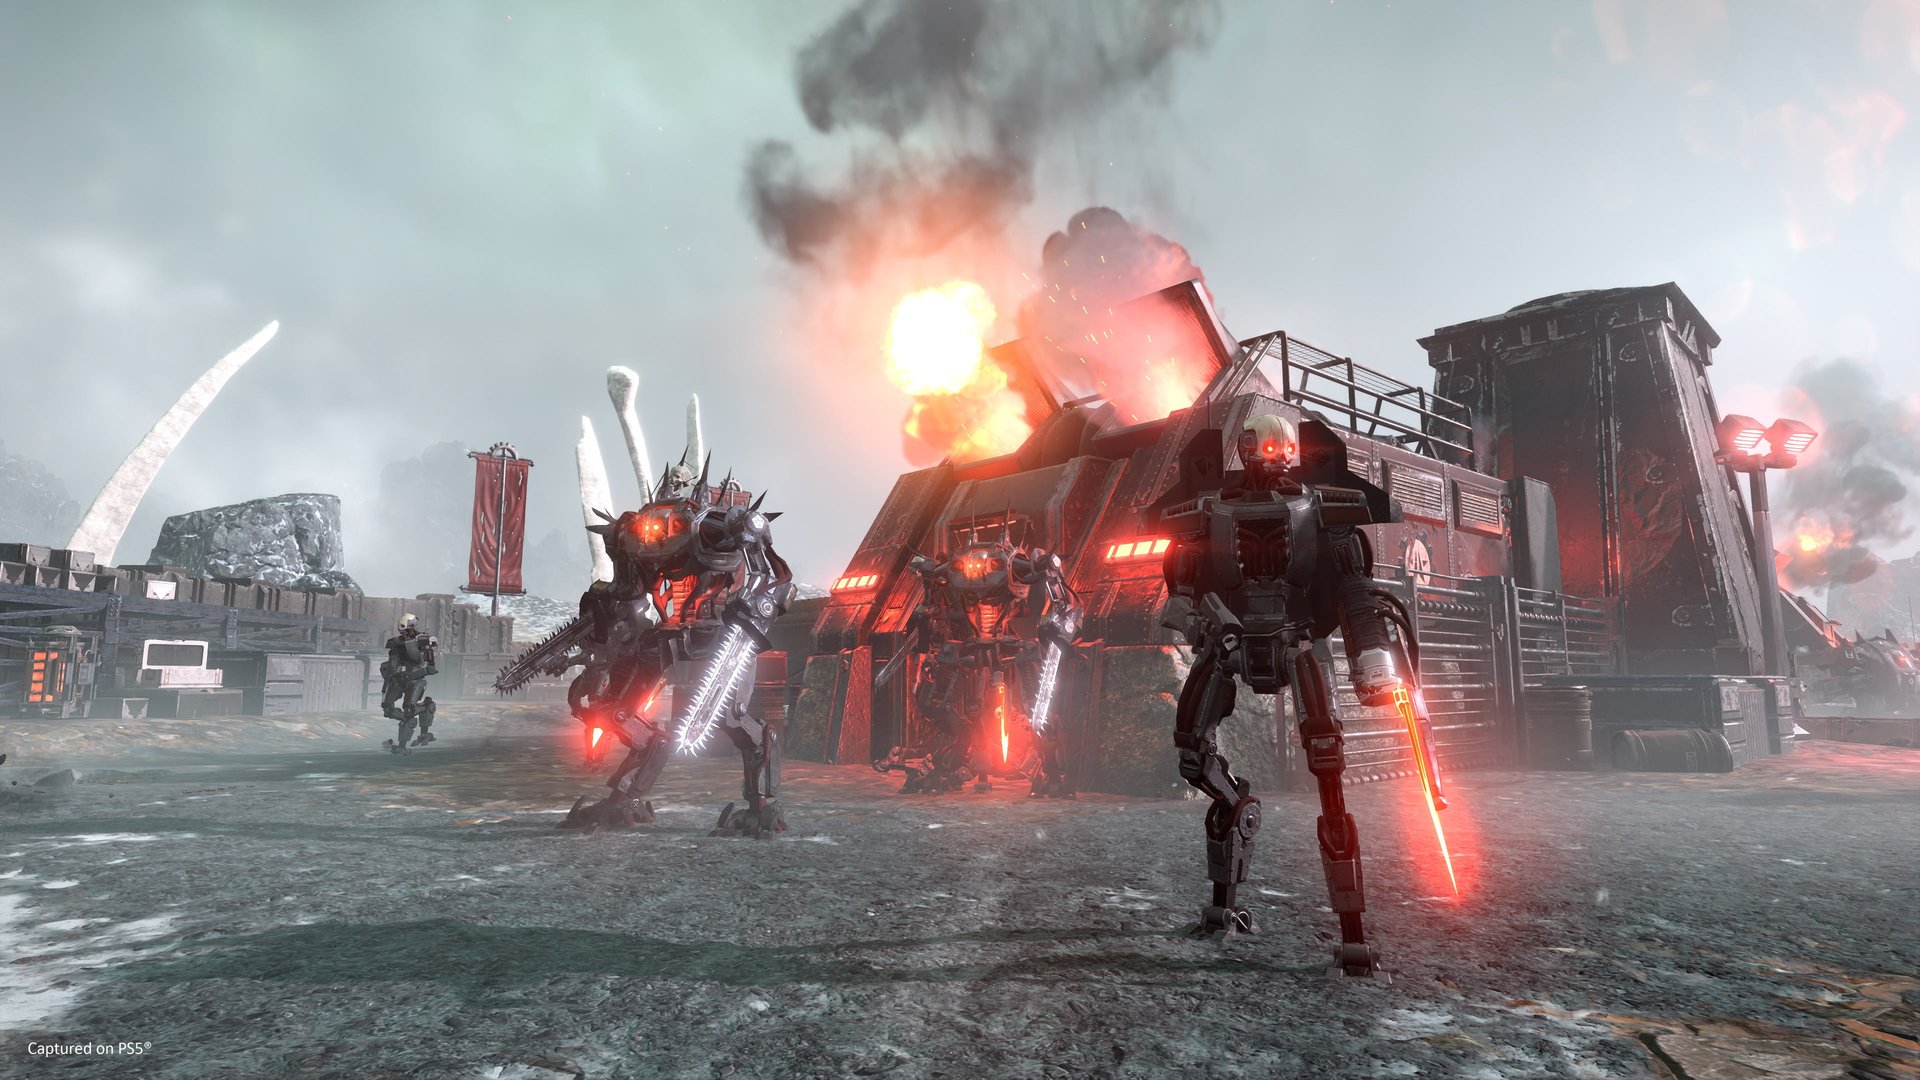
Threat dossier10
Automatons
Every bot from Trooper to Factory Strider: armor by part, weak points, the attacks that kill squads, and the weapons, stratagems and tactics that kill each one.
On this page10 chapters
The front today
Bots win at range. They shoot straight, fire rockets and cannons, and wrap their big units in heavy armor around a few small soft spots. Fight them from cover, kill the ones calling for help first, and carry the penetration your difficulty demands.
This tab covers all 37 bot units, the standard roster plus the Jet Brigade, Incineration Corps and Cyborg Legion, and every bot structure you will be asked to destroy: what each one does to you, where it is soft, and what kills it.
1.1Before you drop on a bot planet
- Bring a medium-penetration or explosive primary. Devastators arrive at difficulty 2, and light rounds glance off their torsos. Until you own one, aim for heads.
- From difficulty 4, every diver carries heavy or anti-tank penetration. Hulks and tanks join the regular spawns there. The EAT-17, Recoilless Rifle, Quasar Cannon and Thermite grenade all answer both.
- Wear Fortified armor and go prone when rockets fly. Most bot damage is explosive, and both cut it hard (by how much).
- Kill the flare before it flies. Any light bot can fire a red flare that calls a dropship. The draw is slow: shoot the bot during it and the drop never comes.
- Break line of sight. Bots cannot shoot through walls or see through smoke. Move from cover to cover and smoke open ground.
- Aim for the glow. Heads, stomachs, heatsinks, thrusters, eyes and vents are where bots are soft.
- Put a grenade in every Fabricator you pass. One explosive through a vent ends its production.
- Skip what you do not need. Tanks, Factory Striders and Cannon Turrets can be walked around.
1.2What to shoot first
- A light bot drawing its flareThe draw is long enough to interrupt; once the flare is up, a dropship is on its way to you.
- Anything that knocks you down or kills in one hitRocket Devastators and Rocket Raiders, a Reinforced Scout Strider stopping to fire, Cannon Turrets, Barrager Tanks, Mortars and Gunships.
- Force multipliersAgitators (their death stuns the bots they command) and Detector Towers.
- ClosersHulk Scorchers and Firebombers, Berserker packs, Radicals and Jet Brigade jumpers.
- Everything elseTroopers and plain Devastators, one at a time, from cover.
1.3What changed in 2026, and what advice is stale
No bot unit has arrived since the Cyborg Legion (Radical, Agitator and Vox Engine), which came with Machinery of Oppression on 2026-02-10. Devoid of Liberty (7.0.0) changed no bot unit or stat; 7.1.0 brought the Retrieve Recon Craft mission to the bot front. The numbers that decide fights today come from four 2026 patches:
Harder at the top
Difficulty 9 and up got more intense on every front, which Arrowhead called the biggest change on the Automaton front, and bots re-aim more often when many of them are firing. Commando missions (behind the lines, limited Super Destroyer support) are offered on every bot planet under liberation. Patch notes
Tanks got tougher
Every tank's hull and rear engine vents gained health and armor, the Heavy Devastator's shield became breakable, and the War Strider's hip joints got softer. Tank advice from before this patch ("one Recoilless to the hull", "medium penetration to the rear") no longer works. Patch notes
Bots hit vehicles; Vox Engines got softer
About 28 bot attacks gained one penetration step, so exosuits, the Bastion tank and other vehicles take real damage from bot fire. The Vox Engine lost health and its cannons lost armor, no more than three can be alive at once, and the Orbital Railcannon Strike now kills one in a single hit. Vox Engine guides from before this patch are wrong. Patch notes
Spawns follow each diver
Enemy spawns are balanced per diver by nearby pressure, so a split squad gets fairer spawns, and far-off bots despawn when the map is over budget. The Orbital Precision Strike's cooldown dropped to 80 seconds, and Anti-Air Emplacements no longer block the Eagle rearm. Patch notes
1.4Where the bots are
On September 26, 2026 at 12:00 UTC the Automatons held 12 planets with an active campaign and drew about a quarter of the divers fighting on campaign planets live figure. That changes every day: the live war maps show today's front. Before you pick a loadout, check the planet's subfaction icon: a planet may field the Jet Brigade, the Incineration Corps or the Cyborg Legion instead of the standard roster, and each one changes a slot or two (Subfactions).
Damage rules against bots
Match your penetration to the part you are shooting. Put medium penetration in your primary and heavy or anti-tank penetration in your support slot; everything else on the bot front is aim.
Every attack has an armor-penetration value (AP) and every body part an armor value (AV). A hit with more penetration than the part's armor does full damage, an equal hit does 65%, and a lower one bounces off and does nothing. The game's weapon traits name the tiers AP2 Light, AP3 Medium, AP4 Heavy and AP5 to AP10 Anti-Tank. What Kills What sets the rule out for all three fronts, and Weapons explains durable damage and stagger.
2.1What each tier reaches on the bot front
Any gun
Kills every light bot and hits the heads and glowing stomachs of Devastators and Berserkers at full damage. Slowly, or from behind: Scout Strider legs, the Hulk's back heatsink, the Heavy Devastator's backpack, Vox Engine vents. It bounces off Devastator torsos. AR-23 Liberator, R-63 Diligence, SG-8 Punisher, M-105 Stalwart.
The bot-front baseline
Adds Devastator torsos and the Scout Strider's waist. Slowly: Gunship thrusters, tank turret heatsinks and tracks, Barrager launch tubes, War Strider hips, the Factory Strider's chin guns and belly. It cannot hurt a Hulk's head or body, tank hulls or strider eyes. R-63CS Diligence Counter Sniper, JAR-5 Dominator, AR-23P Liberator Penetrator, MG-43 Machine Gun; the blasts of the CB-9, GL-21 and PLAS-101 Purifier.
Hulk eyes and Gunships
Adds the Hulk's eye slit (at 65%), Gunship thrusters, tank turret heatsinks, War Strider eyes and hips, Scout Striders from the front, and the Anti-Air, Mortar and Bunker turrets. Slowly: Hulk and War Strider bodies, the Factory Strider's eye and legs, tank rear vents, Vox Engine cannons. It cannot hurt tank fronts, dropships or Fabricator shells. AC-8 Autocannon, APW-1 Anti-Materiel Rifle, MG-206 Heavy Machine Gun, LAS-98 Laser Cannon, P-4 Senator, R-36 Eruptor.
Everything, in fewer hits
AP5 (RS-422 Railgun, S-11 Speargun, charged PLAS-45 Epoch, P-33 Missile Pistol, Eagle Strafing Run) does full damage to every heavy-armored part but only 65% to tank hulls, dropship thrusters and Fabricator shells, and nothing to a Command Bunker. From AP6 (EAT-17, LAS-99 Quasar Cannon, GR-8 Recoilless Rifle, MLS-4X Commando, EAT-411 Leveller, GP-20 Ultimatum, FAF-14 Spear, G-123 Thermite) you hurt every bot and structure. One EAT-17, Quasar, Recoilless or Spear hit kills a Hulk, a Scout Strider or a Gunship, drops a dropship, or kills a War Strider through its crotch, hips or legs (the Commando needs about two).
2.2The fine print that decides fights
- Shoot armor square-on. Most weapons lose penetration only at extreme angles, but there is no reason to give any away.
- Explosions carry one AP value, one step lower in the outer ring. They ignore durability but are cut by a part's explosive resistance; a fully blast-immune part (every part of a Berserker, a Gunship's fuselage) passes the blast to the unit's main pool once, if it can penetrate that.
- Durable parts (tank hulls, striders, thrusters) take a weapon's lower "durable" damage for most of each hit, so rockets, cannons and anti-tank beat fast-firing guns there.
- The main pool. Most parts pass part of their damage to the unit's main health, and the unit dies when that pool or any fatal part runs out. A Hulk with a broken heatsink goes down and bleeds out over about 13 seconds.
- Breakable armor (the Factory Strider's plates, the Agitator's helmet and chest plate, the Heavy Devastator's shield) must break before the part under it takes damage.
- Structures play by their own rules: Detector Towers, Stratagem Jammers and Gunship Facilities check demolition force, not armor, and a Fabricator dies to an explosive in its vent or to anti-tank on its shell (Fabricators and structures).
2.3Your side of the exchange
A diver has 125 health and takes half damage from explosions, which is most of what bots throw at you. Stack the rest:
- Fortified armor: Recoil -30% when crouched or prone; 50% explosive resistance. It is the default passive against bots (every passive).
- Go prone. Lying down cuts damage from an explosion's outer radius by 90%. Dive the moment a rocket volley comes in.
- Walls and smoke. Since patch 1.001.104 bots cannot shoot through walls or see through smoke. An Orbital or Eagle Smoke Strike, or a G-3 Smoke grenade, gets you across open ground.
- Shields. The SH-32 Shield Generator Pack blocks projectiles from every side but not fire or gas, and the FX-12 Shield Generator Relay gives the squad a dome to shoot from. War Strider grenades ignore both, and Radical kicks break the relay.
- Vehicles are not safe. Since 6.3.0 bot grenades, rockets, autocannons and cyclers hurt exosuits, the Bastion tank and other vehicles.
2.4The ladder: every bot and structure
Read "Min. penetration" as the lowest tier that kills the unit from the front, the way it usually faces you (2 = any gun, 3 = medium, 4 = heavy, 5 and up = anti-tank); a softer weak spot that needs flanking, like a Hulk's heatsink, is in the unit's own table further down. "Body armor" is the armor of the main pool, "From difficulty" is the lowest difficulty where the unit can appear at all (regular spawns may start later), and a subfaction of "--" means the standard roster. A structure with no penetration value falls to demolition force or an explosive in its vent instead.
| Unit | Class | Subfaction | Body armor | Min. penetration | From difficulty | Source |
|---|---|---|---|---|---|---|
| Assault Raider | small | Jet Brigade | 0 | 2 | 1 | wiki |
| Brawler | small | -- | 0 | 2 | 1 | wiki |
| Commissar | small | -- | 1 | 2 | 1 | wiki |
| Incendiary Rocket Raider | small | Incineration Corps | 0 | 2 | 1 | wiki |
| Jet Brigade Commissar | small | Jet Brigade | 0 | 2 | 1 | wiki |
| Jet Brigade MG Raider | small | Jet Brigade | 0 | 2 | 2 | wiki |
| Jet Brigade Trooper | small | Jet Brigade | 0 | 2 | 3 | wiki |
| Marauder | small | -- | 0 | 2 | 5 | wiki |
| MG Raider | small | -- | 0 | 2 | 2 | wiki |
| Pyro Trooper | small | Incineration Corps | 0 | 2 | 1 | wiki |
| Rocket Raider | small | -- | 0 | 2 | 2 | wiki |
| Trooper | small | -- | 0 | 2 | 1 | wiki |
| Agitator | medium | Cyborg Legion | 1 | 2 | 1 | wiki |
| Berserker | medium | -- | 0 | 2 | 2 | wiki |
| Conflagration Devastator | medium | Incineration Corps | 2 | 2 | 1 | wiki |
| Devastator | medium | -- | 2 | 2 | 2 | wiki |
| Heavy Devastator | medium | -- | 2 | 2 | 1 | wiki |
| Incendiary MG Devastator | medium | Incineration Corps | 2 | 2 | 3 | wiki |
| Jet Brigade Devastator | medium | Jet Brigade | 2 | 2 | 2 | wiki |
| Radical | medium | Cyborg Legion | 1 | 2 | 1 | wiki |
| Reinforced Scout Strider | medium | -- | 4 | 2 | 8 | wiki |
| Rocket Devastator | medium | -- | 2 | 2 | 1 | wiki |
| Scout Strider | medium | -- | 4 | 2 | 3 | wiki |
| Annihilator Tank | heavy | -- | 5 | 5 | 3 | wiki |
| Barrager Tank | heavy | -- | 5 | 3 | 7 | wiki |
| Factory Strider | heavy | -- | 5 | 4 | 4 | wiki |
| Hulk Bruiser | heavy | -- | 4 | 4 | 4 | wiki |
| Hulk Firebomber | heavy | Incineration Corps | 4 | 4 | 4 | wiki |
| Hulk Obliterator | heavy | -- | 4 | 4 | 3 | wiki |
| Hulk Scorcher | heavy | -- | 4 | 4 | 4 | wiki |
| Jet Brigade Hulk Bruiser | heavy | Jet Brigade | 4 | 3 | 4 | wiki |
| Jet Brigade Hulk Scorcher | heavy | Jet Brigade | 4 | 3 | 4 | wiki |
| Shredder Tank | heavy | -- | 5 | 5 | 3 | wiki |
| Vox Engine | heavy | Cyborg Legion | 5 | 4 | 7 | wiki |
| War Strider | heavy | -- | 4 | 3 | 6 | wiki |
| Dropship | air | -- | 5 | 5 | 1 | wiki |
| Gunship | air | -- | 3 | 3 | 5 | wiki |
| Ammo Stockpile | structure | -- | 3 | 3 | 1 | wiki |
| Anti-Air Emplacement | structure | -- | 4 | 4 | 4 | wiki |
| Automaton Fabricator | structure | -- | 5 | -- | 1 | wiki |
| Automaton MG Emplacement (Heavy Fusion Repeater) | structure | -- | 3 | 2 | 1 | wiki |
| Automaton MG Emplacement (Light Fusion Cycler) | structure | -- | 2 | 2 | 1 | wiki |
| Bulk Fabricator | structure | -- | 5 | -- | 1 | wiki |
| Bunker Turret | structure | -- | 4 | 4 | 5 | wiki |
| Cannon Turret | structure | -- | 5 | 5 | 3 | wiki |
| Command Bunker | structure | -- | 6 | 6 | 5 | wiki |
| Contact Mine | structure | -- | -- | 2 | -- | wiki |
| Cyborg Production Unit | structure | -- | -- | -- | 4 | wiki |
| Detector Tower | structure | -- | -- | -- | 4 | wiki |
| Enemy Bio-Processor | structure | -- | 1 | 2 | 3 | wiki |
| Fuel Silo | structure | -- | -- | -- | 1 | wiki |
| Gunship Facility | structure | -- | -- | -- | 6 | wiki |
| Megafactory Gate | structure | -- | 4 | 4 | -- | wiki |
| Mortar Emplacement | structure | -- | 4 | 4 | 4 | wiki |
| Parked Dropship | structure | -- | 5 | 5 | 3 | wiki |
| Stratagem Jammer | structure | -- | -- | -- | 4 | wiki |
| Terrorist Memorial | structure | -- | -- | -- | 4 | wiki |
| Transmission Tower | structure | -- | -- | 2 | 2 | wiki |
Infantry and Scout Striders
Head-shoot light bots before they flare. Drop Devastators with a shot to the head or the glowing stomach, or carry medium penetration for the torso. Back away from Berserkers while you empty a magazine into them, and blow Scout Striders off their legs.
3.1Troopers, Raiders and Commissars
Any primary kills them, and one head shot does it. Every light bot shares the Trooper's frame (the table below): a small head, a body any gun gets through, and arms that on most of them only disarm it. Each one can fire a red flare from its left arm to call a bot drop, and the draw animation is long enough to interrupt. Shooting near them makes them flinch and spray, so suppressive fire protects a teammate who is reloading. For groups, bring an Eagle Cluster Bomb, an Orbital Airburst Strike or a sentry.
Trooper
A fusion SMG in short bursts, then a pause to cool; throws HE grenades at divers behind cover. Keeps its distance and flares once alerted. One head shot.
Commissar
Leads patrols with a fusion pistol, a heat blade and a grenade. Lightly armored all over, which any gun still penetrates at full damage. It does not flare more often than other light bots, whatever you have heard.
Brawler
Runs straight at you with two heat blades that injure limbs and chain hits so you cannot stim. Its head shares the main pool, so body and leg shots kill it just as fast; drop it before it reaches you.
MG Raider
The most dangerous light bot at medium range: long bursts from a light fusion repeater. Suppress it, or shoot the finned power backpack, which explodes and burns the bots around it (and any diver nearby).
Rocket Raider
A rocket every few seconds from long range, and each one ragdolls you. Priority target: shooting at it ruins its aim. The Incineration Corps swaps it for the Incendiary Rocket Raider.
Marauder
A Trooper with an armored torso. Aim for the head, or bring medium penetration.
The Assault Raider (a Jet Brigade jump-pack bot that also turns up on standard planets), the Jet Brigade Troopers, MG Raiders and Commissars, the Pyro Trooper and the Incendiary Rocket Raider are under Subfactions. The shared light frame, where only the head is a weak spot and the arms are not fatal:
| Part | Armor | Health | Weak point | Source |
|---|---|---|---|---|
| Main (body pool) | 0 | 125 | main pool; 125 total | wiki |
| Head | 0 | 40 | fatal weak spot | wiki |
| Torso | 0 | 100 | fatal | wiki |
| Arms (2) | 0 | 65 | non-fatal; gun arm disarms | wiki |
| Legs (2) | 0 | 90 | fatal | wiki |
3.2Devastators
Shoot the head: one round from an R-63 Diligence or R-63CS Diligence Counter Sniper, a JAR-5 Dominator or a P-113 Verdict kills a Devastator, and so does one APW-1 shot. The glowing stomach is a bigger target behind the same light armor, though it takes a few more hits; the torso needs medium penetration. A missed head shot glances off the armored torso. Devastators walk steadily toward you while firing, but they flinch when hit, so steady fire ruins their aim, and stagger weapons (the SG-8 Punisher family, the JAR-5, the CB-9 Exploding Crossbow) keep them off balance. Two CB-9 bolts to the torso usually kill one and stagger its neighbors.
Rocket Devastator
Four-rocket salvos every few seconds, accurate at range, and each rocket ragdolls you. Kill it first. Any gun destroys its rocket pods and turns it into a plain Devastator, or you can let it waste its rockets on solid cover while you peek.
Heavy Devastator
Fast fusion-repeater bursts from behind a shield; a group covers each other's pauses, and its hits stop you from stimming. Shoot over the shield rim at the head, or flank the backpack: any gun breaks it, and that kills the bot. Explosives stagger it into dropping its guard. Since 6.2.2 the shield breaks too: about five AC-8 or APW-1 shots approx, or one anti-tank hit. Bullets into the shield do nothing to the bot.
Every Devastator is built on this frame (the Rocket Devastator's pelvis is lighter); the head and stomach are the soft fatal parts, the torso the armored one:
| Part | Armor | Health | Weak point | Source |
|---|---|---|---|---|
| Main (body pool) | 2 | 750 | main pool | wiki |
| Head | 1 | 110 | fatal weak spot | wiki |
| Torso | 3 | 425 | fatal; armored | wiki |
| Shoulders (2) | 2 | 150 | non-fatal | wiki |
| Arms (2) | 1 | 260 | non-fatal; gun arm disarms | wiki |
| Stomach | 1 | 350 | fatal weak spot | wiki |
| Pelvis | 2 | 500 | fatal | wiki |
| Legs (2) | 2 | 500 | fatal | wiki |
The Heavy Devastator adds the breakable shield and a backpack you can kill from behind:
| Part | Armor | Health | Weak point | Source |
|---|---|---|---|---|
| Main (body pool) | 2 | 750 | main pool | wiki |
| Head | 1 | 110 | fatal weak spot (peeks over the shield) | wiki |
| Torso | 3 | 425 | fatal; armored | wiki |
| Shoulders (2) | 2 | 150 | non-fatal | wiki |
| Arms (2) | 1 | 260 | non-fatal; gun arm disarms | wiki |
| Stomach | 1 | 350 | fatal (behind the shield) | wiki |
| Pelvis | 2 | 500 | fatal | wiki |
| Legs (2) | 2 | 500 | fatal | wiki |
| Backpack | 2 | 600 | fatal weak spot (from behind) | wiki |
| Shield | 4 | 800 | breakable armor (drops when destroyed) | wiki |
3.3Berserkers
Back away and keep shooting the head or the glowing stomach; stagger stops them cold. Berserkers run straight at you in packs of three or more to force you out of cover, and their chainsaw arms maim in one hit. Stagger weapons (JAR-5 Dominator, SG-8 Punisher, SMG-72 Pummeler, CB-9 Exploding Crossbow) or steady high-rate fire (MG-43 Machine Gun, M-105 Stalwart, BR-14 Adjudicator) put them down; a G-23 Stun grenade stops a whole pack, and leg shots slow them. Every part is blast-immune, so explosives only reach the main pool: save them for a clump. A Berserker that has lost both arms, or finds you on the ground, stomps. They appear from difficulty 2 and never on Incineration Corps planets.
head or stomach (AV1) with stagger: JAR-5 Dominator; SG-8 Punisher; MG-43 Machine Gun; M-105 Stalwart; G-23 Stun. Stratagems: Eagle Cluster Bomb; Orbital Airburst Strike; A/G-16 Gatling Sentry.
The chest is its one tough, armored part; the head and stomach are soft:
| Part | Armor | Health | Weak point | Source |
|---|---|---|---|---|
| Main (body pool) | 0 | 750 | main pool | wiki |
| Head | 1 | 110 | fatal weak spot | wiki |
| Chest | 2 | 425 | fatal; toughest part (durable) | wiki |
| Stomach (glowing) | 1 | 350 | fatal weak spot | wiki |
| Pelvis | 1 | 600 | fatal | wiki |
| Shoulders (2) | 0 | 180 | non-fatal | wiki |
| Arms (2) | 1 | 260 | non-fatal; disarms (it then stomps) | wiki |
| Legs (2) | 1 | 750 | fatal; slows it | wiki |
3.4Scout Striders
One explosive hit takes a leg (a single AC-8 shell, GL-21 grenade or CB-9 bolt); medium penetration works on the waist; from behind or above, shoot the pilot. The Scout Strider is a fast two-legged walker with a heavy fusion repeater (it penetrates vehicles since 6.3.0) and a stomp. Its front plate shields the Trooper pilot, and destroying the waist throws the pilot out. A grenade thrown behind a fresh drop can take out a whole cluster. It appears from difficulty 3, except on Cyborg Legion planets, where Radicals and Agitators take its place.
It carries four heavy HE rockets whose blast and shockwave kill any diver who is not prone or in Fortified heavy armor. It stops and vents exhaust for a moment before each rocket: that is your cue to dive. Kill it first by shooting one of its side rockets (most primaries need a shot or two); patch 6.1.0 restored the kill when a rocket detonates, though the wiki's tactics text still calls it bugged. Otherwise put medium penetration into the waist, or one AC-8 shell into each leg. Its pilot is sealed in, so nothing jumps out afterward.
The legs are the Scout Strider's softest fatal part, and the open pilot is the weak spot from behind:
| Part | Armor | Health | Weak point | Source |
|---|---|---|---|---|
| Main (walker pool) | 4 | 500 | main pool | wiki |
| Pilot (Trooper, open back) | 0 | 125 | fatal weak spot from behind or above | wiki |
| Front plate | 4 | 350 | fatal; shields the pilot from the front | wiki |
| Heavy fusion repeater | 4 | 300 | fatal | wiki |
| Turret system | 3 | 300 | fatal | wiki |
| Waist | 3 | 300 | fatal | wiki |
| Legs (2) | 2 | 400 | fatal; lowest armor | wiki |
The Reinforced model trades the open pilot for side rockets that are fatal weak spots:
| Part | Armor | Health | Weak point | Source |
|---|---|---|---|---|
| Main (walker pool) | 4 | 500 | main pool | wiki |
| Faceplate | 4 | 400 | fatal | wiki |
| Heavy fusion repeater | 4 | 300 | fatal | wiki |
| Rocket rails (2) | 2 | 200 | non-fatal | wiki |
| Side rockets (4) | 2 | 100 | fatal weak spot (kill restored in 1.006.100; the wiki's tactics text still calls it bugged) | wiki |
| Turret system | 3 | 300 | fatal | wiki |
| Waist | 3 | 300 | fatal | wiki |
| Legs (2) | 2 | 400 | fatal | wiki |
Heavies: Hulks, striders and tanks
Every heavy has a spot you can reach without anti-tank: the Hulk's eye slit and back heatsink, the War Strider's hips and eyes, a tank's turret heatsink, the Factory Strider's chin guns and belly. Anti-tank turns a flanking maneuver into one shot; from difficulty 4, every diver should carry heavy or anti-tank penetration.
Heavies are slow, so big stratagems land on them (stratagems by job). Across all three fronts, What Kills What sorts the heavy-killers by slot.
4.1Hulks
One EAT-17, Quasar Cannon, Recoilless Rifle or Spear anywhere on the body kills a Hulk, and so does one Thermite. Without anti-tank, put heavy penetration into the eye slit, or get behind it and shoot the glowing heatsink with anything. The APW-1 Anti-Materiel Rifle, RS-422 Railgun and S-11 Speargun kill with one eye shot; the AC-8 Autocannon and R-36 Eruptor need two, the MG-206 four. On the heatsink an AC-8, CB-9 or GL-21 needs two or three hits, a Liberator about 19 rounds computed. When the head is hard to hit, shoot a leg: one cripples and staggers it, both kill it.
Hulk Bruiser
A fusion autocannon (it penetrates vehicles since 6.3.0) and a rocket launcher. The common Hulk: fight it from cover and kill it at range.
Hulk Scorcher
A heavy flamethrower out to about 25 m and a rotary saw with no windup, and it sprints. Never run from it in a straight line, cripple a leg, and dive to put yourself out.
Hulk Obliterator
Two revolving rocket launchers firing alternating salvos. It appears only as the target of Eliminate Automaton Hulks, a difficulty-3 mission.
Firebomber and jump-pack Hulks
The Incineration Corps' Hulk Firebomber lobs white-phosphorus shells over cover, then switches to a flamethrower up close. Jet Brigade Hulks trade the heatsink for a jump pack that kills them when it blows. Both are under Subfactions.
Every Hulk hits hard up close: an arm slam ragdolls you, the stomp hurts, and a dying Hulk vents and then explodes, so step back from the wreck. They are slow, so the Eagle 500kg Bomb, Eagle Airstrike, Strafing Run, 110mm Rocket Pods, Orbital Precision Strike and Railcannon all land.
APW-1 or RS-422 Railgun (1 head); AC-8 (2 head); EAT-17 / LAS-99 / GR-8 (1 body); flank the AV1 heatsink. Stratagems: Eagle 500kg Bomb; Orbital Precision Strike; Eagle Airstrike; Orbital Railcannon Strike.
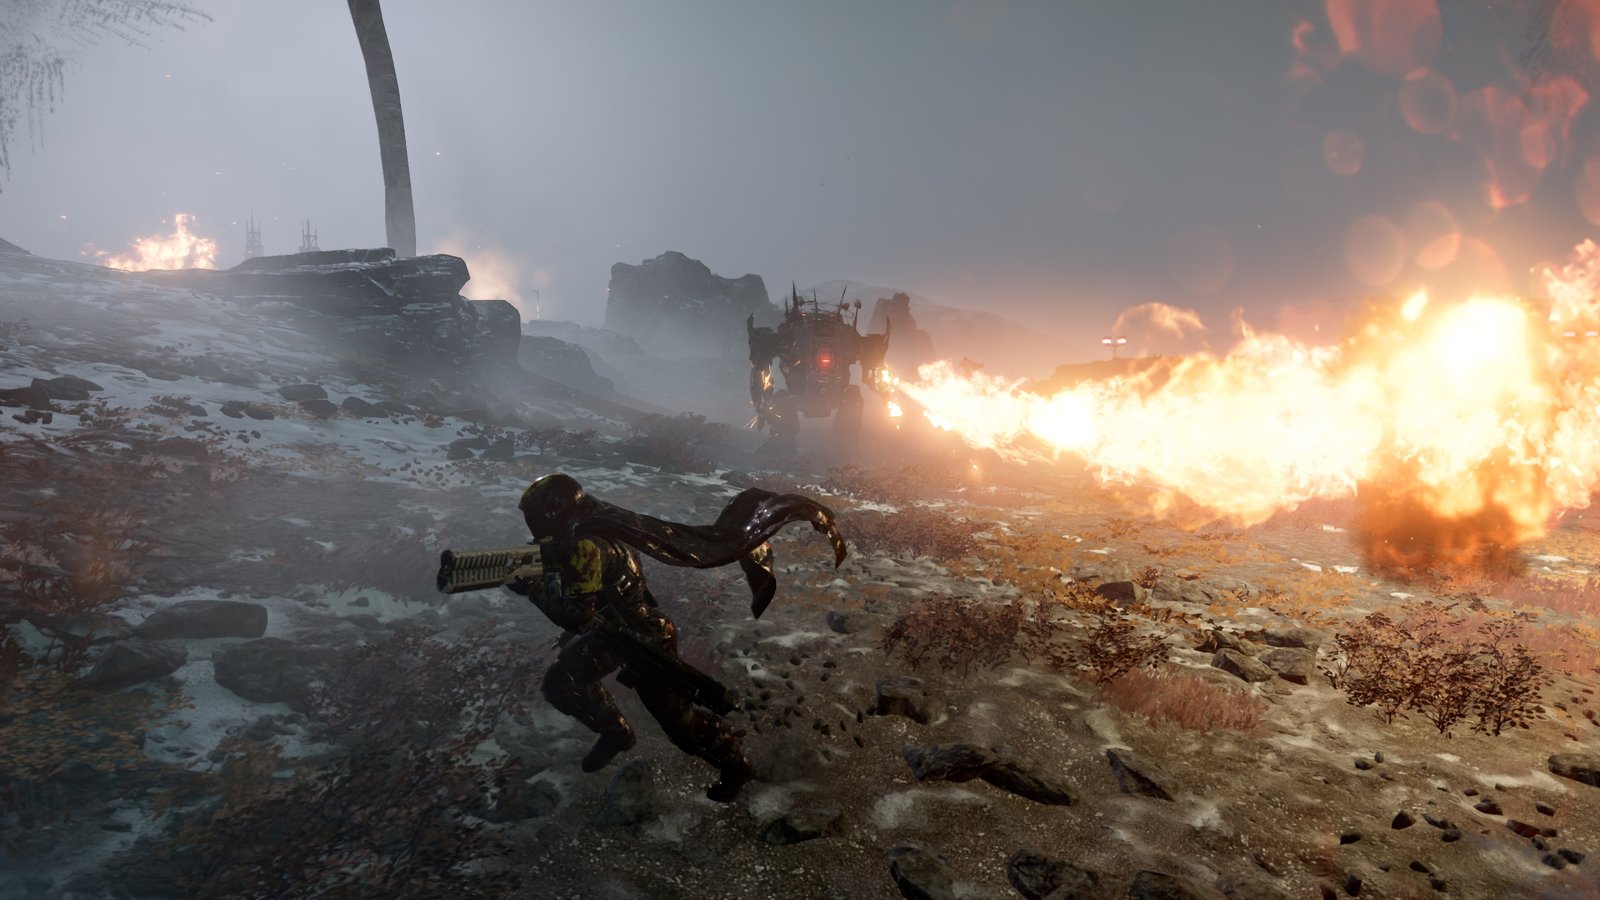
Every Hulk shares this anatomy: heavy armor all over except the heatsink on its back.
| Part | Armor | Health | Weak point | Source |
|---|---|---|---|---|
| Main (body pool) | 4 | 1,800 | main pool; EAT-17, LAS-99, GR-8 or FAF-14 Spear one-shots it | wiki |
| Head (eye slit) | 4 | 250 | fatal weak spot | wiki |
| Arms (2) | 4 | 500 | non-fatal; disarms (it then stomps) | wiki |
| Legs (2) | 4 | 500 | non-fatal; one cripples it, both kill it (+500 no-decay bleed) | wiki |
| Back heatsink | 1 | 900 | fatal weak spot from behind (downs it; 650 bleed at 50/s) | wiki |
4.2War Strider
One EAT-17, Quasar or Recoilless shot to the crotch, a hip joint or a leg kills it, and so does one Spear or Ultimatum anywhere. Without anti-tank, three AC-8 or APW-1 shots to an eye or a hip joint do it. The War Strider arrives at difficulty 6, taking a tank's place. It is slow, rarely chases and announces itself with a howl, but its twin fusion culverins penetrate vehicles (since 6.3.0) and it lobs ten-grenade salvos in a high arc over cover that ignore shield packs and the Shield Generator Relay. Strafe sideways to dodge its guns, always keep an exit from the grenade rain, and do not count on mines: it sets them off. One overcharged Railgun shot to an eye or two Missile Pistol shots to the torso also kill it, and the Eagle 500kg, Airstrike, a full 110mm Rocket Pods salvo, the Precision Strike and the Railcannon all do.
EAT-17 / LAS-99 / GR-8 (1 crotch, hip or leg); FAF-14 Spear or GP-20 (1); AC-8 or APW-1 (3 per eye or hip joint). Stratagems: Eagle 500kg Bomb; Eagle Airstrike; Eagle 110mm Rocket Pods; Orbital Railcannon Strike.
Since 6.2.2 the hip joints are its softest fatal parts; the eyes and the rear heatsink are heavy-armored weak spots:
| Part | Armor | Health | Weak point | Source |
|---|---|---|---|---|
| Main (body pool) | 4 | 3,500 | main pool | wiki |
| Torso | 4 | 3,300 | fatal | wiki |
| Eyes (2) | 4 | 500 | fatal weak spot | wiki |
| Fusion culverins (2) | 4 | 500 | non-fatal; disarms | wiki |
| Grenade launchers (2) | 4 | 400 | non-fatal; disarms | wiki |
| Crotch | 4 | 1,800 | fatal | wiki |
| Rear heatsink | 4 | 700 | fatal weak spot (from behind) | wiki |
| Hip joints (2) | 3 | 750 | fatal weak spot; lowest armor | wiki |
| Legs (2) | 4 | 1,500 | fatal | wiki |
| Greaves (2) | 5 | 150 | non-fatal; the only AV5 part | wiki |
4.3Factory Strider
Shoot out the chin guns first (AC-8, APW-1 or Laser Cannon), then put one Recoilless shot or two EAT-17 or Quasar shots into the eye. A Leveller or Solo Silo kills it wherever it hits. The Orbital Railcannon Strike, which one-shots a Vox Engine since 6.3.0, does not one-shot a Factory Strider; the Eagle 500kg Bomb and Precision Strike help, and orbital barrages soften it.
- What it does: a top cannon that turns all the way around and kills a diver with one shell, chin gatlings, crushing feet and a large death explosion. It drops four Devastators every 50 to 55 seconds approx (Jet Brigade Devastators on Jet Brigade planets), and it hears unusually well.
- Other ways in: breaking the head armor exposes the whole head to heavy-penetration fire; the belly panels die to sustained medium or heavy fire from underneath, which is dangerous with fresh Devastators around; each leg takes two Recoilless, EAT-17 or Quasar hits, one Bastion shell, or two or three anti-tank mines laid on its path.
- Use it: its cannon destroys Fabricators, Detector Towers and Jammers, so bait its fire into them. Shoot down its dropship before release and it dies with the ship.
- When it appears: from difficulty 4 as the target of Eliminate Automaton Factory Strider; in regular spawns from difficulty 6 by the wiki's Difficulty table, or 7 by its own page (6 on Cyborg Legion planets) sources disagree.
- Intercept Convoy (difficulty 7 and up): five Factory Striders cross the map, one carrying a Stratagem Scrambler, and convoy striders fire flares. On Cyborg Legion planets the convoy is five Vox Engines. Anti-tank mines on the route and the Solo Silo (one missile can kill two striders) are the classic answers.
EAT-411 Leveller or MS-11 Solo Silo (1); GR-8 (1 eye); EAT-17 / LAS-99 (2 eye); AC-8 or APW-1 on gatlings and belly. Stratagems: Eagle 500kg Bomb; Orbital Precision Strike; Orbital 380mm HE Barrage; MD-17 Anti-Tank Mines (convoys).
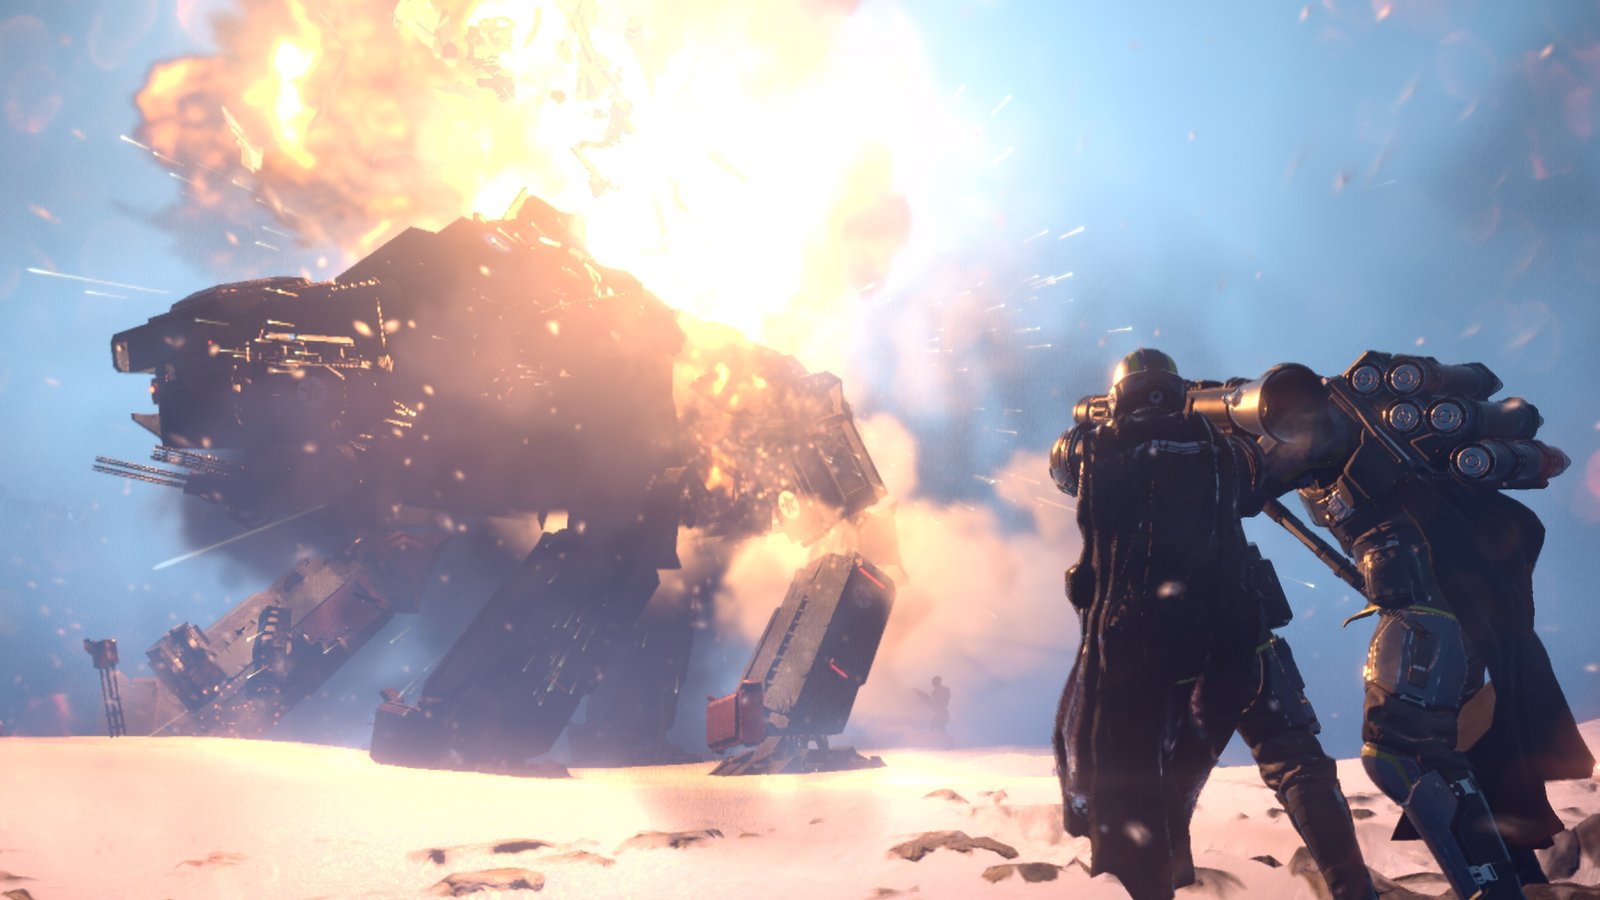
Armor plates must break before what is under them takes damage; the eye, the leg assemblies and the belly panels are the fatal weak spots:
| Part | Armor | Health | Weak point | Source |
|---|---|---|---|---|
| Main (body pool) | 4 | 10,000 | main pool | wiki |
| Head armor | 5 | 1,500 | breakable armor over the eye | wiki |
| Head (eye) | 4 | 2,500 | fatal weak spot | wiki |
| Neck armor | 5 | 1,500 | breakable armor | wiki |
| Neck | 4 | 2,500 | fatal | wiki |
| Chin gatling guns (2) | 3 | 300 | non-fatal; destroy first | wiki |
| Top cannon turret | 5 | 900 | non-fatal; disarms | wiki |
| Body armor plates (front, top, sides, rear) | 5 | 2,200 | breakable armor; 30% to Main | wiki |
| Front engine weak spot | 4 | 2,000 | non-fatal; 100% to Main | wiki |
| Rear engine weak spot | 3 | 1,500 | non-fatal; 100% to Main | wiki |
| Leg armor (8) | 5 | 1,500 | breakable armor | wiki |
| Knee armor (4) | 5 | 800 | breakable armor | wiki |
| Leg assemblies (4) | 4 | 1,500 | fatal (+2,000 no-decay bleed: 3,500 effective) | wiki |
| Belly panels (2) | 3 | 1,200 | fatal weak spot from underneath (+1,200 no-decay bleed) | wiki |
| Stratagem scrambler (one convoy strider) | 0 | 5,000 | non-fatal; jams stratagems | wiki |
4.4Tanks: Annihilator, Shredder and Barrager
One Recoilless shot to the turret, one Spear or one Thermite kills any tank. The EAT-17 and Quasar need two turret hits, or one close to the turret heatsink from the side. Without anti-tank, circle while it tracks a teammate and hit the turret heatsink with an AC-8 or R-36 Eruptor (about three shots each).
Patch 6.2.2 made every tank's hull and rear engine vents much tougher: "one Recoilless to the hull" and "medium penetration to the rear" are dead advice, and the rear vents now take full damage only from anti-tank weapons. Destroying the turret or the engine kills the tank, which explodes after a short delay and leaves a wreck you can use as cover; destroying a track immobilizes it. Tracks crush divers. For stratagems the wiki's first pick is the Eagle Airstrike; the 110mm Rocket Pods, Railcannon and Orbital Laser work, and the Eagle 500kg and Precision Strike need a direct hit.
Annihilator Tank
A fusion battle cannon that shows a red light about two seconds before it fires, plus a coaxial and a hull gun. Circle it while it tracks someone else; it cannot hit a diver standing on its turret.
Shredder Tank
Four heavy fusion cyclers on a fast turret that tracks divers standing right beside it, so do not try to climb it; kill it from range.
Barrager Tank
Three-rocket volleys, fired straight at you up close or as artillery that ignores cover at range. Its launch tubes face you front and back and are its weak spot, and an Eagle Strafing Run destroys them. Kill it early.
The Annihilator's hull and turret, which the Shredder shares (its turret sides are fully armored too): the turret heatsink is the soft way in, the rear vents the anti-tank one.
| Part | Armor | Health | Weak point | Source |
|---|---|---|---|---|
| Turret (turret pool) | 5 | 2,100 | fatal; destroying it destroys the tank | wiki |
| Turret front | 5 | Main | shares the turret pool; explosion-immune | wiki |
| Turret rear heatsink | 3 | 750 | fatal weak spot; 200% to the turret pool | wiki |
| Hull (hull pool) | 5 | 4,000 | main pool | wiki |
| Hull front and sides | 5 | Main | shares the hull pool; 35% explosive resistance | wiki |
| Rear engine vents | 4 | 1,500 | fatal weak spot; 150% to the hull pool | wiki |
| Tracks (2) | 3 | 750 | non-fatal; immobilizes | wiki |
The Barrager keeps the hull, but its launcher turret has soft tubes front and back. Ignore the old wiki line that two Eruptor rounds break a tube: the tubes gained health in 6.2.2, and a recount puts it at about six computed.
| Part | Armor | Health | Weak point | Source |
|---|---|---|---|---|
| Launcher turret (turret pool) | 5 | 2,100 | fatal | wiki |
| Launch tubes (front and back) | 3 | 1,500 | fatal weak spot; 150% to the turret pool | wiki |
| Hull (hull pool) | 5 | 4,000 | main pool | wiki |
| Hull front and sides | 5 | Main | shares the hull pool; 35% explosive resistance | wiki |
| Rear engine vents | 4 | 1,500 | fatal weak spot; 150% to the hull pool | wiki |
| Tracks (2) | 3 | 750 | non-fatal; immobilizes | wiki |
Air and bot drops
Stop the drop before it happens: kill flaring bots and Detector Towers. When a drop comes anyway, leave, or hit a dropship thruster with anti-tank so it crashes onto its own cargo. Against Gunships, focus one thruster, and end the Gunship Facility with a Hellbomb.
5.1Bot drops
A drop is called by a light bot's flare, by a Detector Tower that can see you, or by a convoy strider. Dropships come in from the same direction all mission (in cities they descend straight down), so once you know the direction you can pre-aim. A dropship carries 12 slots of bots: light bots, Devastators and Scout Striders take one each, a Hulk four, a War Strider eight, and a tank or Factory Strider the whole ship community-measured.
- Deny itKill the flaring bot during its draw animation; since 4.1.0 a basic Trooper needs a good look at you before it flares. A prone diver is invisible to a Detector Tower.
- Down itOne EAT-17, Quasar or Recoilless hit on a thruster (two Commando rockets) can crash the ship onto its own cargo. The Leveller, Spear, Solo Silo and the Bastion's main gun cleave through the fuselage and destroy the whole load, and a Factory Strider dies with its ship if the fuselage goes before release.
- Meet the cargoA GL-21 or another splash weapon kills bots while they hang under the ship; an Orbital EMS Strike freezes the drop, and an Orbital Airburst Strike, 120mm HE Barrage or Gatling Barrage on the landing zone catches them as they land.
- Or leaveBreak line of sight and move on before the new bots find you.
The dropship's thrusters carry anti-tank armor, and the ship falls when one goes:
| Part | Armor | Health | Weak point | Source |
|---|---|---|---|---|
| Main (hull pool) | 5 | 3,500 | main pool | wiki |
| Fuselage | 5 | Main | fatal | wiki |
| Thrusters (4) | 5 | 1,500 | downs it (it may crash onto its cargo) | wiki |
5.2Gunships
Focus one thruster: two AC-8 Autocannon or APW-1 shots, two R-36 Eruptor rounds or two charged PLAS-101 Purifier shots bring a Gunship down, and any anti-tank hit anywhere kills it. The W.A.S.P. Launcher and the Spear lock on. The MG-206 needs about eight rounds per thruster and the R-63CS about nine computed.
Gunships hover at range, strafe around your cover and fire a heavy fusion cycler (it penetrates vehicles since 6.3.0) and rocket salvos that ragdoll you; when one crashes, the wreck crushes and its fuel blast kills. They come two ways. From difficulty 6 a Gunship Facility launches up to two every 60 seconds, four alive per tower, once a diver within about 150 m has been spotted, and only a Hellbomb destroys the tower (towers and facilities). From difficulty 5 an operation can also roll the Gunship Patrols modifier (operations carry one from difficulty 5, two from difficulty 8), which sends groups of two to four; alerting one alerts the group. The E/MG-101 HMG Emplacement shreds them, and an active SEAF SAM Site shoots them down.
one thruster: AC-8 2; APW-1 2; R-36 Eruptor 2; MG-206 8; any anti-tank 1; W.A.S.P. or Spear lock on. Stratagems: E/MG-101 HMG Emplacement; SEAF SAM Site; Hellbomb the Gunship Facility.
All four thrusters are fatal weak spots with far less health than the hull:
The Cyborg Legion
Kill Agitators first: their death stuns every bot they command. Watch for Radical smoke, which marks where a Radical is about to sprint from. From difficulty 7, bring a dedicated Vox Engine answer: an Orbital Railcannon Strike, a Leveller or Solo Silo, Spears on its cannons, or three broken vents and a grenade in the hatch.
The Cyborg Legion (Radical, Agitator and Vox Engine) arrived with Machinery of Oppression on 2026-02-10; Arrowhead's reveal describes Cyborgs as augmented soldiers built in the Megafactories of Cyberstan. They spawn only on planets that show the Cyborg Legion icon: Radicals and Agitators on every difficulty in place of Scout Striders, and Vox Engines from difficulty 7 in place of Factory Striders (which spawn there from difficulty 6). Unlike other bots, Cyborgs attack the moment they detect you, with no scanning pause. The wiki lists Radicals and Agitators from difficulty 1; the Fandom wiki says 4 and up sources disagree.
6.1Agitator
Kill it first: its death stuns every bot under its command for a few seconds. An Agitator commands the Troopers and other light bots, Berserkers and Devastators around it; their eyes glow orange-yellow and they move faster, which makes Heavy Devastators and Berserkers far more dangerous. It hangs back behind them, uses cover and sidesteps, fires a plasma charger in short volleys or an overcharged explosive shot, and throws grenades at your last position. Break its helmet (two or three R-63 Diligence shots) and one more head shot finishes it. Explosive weapons such as the SG-8P Punisher Plasma and PLAS-101 Purifier hit several of its parts at once, and one GP-31 Grenade Pistol impact or one overcharged Railgun shot to a leg kills it.
kill first; helmet then head: R-63 Diligence (2-3 + 1); SG-8P Punisher Plasma; PLAS-101 Purifier; GP-31 (1 impact). Stratagems: Eagle Cluster Bomb; Orbital Airburst Strike; A/G-16 Gatling Sentry.
The helmet and the chest plate are breakable armor over softer parts:
| Part | Armor | Health | Weak point | Source |
|---|---|---|---|---|
| Main (body pool) | 1 | 750 | main pool | wiki |
| Helmet | 2 | 200 | breakable armor over the head | wiki |
| Head | 1 | 150 | fatal weak spot (after the helmet) | wiki |
| Torso armor | 2 | 300 | breakable armor | wiki |
| Torso | 2 | 1,200 | fatal | wiki |
| Pauldrons (2) | 2 | 200 | non-fatal | wiki |
| Upper arms (2) | 1 | 300 | non-fatal | wiki |
| Forearms (2) | 2 | 300 | non-fatal | wiki |
| Pelvis and left leg | 2 | 1,400 | fatal | wiki |
| Right leg | 2 | 1,400 | fatal | wiki |
6.2Radical
Watch for its smoke, then take the head: one shot from an R-63 Diligence, JAR-5 Dominator or APW-1 kills it. A Radical yells, throws a smoke grenade between you and it (and again about every 30 seconds), then sprints in as fast as a sprinting diver. Up close it fires a plasma scattergun and fights with kicks and strikes that ragdoll you unless you wear Rock Solid armor, and it executes downed divers. Its smoke also blinds your sentries, and its kicks break Shield Generator Relays. Explosive weapons (PLAS-101 Purifier, SG-8P Punisher Plasma, GL-21 Grenade Launcher) hit several parts at once, stagger interrupts the kicks, and a dive to the side as it commits to a melee attack makes it miss.
head (AV1): R-63 Diligence, JAR-5 Dominator, APW-1 1 shot; explosives (PLAS-101 Purifier, SG-8P, GL-21); stagger. Stratagems: Eagle Cluster Bomb; Orbital Airburst Strike; A/G-16 Gatling Sentry.
Only the head is soft; the chest and legs carry big health pools behind light armor:
| Part | Armor | Health | Weak point | Source |
|---|---|---|---|---|
| Main (body pool) | 1 | 750 | main pool | wiki |
| Head | 1 | 150 | fatal weak spot | wiki |
| Torso (glowing chest) | 2 | 1,200 | fatal | wiki |
| Pauldron | 2 | 200 | non-fatal | wiki |
| Upper arms (2) | 1 | 300 | non-fatal | wiki |
| Forearms (2) | 2 | 300 | non-fatal | wiki |
| Pelvis and left leg | 2 | 1,400 | fatal | wiki |
| Right leg | 2 | 1,400 | fatal | wiki |
6.3Vox Engine
One Orbital Railcannon Strike kills it (since 6.3.0; a hit on a speaker can waste the shot), and so does one Leveller or Solo Silo on the body. Two Spears kill it, one per cannon. With no heavy answer, break three of its six vents and throw any grenade into the hatch that opens.
- Threat: two plasma macro-culverins (they can fire straight down at divers underneath and wreck structures), side miniguns guarding its flanks, 16-missile salvos whose impact points glow on the ground, a reactor blast on death and a falling sarcophagus. It blares propaganda as it comes, your early warning, and sounds an alarm when it spots you. It appears from difficulty 7, and no more than three are alive at once.
- The vent trick: three vents sit high on the rear torso, three low on the rear chassis and underneath. Any gun breaks them, and each broken vent also hurts the main pool. After three, a hatch opens: any thrown grenade inside destroys the Engine (throwing knives, autocannon shells and grenade-launcher rounds do not count). Kill the side miniguns first so you can approach from the flank.
- The cannons: destroying both kills it. Per cannon: one Spear or Bastion shell, two EAT-17, Quasar or Recoilless hits, three Anti-Tank Emplacement shells or Patriot exosuit rockets, or four Commando rockets. That is four EAT or Quasar hits in all, or three Recoilless shots to the front.
- Other heavy damage: two or three C4 charges, two Thermites or two Ultimatum shots under the chassis; two Eagle Strafing Runs; the Orbital Laser.
- Stale guides: Windows Central's February 11, 2026 guide quotes pre-6.3.0 health and says the Railcannon does not one-shot it; both are out of date.
3 vents then a throwable in the hatch; FAF-14 Spear 1 per cannon (2 kill); EAT-411 or MS-11 1; GR-8 3 body; C4 2-3. Stratagems: Orbital Railcannon Strike (1); Orbital Laser; Eagle Strafing Run (2 uses); E/AT-12 Anti-Tank Emplacement.
Most of its bulk is anti-tank armor over huge pools; the vents, the cannons and the hatches are the ways in:
| Part | Armor | Health | Weak point | Source |
|---|---|---|---|---|
| Main (body pool) | 5 | 9,000 | main pool (a 50,000 bleed pool drains at 10,000/s after it empties) | wiki |
| Sarcophagus (pilot pod) | 5 | 7,000 | non-fatal (Arrowhead: intended) | wiki |
| Torso | 5 | 9,000 | non-fatal; 100% to Main | wiki |
| Macro-culverin cannons (2) | 4 | 3,500 | destroying both kills it; each adds 2,000 to Main | wiki |
| Missile launchers (2) | 3 | 1,200 | non-fatal; ends the missile salvos | wiki |
| Side miniguns (2) | 3 | 300 | non-fatal; destroy first to flank | wiki |
| Speakers (2) | 3 | 800 | non-fatal | wiki |
| Fog lights (2) | 1 | 50 | non-fatal | wiki |
| Torso flaps (2) | 3 | 500 | non-fatal; 100% to Main | wiki |
| Vents (6: 3 upper rear, 3 lower) | 1 | 300 | weak spot; each destroyed adds 700 to Main; 3 open a hatch | wiki |
| Hatches (2) | 0 | -- | fatal: any throwable inside (not knives) destroys it | wiki |
| Undercarriage | 5 | 9,000 | non-fatal; 100% to Main | wiki |
| Trackpod latches (4) | 3 | 2,000 | non-fatal; 50% to Main | wiki |
| Tracks (4) | 4 | 3,000 | non-fatal; 60% to Main | wiki |
Subfactions
Check the planet's subfaction icon before you drop and change one or two slots: explosive primaries against the Jet Brigade, fire resistance against the Incineration Corps, precision and a Vox Engine answer against the Cyborg Legion.
Besides the standard roster the bots field the Jet Brigade, Incineration Corps and Cyborg Legion. Which planets carry which icon shifts with the war (the fronts), and the Loadouts tab has dated builds for each subfaction.
7.1Jet Brigade
Kill them at range with explosive primaries that pop jump packs (PLAS-101 Purifier, SG-8P Punisher Plasma, R-36 Eruptor), and dive backward when they close. On Jet Brigade planets, Troopers, Commissars, MG Raiders, Devastators, Hulk Bruisers and Scorchers wear jump packs (some of them below difficulty 4, all of them from 4), and Assault Raiders become Jet Brigade Commissars. They leap into close range when you are far away and jump again to re-engage. A pack explodes when destroyed, and the blast chains through a group or a whole dropship load; damage that reaches a pack through the chest can set it off even after the bot dies. They also leap out of Eagle and orbital strikes, so stun or pin them before you call one in.
- Jet Brigade Trooper, MG Raider and Commissar (and the Assault Raider): the light frame plus a jump pack that is a fatal weak spot. Shoot the pack at range.
- Jet Brigade Devastator: fires six bursts, cools for a few seconds, then jump-packs across open ground. Shoot the pack at range: it explodes and burns, though the Devastator itself can survive it.
- Jet Brigade Hulks (Bruiser and Scorcher): a heavy jump pack replaces the heatsink and shows over the shoulders from the front. Destroying it kills the Hulk in a big fiery blast, and explosive fire works on it, so weapons that cannot hurt a normal Hulk can kill these: the minimum penetration drops to 3.
The jump pack is the Jet Brigade Hulk's new weak spot, and it is lighter armor than the rest of the body:
| Part | Armor | Health | Weak point | Source |
|---|---|---|---|---|
| Main (body pool) | 4 | 1,800 | main pool; EAT-17, LAS-99, GR-8 or FAF-14 Spear one-shots it | wiki |
| Head (eye slit) | 4 | 250 | fatal weak spot | wiki |
| Arms (2) | 4 | 500 | non-fatal; disarms (it then stomps) | wiki |
| Legs (2) | 4 | 500 | non-fatal; one cripples it, both kill it (+500 no-decay bleed) | wiki |
| Heavy jump pack (covers the heatsink) | 3 | 750 | fatal weak spot; explodes (500 blast + fire) | wiki |
7.2Incineration Corps
Wear fire resistance and kill at range; dive or go prone the moment you catch fire. Inflammable armor (75% fire damage resistance) or Acclimated beats Fortified here, and the Integrated Extinguishers booster puts a burning diver out sooner. The Corps brings no Berserkers, Rocket Raiders or Assault Raiders, but it sends fire at you from every direction, and its light bots throw incendiary grenades.
Pyro Trooper
A portable flamer in short bursts, plus white-phosphorus grenades. Its fuel tank stands above its head: shoot it from more than 4 m away and it explodes in a fiery blast.
Incendiary Rocket Raider
A fusion bolt every few seconds that trips you (it penetrates vehicles since 6.3.0), and incendiary grenades. Priority target: suppress it and take the head. Its own page says it appears from difficulty 1, the subfaction page says 4 sources disagree.
Conflagration Devastator
Replaces the Heavy Devastator: a shielded Devastator with an incendiary scattergun. Stay out of close range, shoot over the shield and use explosives. It has no backpack to flank.
Incendiary MG Devastator
Another shielded Devastator, with an incendiary fusion gun firing eight-round bursts; fight it like a Heavy Devastator. The wiki's change history says its shield became breakable like the Heavy Devastator's, but its anatomy table still lists it as unbreakable flagged.
The Hulk Firebomber replaces the Bruiser from difficulty 4: it lobs two white-phosphorus shells over cover, pauses, and switches to a flamethrower inside about 25 m. Keep moving and kill it like any other Hulk.
Since 6.1.0, small and medium bots panic and attack at random while they are being flamed, but only flamethrower-type weapons and the Meltagun cause it; a burn from incendiary grenades or rounds is not documented to. The bot loadout checklist also notes that small bots take only half damage from fire, so on this front prefer explosives and medium penetration.
The Pyro Trooper's fuel tank is the fatal weak spot to shoot from range:
| Part | Armor | Health | Weak point | Source |
|---|---|---|---|---|
| Main (body pool) | 0 | 125 | main pool | wiki |
| Head | 0 | 40 | fatal weak spot | wiki |
| Torso | 0 | 100 | fatal | wiki |
| Arms (2) | 0 | 65 | non-fatal | wiki |
| Legs (2) | 0 | 90 | fatal | wiki |
| Fuel tank (200-HP shell over a 10-HP core) | 2 | 200 | fatal weak spot; explodes (400 blast + fire) | wiki |
7.3Cyborg Legion
Bring precision (the R-63 Diligence or JAR-5 Dominator) and explosives for Agitators and Radicals, plus a dedicated Vox Engine answer from difficulty 7. The Legion replaces Scout Striders with Radicals and Agitators on every difficulty, and Factory Striders with Vox Engines from difficulty 7; its units have their own chapter, The Cyborg Legion. Its home ground, the Megafactory cities, bristles with Anti-Air Emplacements that ground your Eagles, so plan on orbitals there (Windows Central's February 2026 guide advised the same). Rock Solid armor keeps Radical kicks from ragdolling you.
Fabricators and structures
A grenade through a Fabricator's vent ends it. Clear outposts on your way for samples and Requisition, take out Detector Towers and Anti-Air sites before they shape the fight, and remember that only a Hellbomb destroys a Gunship Facility.
8.1Outposts and Fabricators
An outpost's Fabricators keep building bots until they die. Small outposts hold one Fabricator, medium outposts one to three, heavy outposts three or four, and a Fortress six. Clearing a small, medium, heavy or Fortress outpost pays 50, 100, 150 and 200 Requisition with 5, 10, 20 and 40 XP respectively; a Fortress adds Confidential Data, and every outpost holds samples. Outposts are guarded by machine-gun emplacements, turrets, barbed wire and, commonly from difficulty 7, contact mines. There are three ways to kill a Fabricator:
- An explosive into a ventAny explosive with demolition 20 or more delivered inside a vent or through the open door: a thrown grenade, a GL-21 grenade, an R-36 Eruptor round, or an AC-8 shell through the hatch. Small-arms fire into a vent does nothing; it has to be an explosive.
- Anti-tank on the shellOne EAT-17, Quasar, Recoilless or Spear hit, two Commando rockets, or an Eagle Strafing Run or Airstrike. Aim at the upper structure: low walls soak up blasts.
- Demolition on the shellA GP-20 Ultimatum direct hit or TED-63 Dynamite, a Hellpod landing on it, or a shot you bait from a Cannon Turret, Annihilator, Factory Strider or Reinforced Scout Strider.
Stand clear when it goes: a Fabricator explodes violently (a diver still inside a Hellpod is safe). The ordinary Fabricator builds light bots, never Commissars:
| Part | Armor | Health | Weak point | Source |
|---|---|---|---|---|
| Shell | 5 | 1,500 | destroyed by damage (AV5) or demolition 40 | wiki |
| Vents | -- | -- | weak spot: an explosive with demolition 20+ inside destroys it | wiki |
The Bulk Fabricator in city and Megafactory outposts builds Devastators, Berserkers, Scout Striders, Hulks, tanks and War Striders. The vent rule is the same (one Eruptor round into a vent does it), and its shell takes one Spear, two EAT-17, Quasar or Recoilless hits, or four Commando rockets. The health below is the in-game record; the patch notes that introduced it gave a higher figure.
| Part | Armor | Health | Weak point | Source |
|---|---|---|---|---|
| Shell | 5 | 4,000 | destroyed by damage (AV5) or demolition 50 | wiki |
| Vents (2, on top) | -- | -- | weak spot: an explosive with demolition 20+ inside destroys it | wiki |
Which of your weapons close spawners, on every front: special jobs on the Weapons tab.
8.2Turrets and emplacements
Hit turrets from behind: every one has a softer rear heatsink or vent. Or run the Compromise Automaton Defenses objective (difficulty 4 and up, since 6.0.1): uploading its virus makes every Cannon Turret, Bunker Turret, Mortar and Anti-Air Emplacement on the map malfunction, though they still count as targets.
Cannon Turret
The Annihilator's cannon on a tower, with a red flash about a second before it fires and a very long reach. Stand at the foot of a tall tower (the barrel cannot point down that far) or hit the rear heatsink. Kill it with: rear heatsink (AV3): AC-8 3, R-36 Eruptor 3, anti-tank 1; hug the base of a tall tower.
Bunker Turret
A fusion gun in two-shot bursts out to about 150 m, and tiny on radar. The Spear cannot lock on to it; a Railgun works at 80% charge. Kill it with: AP4: AC-8, APW-1, LAS-98 Laser Cannon; anti-tank 1; G-123 Thermite; rear vent with AP3.
Anti-Air Emplacement
Grounds every Eagle within 150 m: an Eagle flown into its coverage gets shot, and every Eagle goes on cooldown (since 7.1.0 it no longer blocks the rearm). Use orbitals or a Hellbomb, not Eagles. Kill it with: AP4: AC-8, APW-1, LAS-98; anti-tank 1; FAF-14 Spear locks on; G-123 Thermite; rear vent with AP3.
Mortar Emplacement
Shells any diver another bot has spotted, 50 to 150 m out; Mission Control warns that you are in range of enemy artillery. Kill it with: AP4: AC-8, APW-1, LAS-98; anti-tank 1; G-123 Thermite; rear vent with AP3; anti-tank mines, orbitals and a Hellbomb work too.
Machine-gun emplacements are manned by a Trooper behind a gun shield: head-shoot the gunner or use explosives, and man the empty gun yourself if you like. The Cannon Turret's anatomy shows the pattern every bot turret follows, an armored front and a soft rear:
| Part | Armor | Health | Weak point | Source |
|---|---|---|---|---|
| Turret pool | 5 | 2,100 | main pool | wiki |
| Front | 5 | Main | explosion-immune | wiki |
| Rear heatsink | 3 | 750 | fatal weak spot; 200% to Main | wiki |
8.3Detector Towers, Jammers and Gunship Facilities
These three ignore armor and fall only to demolition force, so bring the right tool before you engage.
Detector Tower
A red vision cone 150 m long; while it sees a diver it calls bot drops onto your last known position. Prone divers are invisible to it, and it cannot see straight down. Destroy it with the objective Hellbomb (not offered inside Fortresses), an Eagle 500kg Bomb, an Orbital Precision Strike, SEAF artillery, or a Cannon Turret shot you bait into it.
Stratagem Jammer
No stratagems within 150 m except SEAF artillery. Disable it at its terminal, then use a Hellbomb or any stratagem with demolition 50; a Portable Hellbomb or SEAF artillery works without disabling it.
Gunship Facility
Launches Gunships while a diver is near. Only demolition 60 destroys it: a NUX-223 Hellbomb, a B-100 Portable Hellbomb or a SEAF artillery mini-nuke within about 17 m. Eagles and orbitals do nothing to it.
8.4Mission targets and hazards
- Command Bunker (Destroy Command Bunkers, from difficulty 5): its casemates and turrets fire from long range unprovoked. The mission Hellbomb does the job; so do EAT-411, FAF-14 Spear, MS-11 or Bastion (1); EAT-17 / LAS-99 / GR-8 / GP-20 (2); C4 or Thermite (2). Aim at the bunker, not its walls.
- Megafactory gates wall off districts of the factory cities: G-48 Giga Grenade (demolition 40); explosives and anti-tank; or use a culvert or broken wall. Guns whose standard damage exceeds their durable damage (the APW-1, the AC-8) cannot hurt them, and bots open the gates as they approach.
- Contact mines (common from difficulty 7) kill most divers outright; Fortified or Democracy Protects may save you. Shoot them from range (beam weapons such as the LAS-5 Scythe clear a minefield) and ping them for the squad.
- Enemy Bio-Processors (Sabotage Orgo-Plasma Synthesis, Blitz: Destroy Bio-Processors): any weapon (AV1, 5,000 HP); one B/MD C4 charge, EAT-411 Leveller or GP-20 Ultimatum shot, TED-63 Dynamite or G-48 Giga Grenade (demolition 40); two G-123 Thermite thrown close.
- Transmission Tower (Destroy Transmission Network): any weapon on the plates; CB-9 Exploding Crossbow, R-36 Eruptor or AC-8 Autocannon hit several at once; LAS-99 Quasar Cannon brings the tower down.
- Supply bases (Sabotage Supply Bases): ammunition stockpiles take AP3+ or explosives (50 HP, AV3, 100% durable), from a distance, and they chain-explode, so keep your distance. Fuel silos need demolition 60: NUX-223 Hellbomb, B-100 Portable Hellbomb or SEAF Artillery Mini-Nuke.
- Parked dropships (Sabotage Air Base): any anti-tank weapon (1 shot), e.g. LAS-99 Quasar Cannon; GP-20 Ultimatum 1; G-123 Thermite or G-48 Giga Grenade 1; P-33 Missile Pistol 2; TM-1 Lure Mine 2; PLAS-45 Epoch 2 charged; RS-422 Railgun 3-4.
- Terrorist Memorials (Erase Terrorist Memorials, a Megafactory objective): AC-8 Autocannon (APHET) or most grenades, e.g. G-12 High Explosive (demolition 30).
- Cyborg production (Halt Cyborg Production, Megafactory maps from difficulty 4): the cooling tower needs a Hellbomb or another heavy-demolition strike, and the Cyborg Assembly Unit dies only through the objective (flood it with hydrogen from the terminal), with a huge blast 30 seconds later.
Every structure's armor, health and minimum penetration is in the ladder, and each mission is on the Missions tab. Structure explosions and the Vox Engine's and Factory Strider's cannons do demolition for you.
Playbook
Fight from cover, kill what knocks you down first, and bring one more anti-tank answer than you think you need. The rules below hold at every difficulty; the bands after them say what each step up adds and what to carry for it.
9.1Ten rules
- Break line of sightBots win at range and cannot shoot through walls or smoke. Move cover to cover, and bring smoke (Orbital or Eagle Smoke Strike, G-3 Smoke) to cross open ground.
- Kill the flare-callers firstTroopers, Commissars, Raiders, Brawlers, Pyro Troopers and Marauders call drops; interrupt the flare and the drop never comes. Sneaking? Leave patrols alone: killing one alerts the whole patrol, and crawling past is often better.
- Shoot to suppressFiring at light bots and Devastators makes them flinch. Cover a reloading or stimming teammate by shooting at whatever is shooting at them.
- Shoot in priority orderWhatever knocks you down or kills in one hit, then force multipliers, then closers, then everything else (the list).
- Aim for the weak spotsDevastator and Berserker heads and stomachs, the Hulk's eye slit or back heatsink, tank turret heatsinks, Gunship thrusters, War Strider hips and eyes, the Factory Strider's eye and belly, Vox Engine vents.
- Carry the right penetrationEveryone: a medium-penetration or explosive primary. From difficulty 4: a heavy-penetration support weapon or an anti-tank weapon on every diver. From difficulty 6: two or more anti-tank answers in the squad. This is our recommendation, read from the armor tables and the difficulty milestones.
- Respect explosivesWear Fortified, and dive the moment a Reinforced Scout Strider stops to fire or a rocket volley comes in.
- Deny the dropsAnti-tank to a dropship thruster, the Leveller, Spear, Solo Silo or Bastion through the fuselage, or explosives pre-aimed where the cargo lands.
- Close the factoriesA grenade into a Fabricator vent ends its spawns, and clearing outposts pays Requisition. Stand clear of the blast.
- Skip what you do not needTanks, Factory Striders and Cannon Turrets can be bypassed, Compromise Automaton Defenses switches off the map's turrets, and a prone diver is invisible to a Detector Tower.
Bots spot a standing diver about 10 m later at night community-measured, and since 5.0.2 a suppressed weapon is about half as loud, so night drops and suppressors both help a stealth approach.
9.2What each difficulty adds
Each band lists what first shows up in regular spawns, from the wiki's Difficulty table (a unit's "From difficulty" in the ladder can be lower when a special mission brings it early), and what to carry for it.
Learn the bots
New: Troopers, Brawlers, Commissars and dropships from 1; Raiders, Devastators, Berserkers and the first outposts from 2; Scout Striders, Cannon Turrets and the first (rare) tanks from 3. Bring: the Orbital Precision Strike and MG-43 Machine Gun you start with, the EAT-17 from level 3 for the odd tank, and an Eagle Airstrike for Devastator lines and Fabricators. The R-63 Diligence (Helldivers Mobilize! p2, 8 Medals) one-shots Devastator heads, and the FS-05 Marksman heavy armor gives you Fortified for 6 Medals. Play: practice head shots, flare interrupts and grenades into vents.
Heavies arrive
New: Hulk Bruisers and Scorchers, Heavy and Rocket Devastators and regular tanks from 4, with Anti-Air, Mortar, Jammer and Detector Tower objectives; Marauders, Gunships (through an operation modifier), Bunker Turrets and Command Bunker missions from 5. Bring: an anti-tank or heavy-penetration weapon on every diver (the Recoilless Rifle from level 5, the EAT-17, or the Quasar Cannon from level 18), Fortified heavy armor, and the Orbital Precision Strike or Eagle 500kg Bomb for Hulks and tanks. Play: kill Rocket Devastators first, and flank Hulks.
Striders and the Legion
New: War Striders, regular Factory Striders and Gunship Facilities from 6; Barrager Tanks, Vox Engines on Cyborg planets, Intercept Convoy, and points of interest guarded by Cannon Turrets and mines from 7. Bring: two or more reusable anti-tank weapons in the squad, an AC-8 Autocannon (level 10) or a Spear for Gunships and Anti-Air sites, a Shield Generator Pack or Relay against the gunfire, and on Cyborg planets the Orbital Railcannon Strike (level 20). Play: plan a Hellbomb for every Gunship Facility, and watch for mines.
Everything, harder
New: Reinforced Scout Striders from 8. No new units after that, but 6.0.1 raised the intensity from difficulty 9 on every front, most of all against bots, and big bot groups re-aim more often. Operations carry more modifiers (one from difficulty 5, two from difficulty 8). Bring: everything above; the dated builds for these difficulties are on the Loadouts tab. Play: dive when a Reinforced Scout Strider vents, pick fewer fights, and stay together.
9.3Squad roles for your first bot squads
Anti-tank carrier
Recoilless Rifle, EAT-17 or Quasar Cannon, Commando, Spear or Leveller. Calls out Hulks, tanks, War and Factory Striders and Vox Engines, and takes them.
Line holder
An AC-8 Autocannon, APW-1 Anti-Materiel Rifle or MG-206 Heavy Machine Gun for Devastators, Scout Striders, Gunships and turret vents. The Autocannon also closes Fabricators.
Support
Shield Generator Relay, EMS, smoke and sentries; revives teammates and covers their reloads.
Ping heavies and turrets the moment you see them: the bot front punishes surprises. Stay within reach of each other; 7.1.0 balances spawns when a squad splits, but a diver on their own has no one to cover a reload. More on squad roles and squad compositions.
9.4Drills for when it goes wrong
A dropship is inbound
Get to cover that faces the drop. The anti-tank carrier hits a thruster; everyone else splashes the cargo as it hangs, then kills Rocket Devastators and Rocket Raiders first. If the fight is not worth it, leave before the bots find you.
A Hulk is closing
Anti-tank to the body, or heavy penetration to the eye slit. No launcher? Cripple a leg, then circle to the heatsink while a teammate holds its attention. Against a Scorcher, never run in a straight line, and dive to put out flames.
A tank rolls up
Recoilless or Thermite to the turret, or two EAT or Quasar hits. Without anti-tank, flank it while it tracks someone else and hit the turret heatsink. An Annihilator cannot hit a diver standing on its turret; a Shredder's turret tracks divers right beside it.
Gunships overhead
Get under cover, then focus one thruster per Gunship with an Autocannon, Anti-Materiel Rifle or Eruptor, or lock on with a Spear or W.A.S.P. If a Facility keeps launching them, the fix is a Hellbomb on the tower.
What to bring and buy
Bring one stratagem for heavies, one for crowds and drops, and one that shields you from gunfire. Buy the explosive primary, the anti-tank grenade and the Fortified armor first.
10.1Stratagems by job
Hulks, tanks, striders, Vox Engines
Orbital Railcannon Strike: one-shots tanks, Hulks, War Striders and Vox Engines, and only softens a Factory Strider. Eagle 500kg Bomb: Hulks and War Striders (tanks only on a direct hit). Eagle Airstrike: the wiki's first pick against tanks. Eagle 110mm Rocket Pods: lock onto the biggest target in range. Orbital Precision Strike: a direct hit kills Hulks and tanks, with a cooldown of only 80 seconds. Orbital Laser: anything, 3 per mission.
Infantry, Berserker packs, fresh drops
Eagle Cluster Bomb: light bots, Berserker packs and Devastators in the open. Orbital Airburst Strike and 120mm HE Barrage: groups and fresh drops. Orbital Gatling Barrage: Devastators, Scout Striders and infantry. Eagle Strafing Run: Devastator lines and Scout Striders; two runs kill a Vox Engine. Orbital EMS Strike: freezes a drop, a Hulk or a Berserker pack for your follow-up.
Outposts and objectives
Orbital 380mm HE Barrage and Walking Barrage: whole outposts and Fortresses. Eagle 500kg Bomb and Orbital Precision Strike: Detector Towers, disabled Jammers and Fabricators. Hellbombs: the only answer to a Gunship Facility. Anti-Air sites ground your Eagles within 150 m, so bring at least one orbital.
Cover you can call in
FX-12 Shield Generator Relay: a dome to shoot from (not against War Strider grenades, and Radical kicks break it). Orbital or Eagle Smoke Strike: cross open ground under Devastator and turret fire. Rocket and Autocannon Sentries: Hulks, striders and Devastators. E/MG-101 HMG Emplacement: Gunships and Devastators. E/AT-12 Anti-Tank Emplacement and MD-17 Anti-Tank Mines: Factory Striders and convoys (War Striders set mines off).
Every stratagem's code, cooldown and unlock level is on the Stratagems tab.
10.2The bot loadout checklist
These are the bot-front rules the coverage check tests, each with its source: an answer for every heavy at your difficulty, an anti-air answer from difficulty 5, a Hellbomb plan for Gunship Facilities from 6, a Vox Engine answer on Cyborg planets from 7, and fire only as a last resort. The rules that hold on every front (spawners, crowds, one backpack, 4 different boosters) are on the same tab.
| Check | From difficulty | Rule | Source |
|---|---|---|---|
| crowds | 1 | Bot drops and Berserker packs need a crowd tool that is not fire alone: explosives, Medium-penetration volume or stun (small bots take half fire damage). | wiki |
| front-note | 1 | Fire is weak against bots: small bots take half fire damage and robots ignite slowly, so favor explosives and Medium penetration. | wiki |
| front-note | 1 | Bots kill with rockets and cannons: Fortified or a Concussive Padding passive (explosive damage -50%), heavy armor and a shield pack or smoke are the defaults. | wiki |
| front-note | 1 | Incineration Corps: fire replaces rockets as the main threat, so Inflammable (75% fire resistance) or Acclimated beats Fortified, and Integrated Extinguishers puts a burning diver out faster. | wiki |
| front-note | 1 | Jet Brigade: explosive primaries pop jump packs at range, and jump-packing units leap out of strikes, so stun or pin them first. | wiki |
| front-note | 1 | Cyborg Legion: Radical kicks ragdoll you unless you wear Rock Solid, and Agitators buff their squad, so kill them first with precision or explosives. | wiki |
| front-note | 2 | Devastator torsos are AV3: carry an AP3 or explosive primary, or aim for their AV1 heads. | wiki |
| front-note | 5 | From D5 Gunships (400-HP AV3 thrusters) need an anti-air answer: an AC-8 or AMR (two shots per thruster), a Spear or W.A.S.P. lock-on, or any anti-tank hit. | wiki |
| heavies | 1 | Every Automaton heavy at this difficulty (tanks from D3, Hulks from D4, War and Factory Striders from D6-7, Vox Engines on Cyborg planets from D7) needs an answer: a Recoilless, EAT, Quasar or Spear, Thermite, an AP4 hit on a Hulk eye, or a heavy-killing strike. | wiki |
| heavies | 7 | Cyborg Legion from D7: bring a Vox Engine answer (9,000 HP): the Railcannon one-shots it, a Leveller or Solo Silo body hit kills it, a Spear kills a cannon, or break three vents and throw a grenade in; EAT and Quasar need four hits. | wiki |
| mix | 4 | Anti-air emplacements (from D4, dense on Megafactory maps) ground Eagles within 150 m: bring at least one orbital, or plan to destroy the site first. | wiki |
| spawners | 6 | From D6 Gunship Facilities need demolition 60: the mission Hellbomb, a B-100 Portable Hellbomb or a SEAF Artillery mini-nuke (Eagles and orbitals do nothing). | wiki |
| squad-boosters | 1 | Against bots the dated consensus boosters are Experimental Infusion, Hellpod Space Optimization and Stamina; Concealed Insertion suits stealth and Commando missions, Integrated Extinguishers the Incineration Corps. | Steam guide |
10.3What to buy for the bot front
The Warbonds tab's bot-front purchase order, built from two dated community lists, GamesRadar's (August 2026) and a Steam guide built on u.gg data (August 19, 2026) community consensus. Democratic Detonation leads because its first three pages hold an anti-tank grenade, an explosive rifle and Fortified heavy armor; the Redacted Regiment and Siege Breakers add the C4 Pack and the Leveller. Buy each warbond, then its items in this order:
| # | Buy | Warbond | Page | Cost | Why | Consensus (dated) | Source |
|---|---|---|---|---|---|---|---|
| 1 | Democratic Detonation | Democratic Detonation | -- | 1,000 SC | First against Automatons: the Eruptor, Thermite for tanks and Hulks, and Fortified armor. | GamesRadar 2026-08-14 (Eruptor S vs bots) | gamesradar.com |
| 2 | G-123 Thermite | Democratic Detonation | 1 | 15 Medals | An anti-tank grenade on page 1: it kills armor without a support slot. | GamesRadar S (2026-08-13) and Steam guide S+ (2026-08-19) for the warbond | wiki |
| 3 | R-36 Eruptor | Democratic Detonation | 2 | 60 Medals | An explosive rifle that closes bug holes and fabricators. | GamesRadar 2026-08-14 (A/S/A); Steam guide 2026-08-19 (S+ vs bugs and bots) | gamesradar.com |
| 4 | FS-55 Devastator (armor) | Democratic Detonation | 3 | 64 Medals | Fortified heavy armor: half damage from explosions. | research/02 8.5 on GamesRadar (2026-08-14) and Steam guide (2026-08-19) per-front tiers | wiki |
| 5 | Redacted Regiment | Redacted Regiment | -- | 1,000 SC | Second against Automatons: the Censor, Reduced Signature armor and the C4 Pack. | GamesRadar 2026-08-14 (Censor S, C4 S vs bots); Steam guide 2026-08-19 (Reduced Signature S+) | gamesradar.com |
| 6 | R-72 Censor | Redacted Regiment | 1 | 35 Medals | A suppressed marksman rifle, a top pick against bots. | GamesRadar 2026-08-14 (S vs bots) | gamesradar.com |
| 7 | RS-89 Shadow Paragon (armor) | Redacted Regiment | 1 | 45 Medals | Reduced Signature light armor: quieter, and enemies spot you later. | Steam guide 2026-08-19 (S+ vs bots, S vs squids) | Steam guide |
| 8 | B/MD C4 Pack | Redacted Regiment | 3 | 110 Medals | Remote-detonated AT III charges, a top pick against bots. | GamesRadar 2026-08-14 (S vs bots); Steam guide 2026-08-19 (S+ vs bots) | gamesradar.com |
| 9 | Siege Breakers | Siege Breakers | -- | 1,000 SC | Third against Automatons: the Leveller. | GamesRadar 2026-08-14 (S vs bots); Steam guide 2026-08-19 (S+ vs bots) | gamesradar.com |
| 10 | EAT-411 Leveller | Siege Breakers | 2 | 85 Medals | An expendable anti-tank rocket that closes Bile Titan holes and destroys spawners. | GamesRadar 2026-08-14 (S vs bots); Steam guide 2026-08-19 (S+ vs bots) | wiki |
| 11 | Castellan's Creed | Castellan's Creed | -- | 1,500 SC | Worth adding against Automatons: the Meltagun. | GamesRadar 2026-08-14 (Meltagun S vs bots) | gamesradar.com |
| 12 | 40-K Meltagun | Castellan's Creed | 3 | 110 Medals | A short-range AT III thermal beam. | GamesRadar 2026-08-14 (S vs bots, A vs bugs and squids); Steam guide 2026-08-19 (S+ vs bugs and bots) | gamesradar.com |
| 13 | Borderline Justice | Borderline Justice | -- | 1,000 SC | Worth adding against Automatons: the Talon. | GamesRadar 2026-08-14 (Talon S vs bots) | gamesradar.com |
| 14 | LAS-58 Talon | Borderline Justice | 2 | 40 Medals | A laser revolver that uses heat instead of ammo, a top pick against bots. | GamesRadar 2026-08-14 (S vs bots, A vs squids) | gamesradar.com |
| 15 | Steeled Veterans | Steeled Veterans | -- | 1,000 SC | Worth adding against Automatons: the Senator. | GamesRadar 2026-08-14 (Senator S vs bots) | gamesradar.com |
| 16 | P-4 Senator | Steeled Veterans | 1 | 15 Medals | A Heavy-pen revolver, a top sidearm against bots. | GamesRadar 2026-08-14 (S vs bots, A vs squids) | gamesradar.com |
| 17 | Entrenched Division | Entrenched Division | -- | 1,000 SC | Worth adding against Automatons: the Sapper armor. | Steam guide 2026-08-19 (Sapper armor S+ vs bots) | Steam guide |
| 18 | CPG-48 Sapper (armor) | Entrenched Division | 1 | 45 Medals | Grenadier armor: explosive resistance plus two extra grenades. | Steam guide 2026-08-19 (S+ vs bots) | Steam guide |
| 19 | Polar Patriots | Polar Patriots | -- | 1,000 SC | Once the top three are owned: the Purifier fits any front. | GamesRadar 2026-08-14 (S/S/S); Steam guide 2026-08-19 (S+ every front) | gamesradar.com |
| 20 | PLAS-101 Purifier | Polar Patriots | 3 | 80 Medals | A charge-up explosive primary rated S or better on every front in both lists. | GamesRadar 2026-08-14 (S/S/S); Steam guide 2026-08-19 (S+ every front) | gamesradar.com |
The full ranking, the plan for the free warbond and the skip list are on the Warbonds tab.
10.4What the community rates, and when
Tier lists are opinions; read them with their dates.
- GamesRadar's support-weapon tier list (updated August 14, 2026), for Automatons: S for the C4 Pack, Commando, Expendable Anti-Tank, Leveller, Meltagun, Railgun, Recoilless Rifle and Speargun; A for the Breaching Hammer, De-Escalator, Epoch, Quasar Cannon, Solo Silo and Spear; B for the Anti-Materiel Rifle, Autocannon, Cremator, Grenade Launcher and W.A.S.P.; C for the Heavy Machine Gun, Laser Cannon, Machine Gun, Stalwart and others opinion (GamesRadar).
- u.gg (its list stamped patch 7.0.2, read September 26, 2026) rates the AC-8 Autocannon S+ against all three factions, the only support weapon it rates that high, where GamesRadar puts it at B against bots opinion.
- A Steam community thread that calls the Autocannon the bot weapon that "does everything" dates from March 28, 2024, before the armor overhaul of September 17, 2024: history, not current advice (Steam thread).
- Press guides from the Cyberstan launch (PC Gamer, February 10, 2026; Windows Central, February 11, 2026) recommended the vent-and-grenade trick, shield generators, the Orbital Laser and Hellbombs against Vox Engines. Only Windows Central quoted health figures, and those predate 6.3.0.
The disagreement over the Autocannon is taste, not fact. The neutral comparison is the armor and penetration data on this tab and the penetration ladder.
Threat dossier11
Illuminate
Every Illuminate unit across the Invasion Fleet, Appropriators and Vote Snatchers: shields and how they break, armor, weak points and the counters for each.
On this page12 chapters
The front today
Shoot the Watchers first, bring steady damage instead of one big gun, and check the planet's fleet before you drop. The Illuminate ("squids") protect themselves with shields, breakable plates and deep health pools rather than heavy armor, so machine guns, fire and explosives decide most fights here, and an anti-tank launcher is for a short list of targets.
- Kill every Watcher on sight. It is the only Illuminate unit that calls reinforcements (how to kill it).
- Bring damage per second, not just penetration. Apart from the ships and structures, only the Harvester's and Gatekeeper's heavy armor and the Crusher's helmet need more than medium penetration.
- Strip a shield with steady fire, then land the big hit. A Harvester's shield swallows a whole rocket (shields and faction rules).
- Use explosives on Overseers. Their shields and plates let blasts straight through to their health (Overseers).
- Read the fleet before you drop. Each of the four fleets wants a different loadout (Fleets).
1.1Where the front stands
On September 26, 2026 the Illuminate held 25 planets and 19 of the war's campaigns ran against them, drawing about 10% of the divers on campaign planets approx. Most of those planets run the regular roster. Three showed a fleet: Alaraph (Vote Snatchers), Senge 23 (Appropriators, joined by the Invasion Fleet) and Siemnot (Mindless Masses). No planet had an Exostorm, a Void effect or Heavy SEAF Presence that day. The front moves daily, so check the live war maps for today's planets and fleets.
This tab is checked against patch 7.1.1. The last patch to change the Illuminate was 7.1.0 (September 22, 2026): it fixed Wretches and Crushers clipping, made the Gazer Spire finish its firing cycle and balanced enemy spawns per diver (7.1.0 notes). The newest units are the Wretch and Crusher of the Vote Snatchers fleet, added with Devoid of Liberty (7.0.0, August 12, 2026; 7.0.0 notes).
1.2Every unit at a glance
Read the Min. penetration column first: it is the lowest penetration that can kill the unit from the front, through its easiest fatal part (2 is light, so any weapon; 3 medium; 4 heavy; 5 and up anti-tank). Nearly every Illuminate soldier and walker dies to light penetration aimed at the right part; the exceptions are the Harvester, the Stingray, the ships and the spawner structures. Body armor is the armor of the unit's main health pool, and From difficulty is the lowest difficulty where it can appear at all. A dash in Subfaction means the regular roster, the Invasion Fleet; a dash in Min. penetration means only a Hellbomb-class blast destroys it.
| Unit | Class | Subfaction | Body armor | Min. penetration | From difficulty | Source |
|---|---|---|---|---|---|---|
| Voteless | small | -- | 0 | 2 | 1 | wiki |
| Crescent Overseer | medium | -- | 0 | 2 | 3 | wiki |
| Elevated Overseer | medium | -- | 0 | 2 | 3 | wiki |
| Obtruder | medium | Appropriators | 0 | 2 | 1 | wiki |
| Overseer | medium | -- | 0 | 2 | 1 | wiki |
| Watcher | medium | -- | 0 | 2 | 1 | wiki |
| Wretch | medium | Vote Snatchers | 1 | 2 | 1 | wiki |
| Crusher | heavy | Vote Snatchers | 1 | 2 | 4 | wiki |
| Fleshmob | heavy | -- | 0 | 2 | 1 | wiki |
| Gatekeeper | heavy | Appropriators | 4 | 2 | 4 | wiki |
| Harvester | heavy | -- | 4 | 3 | 3 | wiki |
| Veracitor | heavy | Appropriators | 3 | 2 | 4 | wiki |
| Illuminate Overship | air | -- | 10 | 10 | 1 | wiki |
| Leviathan | air | -- | 5 | 5 | 8 | wiki |
| Stingray | air | -- | 3 | 3 | 4 | wiki |
| Warp Ship | air | -- | 5 | 5 | 1 | wiki |
| Cognitive Disruptor | structure | -- | 0 | 2 | 2 | wiki |
| Exospire | structure | -- | 2 | 2 | 3 | wiki |
| Gazer | structure | -- | 5 | 2 | 1 | wiki |
| Gazer Spire | structure | -- | 9 | -- | 5 | wiki |
| Grounded Warp Ship | structure | -- | 5 | 5 | 1 | wiki |
| Illuminate Encampment | structure | -- | -- | 5 | 2 | wiki |
| Lightning Spire | structure | -- | 2 | 2 | 1 | wiki |
| Monolith | structure | -- | -- | -- | 1 | wiki |
| Void Blossom unverified | structure | -- | 3 | 2 | 3 | wiki |
| Warp Gateway | structure | -- | 5 | 5 | 2 | wiki |
1.3No fourth enemy faction
There are still 3 enemy factions as of patch 7.1.1, and no official post announces a fourth. The war has grown subfactions instead: the Illuminate's four fleets, the Terminid strains (Predator Strain, Spore Burst Strain and Rupture Strain) and the Automaton subfactions (Jet Brigade, Incineration Corps and Cyborg Legion). The wiki lists a fourth faction, the Federation of Super Earth, but that is your side: civilians, SEAF soldiers and other Helldivers matter on this tab only as friendly-fire targets in the cities (Where you fight them).
Shields and faction rules
Illuminate defenses punish one big hit and reward steady damage. A shield swallows a whole rocket, a breakable plate throws away the overkill, and several units let an explosion pass straight through to their health. Chip first, then finish, and aim your explosives at the units whose shields and plates let blasts through.
2.1The damage rule in three lines
- Above: a hit whose armor penetration is higher than the armor of the part it strikes deals full damage.
- Equal: it deals 65%.
- Below: it bounces and deals nothing.
The weapon traits in the game name the tiers (AP2 Light, AP3 Medium, AP4 Heavy and AP5 to AP10 Anti-Tank); this tab says light, medium, heavy and anti-tank. Three more rules matter on this front. Explosions carry their own penetration (one tier lower at the edge of the blast); they ignore durability, but a part's explosion resistance cuts them, and a part immune to explosions passes the blast to the unit's main health once, if the blast's penetration reaches that pool's armor. Durable parts shrug off weapons with low durable damage: the walkers, Stingrays, Fleshmobs and Crushers are durable in places, so rockets, explosives, the AC-8 Autocannon and the APW-1 Anti-Materiel Rifle beat fast light fire there. Damage to main health: most parts pass only a share of their damage to the unit's main pool, but a few pass on more than they take (the Fleshmob's faces and the Harvester's eye), which makes them the real weak points. The rule for every front is on What Kills What.
Counts such as "4 shots" or "about 17 rounds" were computed by the research from the wiki's datamined weapon damage and the in-game armor tables: point-blank, straight on, every pellet hitting, each blast counted once approx. They ignore damage falloff, angles and blasts that hit several parts at once, so explosives often do better than listed. An independent recount reproduced almost every one. Use them to rank weapons, not to count frames (wiki datamine).
2.2Five shields, five answers
A shield is a separate pool that must empty before the body takes damage, and each kind has its own answer. The wiki's summary of the faction fits: shields and plates cancel or reduce overkill, punishing single powerful shots and rewarding continuous damage (wiki). The health of every shield is in its unit's parts table below.
A bubble that swallows any single hit
It absorbs a whole hit whatever its size (an EAT-17 rocket only pops it) and regenerates. Empty it with fast fire (the MG-43 Machine Gun needs about 17 rounds), about 4 GL-21 grenades, or one or two R-36 Eruptor or AC-8 flak shots, whose 30 shrapnel fragments each hit it. Or break one of its generator prongs above and below the eye with medium penetration, and the shield is gone for good.
A hand shield that blasts ignore
Raised under heavy fire, lowered to shoot, and forced down when SEAF soldiers come within 10 m. It never covers the legs, and every explosion goes around it into the Overseer's health, which is why explosives are the Overseer answer.
A pilot shield you can switch off for good
A rechargeable shield over the Overseer who drives the construct; explosions pass it by, and fire reaches the pilot through it (GamesRadar, March 20, 2026) community-tested. Break the Veracitor's head (two JAR-5 Dominator shots, one AC-8) or the Gatekeeper's horn (one hit from an AC-8, APW-1 or MG-206) and it never comes back.
A ship shield you must drain fast
It starts regenerating after a 15-second pause, and if it comes back while your grenade sits in the bay, the grenade does nothing. Drain it with steady fire (the LAS-16 Sickle and machine guns empty it without a reload), then act at once. A G-123 Thermite or a C4 charge destroys a grounded ship even through its shield. Airborne ships have carried the same shield since patch 1.002.200.
A shield only the big cannon breaks
Only the Planetary Defense Cannon hurts the Overship. Its first shell breaks the shield and a second one into the nearest glowing port kills the ship. A broken shield comes back 60 seconds after it fell; a damaged one starts regenerating after 20 seconds untouched.
2.3Plates that waste your overkill
Breakable plating has its own pool, must break before the part beneath takes damage, and loses any damage beyond what it needed. A single huge hit on a plate is mostly wasted; two medium hits often do more.
- Overseers: plates over softer flesh on the chest, crotch and limbs, passing little to the Overseer's health. Since 6.1.0 an Overseer staggers when its armor and shield break, and its exposed flesh staggers easily, so the R-72 Censor, SG-20 Halt, SG-97 Sweeper and R-2124 Constitution interrupt it.
- Harvester: a heavy carapace that, once broken, exposes softer fatal internals.
- Gatekeeper: heavy carapace and limb plates over fatal internals.
- Leviathan: fins, spine and tail armored against everything below anti-tank; a broken fin or tail exposes internals that heavy penetration can hurt.
- Crusher: a helmet over a fatal head; unlike the rest of its body, neither regenerates.
2.4Where explosions go
- Straight through: the parts of Overseers, Watchers and Obtruders and the limbs of the Voteless ignore explosions, but their main health pool is unarmored, so every blast lands in full. That is why explosive primaries (PLAS-1 Scorcher, PLAS-101 Purifier, CB-9 Exploding Crossbow, R-36 Eruptor, SG-8P Punisher Plasma) and the GP-31 Grenade Pistol are the classic Overseer answer.
- Blocked below heavy penetration: every Harvester exterior part except the chassis ignores explosions, and the chassis is heavily armored, so while its armor is whole a blast needs heavy penetration to hurt it. GL-21 grenades then do nothing to its body; once its shield is down, the Eagle 110mm Rocket Pods (a heavy-penetration blast since 6.3.0) and the Eagle 500kg Bomb do. Once a teammate breaks the carapace, the exposed internals take GL-21 grenades at full damage.
- Reduced: the Veracitor's and Gatekeeper's limbs ignore explosions, so a blast only reaches their main health: a medium-penetration blast at reduced damage on the Veracitor, and nothing below heavy on the Gatekeeper. Big blasts and direct hits are what count.
- Mixed: the Crusher's head, torso and pelvis ignore explosions, its legs and helmet partly resist them and its arms barely do, so one big blast (a G-123 Thermite or C4 charge) hits several parts and its health at once and kills it.
- Amplified: a Grounded Warp Ship's hull takes extra damage from explosions.
2.5What they do to you
Watchers, Harvesters, Lightning Spires
A Watcher's Tesla Suppressor zaps for 30 with a 1.5-second stun that slows you and drains stamina. Within about 20 m a Harvester's Tesla Ripper throws arcs of 60 each, up to three at once, enough to kill several divers. A Lightning Spire arcs for 200 within 25 m and chains through Illuminate units and guard dogs.
Defense: the Electrical Conduit passive (95% arc resistance); Acclimated, Adreno-Defibrillator and Desert Stormer armors resist arcs too. Go prone near a Lightning Spire: it will not target a diver who crawls into range.
Harvesters, Leviathans, Gazers, Gazer Spires
The Harvester's Disintegration Beamer burns 1,400 damage per second (1,800 once its eye is broken) after a 1.1-second charge; a diver has 125 health, so even a graze nearly kills. Each of a Leviathan's four culverins burns 400 per second, a Gazer 50, and a Gazer Spire 1,000 out to about 250 m.
Defense: break line of sight and keep moving sideways. Smoke stops a new lock but not a beam already on you. Vehicles and exosuits are big, slow targets.
Overseers, Stingrays, Gatekeepers, drones
Overseer bolts and Crescent Overseer barrages; Elevated Overseer grenades (200, and they ragdoll you); Stingray strafes and the Stingray's death blast (300); Leviathan bombs (250); the Gatekeeper's cannon; and the 300-damage crash of a dying Watcher or Obtruder within 1-2 m.
Defense: divers take only half damage from explosions, and Fortified armor cuts that again (its passive: Recoil -30% when crouched or prone; 50% explosive resistance); going prone cuts the outer part of a blast by 90%. The SH-32 Shield Generator Pack is the wiki's answer to Stingray strafes.
Crushers, Veracitors, Overseers, Wretches, Fleshmobs
A Crusher's cudgel (200 plus a 50 blast) kills on a direct hit; every Veracitor melee attack has had anti-tank penetration since 7.0.0; an Overseer's staff (75) ragdolls you and the follow-up usually kills; Wretch blades hit for 50; a charging Fleshmob knocks you flat.
Defense: keep moving, because Crusher and Veracitor swings do not track. The Rock Solid passive makes you harder to knock down and stops the Overseer's ragdoll. The SH-20 Ballistic Shield Backpack blocks about 5 Crusher swings or 15 Veracitor hits, but you still go flying.
Patch 6.3.0 raised the penetration of many Illuminate weapons so they can hurt vehicles (6.3.0 notes; the wiki records the details as undocumented changes). Overseer, Crescent Overseer, Stingray and Gatekeeper plasma also does triple damage to the TD-220 Bastion; Fleshmobs have damaged vehicles since 6.2.2 and can flip an FRV. The wiki advises keeping exosuits, FRVs and emplacements away from Leviathans and out of a Harvester's sight.
2.6Fire, gas, arc and stun
Kills the horde, panics the rest
Fire alone burns Voteless to death, and since 6.1.0 small and medium Illuminate flamed in the face panic and attack at random (heavies are immune). Fleshmobs take 1.8 times fire damage; Wretches, Harvesters and Crushers 1.5 times.
Confuses and slows
Gas damages over time and confuses; since 6.2.2 confused units are also slowed 25%. It kills Voteless in 4-7 seconds and pulls a Fleshmob's attention off you, even mid-charge.
Stuns the drones and the Harvester
An arc hit stuns a Watcher or Obtruder and cancels a Watcher's call. The ARC-3 Arc Thrower stun-locks a Harvester once its shield is down (the A/ARC-3 Tesla Tower does not). Fleshmobs take 1.8 times arc damage.
Freezes constructs, stops a charge
The Orbital EMS Strike, G-23 Stun grenade and A/M-23 EMS Mortar Sentry freeze Veracitors and Gatekeepers while the pilot bangs on the controls. Only the Orbital EMS Strike and a G-109 Urchin stop a charging Fleshmob. Stun rounds and arcs (ARC-12 Blitzer, ARC-3, SG-20 Halt) halt an Elevated Overseer's strafing, and a CQC-19 Stun Lance or CQC-30 Stun Baton holds an Overseer.
How these effects compare across the three fronts: Fire, gas, arc and stun by front.
2.7Reinforcements, detection and spawns
- Only Watchers call reinforcements. The call is long, visible and loud (blue flares), and a kill or an arc stun interrupts it. Once the "Illuminate Ships Incoming" banner appears, the call has gone out and Warp Ships will beam troops down.
- No calls on Vote Snatchers planets, which have no Watchers, but bigger patrols and guards. Few calls with the Mindless Masses on low difficulties, but Voteless swarms of 50 or more.
- Sight and alerts, not proximity: since 1.003.101 no spawner gives you away just for being near it; detection runs on line of sight and alert level, and a noise can send enemies to search the spot. The Veracitor spots divers from 100 m, farther than anything else; Obtruders drift toward suspected activity; Stingrays never arrive at the start of a mission.
- An unalerted Harvester has no shield up, so one big hit, such as an Orbital Railcannon or Precision Strike, can kill it before the fight starts.
- Spawns follow each diver. Since 7.1.0 the game balances enemy pressure per diver by the number and distance of nearby enemies and despawns far ones when it is over budget. On difficulty 9 and up, patch 6.0.1 raised the intensity on every front, least for the Terminids and the Illuminate.
What each difficulty adds. Most of the roster appears from difficulty 1 (the From difficulty column above holds every unit's figure). Then:
- Elevated Overseers from difficulty 3 and Crescent Overseers from 3.
- Harvesters from 3 in Destroy Harvesters missions, and from 4 in regular spawns.
- Stingrays from 4; Veracitors from 4 and Gatekeepers from 4 (Appropriators); Crushers from 4 (Vote Snatchers).
- Gazer Spires from 5 (Void missions).
- Leviathans from 8 (Mega Cities with the Leviathan Blockade modifier). Difficulties 6, 7, 9 and 10 add no new unit.
The horde: Voteless and Watchers
Kill the Watcher, then deal with the crowd. The Watcher turns a skirmish into a siege by calling in ships; the Voteless die to anything that hits the head, burn to death from fire alone, and are slow enough that a lightly armored diver can simply outrun them.
3.1Watcher
Kill it: the moment you see it. One APW-1 Anti-Materiel Rifle or RS-422 Railgun hit to the body kills it; a JAR-5 Dominator, SG-8S Slugger, P-4 Senator or AC-8 Autocannon needs two approx. An ARC-12 Blitzer or ARC-3 Arc Thrower hit stuns it and cancels the call. Aim at center mass, because it survives losing several fins. Gatling and machine-gun sentries and the AX/AR-23 Guard Dog pick them off too.
Watch out for: the call. A Watcher sweeps the ground with a blue search cone that turns pink when it suspects something; if it spots a diver again, or keeps taking fire, it stops and releases blue flares that bring in Warp Ships. Up close its Tesla Suppressor zaps you (30 damage and a 1.5-second stun that slows you and drains stamina), which is deadly inside a Voteless or Fleshmob crowd. A killed Watcher drops and explodes where it lands (300 damage within 1-2 m, which ragdolls, and 80 out to 5 m), so don't kill one directly overhead.
Where: in every fleet but the Vote Snatchers, which have none (so nothing calls reinforcements there), and rare with the Mindless Masses on low difficulties. The Appropriators' Obtruder looks like a Watcher but never calls (Obtruder).
The body is the fatal weak spot; the eye and fins soak damage without killing it.
| Part | Armor | Health | Weak point | Source |
|---|---|---|---|---|
| Main | 0 | 600 | main health pool | wiki |
| Body | 2 | 400 | FATAL WEAK SPOT: center mass; 100% to Main (capped); explosion-immune | wiki |
| Eye | 0 | 300 | non-fatal; cannot kill it alone (its transfer to Main is capped at 300); explosion-immune | wiki |
| Upper Fin | 2 | 200 | non-fatal; 100% to Main (capped); explosion-immune | wiki |
| Lower Fin | 2 | 200 | non-fatal; 100% to Main (capped); explosion-immune | wiki |
| Side Fins (2) | 0 | 150 | non-fatal; 100% to Main (capped); explosion-immune | wiki |
3.2Voteless
Kill it: with anything. One head shot kills every variant, and most automatic weapons drop one with a single leg shot. Fire alone burns them to death (beam and incendiary weapons such as the LAS-5 Scythe and SG-451 Cookout ignite them at range), and gas both damages and confuses a crowd. Against big hordes the wiki suggests the CB-9 Exploding Crossbow, FLAM-66 Torcher, AR-23A Liberator Carbine and SG-8P Punisher Plasma; the A/ARC-3 Tesla Tower and A/FLAM-40 Flame Sentry hold a street by themselves, and the Eagle Cluster Bomb, Eagle Napalm Airstrike and Orbital Gas Strike clear one.
Watch out for: numbers, not damage. Former Super Earth citizens rebuilt by the Illuminate, the Voteless fill almost every patrol and reinforcement wave and pour out of Grounded Warp Ships. One swipes for 25 and lunges a short way; a crowd soaks the fire meant for the Overseers and Harvesters behind it. They are slower than small bugs and cannot leap, so a lightly armored diver can often run past them. A Voteless that survives losing a leg collapses and crawls on.
Where: from difficulty 1 in the regular roster, and in far larger numbers with the Mindless Masses; none on Appropriators planets. Whether they march with the Vote Snatchers is disputed: the wiki's Vote Snatchers page says yes, its Voteless page says no unverified.
Three sizes share one layout, each with more health than the last: the head is the fatal weak spot, the arms are not fatal, and a leg hit drops it.
| Part | Armor | Health | Weak point | Source |
|---|---|---|---|---|
| Light: Main | 0 | 100 | main health pool; bleed-out 100 at 5/s | wiki |
| Light: Head | 1 | 40 | fatal weak spot (any weapon); 100% to Main (capped); explosion-immune | wiki |
| Light: Upper Arms (2) | 0 | 50 | non-fatal; 40% to Main (capped); explosion-immune; bleed-out 1,000 at 40/s | wiki |
| Light: Forearms (2) | 0 | 50 | non-fatal; 30% to Main (uncapped); explosion-immune | wiki |
| Light: Legs | 0 | 80 | leg hits down it (a Voteless that survives crawls on); fatal per the in-game record; 30% to Main (capped); explosion-immune | wiki |
| Medium: Main | 0 | 130 | main health pool; bleed-out 100 at 5/s | wiki |
| Medium: Head | 1 | 50 | fatal weak spot (any weapon); 100% to Main (capped); explosion-immune | wiki |
| Medium: Upper Arms (2) | 0 | 65 | non-fatal; 40% to Main (capped); explosion-immune; bleed-out 1,000 at 40/s | wiki |
| Medium: Forearms (2) | 0 | 50 | non-fatal; 30% to Main (uncapped); explosion-immune | wiki |
| Medium: Legs | 0 | 80 | leg hits down it (a Voteless that survives crawls on); fatal per the in-game record; 30% to Main (capped); explosion-immune | wiki |
| Heavy: Main | 0 | 160 | main health pool; bleed-out 100 at 5/s | wiki |
| Heavy: Head | 1 | 60 | fatal weak spot (any weapon); 100% to Main (capped); explosion-immune | wiki |
| Heavy: Upper Arms (2) | 0 | 80 | non-fatal; 40% to Main (capped); explosion-immune; bleed-out 1,000 at 40/s | wiki |
| Heavy: Forearms (2) | 0 | 65 | non-fatal; 30% to Main (uncapped); explosion-immune | wiki |
| Heavy: Legs | 0 | 80 | leg hits down it (a Voteless that survives crawls on); fatal per the in-game record; 30% to Main (capped); explosion-immune | wiki |
Overseers
Use explosives. An Overseer's shield and plates ignore blasts, so every explosion lands in its health: two hits from an R-36 Eruptor, CB-9 Exploding Crossbow, PLAS-101 Purifier or GP-31 Grenade Pistol drop one approx. Without explosives, put a medium-penetration round into the head, or shoot the legs, which the shield never covers.
All three kinds share one frame: breakable plates over softer flesh, a fatal right arm (the weapon arm), a non-fatal left arm, and legs that pass damage to the main health pool. Only the plain Overseer carries a hand shield, and Stingray plasma never hurts any of them.
4.1Overseer
Kill it:
- Explosives go around the shield and plates: two hits from the PLAS-101 Purifier, CB-9, R-36 or GP-31, four from the PLAS-1 Scorcher.
- A medium-penetration head shot kills in one: JAR-5 Dominator, SG-8S Slugger, P-4 Senator, APW-1 or RS-422 (the wiki adds the R-6 Deadeye).
- Steady fire strips the plates: an MG-43 or AR-23 Liberator kills it in about 10 rounds through the chest or the always-exposed legs approx.
- Stay out of reach: sidestep its slow bolts and break contact before it closes in; one hit from a CQC-19 Stun Lance or CQC-30 Stun Baton holds it long enough to back off. The Eagle Cluster Bomb, Orbital Airburst Strike and Orbital Gas Strike handle groups.
Watch out for: the Pathfinder Lightspear. At range it fires a slow, charged plasma bolt (40 plus a 30 blast, with anti-tank penetration since 6.3.0); up close it swings it as a staff (75, and the ragdoll usually sets up a killing follow-up). It leads Voteless, pointing its Lightspear to send them in, and raises its hand shield under heavy fire.
Where: in patrols, on objectives, from Grounded Warp Ships and landed ships at outposts, and in reinforcements, from difficulty 1; fewer with the Mindless Masses and none with the Vote Snatchers. The Eliminate Overseers side objective asks for a set number of kills.
The head is the fatal weak spot behind medium armor; the plates pass little to its health, and the legs share its main pool.
| Part | Armor | Health | Weak point | Source |
|---|---|---|---|---|
| Main | 0 | 600 | main health pool | wiki |
| Head | 3 | 150 | FATAL WEAK SPOT behind an AV3 helmet (AP3+); 100% to Main (capped); explosion-immune | wiki |
| Chest Armor | 2 | 150 | breakable plate over the torso; non-fatal; 20% to Main (uncapped); explosion-immune | wiki |
| Crotch Armor | 2 | 200 | breakable plate; non-fatal; 20% to Main (uncapped); explosion-immune | wiki |
| Limb Armor (8) | 2 | 100 | breakable plates; non-fatal; 20% to Main (uncapped); explosion-immune | wiki |
| Torso | 1 | 600 | fatal; 100% to Main (capped); explosion-immune | wiki |
| Right Arm | 1 | 300 | fatal (the lance arm); 50% to Main (capped); explosion-immune | wiki |
| Left Arm | 1 | 300 | non-fatal (the shield arm); 50% to Main (capped); explosion-immune | wiki |
| Legs (2) | 0 | Main | share the Main pool at 70% (non-fatal); the shield never covers them; explosion-immune | wiki |
| Shield | 2 | 1,500 | hand-held energy shield; blocks bullets from the front, explosions pass to Main; lowered when SEAF come within 10 m; non-fatal; explosion-immune | wiki |
4.2Elevated Overseer
Kill it: stun it, then take the head. An ARC-12 Blitzer, ARC-3 Arc Thrower or SG-20 Halt stun round stops its strafing and makes it drop the grenade it was about to throw; one P-4 Senator or APW-1 head shot then kills it. Its jetpack is fatal too (one SG-8S Slugger shot, three from an R-63 Diligence) approx. The P-92 Warrant's tracking rounds ignore its dodging, guard dogs (the AX/AR-23 Guard Dog and AX/LAS-5 Rover) strip its plates, and diving toward it while firing pushes it back and spoils its aim.
Watch out for: a jetpack Overseer that hovers about 10 m from the nearest diver, strafes sideways and dodges. Its Plasma Storm Rifle fires 7-round bursts (since 6.3.0 it mixes short and long bursts and misses moving targets more), and its Plasma Detonator grenades (200 blast on a 6-second fuse) ragdoll you. Its jetpack explodes when destroyed and can go off later on the corpse, so give burning bodies room.
Where: from difficulty 3; never with the Mindless Masses or the Vote Snatchers.
Patch 4.1.0 gave its head more health but lighter armor, so light penetration hurts it now; guides from before that patch have its old numbers. The torso and arm values below follow the 4.1.0 notes, because the wiki's table was never updated (graded likely).
| Part | Armor | Health | Weak point | Source |
|---|---|---|---|---|
| Main | 0 | 450 | main health pool | wiki |
| Head | 2 | 200 | FATAL WEAK SPOT (AV2 since 4.1.0); 100% to Main (capped); explosion-immune | wiki |
| Jetpack | 2 | 300 | FATAL WEAK SPOT; explodes (150 blast, 4 m) and can stay live on the corpse; 50% to Main (capped); explosion-immune | wiki |
| Chest Armor | 2 | 150 | breakable plate over the torso; non-fatal; 20% to Main (uncapped); explosion-immune | wiki |
| Crotch Armor | 2 | 200 | breakable plate; non-fatal; 20% to Main (uncapped); explosion-immune | wiki |
| Limb Armor | 2 | 100 | breakable plates; non-fatal; 20% to Main (uncapped); explosion-immune | wiki |
| Torso | 1 | 450 | fatal; 100% to Main (capped); explosion-immune | wiki |
| Right Arm | 1 | 250 | fatal (the rifle arm); 50% to Main (capped); explosion-immune | wiki |
| Left Arm | 1 | 250 | non-fatal; 50% to Main (capped); explosion-immune | wiki |
| Legs (2) | 0 | Main | share the Main pool at 70% (non-fatal); explosion-immune | wiki |
4.3Crescent Overseer
Kill it: find it by its arcing shots, flank it and use the Overseer answers. It has the Overseer's armor without the hand shield, which makes it the easiest Overseer to kill once you reach it. An Orbital Airburst Strike or Eagle Airstrike on a bombard group, an Eagle Cluster Bomb or an Orbital Precision Strike clears them from afar. Its backpack is not a weak spot.
Watch out for: the Plasma Bombard, which lobs three-round barrages over cover from very long range (40 plus an 80 blast, and it leads its shots); since 6.0.1 the barrage staggers. Up close it switches to slower direct shots and punches that ragdoll. Only one or two come per group, but a group left alone can shell you from where it spawned, so spread out: the splash punishes clumped squads.
Where: from difficulty 3 with the regular roster; with the Mindless Masses only as guards; never with the Appropriators or the Vote Snatchers.
The same frame as the Overseer, minus the shield: the head is the fatal weak spot behind medium armor.
| Part | Armor | Health | Weak point | Source |
|---|---|---|---|---|
| Main | 0 | 600 | main health pool | wiki |
| Head | 3 | 150 | FATAL WEAK SPOT behind an AV3 helmet (AP3+); 100% to Main (capped); explosion-immune | wiki |
| Chest Armor | 2 | 150 | breakable plate over the torso; non-fatal; 20% to Main (uncapped); explosion-immune | wiki |
| Crotch Armor | 2 | 200 | breakable plate; non-fatal; 20% to Main (uncapped); explosion-immune | wiki |
| Limb Armor | 2 | 100 | breakable plates; non-fatal; 20% to Main (uncapped); explosion-immune | wiki |
| Torso | 1 | 600 | fatal; 100% to Main (capped); explosion-immune | wiki |
| Right Arm | 1 | 300 | fatal; 50% to Main (capped); explosion-immune | wiki |
| Left Arm | 1 | 300 | non-fatal; 50% to Main (capped); explosion-immune | wiki |
| Legs (2) | 0 | Main | share the Main pool at 70% (non-fatal); explosion-immune | wiki |
Heavies: Harvester and Fleshmob
Harvester: strip the shield, then put one anti-tank rocket into a hip joint. Fleshmob: sidestep the charge and pour fire, shrapnel or explosives into its faces. Neither needs the biggest gun you own, and both punish standing still.
5.1Harvester
Kill it, in order:
- Strip the shieldFast fire (about 17 MG-43 rounds; the M-105 Stalwart and LAS-98 Laser Cannon work too), about 4 GL-21 grenades, or one or two R-36 Eruptor or AC-8 flak shots. Or break one generator prong above or below the eye with medium penetration, and the shield is gone for good.
- Hit a hip jointOne anti-tank rocket to any hip joint kills it: MLS-4X Commando, EAT-17, LAS-99 Quasar Cannon, GR-8 Recoilless Rifle or FAF-14 Spear. Without a launcher: 4 APW-1 or AC-8 APHET shots per joint, 3 from the RS-422, 15 from the MG-206, 38 from the MG-43. One GR-8 to the eye also kills; an EAT-17 or LAS-99 there needs a second hit approx.
- Save your grenadesWhile its armor is whole it ignores blasts below heavy penetration, so stop lobbing GL-21 grenades at the body once the shield is down, unless a teammate has broken the carapace.
Stratagems: the Orbital Laser burns through the shield; the E/AT-12 Anti-Tank Emplacement was introduced, in Arrowhead's words, "to put a dent in those Illuminate Harvesters" (Urban Legends post); the Eagle 110mm Rocket Pods were tuned in 6.3.0 to one-shot an unshielded Harvester more reliably, though Arrowhead says it is still not a guaranteed kill. An Orbital Railcannon Strike, Orbital Precision Strike or Eagle 500kg Bomb kills one only while its shield is down or not yet raised, because the shield soaks the whole hit.
Watch out for: the Disintegration Beamer. After a 1.1-second charge it sweeps a beam for 4 seconds at 1,400 damage per second, with anti-tank penetration, and sets you on fire; destroying the eye raises that to 1,800, so don't chip the eye unless your shot kills. Within about 20 m its Tesla Ripper arcs can kill several divers at once; Electrical Conduit armor negates them, and the ARC-3 Arc Thrower stun-locks the Harvester once its shield is down. Its falling legs and corpse can crush you.
Where: from difficulty 3 in Destroy Harvesters missions and from 4 in regular patrols; it guards Monoliths and heavy encampments and arrives with reinforcements. With the Mindless Masses only on high difficulties; none on Vote Snatchers planets.
The wiki says two MLS-4X Commando rockets to the head kill it; the research's computation gives three through the eye, so aim the Commando at a hip joint instead unverified.
Look for the hip joints and the generator prongs, a tier softer than the heavy plating around them. Rows that begin "Armor broken" exist only after the carapace breaks.
| Part | Armor | Health | Weak point | Source |
|---|---|---|---|---|
| Main | 4 | 3,000 | main health pool; the whole exterior is explosion-immune (blasts need AP4+ to reach Main); 70% durable | wiki |
| Eye | 2 | 350 | WEAK POINT: 120% to Main, uncapped (one GR-8 kills); destroying it raises beam damage to 1,800/s; non-fatal; explosion-immune | wiki |
| Shield Generators (3) | 3 | 350 | WEAK POINT: break one prong and the shield is gone for good; non-fatal; 10% to Main (capped); explosion-immune | wiki |
| Chassis | 4 | 2,000 | fatal; 100% to Main (capped); 75% durable | wiki |
| Carapace (2) | 4 | 800 | non-fatal; 100% to Main (uncapped); 75% durable; explosion-immune | wiki |
| Carapace Weakspots (2) | 1 | 500 | non-fatal; 100% to Main (uncapped); 80% durable; explosion-immune | wiki |
| Left Hip Joint | 3 | 1,000 | FATAL WEAK SPOT; 45% to Main (capped); 70% durable; explosion-immune | wiki |
| Right & Middle Hip Joints (2) | 3 | 1,000 | FATAL WEAK SPOT; 60% to Main (capped); 70% durable; explosion-immune | wiki |
| Left Upper Thigh Armor | 4 | 600 | non-fatal; 30% to Main (capped); 75% durable; explosion-immune | wiki |
| Right & Middle Upper Thigh Armor (2) | 4 | 900 | non-fatal; 30% to Main (capped); 75% durable; explosion-immune | wiki |
| Lower Thigh Armor (3) | 4 | 900 | non-fatal; 30% to Main (capped); 75% durable; explosion-immune | wiki |
| Shin armor (3) | 4 | 900 | non-fatal; 30% to Main (capped); 75% durable; explosion-immune | wiki |
| Left Foot Armor | 4 | 900 | non-fatal; 30% to Main (capped); explosion-immune | wiki |
| Right & Middle Foot Armor (2) | 4 | 900 | non-fatal; 30% to Main (capped); 75% durable; explosion-immune | wiki |
| Exposed Leg Internals | 3 | 1,000 | fatal; 60% to Main (capped); 25% durable; explosion-immune | wiki |
| Shield | 0 | 1,500 | regenerating bubble; absorbs any single hit in full; raised only once alerted; non-fatal | wiki |
| Armor broken: damaged chassis | 4 | 2,000 | fatal; 100% to Main (capped); 75% durable | wiki |
| Armor broken: internals (2) | 2 | 800 | fatal; 100% to Main (capped); 50% durable | wiki |
| Armor broken: right and left upper-leg internals (3) | 3 | 1,000 | fatal; 45% to Main (capped); 25% durable; explosion-immune | wiki |
| Armor broken: middle upper-leg internals | 3 | 1,000 | fatal; 60% to Main (capped); 25% durable; explosion-immune | wiki |
| Armor broken: lower-leg internals (3) | 3 | 1,000 | fatal; 60% to Main (capped); 25% durable; explosion-immune | wiki |
5.2Fleshmob
Kill it: it has no fatal part, so you grind through its whole health pool. Shoot the faces, which pass on more damage than they take, and use weapons that hit several parts at once.
- Explosives and shrapnel: the wiki counts 4 GL-21 grenades or 4 StA-X3 W.A.S.P. missiles; the RL-77 Airburst Rocket Launcher, AC-8 flak and Orbital Airburst Strike shred it; two EAT-17 or GR-8 rockets, or one FAF-14 Spear, finish it approx.
- Fire and arc: it takes 1.8 times damage from both, so flamethrowers, the Eagle Napalm Airstrike, the Orbital Napalm Barrage and the A/FLAM-40 Flame Sentry work well. Gas pulls its attention off you, even mid-charge.
- Big hits to the faces: since 4.1.0 the six face chunks pass their damage on to its health without a cap, so a big single hit there is multiplied; the wiki computes one VG-70 Variable TOTAL salvo at about its whole health.
- Dodge: dive sideways out of a charge (it can still clip you). Breaking its arms stops its swings but not its charge, and breaking its legs does not slow it.
Watch out for: under 15 m it walks up and swings; at 15-30 m it rushes you, flailing, knocking divers back and smashing cover; beyond 30 m it roars and charges like a Terminid Charger, ragdolling whoever it hits. It never flinches, and only the Orbital EMS Strike and a stuck G-109 Urchin stop a charge. Since 6.2.2 it damages vehicles and can flip an FRV.
Where: from difficulty 1, the only large enemy on the lowest difficulty, and the Mindless Masses' heavy; none on Appropriators planets, and disputed with the Vote Snatchers unverified.
Every part is unarmored, so what matters is where your damage goes: the face chunks are the weak point, and the arms pass little to its health.
| Part | Armor | Health | Weak point | Source |
|---|---|---|---|---|
| Main | 0 | 5,000 | no fatal part: grind the 5,000 pool; x1.8 fire and arc damage; 40% durable | wiki |
| Head Chunks (6) | 0 | 400 | WEAK POINT: the faces pass 150% to Main; non-fatal; 25% durable; ExDR 25% | wiki |
| Stomach Chunks (2) | 0 | 400 | non-fatal; 100% to Main (uncapped); 40% durable; ExDR 25% | wiki |
| Arms (4) | 0 | 200 | non-fatal; breaking them stops its swings (charges remain); 25% to Main (capped); 40% durable; explosion-immune | wiki |
| Legs (2) | 0 | 400 | non-fatal; breaking them does not slow it; 100% to Main (uncapped); 40% durable; ExDR 25% | wiki |
Air and the fleet's ships
Step sideways out of a Stingray's blue line, then shoot it while it slows. Kill the Watcher and you rarely meet a Warp Ship. In Mega Cities from difficulty 8, kill a Leviathan's turrets first. And never shoot the Overship with small arms: it calls Warp Ships onto the shooter.
6.1Stingray
Dodge it: step sideways out of the blue line it paints on the ground (the fastest escape), or go prone with Fortified armor or under an SH-32 Shield Generator Pack; jump and warp packs dodge it reliably.
Kill it: only while it slows to strafe. The AC-8, APW-1 or RS-422 need 3 hits; the MLS-4X Commando, EAT-17 or GR-8 one; the MG-43 about 30 rounds approx. The LAS-98 Laser Cannon hits it even in full flight. The FAF-14 Spear and StA-X3 W.A.S.P. lock on but only catch it when it slows. An activated SEAF SAM Site shoots Stingrays down, though not at full speed.
Watch out for: it arrives from beyond the map during a mission, never in patrols and never at the start, circles two or three times at high speed, then slows, hovers forward and strafes the blue line with its Plasma Destructor gunpods (50 plus a 125 blast per bolt, anti-tank penetration, for 4.4 seconds). It explodes when it dies (300 within 5-12 m), and its wreck keeps flying. Its strafe kills other Illuminate caught in it, even Grounded Warp Ships, but never Overseers. Call "Stingray line" when the blue strip appears.
Where: from difficulty 4, and only with the regular roster: no other fleet brings them unless the Invasion Fleet joins it.
The whole airframe is one medium-armored, partly durable pool: medium penetration hurts it at reduced damage, heavy at full.
| Part | Armor | Health | Weak point | Source |
|---|---|---|---|---|
| Main | 3 | 800 | main health pool (the whole airframe); explodes on death (300 blast, 5-12 m) and the wreck keeps flying; 70% durable | wiki |
| Gun Ports | 3 | Main | non-fatal; share the Main pool; 50% durable; explosion-immune | wiki |
6.2Warp Ship
Kill it: kill the Watcher first and it never comes. If it does, splash the troops while they hang in its beam (GL-21, grenades). With a launcher, drain its shield, then put one FAF-14 Spear or GR-8 rocket, or two EAT-17 or LAS-99 shots, into the beamer underneath; the armored sides soak damage, so don't shoot them. A SEAF SAM Site needs one missile for the shield and one to kill.
Watch out for: airborne ships answer a Watcher's call and beam troops down from their underside, like the Automatons' dropships. Since patch 1.002.200 they carry the same shield as the grounded ones, which are spawners (Grounded Warp Ship).
The beamer is the fatal weak spot; every other hull part is anti-tank armor that only feeds the main pool.
| Part | Armor | Health | Weak point | Source |
|---|---|---|---|---|
| Main | 5 | 3,500 | main health pool; 100% durable | wiki |
| Beamer | 5 | 1,000 | FATAL WEAK SPOT under the ship; 100% to Main (uncapped); 100% durable; explosion-immune; +1,500 bleed health (no decay) | wiki |
| Frontal Fuselage (2) | 5 | 1,000 | non-fatal; 100% to Main (uncapped); 100% durable; explosion-immune | wiki |
| Rear Fuselage (2) | 5 | 1,000 | non-fatal; 100% to Main (uncapped); 100% durable; explosion-immune | wiki |
| Engine | 5 | Main | non-fatal; shares the Main pool; 100% durable; explosion-immune | wiki |
| Stern (2) | 5 | 1,000 | non-fatal; 100% to Main (capped); 100% durable; explosion-immune | wiki |
| Bow | 5 | 1,000 | non-fatal; 100% to Main (capped); 100% durable; explosion-immune | wiki |
| Shield | 0 | 2,500 | 2,500 bubble since 1.002.200; must fall before the hull takes damage; non-fatal; passes nothing to Main | wiki |
6.3Leviathan
Kill it: the four turrets first. One EAT-17 or LAS-99 Quasar Cannon hit each (about 9 AC-8 or APW-1 hits) removes almost all its damage approx. The GR-8, FAF-14 Spear and E/AT-12 Anti-Tank Emplacement work on the body; a broken fin or tail exposes internals that the APW-1 and LAS-98 can hurt; in Take Down Overship the Planetary Defense Cannon hits Leviathans hard too. The wiki says an exactly placed Eagle Strafing Run or Orbital Gatling Barrage can kill one unverified.
Watch out for: four Disintegration Culverins underneath (400 damage per second each, setting you on fire) that often focus one diver; since 1.003.103 it marks its target with light a few seconds before firing, so move when you are lit. Ten plasma bomb generators (250 blast) cover anything beneath it, and its wreck crushes whatever is below. Smoke blocks it from acquiring a new target. Keep exosuits, FRVs and emplacements away from it.
Where: only in Mega City missions with the Leviathan Blockade operation modifier, from difficulty 8, up to five at once.
The turrets are the targets; the fins, spine and tail are anti-tank armor, and the internals appear only after one of them breaks.
| Part | Armor | Health | Weak point | Source |
|---|---|---|---|---|
| Main | 4 | 15,000 | main health pool; only in Mega City missions with the Leviathan Blockade modifier (D8+), up to 5 at once | wiki |
| Turrets (4) | 4 | 1,500 | non-fatal but each carries a 400/s Disintegration Culverin: kill these first; 85% durable | wiki |
| Front Vertebra | 5 | 7,000 | non-fatal; 100% to Main (capped); ExDR 35% | wiki |
| Front Fins (2) | 5 | 5,500 | non-fatal; 100% to Main (capped); ExDR 35% | wiki |
| Warp Disc | 5 | 3,000 | non-fatal; 100% to Main (capped); explosion-immune | wiki |
| Forward-Middle Vertebra | 5 | 5,500 | non-fatal; 100% to Main (capped); ExDR 35% | wiki |
| Forward-Middle Fins (2) | 5 | 5,000 | non-fatal; 100% to Main (capped); ExDR 35% | wiki |
| Rearward-Middle Vertebra | 5 | 5,500 | non-fatal; 100% to Main (capped); ExDR 35% | wiki |
| Rearward-Middle Fins (2) | 5 | 3,900 | non-fatal; 100% to Main (capped); ExDR 35% | wiki |
| Rear Vertebra | 5 | 5,000 | non-fatal; 100% to Main (capped); ExDR 35% | wiki |
| Rear Fins (2) | 5 | 3,000 | non-fatal; 100% to Main (capped); ExDR 35% | wiki |
| Tail | 5 | 3,900 | non-fatal; 100% to Main (capped); ExDR 35% | wiki |
| Fins or tail broken: internals | 4 | 15,000 | fatal; 100% to Main | wiki |
| Fins or tail broken: damaged rearward-middle vertebra | 5 | 5,500 | non-fatal; 100% to Main (capped); ExDR 35% | wiki |
6.4Illuminate Overship
Leave it alone unless you are on the Planetary Defense Cannon: small-arms fire only brings Warp Ships down on you, and since 6.1.0 nothing else can destroy it.
Kill it in Take Down Overship: retrieve the access codes, raise the cannon and aim it yourself. The first shell breaks the shield and a second into the nearest glowing port kills the ship. A broken shield returns 60 seconds after it fell, so fire the second shell quickly.
Where: over Mega Cities in Take Down Overship, and in some Exostorm and Void operations.
Its hull and ports sit at the top of the armor scale; only the cannon's shells get through.
| Part | Armor | Health | Weak point | Source |
|---|---|---|---|---|
| Main | 10 | 18,001 | main health pool; 100% durable | wiki |
| Port | 10 | 1,500 | FATAL WEAK SPOT (the glowing ports under the cap); 100% to Main (capped); 100% durable; explosion-immune | wiki |
| Shield | 0 | 10,000 | 10,000; regenerates 500/s after 20 s untouched; returns 60 s after falling; non-fatal; passes nothing to Main | wiki |
Fleets: what changes on each planet
Check the planet's fleet before you drop. The Illuminate front splits into four fleets, the Invasion Fleet, Mindless Masses, Appropriators and Vote Snatchers, and each wants a different loadout. Arrowhead's creative director wrote in September 2026 that the split exists so that loadouts must fit the fleet (A Look Back). A planet's fleet shows as a planet effect on the war map; a planet without one runs the regular roster.
Invasion Fleet
Brings: Voteless, Watchers, all three Overseers, Fleshmobs, Harvesters, Stingrays and Warp Ships, plus Leviathans in city missions. Signature threat: shielded Harvesters behind Voteless hordes, Stingray strafes and Crescent bombardment.
Bring: per pair of divers, one horde clearer (M-105 Stalwart, MG-43, a flamethrower, gas) and one Harvester answer (MLS-4X Commando, EAT-17, LAS-99, GR-8), plus a Watcher killer (JAR-5 Dominator, R-63CS Diligence Counter Sniper, APW-1, RS-422). Play: Watchers first, then Harvesters; activate SAM sites for Stingrays; wear Electrical Conduit against the arcs.
Mindless Masses
Brings: far more Voteless and Fleshmobs, in patrols of dozens and swarms of 50 or more even on low difficulties. Removes: Elevated Overseers and Stingrays; Crescent Overseers come only as guards and Watchers are rare on low difficulties, so reinforcement calls are few. Overseers and Harvesters return on high difficulties.
Bring: fire (FLAM-40 Flamethrower, B/FLAM-80 Cremator, FLAM-66 Torcher, P-72 Crisper), the M-105 Stalwart, GL-21, RL-77 Airburst and gas; one-handed SMGs and pistols to shoot while backing off; and still one anti-armor tool. Play: stay mobile and save big blasts for Fleshmob packs.
Appropriators
Brings: Veracitor and Gatekeeper constructs from difficulty 4, Obtruder swarms, and Overseers, Elevated Overseers, Harvesters and Watchers. Removes: Voteless, Fleshmobs, Crescent Overseers and Stingrays.
Bring: shield breakers (LAS-16 Sickle, machine guns), an AC-8 or APW-1 for Gatekeeper horns and construct weak spots, anti-tank for cockpits, fast-handling rifles for Obtruders, and Fortified armor against the plasma blasts. Play: keep your distance from Veracitors and never melee an Obtruder overhead (the units).
Vote Snatchers
Brings: Wretches from difficulty 1 and Crushers from 4, in larger patrols and guards. Removes: every Overseer, the Harvesters, Watchers and Stingrays, so nothing calls reinforcements. Voteless and Fleshmobs may come along; the wiki's pages disagree unverified.
Bring: high rate of fire for Wretch legs (MGX-42 Bullet Storm, MG-43, M-105 Stalwart), heavy penetration for Crusher helmets (AC-8, RS-422, P/40-K Bolt Pistol, APW-1), a G-123 Thermite, fire and gas. Play: kill the Wretches first so they can't surround you while the squad works a Crusher, and never waste a single rocket on a Crusher's body (the units).
7.1Mixed planets
Since 7.0.0 the Invasion Fleet can join another fleet's planet and bring its own units back: all three Overseers, Harvesters, Stingrays, Warp Ships and Watchers on Vote Snatchers planets; Crescent Overseers and Stingrays on Mindless Masses planets; and Voteless, Fleshmobs, Crescent Overseers and Stingrays on Appropriators planets, a list the wiki marks "needs confirmation" unverified. On a mixed planet, split the jobs: some divers clear the horde while others carry the anti-heavy tools. Loadout changes for every front's subfactions are on the loadouts tab (Subfaction adjustments).
Appropriators: Veracitor, Gatekeeper, Obtruder
Kill the pilot, not the machine. One anti-tank hit to an unshielded cockpit ends a Veracitor or Gatekeeper, one heavy-penetration hit to a Gatekeeper's horn switches its pilot shield off for good, and both constructs hide soft weak spots on their backs that any gun can kill. Bring rate of fire for the Obtruder swarms, and Fortified armor, because plasma explodes from every rank.
The Appropriators, added in patch 6.1.0 (6.1.0 notes), field only what the wiki calls "pure" Illuminate: no Voteless, Fleshmobs, Crescent Overseers or Stingrays (wiki). Each construct is driven by an Overseer behind a rechargeable shield; kill the pilot and the machine dies.
8.1Veracitor
Kill it:
- Cockpit: one EAT-17, GR-8 or LAS-99 to the unshielded cockpit kills it; the MLS-4X Commando needs one or two.
- Head: break it with medium penetration (two JAR-5 Dominator shots, one AC-8) and the pilot shield is off for good.
- Back: from behind or from high ground, the soft weak spot at the back of the cockpit takes any weapon (3 AC-8 or APW-1 shots, 15 AR-23 Liberator rounds); its hips and upper legs are fatal and only lightly armored approx.
- Arms: medium penetration hurts them, so machine guns (MG-43, M-1000 Maxigun) and the RL-77 Airburst's flak at the cockpit work.
- Strikes: its limbs ignore explosions, so small blasts do little; an Orbital Precision Strike or Eagle 500kg Bomb works, and EMS (Orbital EMS Strike, G-23 Stun, A/M-23 EMS Mortar Sentry) freezes it.
Watch out for: a close-combat walker that charges on its legs, swipes with its claw arms and crosses them over the cockpit at range to protect the pilot. It spots divers from 100 m and has guarded outposts since 7.0.0, which also gave every construct melee attack anti-tank penetration and more knockback (it swipes for 75, slams for 300 and rams for 70): the SH-20 Ballistic Shield still blocks the damage, but you go flying and the shield breaks after about 15 hits. Its charge smashes through obstacles and stops at walls.
Where: Appropriators planets, from difficulty 4.
Find the Pilot, Head and Cockpit Weakspot rows: the pilot is fatal once its shield is down, and the soft weak spots are the any-weapon route.
| Part | Armor | Health | Weak point | Source |
|---|---|---|---|---|
| Main | 3 | 3,000 | main health pool; 100% durable | wiki |
| Head | 3 | 300 | non-fatal; destroying it switches the pilot shield off permanently; passes nothing to Main; explosion-immune | wiki |
| Chassis | 3 | 1,600 | fatal; 75% to Main (uncapped); 50% durable; explosion-immune | wiki |
| Carapace (2) | 3 | 400 | non-fatal; 50% to Main (uncapped); 50% durable; explosion-immune | wiki |
| Internals (2) | 1 | 600 | fatal weak spots (AV1 vents); 100% to Main (uncapped); 50% durable; explosion-immune | wiki |
| Shield | 2 | 1,300 | rechargeable shield over the pilot; non-fatal; passes nothing to Main; explosion-immune | wiki |
| Pilot | 2 | 700 | FATAL WEAK SPOT once the shield is down (one AV2 hitbox); passes nothing to Main; explosion-immune | wiki |
| Cockpit | 3 | 1,600 | fatal; 100% to Main (capped); 50% durable; explosion-immune | wiki |
| Cockpit Weakspot | 1 | 800 | FATAL WEAK SPOT (AV1) at the back of the cockpit, under the armor around the head; 100% to Main (capped); 50% durable; explosion-immune | wiki |
| Shoulders (2) | 2 | 800 | non-fatal; 75% to Main (uncapped); 50% durable; explosion-immune | wiki |
| Upper Arms (2) | 2 | 800 | non-fatal; 75% to Main (uncapped); 50% durable; explosion-immune | wiki |
| Lower Arms (2) | 3 | 800 | non-fatal; passes nothing to Main; 50% durable; explosion-immune | wiki |
| Arm Weakspots (2) | 1 | 800 | non-fatal AV1 vents; destroy the arm they sit on; passes nothing to Main; explosion-immune | wiki |
| Hips (2) | 2 | 1,600 | fatal; 75% to Main (uncapped); 50% durable; explosion-immune | wiki |
| Rear Hip | 3 | 1,600 | fatal; 75% to Main (uncapped); 50% durable; explosion-immune | wiki |
| Upper Legs (2) | 2 | 1,600 | fatal; 75% to Main (uncapped); 50% durable; explosion-immune | wiki |
| Lower Legs (2) | 3 | 1,600 | fatal; 75% to Main (uncapped); 50% durable; explosion-immune | wiki |
| Rear Leg | 3 | 1,600 | fatal; 75% to Main (uncapped); 50% durable; explosion-immune | wiki |
8.2Gatekeeper
Kill it:
- Horn: the horn on its forehead generates the pilot shield; one AC-8, APW-1 or MG-206 hit removes the shield for good.
- Cockpit stump: one EAT-17 or GR-8 into the stump that holds the cockpit kills it.
- Hips and legs: its three hips and three legs are all fatal and medium-armored (a hip takes 3 AC-8 or APW-1 hits, 2 from the RS-422, 9 from the MG-206) approx.
- Back: its two soft weak spots, at the rear and behind the cockpit, take any weapon from behind.
- Strikes: the Orbital Precision Strike, Eagle 500kg Bomb and Orbital Railcannon Strike; the Orbital EMS Strike stuns it.
Watch out for: twin Plasma Starcannons with blue guiding lasers: a charged two-shot burst (110 plus a 60 blast) that ragdolls you even behind cover, and a long tracking volley (30 plus a 20 blast per bolt for 3.5 seconds), telegraphed by the barrels spinning up. It holds the middle of an Appropriator line, between Veracitors in front and Harvesters behind. Since 7.0.0 it spawns about as often as the Veracitor, so older guides that call it rare are out of date.
Where: Appropriators planets, from difficulty 4.
Its plating, horn, guns and cockpit are heavy armor; the pilot is partly durable, so it takes more rounds than the Veracitor's.
| Part | Armor | Health | Weak point | Source |
|---|---|---|---|---|
| Main | 4 | 2,500 | main health pool; 100% durable | wiki |
| Shield Generator | 4 | 50 | WEAK POINT: the horn; one AP4 hit switches the pilot shield off for good; non-fatal; passes nothing to Main; explosion-immune | wiki |
| Chassis | 4 | 1,600 | fatal; 75% to Main (uncapped); 80% durable; explosion-immune | wiki |
| Carapace (2) | 4 | 400 | non-fatal; 20% to Main (uncapped); explosion-immune | wiki |
| Rear Weakspot | 1 | 800 | FATAL WEAK SPOT (AV1, on its back); 100% to Main (uncapped); 80% durable; explosion-immune | wiki |
| Shield | 2 | 1,300 | rechargeable shield over the pilot; non-fatal; passes nothing to Main; explosion-immune | wiki |
| Pilot | 2 | 700 | FATAL once the shield is down; passes nothing to Main; 50% durable; explosion-immune | wiki |
| Cockpit | 4 | 1,200 | fatal: one EAT-17 or GR-8 to the stump kills it; 75% to Main (capped); 80% durable; explosion-immune | wiki |
| Cockpit Weakspot | 1 | 800 | FATAL WEAK SPOT (AV1, at the back of the cockpit); 100% to Main (capped); 80% durable; explosion-immune | wiki |
| Shoulder Armor (2) | 4 | 200 | non-fatal; 20% to Main (uncapped); explosion-immune | wiki |
| Arm Armor (2) | 4 | 200 | non-fatal; 20% to Main (uncapped); explosion-immune | wiki |
| Arms (2) | 3 | 1,600 | non-fatal; 100% to Main (uncapped); 50% durable; explosion-immune | wiki |
| Guns (2) | 4 | 800 | non-fatal; disarm; passes nothing to Main; explosion-immune | wiki |
| Gun Weakspots (2) | 2 | 800 | non-fatal; disarm; passes nothing to Main; explosion-immune | wiki |
| Leg Armor (6) | 4 | 200 | non-fatal; 20% to Main (uncapped); explosion-immune | wiki |
| Hips (3) | 3 | 800 | fatal; 100% to Main (uncapped); 50% durable; explosion-immune | wiki |
| Legs (3) | 3 | 800 | fatal; 100% to Main (uncapped); 50% durable; explosion-immune | wiki |
| Armor broken: internals (2) | 2 | 800 | fatal; 100% to Main (uncapped); 50% durable; explosion-immune | wiki |
| Armor broken: arms (2) | 3 | 1,600 | non-fatal; 100% to Main (uncapped); 50% durable; explosion-immune | wiki |
| Armor broken: legs (3) | 3 | 800 | fatal; 100% to Main (uncapped); 50% durable; explosion-immune | wiki |
8.3Obtruder
Kill it: with rate of fire and quick handling: the AR-23A Liberator Carbine, AR-61 Tenderizer, MP-98 Knight, SMG-203 Gallant or LAS-16 Sickle; shotguns (SG-97 Sweeper, SG-20 Halt, the Punisher family); the LAS-58 Talon in one or two shots; AC-8 flak and arc weapons for clumps; and guard dogs (AX/AR-23, AX/LAS-5 Rover, AX/ARC-3 K-9). Gatling and machine-gun sentries and the Orbital Airburst Strike help.
Watch out for: a Watcher look-alike without the search cone that never calls reinforcements. Obtruders come in large swarms (the wiki says up to about 18 unverified) from fast patrols or Warp Ships, fly over any terrain, surround a diver and fire slow, clearly charged, inaccurate Plasma Torch shots. Each explodes when killed and again when it lands (300 within 1-2 m), and one blast can set off its neighbors. Swarms swamp lock-on weapons (the W.A.S.P., the P-92 Warrant) with false targets, and one killed overhead falls on you, so don't melee them above you.
Where: Appropriators planets, from difficulty 1.
Aim at the body, the fatal weak spot; the eye and fins feed its health but cannot kill it alone.
| Part | Armor | Health | Weak point | Source |
|---|---|---|---|---|
| Main | 0 | 400 | main health pool | wiki |
| Body | 1 | 400 | FATAL WEAK SPOT: center mass; 100% to Main (capped); explosion-immune | wiki |
| Eye | 0 | 300 | non-fatal; one hit can damage eye, body and Main together; 100% to Main (capped); explosion-immune | wiki |
| Vertical Fins (2) | 0 | 100 | non-fatal; 100% to Main (capped); explosion-immune | wiki |
| Lateral Fins (2) | 0 | 100 | non-fatal; 100% to Main (capped); explosion-immune | wiki |
Vote Snatchers: Wretch and Crusher
Shoot Wretches in the legs, never the head, and kill them first. Break a Crusher's helmet with heavy penetration, then shoot the head, or stick one Thermite on it. Nothing on these planets calls reinforcements, so every fight is about the patrol in front of you.
The newest Illuminate units are the Wretch and Crusher, added with Devoid of Liberty (August 12, 2026): citizens mutated by the Illuminate. On Vote Snatchers planets they replace every Overseer, the Harvesters, Watchers and Stingrays, and patrols and guards come in larger numbers. The dispatch for Major Order A3-8-6 spelled out both counters: "Sever its bladed appendages; cranial trauma has no effect" (wiki Wretch page) and "Concentrate fire on its control helmet to expose a lethal vulnerability" (wiki Crusher page).
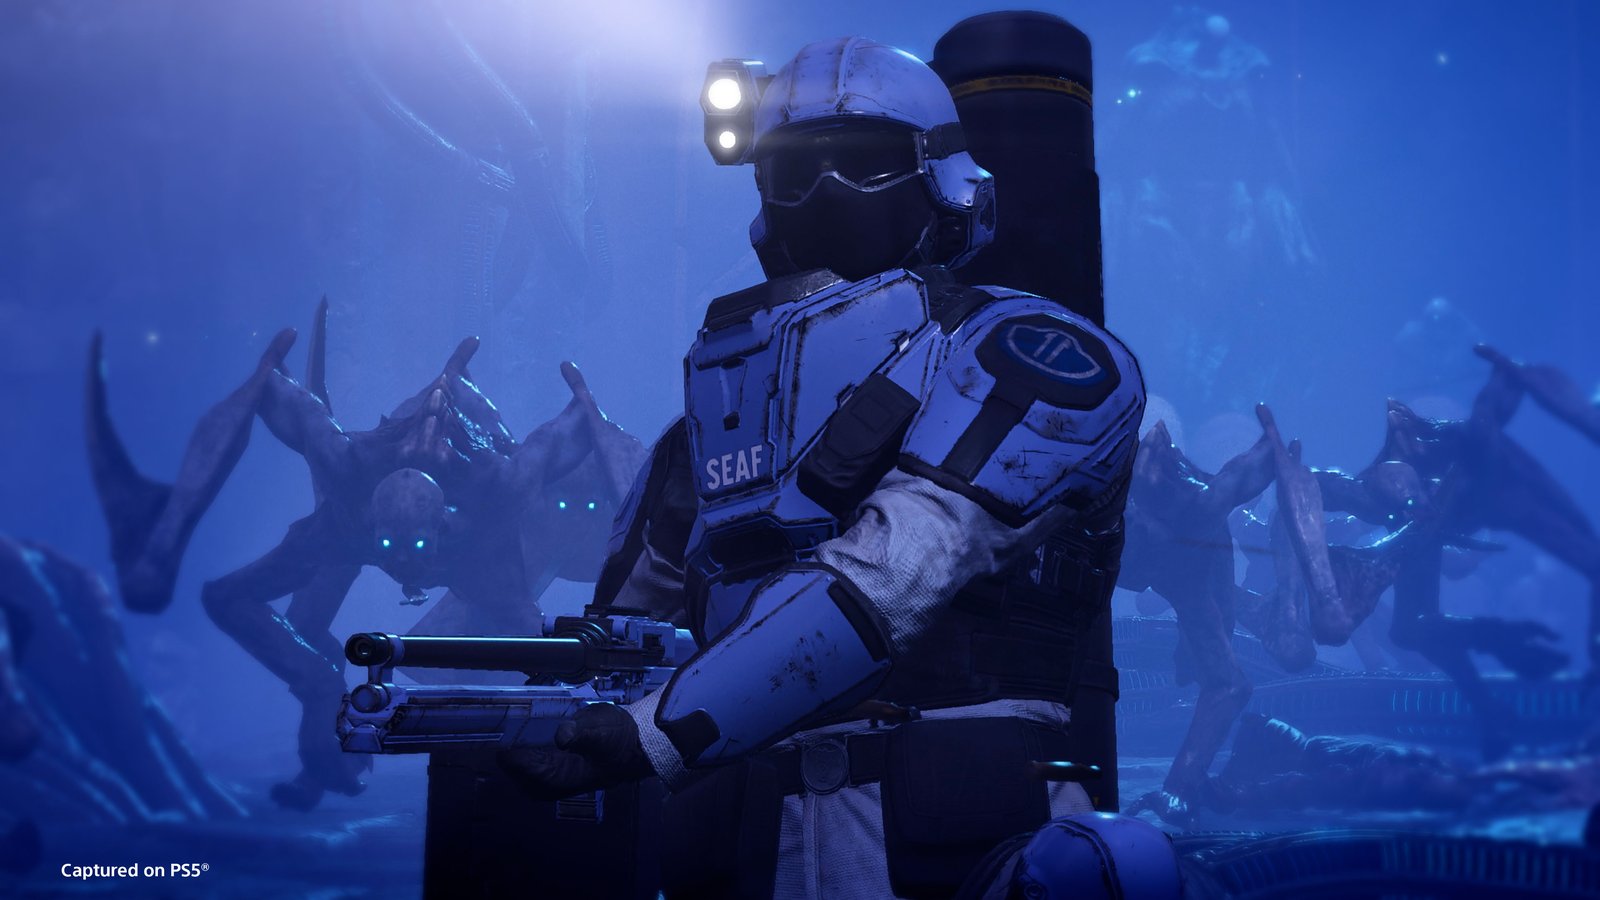
9.1Wretch
Kill it: aim low. Each leg holds the Wretch's whole health and passes all of it on, so a destroyed leg kills it: 5 AR-23 Liberator rounds, 3 from the R-63 Diligence, one from an AC-8 or APW-1 approx. The blade arms are a second target. The head is a decoy: a headless Wretch stands up and slashes wildly until it dies. Slide, crouch or go prone when it pounces, or kill it mid-leap.
High rate of fire (MGX-42 Bullet Storm, MG-43, M-105 Stalwart), fire (P-72 Crisper, SMG/FLAM-34 Stoker, FLAM-66 Torcher, FLAM-40 Flamethrower, B/FLAM-80 Cremator) and gas slow and break up packs; the Eagle Napalm Airstrike, Orbital Gas Strike and the gas and fire guard dogs (AX/TX-13 Dog Breath, AX/FLAM-75 Hot Dog) help. Wretches attack sentries and emplacements before divers or SEAF, so a sentry makes good bait.
Watch out for: a nimble, hunched mutant with two blade arms and two grasping hands. It runs straight at you but often darts around cover to flank, then pounces with a leap that tracks a moving diver and ends in a sideways slash (50, with heavy penetration; its hands hit for 25). It passes through an SH-32 shield bubble from some angles. A known issue: its leap lands less often on players who are not hosting, because of host-side latency.
Where: Vote Snatchers planets, from difficulty 1.
Note the Legs row: a destroyed leg deals its full health to the Wretch's main pool. The Head row is the decoy.
| Part | Armor | Health | Weak point | Source |
|---|---|---|---|---|
| Main | 1 | 450 | main health pool | wiki |
| Head | 1 | 100 | DECOY: non-fatal; a headless Wretch keeps slashing; 100% to Main (capped); explosion-immune | wiki |
| Arms (4) | 1 | 50 | non-fatal; 50% to Main (capped); explosion-immune | wiki |
| Claws (2) | 3 | 200 | the blade arms (AV3); non-fatal; 100% to Main (capped); explosion-immune | wiki |
| Legs (2) | 1 | 450 | KILL ROUTE: a destroyed leg deals its full 450 to Main; explosion-immune | wiki |
9.2Crusher
Kill it:
- Break the helmetIt takes heavy penetration or better: one RS-422 Railgun shot (safe mode), two from the P/40-K Bolt Pistol, AC-8 or APW-1, four from the MG-206 approx. The helmet does not regenerate.
- Shoot the headOnce the helmet is off, any weapon works on the fatal head: one more AC-8 or Railgun shot, or four AR-23 Liberator rounds.
- Or skip bothOne G-123 Thermite or one C4 charge anywhere kills it: the blast hits several parts and its health at once.
Keep the damage constant. It regenerates 30 health per second on every limb and its main pool, starting half a second after it last took damage (the helmet and head never heal). A single anti-tank shot is wasted: it survives a GR-8 Recoilless or a 40-K Meltagun hit and heals. A light gun on a leg takes about two magazines while it regenerates.
Buy time: the AC-8 staggers it out of its slam; stun and gas slow it, and the wiki lists fire streams among its crowd-control weaknesses unverified; steady fire from a B/FLAM-80 Cremator keeps it from healing; and the SH-20 Ballistic Shield Backpack absorbs about 5 swings, though you still go flying. For stratagems, TheGamer (August 12, 2026) picks the Orbital Railcannon Strike, TD-220 Bastion MK XVI, A/AC-8 Autocannon Sentry and EXO-49 Emancipator Exosuit community-tested.
Watch out for: a slow, towering flesh amalgam with a metal club and a triangular helmet; it weeps when idle and sounds a horn-like cue when it engages. Its Heavy Cudgel slam (200 plus a 50 blast, anti-tank penetration) kills on a direct hit and ragdolls everyone around it, and a lunge gives it deceptive reach. Lose its club arm and it smacks with the other; lose both and it stomps. The long swing does not track, so running past it is surprisingly safe.
Where: Vote Snatchers planets, from difficulty 4.
The helmet is heavy armor over a lightly armored fatal head; everything else is soft but huge, and it regenerates.
| Part | Armor | Health | Weak point | Source |
|---|---|---|---|---|
| Main | 1 | 6,000 | main health pool; limbs and Main regenerate 30/s from 0.5 s after the last hit; 70% durable | wiki |
| Helmet | 4 | 300 | breakable AV4 cap over the head (does not regenerate); non-fatal; passes nothing to Main; ExDR 30% | wiki |
| Head | 1 | 300 | FATAL WEAK SPOT once the helmet is off (does not regenerate); 100% to Main (capped); explosion-immune | wiki |
| Torso | 1 | 6,000 | non-fatal; 100% to Main (capped); 70% durable; explosion-immune | wiki |
| Arms (2) | 1 | 2,000 | non-fatal; 100% to Main (capped); 70% durable; ExDR 20% | wiki |
| Pelvis | 1 | 4,000 | non-fatal; 100% to Main (capped); 60% durable; explosion-immune | wiki |
| Legs (2) | 1 | 4,000 | fatal; slow route for light weapons (regenerates); 100% to Main (capped); 60% durable; ExDR 70% | wiki |
Structures and objectives
Clear the Lightning Spires and Gazers around an encampment first, then close each Grounded Warp Ship with an explosive through its bay door. Gazer Spires and Monoliths fall only to a Hellbomb-class blast.
Closing a spawner through its opening takes an explosive of demolition 20 or more; bullets, beams and arcs never close one. A Warp Gateway also falls to demolition 40 from outside, and Gazer Spires and Monoliths need demolition 60, which only the NUX-223 Hellbomb, the B-100 Portable Hellbomb and a SEAF Artillery Mini-Nuke reach. Since 7.0.0 SEAF troops can destroy enemy spawners too. The same rules on every front: Spawners and structures.
10.1Grounded Warp Ship
Destroy it: drain its shield with steady fire (MG-43, M-105 Stalwart, LAS-16 Sickle), then put any explosive of demolition 20 or more through the bay door before the shield returns: a grenade (cook the long fuses) or a GL-21, CB-9, R-36 or AC-8 round. A G-123 Thermite or C4 charge anywhere destroys it even with its shield up, and so does any demolition-50 strike: the Orbital Precision Strike, Eagle 500kg Bomb, Orbital Railcannon Strike, Orbital Gas Strike, Orbital Laser, the 120mm, 380mm and Walking barrages, or SEAF Artillery (throw the beacon onto the ramp). Once the shield is down, anti-tank fire to the hull works too.
Watch out for: a spawner that releases Voteless, Overseers and others at intervals. If its shield comes back while your grenade is in the bay, the grenade does nothing. The GP-20 Ultimatum needs the shield down first, per the official 1.003.000 notes (Steam); the wiki still says otherwise.
The Main row is the hull, which takes extra damage from explosions; the bay door is the fatal opening, and the shield must fall before either takes a hit.
| Part | Armor | Health | Weak point | Source |
|---|---|---|---|---|
| Main | 5 | 5,000 | the hull; demolition 50 (or 20 explosive at the bay door) destroys it; main health pool; 100% durable; takes 250% explosion damage | wiki |
| Bay door (inner) | 0 | -- | the bay door: an explosive of demolition 20+ inside destroys the ship; fatal | wiki |
| Shield | 0 | 2,500 | regenerates 200/s after a 15 s delay; a shield that returns while an explosive is inside the bay prevents the demolition; non-fatal; passes nothing to Main | wiki |
10.2Warp Gateway
Destroy it: put an explosive of demolition 20 or more into the aperture when it opens, or hit the frame with demolition 40 from outside (an Eagle Airstrike or Orbital Precision Strike). A G-123 Thermite works without waiting, anti-tank fire (GR-8, FAF-14 Spear, LAS-99) works from range, and an Eagle Strafing Run or Orbital Gatling Barrage takes it down. Run when it dies: its delayed blast ragdolls.
Watch out for: continuous spawns, in Void missions and encampments, from difficulty 2.
The Main row is the frame, anti-tank armor that only anti-tank fire hurts; the Gateway row is the aperture, which takes an explosive, not damage.
| Part | Armor | Health | Weak point | Source |
|---|---|---|---|---|
| Main | 5 | 1,500 | the frame; demolition 40 from outside; main health pool; 100% durable | wiki |
| Gateway | -- | -- | the aperture: an explosive of demolition 20+ inside destroys it; fatal | wiki |
10.3Gazer
Destroy it: shoot the eye with any weapon, or hit it with anything of demolition 20 or more (an APW-1 round, a G-6 Frag, the LAS-98 Laser Cannon). Its beam tracks slowly and cannot follow you up close, so run sideways.
Watch out for: a beam turret at encampments and objectives that sets you on fire.
The eye is the only lightly armored part; the rest of the turret is anti-tank armor, so shoot the eye.
| Part | Armor | Health | Weak point | Source |
|---|---|---|---|---|
| Main | 5 | 900 | main health pool; 100% durable | wiki |
| Eye | 1 | 700 | FATAL WEAK SPOT (AV1); 100% to Main (capped) | wiki |
| Sphere | 5 | 900 | armored shell; fatal; 100% to Main (capped) | wiki |
| Base | 5 | 900 | armored base; fatal; 100% to Main (capped); explosion-immune | wiki |
10.4Lightning Spire
Destroy it: any explosive of demolition 20 or more (grenades, GP-31, CB-9, AC-8, R-36) or 200 damage from gunfire (about 6 MG-43 rounds). Crawl into range prone, because it will not target you, and switch guard dogs off near it.
Watch out for: an Illuminate Tesla tower that, after a one-second charge, arcs 200 damage within 25 m and chains through Illuminate units and through guard dogs to their owner. Electrical Conduit armor survives it.
The whole tower is one light-armored pool with little health: light penetration hurts it at reduced damage, medium and up at full.
| Part | Armor | Health | Weak point | Source |
|---|---|---|---|---|
| Main | 2 | 200 | the spire: 200 HP or demolition 20; arcs 200 damage (AP4) at 25 m, chaining through Illuminate; main health pool; 80% durable | wiki |
10.5Cognitive Disruptor
Switch it off: the tower cannot be destroyed, so break the power taps on its nearby generators with explosives, or throw an Orbital Napalm, 120mm or 380mm HE Barrage at it.
Watch out for: within 200 m it scrambles every stratagem code (they draw from a list that includes joke codes), so read the code on screen before you input it. It appears from difficulty 2.
The only row is a power tap: the tower itself cannot be destroyed, and each tap is unarmored.
| Part | Armor | Health | Weak point | Source |
|---|---|---|---|---|
| Power tap (PSU) | 0 | 180 | a power tap (PSU); destroy them all to switch the Disruptor off; main health pool; 100% durable | wiki |
10.6Gazer Spire
Destroy it: only demolition 60 works: the NUX-223 Hellbomb (the objective), a B-100 Portable Hellbomb or a SEAF Artillery Mini-Nuke. In Infiltrate Illuminate Lair, destroy it first, and clear the Warp Gateways that ring it.
Watch out for: its Spire Hyperbeam (1,000 damage per second out to about 250 m), which kills divers, vehicles and exosuits: stay out of its sight line. It appears in Void missions from difficulty 5; since 7.1.0 it completes its firing cycle, and the 7.1.0 notes call it the "Spire Gazer".
Its armor sits near the top of the scale, but damage does not matter here: only demolition 60 destroys the spire.
| Part | Armor | Health | Weak point | Source |
|---|---|---|---|---|
| Main | 9 | 900 | demolition 60 only; its 1,000/s Spire Hyperbeam kills divers and vehicles; main health pool; 100% durable | wiki |
10.7Monolith
Destroy it: demolition 60 inside its 17 m inner radius, from the NUX-223 Hellbomb, a B-100 Portable Hellbomb or a SEAF Artillery Mini-Nuke. It is the objective of Free Colony and Democratize the Void. Touching it kills a diver without explosion resistance.
10.8Illuminate Encampment
Clear it: Lightning Spires and Gazers first, then the ships and gateways as above; orbital barrages and 500kg Bombs find the big ships easily.
What's inside: 1 (small), 1-2 (medium) or 3-4 (heavy) Grounded Warp Ships or Warp Gateways, with Gazers, Lightning Spires and exploding barrels, and Harvesters guarding heavy ones near ruins. There are far fewer per map than other factions' outposts. Outposts pay 50, 100, 150 and 200 Requisition with 5, 10, 20 and 40 XP for a light, medium, heavy and giant one; Illuminate Encampments top out at heavy.
10.9Exospire
Destroy it (Destroy Exospire, from difficulty 3): break the shield generator at each of the 1-3 access nodes, call down and defend a Data Jack, then destroy at least 148 Dark Fluid cells in the core chamber; explosives and splash (GL-21, CB-9, R-36, AC-8 flak, grenades) do it fastest. Stratagems may be hindered by electromagnetic interference, and the storm keeps hitting until the Exospire dies (Exostorms).
Aim at the node generators and the Dark Fluid cells: both are lightly armored but fully durable, so explosives and other high durable damage clear them fastest.
| Part | Armor | Health | Weak point | Source |
|---|---|---|---|---|
| Access-node shield generator | 2 | 800 | fatal to the node; 100% durable (explosives and high durable damage) | wiki |
| Access-node generator top | 1 | 500 | non-fatal; 100% to the generator (capped); explosion-immune | wiki |
| Dark Fluid cell | 1 | 200 | fatal to the cell; 100% durable; destroy at least 148 | wiki |
| Core weak spot | 0 | 50 | fatal; +50 bleed health (no decay); explosion-immune | wiki |
10.10Void Blossom
Destroy it: one hit on its soft corona destroys the flower; explosives clear clusters (CB-9, GL-21, Eagle Airstrike, Eagle Cluster Bomb). Within 5 m its powder reverses your left-right movement and camera for 12 seconds, so dive clear. It grows in Void missions, and its numbers come from an unfinished wiki page unverified.
The corona is the lightly armored weak point; the medium-armored petals around it are not fatal.
| Part | Armor | Health | Weak point | Source |
|---|---|---|---|---|
| Petals unverified | 3 | -- | armored petals around the corona | wiki |
| Corona unverified | 1 | -- | WEAK POINT: one hit destroys the flower; its 5 m powder reverses left/right controls for 12 s, so dive clear | wiki |
10.11SEAF objectives that fight for you
An activated SEAF SAM Site (300 m, 24 missiles) shoots down Stingrays, Warp Ships and Leviathans. SEAF Artillery fires five shells: the Mini-Nuke equals a Hellbomb, one of only three ways to destroy a Monolith or Gazer Spire, and the Static Field shell is an EMS field. On Super Helldive, a community note on the wiki says Illuminate side objectives are almost always SEAF Artillery, a SAM Site, a Cognitive Disruptor, a Radar Station, Eliminate Overseers or Destroy Rogue Research Station unverified. Every side objective, on every front: Side objectives and points of interest.
Where you fight them
In Mega Cities, bring weapons and sentries that arrive by Hellpod and mind where your strikes land: skyscrapers force Eagles and orbital strikes to reposition, and every civilian you kill costs Requisition. Most other Illuminate missions run through a colony, so expect close-quarters streets there too; Exostorm and Void planets add weather and objectives of their own.
11.1Colonies and Mega Cities
Most non-city Illuminate missions include a colony, so expect close-quarters streets. The Illuminate leave colonies mostly intact apart from camps of parked Warp Ships, and colony walls fall to demolition 40 (an Eagle Airstrike or Orbital Precision Strike). Mega Cities fill the whole map, put civilians and SEAF squads in the fight, host Take Down Overship, Repel Invasion Fleet and the Leviathan Blockade (from difficulty 8), and force Eagles and orbital strikes to reposition around skyscrapers, which makes weapons and sentries delivered by Hellpod more reliable there. Every Illuminate mission with its objective: Mission types.
11.2Friendly fire: civilians and SEAF
Each civilian or SEAF soldier a diver kills, directly or with a sentry, guard dog or stratagem, costs 25 Requisition. After 9 such kills your own Super Destroyer turns its 380mm barrage on you until you die; kills by mines cost Requisition but do not count toward that.
SEAF riflemen fire Liberator Penetrator rounds and their specialists shoot through divers, so stay out of their line of fire. SEAF soldiers within 10 m force an Overseer to lower its hand shield, and SEAF troops can destroy spawners. With the Heavy SEAF Presence modifier (7.0.0), a Pelican delivers squads of six (a leader, two riflemen, two specialists with an MG-43 and an EAT-17, and a medic with stims) to fight beside a solo diver or a short squad; the wiki says the modifier has been unavailable since September 21, 2026 unverified. Squad rules for friendly fire: Samples, reinforcements and friendly fire.
11.3Exostorms
Exospires in Illuminate ruins stir a planet's weather in three classes. Class 1 makes the weather permanent and adds occasional lightning (damage and a short stun, after a visible warning). Class 2 adds tornadoes (since 7.0.0) that lift divers, enemies and corpses. Class 3 makes lightning frequent and deadly to divers in medium or lighter armor, so consider heavy armor there. Storms typically reach Class 2 and Class 3 after about 72 and 120 hours. Some biomes swap hazards: acid storms become rain, and sandstorms and blizzards become permanent, visibility-cutting versions that blind enemies too. Destroying the Exospire calms most effects for the rest of that mission (wiki).
11.4The Void
Void planets (the Void Forest biome) bring their own missions: Destroy Gazer Spire; Infiltrate Illuminate Lair, whose objectives are drawn at random (cleanse a shrine with an Aquifer Drill, film experiments with a Tactical Video Camera, destroy a Gazer Spire, eradicate Void Blossoms); Democratize the Void; Extract Anomalous Material, whose GATER self-destructs like a Hellbomb at the end; Blitz: Destroy Illuminate Warp Gateways and Blitz: Suppress Toxic Pollination; plus secondary extraction zones. Whether Void missions are on the map depends on the war, so check the live war maps.
In May 2025 an Illuminate invasion fleet, the Great Host, reached Super Earth itself and fought through its Mega Cities before it was destroyed. In 2026 the Exostorms spread, and 15 planets that failed to stop their storms were swallowed by the Void. The Void Piercer campaign then pierced it, and the Void dissolved on August 23, 2026; the Vote Snatchers had been born inside it. Arrowhead's creative director wrote on September 25, 2026 that the Void "isn't finished with us". The Heavy SEAF Presence modifier went away after the Blazing Electorate campaign failed, according to the wiki.
Playbook
Ten rules, one target order and what to bring. Everything here follows from the armor data and the mechanics above; where it is opinion, it says whose and when.
12.1Ten rules
- Kill Watchers on sightThey are the only reinforcement callers. One APW-1 or Railgun hit kills one, a Dominator, Slugger or Senator needs two, and an arc stun cancels the call.
- Bring damage per second, not just penetrationAlmost everything is lightly armored with a lot of health; only the Harvester and Gatekeeper plating, the Crusher's helmet and the ship hulls sit above medium armor.
- Break shields with steady fire, then land the big hitA Harvester's shield eats a whole rocket: empty it with a machine gun, grenades or shrapnel, or snap a generator prong, then put one anti-tank rocket into a hip joint.
- Use explosives on OverseersTheir plates and hand shield let blasts through to their health; otherwise take medium-penetration head shots or shoot the legs.
- Aim at the real weak pointsVoteless and Overseer heads, the Watcher's body, Fleshmob faces, Harvester hip joints, the Gatekeeper's horn and cockpit stump, the soft backs of both constructs, Wretch legs (never the head), and the Crusher's helmet, then its head.
- Keep moving and break line of sightBeams, bombards and strafes reward standing still. Step sideways out of a Stingray's blue line; smoke denies new beam locks.
- Wear the right armorElectrical Conduit against arcs (Watchers, Harvesters, Lightning Spires); Fortified against the plasma of the Appropriators and Crescent Overseers; go prone under blasts.
- Control the crowdFire kills Voteless outright and panics small and medium Illuminate; gas confuses and slows; stun holds Elevated Overseers and constructs, and only EMS or an Urchin stops a charging Fleshmob.
- Close the spawnersAn explosive through a Grounded Warp Ship's door or a Gateway's aperture ends the flow; Thermite, C4 or a demolition-50 strike kills a Grounded Warp Ship through its shield. Clear Lightning Spires and Gazers first.
- Read the fleet before you dropMindless Masses need horde clearing; Appropriators need shield breaking and anti-construct tools; Vote Snatchers need leg-shooting rate of fire plus a Crusher answer; the Invasion Fleet needs both kinds.
12.2Target priority
When several threats are up at once, work down this list (the research's order, derived from how fast each one kills):
- Watchers about to call.
- Harvesters and Leviathan turrets: they kill in a sweep.
- Crushers and Veracitors closing to melee.
- Elevated Overseers and Gatekeepers: steady ranged damage.
- Crescent Overseers shelling you.
- Stingrays, when they slow to strafe.
- Overseers.
- Wretch packs.
- Fleshmobs: dodge the charge, kill at range.
- Voteless, only when they block you.
Never shoot an Overship with small arms.
12.3What to bring by difficulty
Our recommendation, derived from the armor tables and the difficulty milestones above (not a community ranking):
- Difficulties 1-3: any primary; a medium-penetration or explosive primary (JAR-5 Dominator, PLAS-1 Scorcher, CB-9 Exploding Crossbow) for Overseer heads; and, from difficulty 3, one support weapon that strips shields and kills Harvesters (the MG-43 or an EAT-17).
- Difficulties 4-6: Harvesters, Stingrays, Veracitors, Gatekeepers and Crushers arrive. Every diver should be able to hurt medium-armored parts, and the squad should carry two or more anti-tank answers plus one heavy-penetration weapon for Crusher helmets and Gatekeeper horns.
- Difficulties 7-10: add Leviathan answers for city missions (an EAT-17 or LAS-99 for the turrets, the E/AT-12), smoke, and Fortified or Electrical Conduit armor to suit the fleet.
Every new diver owns the AR-23 Liberator, P-2 Peacemaker, G-12 High Explosive and MG-43 Machine Gun, and the MG-43 is the free weapon that matters most on this front: it strips a Harvester's shield in about 17 rounds, kills an Overseer through the chest or legs in about 10, brings down a Stingray in about 30 and destroys a Lightning Spire in about 6 approx. The free Orbital Precision Strike destroys a Grounded Warp Ship even through its shield. Loadouts built from free items: Beginner loadouts.
The checks below are the loadout coverage rules for this front: what your squad must cover, and from which difficulty. The Coverage check tests a whole loadout against them; dated loadouts by difficulty, with variants for the Mindless Masses, Appropriators, Vote Snatchers and city maps, are in By front and difficulty, and what to buy for this front is in the warbond variants.
| Check | From difficulty | Rule | Source |
|---|---|---|---|
| crowds | 1 | Mindless Masses: dozens of Voteless and Fleshmobs per patrol even on low difficulties, so bring two crowd tools (volume plus fire, gas or a crowd strike). | wiki |
| crowds | 6 | From D6 Illuminate hordes grow: bring fire or gas for Voteless and Fleshmobs (fire kills Voteless outright; Fleshmobs take 1.8x fire damage). | wiki |
| front-note | 1 | Against the Illuminate sustained damage beats single big shots: shields and plates cancel overkill, so pair any launcher with a volume weapon (u.gg rates dedicated anti-tank C here, GamesRadar A). | wiki |
| front-note | 1 | Only Watchers call Illuminate reinforcements: carry something that kills one fast (an AMR or Railgun body shot, a marksman primary) or an arc weapon that stuns it mid-call. | wiki |
| front-note | 1 | Illuminate fleets mix melee and explosive plasma: medium armor with Med-Kit is the usual pick, Electrical Conduit blunts Harvester and Lightning Spire arcs, and Fortified the Appropriators' plasma. | wiki |
| front-note | 4 | From D4 Stingrays (800 HP, AV3) strafe the squad: bring an AP3 or better weapon to hit them during the run, a lock-on launcher (W.A.S.P., Spear) or the LAS-98 in flight. | wiki |
| front-note | 4 | Appropriators: fire reaches construct pilots through their shields, an AC-8 or AMR breaks a Gatekeeper's horn, and one anti-tank hit on a cockpit finishes a Veracitor or Gatekeeper. | wiki |
| heavies | 1 | Every Illuminate heavy at this difficulty (Harvesters from D4, and Crushers, Veracitors and Gatekeepers on their fleets) needs an answer: an anti-tank hit on a Harvester hip joint once its shield drops, an AP4 helmet-breaker for Crushers, or a heavy-killing strike. | wiki |
| heavies | 3 | Harvesters: strip the regenerating shield with sustained fire or shrapnel, then land one anti-tank hit on a hip joint; a 500kg Bomb alone is a poor answer to its explosion-immune shell. | wiki |
| heavies | 4 | Vote Snatchers: one anti-tank shot is not a Crusher answer (it survives a Recoilless hit and regenerates); bring an AP4 helmet-breaker (Autocannon, Railgun, Bolt Pistol, Senator), Thermite or C4, or nonstop fire. | wiki |
| heavies | 8 | City maps from D8: each Leviathan beam turret dies to one Quasar or EAT-17 hit (or the AT Emplacement), so bring one of them, and smoke to block a new lock. | wiki |
| mix | 8 | City maps from D8: Leviathans destroy exosuits and FRVs, so favor strikes, sentries and carried weapons there. | wiki |
| spawners | 1 | Grounded Warp Ships: drain the 2,500 shield with sustained fire and put an explosive through the bay door, or use a demolition-50 strike, a G-123 Thermite or a C4 charge, which work through the shield. | wiki |
| spawners | 5 | Gazer Spires (from D5) and Monoliths fall only to demolition 60: the mission Hellbomb, a B-100 Portable Hellbomb or a SEAF Artillery mini-nuke. | wiki |
| squad-boosters | 1 | Against the Illuminate speed wins: Stamina and Experimental Infusion are the dated consensus boosters, then Hellpod Space Optimization and Vitality. | Steam guide |
12.4Squad roles for your first Illuminate squad
Stop the calls
R-63CS Diligence Counter Sniper (two shots on a Watcher's body or an Overseer's head), JAR-5 Dominator, APW-1 or RS-422. Calls out Watchers, Elevated Overseers and Crescent Overseers and removes them.
Hold the street
M-105 Stalwart or MG-43, a flamethrower or the B/FLAM-80 Cremator, gas and the A/ARC-3 Tesla Tower. Holds streets against Voteless, Wretches and Obtruders.
Harvesters, turrets, cockpits
MLS-4X Commando, EAT-17, LAS-99 or GR-8 for Harvesters, Leviathan turrets, construct cockpits and Fleshmobs; an AC-8 for Crushers and Gatekeepers.
Objectives and uptime
Activates SAM sites and SEAF Artillery, brings EMS and smoke, revives teammates and covers reloads.
Ping Harvesters and Crushers; call "Stingray line" when the blue strip appears; stay out of teammates' arc chains and away from a Lightning Spire's chain; and mind civilians and SEAF in the cities. More on roles and comms: Roles and loadout coordination and Pings, chat and squad lingo.
12.5Community opinion, dated
These are opinions, not rankings of record; the shot counts and armor tables above are the neutral comparison.
- GamesRadar's support-weapon tier list (updated August 14, 2026) for the Illuminate community-tested: S, the GL-52 De-Escalator; A, the C4 Pack, Commando, Cremator, Expendable Anti-Tank, Flamethrower, Grenade Launcher, Leveller, Machine Gun, Meltagun, Quasar Cannon, Railgun and Speargun; B, the Bullet Storm, Epoch, Expendable Napalm, Recoilless Rifle, Stalwart and W.A.S.P.; C, the Airburst Rocket Launcher, Anti-Materiel Rifle, Autocannon, Belt-Fed Grenade Launcher, Breaching Hammer, Defoliation Tool, Heavy Machine Gun, Laser Cannon, Maxigun and Spear; D, the Arc Thrower, One True Flag, Solo Silo and Sterilizer.
- u.gg's support tier list (stamped patch 7.0.2, read September 26, 2026) rates the AC-8 Autocannon S+ on every front; GamesRadar (August 14, 2026) gives it a C against the Illuminate community-tested.
- TheGamer (August 12, 2026) picks, against Crushers, the Autocannon, Orbital Railcannon Strike, Bastion MK XVI, Autocannon Sentry, Emancipator Exosuit, Epoch, Cremator, P/40-K Bolt Pistol and G-123 Thermite; against Wretches, the AR-2 Coyote, LAS-16 Sickle, Liberator Penetrator, Trident, Scorcher and Cookout, plus fire and gas. GameRant (the same day) agrees: heavy penetration for the helmet, constant fire, limbs rather than the head. Both predate 7.1.0, which changed no Illuminate numbers community-tested.
- The wiki's Illuminate page (revised August 28, 2026), written by its community, advises investing in damage per second over penetration, moving fast and prioritizing Watchers community-tested.
12.6Which guides are out of date
Guides written before 4.1.0 (2025-10-23) have wrong Fleshmob and Elevated Overseer numbers; guides from before 6.1.0 (2026-03-17) predate the Appropriators, the Mindless Masses and flame panic; and guides from before 7.0.0 (2026-08-12) predate the Vote Snatchers and the anti-tank Veracitor melee (4.1.0 notes). Every patch, on every front: Patch history.
Loadout planner12
Loadouts by Faction & Difficulty
Build a loadout that covers heavies, crowds and spawners: the principles, starters from free items, dated community loadouts by front and difficulty, and a coverage check.
On this page11 chapters
Loadout principles
From difficulty 4 up, every diver brings three things: an answer to the front's standard heavy, an explosive that closes spawners, and a primary that clears that front's chaff. Build that floor first, then specialize with your squad.
A loadout has three jobs, kill armor, control crowds and keep the squad supplied and alive, and every diver also needs a way to close spawners. Primaries stop at Medium penetration (only the R-36 Eruptor, the FLAM-66 Torcher and a heated LAS-17 Double-Edge Sickle reach Heavy), so your anti-armor comes from the sidearm, the grenade, the support weapon and the strikes. The three-item floor is this manual's rule, drawn from where each front's heavies enter the difficulty ladder, not an Arrowhead rule. Arrowhead's own yardstick is that everything that matters for a loadout unlocks by a player level of about 25 (level-cap post, August 6, 2026). Test a loadout against these rules in the coverage check.
1.1What each slot is for
Primary
The gun you fire most. Choose it for the front's small and medium enemies; with only three primaries reaching Heavy penetration, it is rarely your heavy answer (an R-36 Eruptor kills a Hulk with two shots to the eye).
Secondary
All 25 are one-handed. The GP-31 Grenade Pistol closes spawners, the GP-20 Ultimatum and P-34 Breacher kill a heavy, and the P-4 Senator punches Heavy armor on a weak spot.
Throwable
The G-12 High Explosive you start with closes holes and fabricator vents; the G-123 Thermite kills a Charger or a Hulk; gas, fire and stun grenades hold a crowd. Engineering Kit and a few other passives let you carry more.
Body armor
You pick it for its passive (31 exist) and its weight, which trades speed for protection. Helmets and capes are cosmetic.
4 stratagems
A support weapon, strikes, sentries or a backpack. Only one backpack fits, and a backpack-fed weapon (Recoilless, Autocannon, Spear) takes it. Reinforce, Resupply, SOS Beacon and Eagle Rearm come on top, free.
Booster
One per diver, and it covers everyone; a full squad runs 4 different ones, because a duplicate adds nothing.
1.2The three jobs, plus spawners
In this tab, the free route means what you own after basic training, what Requisition buys and the free Helldivers Mobilize! warbond; premium means the paid warbonds.
Kill armor
Chargers, Bile Titans and Impalers; Hulks, tanks, striders and Vox Engines; Harvesters, Crushers, Gatekeepers and Leviathans. What works: anti-tank penetration (AP5 or more) on a head, hull or joint, or Heavy (AP4) on a weak spot such as a Hulk's eye or a Crusher's helmet.
Free route: EAT-17, GR-8 Recoilless Rifle, LAS-99 Quasar Cannon, MLS-4X Commando, FAF-14 Spear, RS-422 Railgun; the Orbital Precision Strike, Railcannon, Eagle 500kg and 110mm Rocket Pods. Premium: G-123 Thermite, GP-20 Ultimatum, EAT-411 Leveller, P-34 Breacher, G-60 Anti-Tank Seeker, B/MD C4 Pack, 40-K Meltagun.
Control crowds
Stop swarms, bug breaches and bot drops before they swamp the squad, with volume of fire, area damage or a status effect: fire, gas, stun or arcs.
Free route: M-105 Stalwart, MG-43, GL-21 Grenade Launcher, FLAM-40 Flamethrower; the Orbital Gatling Barrage and the Eagle Cluster Bomb and Napalm; the MG and Gatling sentries. Premium: B/FLAM-80 Cremator, MGX-42 Bullet Storm, GL-52 De-Escalator, gas and incendiary grenades, AR-2 Coyote, SMG/FLAM-34 Stoker.
Keep the squad going
Ammunition, healing, shields and mobility that serve more divers than just you.
Free route: B-1 Supply Pack, SH-32 Shield Generator Pack, FX-12 Shield Generator Relay, LIFT-850 Jump Pack, the Orbital Smoke and EMS strikes. Premium: P-11 Stim Pistol, LIFT-182 Warp Pack, AX/FLAM-75 Hot Dog, B-100 Portable Hellbomb, the Surplus EAT Allocation booster.
Close spawners
Bug holes, fabricators, Warp Ship doors and gateways close only to an explosive: demolition 20 or more delivered through the opening, or 40 or more from outside (50 for a Grounded Warp Ship or a Bulk Fabricator). Bullets, beams and arcs never close one.
Free route: G-12 High Explosive (demolition 30), G-6 Frag, G-16 Impact, GL-21, AC-8 Autocannon, EAT-17, Eagle Airstrike, Orbital Precision Strike. Premium: GP-31 Grenade Pistol, R-36 Eruptor, CB-9 Exploding Crossbow, TED-63 Dynamite, GP-20 Ultimatum.
1.3Pick the primary's penetration for the front
A hit whose penetration beats the armor deals full damage, an equal one deals 65%, and a lower one bounces off (the rule in three lines). So choose the primary by the medium enemies of your front:
- Terminids: Light (AP2) handles every small bug; bring Medium (AP3) or fire for Hive Guard heads, Rupture Strain heads and the Bile Spewers of difficulty 6 and up.
- Automatons: Medium for Devastator torsos, Scout Strider waists and Gunship engines; with Light you must land head shots.
- Illuminate: Light kills Voteless, Fleshmobs, Wretches and Overseer flesh; an Overseer's helmet needs Medium, and explosions reach an Overseer through its shield.
1.4Four stratagems: shapes that work
Cooldowns decide the shape. Most support weapons and backpacks take 480 seconds to come back (the EAT-17 only 70, with two launchers per call). Every Eagle stratagem rides the same Eagle: 15 seconds between calls, then a 150-second rearm once its charges run out. Orbitals keep their own cooldowns and ignore anti-air, and sentries have 400 health since 6.3.0.
- The default (any front, from difficulty 4): an anti-tank support weapon, one Eagle, one orbital, and a flex slot for a sentry, a backpack or a second strike.
- Expendable anti-tank plus a backpack: the EAT-17, EAT-411 Leveller and MLS-4X Commando need no backpack, which frees the slot for a Shield Generator Pack, Supply Pack, Jump or Warp Pack or Guard Dog; add two strikes. Best when the backpack is worth more than a reusable launcher: shields against bots, ammunition on Hive Worlds.
- Team weapon: a Recoilless, Autocannon or Spear, two strikes and a sentry, when a squadmate stays close to reload you. Since 7.0.0 either of you may carry the ammo backpack.
- Double Eagle: the 500kg plus the Airstrike or Cluster Bomb for more charges per rearm, then a support weapon and an orbital. Good against bugs and on open bot maps; not on Megafactory maps, where anti-air grounds Eagles.
- Orbital-heavy: the Orbital Laser (3 per mission), a Precision Strike or Railcannon, a support weapon and a backpack. For anti-air maps; in caves, strikes only land through roof openings.
- Defense: two sentries (or a sentry and an emplacement), a support weapon and one strike, for defend and hold-the-point objectives.
Ship modules change the math (the Liquid-Ventilated Cockpit halves the gap between Eagle calls; the Expanded Weapons Bay adds a charge to every Eagle): see ship modules that change stratagems.
1.5Armor: weight and passive by front
Light armor (rating 50, speed 550 and stamina regeneration 125) takes 25% more damage than medium (rating 100, speed 500 and stamina regeneration 100), and heavy (rating 150, speed 450 and stamina regeneration 50) takes 25% less. Rating passives such as Extra Padding add protection without the speed cost, which is why the starter B-01 Tactical (rating 150) moves like medium armor and soaks like heavy.
- Terminids: light or medium, because bugs punish slow divers. Med-Kit (extra, longer-lasting stims) or a resistance passive: Acclimated, Desert Stormer or Inflammable.
- Automatons: heavy with Fortified or a Concussive Padding, because bots kill with rockets and cannons and both passives resist explosions (Fortified: Recoil -30% when crouched or prone; 50% explosive resistance). The FS-05 Marksman sells Fortified for 6 Medals on the free warbond.
- Illuminate: medium with Med-Kit; Electrical Conduit against Harvester arcs and Lightning Spires; Fortified or a Concussive Padding against the Appropriators' plasma, which explodes.
The dated builds agree: Fortified is the passive in 6 of the 7 dated u.gg bot builds (the seventh is a stealth build), and Med-Kit in 4 of the 7 bug and squid builds community-tested. Every passive and the sets that carry it: passives by job.
1.6Boosters: one each, all different
Each diver's booster covers the whole squad, so a full squad runs 4 different ones and a duplicate is wasted: read the loadout screen before you ready up. This manual's default four, read from the u.gg-based Steam tier guide (August 19, 2026) and GameRant's booster ranking (February 5, 2026), are Hellpod Space Optimization, Stamina Enhancement, Experimental Infusion and Vitality Enhancement community-tested, three of them on the free warbond. Swap one for Muscle Enhancement on snow, swamp and acid-heavy bug planets, and for Surplus EAT Allocation when nobody brought anti-tank. More in boosters in a squad.
1.7How difficulty changes the loadout
- Difficulty 1-3Any primary plus a spawner closer. Add one anti-tank option once the EAT-17 unlocks at level 3: the first tanks, Scout Striders and Harvester missions show up in this band.
- Difficulty 4-5Every diver carries an anti-tank answer: Chargers, Hulks, regular tanks, Harvesters and Stingrays join the fight, and Bile Titans and Gunships follow. Bots now demand a Medium-penetration primary.
- Difficulty 6-7Two or more reusable anti-tank weapons per squad (Impalers, War Striders, Titans in breaches); demolition 40 for Bile Titan holes; shields or smoke against bots; Vox Engines on Cyborg Legion planets.
- Difficulty 8-10Full anti-tank coverage, dedicated crowd control and a support diver; Leviathans over Illuminate cities; four different boosters.
Operations also roll random modifiers, one from difficulty 5, two from difficulty 8. What each difficulty pays and adds: difficulty and rewards.
Coverage check
Before you drop, run your loadout past these rules: every heavy of the front has an answer, you can close a spawner, you carry a crowd tool, and nothing in your slots fights the front.
In the next build this chapter becomes an interactive check. You pick a front, an optional subfaction and a difficulty, fill the slots (primary, secondary, throwable, armor, four stratagems and a booster, or start from a beginner or dated community preset), and it tests every rule below, answering PASS, GAP or NOTE with the evidence and a fix drawn from the research, never a score, plus a one-line summary to paste into squad chat. Until then, and whenever scripts are off or the page is printed, the rules themselves are the checklist: the ones for every front first, then your front's, each with the difficulty it starts at and its source.
2.1Every front
The rules that hold everywhere: one spawner closer and one crowd tool from the first drop, two anti-armor answers from difficulty 5, at most one backpack, Eagles that share one rearm, and a booster nobody else in the squad brought.
| Check | From difficulty | Rule | Source |
|---|---|---|---|
| crowds | 1 | Carry at least one crowd tool: a machine gun or other sustained fire, an area strike or chaff sentry, or fire, gas, arc or stun. | wiki |
| heavies | 5 | From difficulty 5 carry two anti-armor answers (a launcher plus Thermite, or an Ultimatum plus a 500kg Bomb) or know which squadmate carries them: from D6 a squad needs two or more reusable anti-tank weapons. | wiki |
| mix | 1 | The check counts your stratagems by permit color (red offensive, blue supply, green defensive) and names the longest cooldown, so you know what comes back last. | wiki |
| mix | 1 | Bring at most one backpack: backpack stratagems and backpack-fed support weapons (Recoilless, Autocannon, Spear, Airburst, W.A.S.P., Belt-Fed GL, Maxigun, Cremator, C4) share the one slot. | wiki |
| mix | 1 | Every Eagle stratagem rides the same Eagle: its charges run out together and it rearms in 150 s, so a second Eagle adds charges, not a second cooldown. | wiki |
| spawners | 1 | Carry at least one explosive with demolition 20 or more (a grenade, grenade pistol, explosive primary or launcher) to close holes, fabricators and warp-ship doors; bullets, beams and arcs never close a spawner. | wiki |
| squad-boosters | 1 | Each diver brings one booster that covers the whole squad; up to four different ones run at once, so a duplicate adds nothing. | wiki |
| squad-boosters | 4 | If nobody in the squad brought an anti-tank weapon, Surplus EAT Allocation adds two free EAT-17 calls per mission. | Steam |
2.2Terminids
Against bugs the heavies arrive in order (Chargers, then Bile Titans and Impalers), Bile Titan holes need demolition 40 from difficulty 6, and each strain adds a rule of its own.
| Check | From difficulty | Rule | Source |
|---|---|---|---|
| crowds | 6 | From D6 bug breaches bring Titans and bigger waves: carry a crowd stratagem (Gatling Barrage, Napalm or Cluster Eagle, Gas Strike, a chaff sentry or a crowd support weapon), not only a crowd primary. | wiki |
| front-note | 1 | Bugs punish slow divers: light or medium armor with Med-Kit or a resistance passive (Acclimated, Desert Stormer, Inflammable) is the default. | wiki |
| front-note | 2 | Spore Burst Strain: kill with fire and lasers so bugs die without bursting, keep crowd control up and never melee. | wiki |
| front-note | 2 | Predator Strain: stay grouped and bring stagger (Punisher, Cookout, Blitzer), fire or gas to reveal cloaked Hunters, and sentries with a view. | wiki |
| front-note | 6 | Rupture Strain: Rupture Warrior and Spewer heads are AV3, so carry an AP3 or better primary; explosives force burrowers up, and Feet First, heavy armor or a Shield Generator Pack blunt their eruption hits. | wiki |
| heavies | 1 | Every Terminid heavy at this difficulty (Chargers from D4, then Bile Titans, Impalers and the Charger variants) needs an answer: an anti-tank head shot (EAT-17, Quasar, Recoilless, Spear), Thermite or a heavy-killing strike. | wiki |
| heavies | 5 | Spore Burst planets: the Spore Burst Bile Titan's 2,500-HP head survives one EAT-17 or Quasar hit, so bring a Recoilless or Spear (one hit) or two anti-tank tools. | wiki |
| heavies | 5 | Gloom planets from D5: the Dragonroach (6,500 HP; head 1,500, AV4) needs an anti-tank head shot, a homing Spear or W.A.S.P., or the Railcannon. | wiki |
| heavies | 6 | Rupture Strain: the Rupture Charger's AV5 head bounces Heavy (AP4) weapons, so carry true anti-tank (AP5 or more). | wiki |
| mix | 1 | Gloom and Hive World planets slow Eagle rearm 20-30%, halve ammo pickups and hide caves from most stratagems: lean on ammo-free weapons and a Supply Pack, and bring fewer Eagles. | wiki |
| spawners | 6 | From D6 Bile Titan holes need demolition 40, which also closes any hole from the rim: a GP-20 Ultimatum, TED-63 Dynamite, EAT-411 Leveller, an Eagle Airstrike or 500kg, or most orbital strikes. | wiki |
| squad-boosters | 1 | Against bugs the dated consensus boosters are Hellpod Space Optimization, Stamina and Experimental Infusion (Vitality next); on snow, swamp and acid-heavy planets swap in Muscle Enhancement. | Steam guide |
2.3Automatons
Against bots the extra checks are about explosions and the sky: explosive resistance, Medium penetration for Devastators, a Gunship answer from difficulty 5, an orbital where anti-air grounds Eagles, a Vox Engine answer on Cyborg Legion planets, and fire only as a side dish.
| Check | From difficulty | Rule | Source |
|---|---|---|---|
| crowds | 1 | Bot drops and Berserker packs need a crowd tool that is not fire alone: explosives, Medium-penetration volume or stun (small bots take half fire damage). | wiki |
| front-note | 1 | Fire is weak against bots: small bots take half fire damage and robots ignite slowly, so favor explosives and Medium penetration. | wiki |
| front-note | 1 | Bots kill with rockets and cannons: Fortified or a Concussive Padding passive (explosive damage -50%), heavy armor and a shield pack or smoke are the defaults. | wiki |
| front-note | 1 | Incineration Corps: fire replaces rockets as the main threat, so Inflammable (75% fire resistance) or Acclimated beats Fortified, and Integrated Extinguishers puts a burning diver out faster. | wiki |
| front-note | 1 | Jet Brigade: explosive primaries pop jump packs at range, and jump-packing units leap out of strikes, so stun or pin them first. | wiki |
| front-note | 1 | Cyborg Legion: Radical kicks ragdoll you unless you wear Rock Solid, and Agitators buff their squad, so kill them first with precision or explosives. | wiki |
| front-note | 2 | Devastator torsos are AV3: carry an AP3 or explosive primary, or aim for their AV1 heads. | wiki |
| front-note | 5 | From D5 Gunships (400-HP AV3 thrusters) need an anti-air answer: an AC-8 or AMR (two shots per thruster), a Spear or W.A.S.P. lock-on, or any anti-tank hit. | wiki |
| heavies | 1 | Every Automaton heavy at this difficulty (tanks from D3, Hulks from D4, War and Factory Striders from D6-7, Vox Engines on Cyborg planets from D7) needs an answer: a Recoilless, EAT, Quasar or Spear, Thermite, an AP4 hit on a Hulk eye, or a heavy-killing strike. | wiki |
| heavies | 7 | Cyborg Legion from D7: bring a Vox Engine answer (9,000 HP): the Railcannon one-shots it, a Leveller or Solo Silo body hit kills it, a Spear kills a cannon, or break three vents and throw a grenade in; EAT and Quasar need four hits. | wiki |
| mix | 4 | Anti-air emplacements (from D4, dense on Megafactory maps) ground Eagles within 150 m: bring at least one orbital, or plan to destroy the site first. | wiki |
| spawners | 6 | From D6 Gunship Facilities need demolition 60: the mission Hellbomb, a B-100 Portable Hellbomb or a SEAF Artillery mini-nuke (Eagles and orbitals do nothing). | wiki |
| squad-boosters | 1 | Against bots the dated consensus boosters are Experimental Infusion, Hellpod Space Optimization and Stamina; Concealed Insertion suits stealth and Commando missions, Integrated Extinguishers the Incineration Corps. | Steam guide |
2.4Illuminate
Against the Illuminate most extra checks are about shields and fleets: sustained damage beside any launcher, a Watcher killer, a Harvester plan, a Crusher helmet-breaker on Vote Snatcher planets, and two crowd tools against the Mindless Masses.
| Check | From difficulty | Rule | Source |
|---|---|---|---|
| crowds | 1 | Mindless Masses: dozens of Voteless and Fleshmobs per patrol even on low difficulties, so bring two crowd tools (volume plus fire, gas or a crowd strike). | wiki |
| crowds | 6 | From D6 Illuminate hordes grow: bring fire or gas for Voteless and Fleshmobs (fire kills Voteless outright; Fleshmobs take 1.8x fire damage). | wiki |
| front-note | 1 | Against the Illuminate sustained damage beats single big shots: shields and plates cancel overkill, so pair any launcher with a volume weapon (u.gg rates dedicated anti-tank C here, GamesRadar A). | wiki |
| front-note | 1 | Only Watchers call Illuminate reinforcements: carry something that kills one fast (an AMR or Railgun body shot, a marksman primary) or an arc weapon that stuns it mid-call. | wiki |
| front-note | 1 | Illuminate fleets mix melee and explosive plasma: medium armor with Med-Kit is the usual pick, Electrical Conduit blunts Harvester and Lightning Spire arcs, and Fortified the Appropriators' plasma. | wiki |
| front-note | 4 | From D4 Stingrays (800 HP, AV3) strafe the squad: bring an AP3 or better weapon to hit them during the run, a lock-on launcher (W.A.S.P., Spear) or the LAS-98 in flight. | wiki |
| front-note | 4 | Appropriators: fire reaches construct pilots through their shields, an AC-8 or AMR breaks a Gatekeeper's horn, and one anti-tank hit on a cockpit finishes a Veracitor or Gatekeeper. | wiki |
| heavies | 1 | Every Illuminate heavy at this difficulty (Harvesters from D4, and Crushers, Veracitors and Gatekeepers on their fleets) needs an answer: an anti-tank hit on a Harvester hip joint once its shield drops, an AP4 helmet-breaker for Crushers, or a heavy-killing strike. | wiki |
| heavies | 3 | Harvesters: strip the regenerating shield with sustained fire or shrapnel, then land one anti-tank hit on a hip joint; a 500kg Bomb alone is a poor answer to its explosion-immune shell. | wiki |
| heavies | 4 | Vote Snatchers: one anti-tank shot is not a Crusher answer (it survives a Recoilless hit and regenerates); bring an AP4 helmet-breaker (Autocannon, Railgun, Bolt Pistol, Senator), Thermite or C4, or nonstop fire. | wiki |
| heavies | 8 | City maps from D8: each Leviathan beam turret dies to one Quasar or EAT-17 hit (or the AT Emplacement), so bring one of them, and smoke to block a new lock. | wiki |
| mix | 8 | City maps from D8: Leviathans destroy exosuits and FRVs, so favor strikes, sentries and carried weapons there. | wiki |
| spawners | 1 | Grounded Warp Ships: drain the 2,500 shield with sustained fire and put an explosive through the bay door, or use a demolition-50 strike, a G-123 Thermite or a C4 charge, which work through the shield. | wiki |
| spawners | 5 | Gazer Spires (from D5) and Monoliths fall only to demolition 60: the mission Hellbomb, a B-100 Portable Hellbomb or a SEAF Artillery mini-nuke. | wiki |
| squad-boosters | 1 | Against the Illuminate speed wins: Stamina and Experimental Infusion are the dated consensus boosters, then Hellpod Space Optimization and Vitality. | Steam guide |
Beginner loadouts from free items
You can reach Super Helldive without a premium warbond. Take what basic training gives you, buy the EAT-17 the moment you reach level 3, put your first Medals into a few Helldivers Mobilize! items, and run the kit for your front below.
Every kit in this chapter uses the free route only. u.gg's three "Standard D10" builds (one per front, April to May 2026) reach difficulty 10 with no premium weapons or stratagems at all community-tested.
3.1What you own after basic training
Every new diver owns the weapons AR-23 Liberator, P-2 Peacemaker, G-12 High Explosive and MG-43 Machine Gun, the stratagems Orbital Precision Strike and MG-43 Machine Gun (the MG-43 arrives by stratagem), the B-01 Tactical armor, and about 1,000 Requisition Slips. It is a thin but complete kit:
- AR-23 Liberator: Light penetration for chaff.
- MG-43 Machine Gun: Medium penetration, your first answer to Hive Guard heads, Devastator torsos, Overseer helmets and Stingrays.
- G-12 High Explosive: demolition 30, so one that lands inside a bug hole, a fabricator vent or a drained Warp Ship's open door closes it.
- Orbital Precision Strike: kills a heavy that stands still and levels structures; since 7.1.0 it comes back every 80 seconds.
- B-01 Tactical: medium armor rated like heavy through Extra Padding, a solid default on any front.
Any front, first purchases: AR-23 Liberator, P-19 Redeemer, G-12 High Explosive; Democracy Protects (DP-40 Hero of the Federation) or Extra Padding; EAT-17 Expendable Anti-Tank (level 3); Eagle Airstrike; Orbital Precision Strike; MG-43 Machine Gun or Orbital Gatling Barrage; booster Hellpod Space Optimization. Two EATs per call give you anti-tank from level 3, the Airstrike breaks patrols and closes holes and fabricators, and Democracy Protects forgives mistakes (50% chance to survive a hit that would kill you; no bleed damage from a chest hemorrhage).
3.2Spend Requisition in this order
Stratagems unlock by player level and cost Requisition. Buy them in roughly this order; the full ladder is in levels and unlocks.
- A strike and a crowd toolThe Eagle Airstrike (level 1, 4,000 Requisition) breaks patrols and closes holes and fabricators. Add one cheap crowd tool: the Orbital Gatling Barrage (1,500), the Eagle Strafing Run (1,500), the A/MG-43 Machine Gun Sentry (1,500) or the M-105 Stalwart (3,500). The B-1 Supply Pack (4,000) can wait.
- Your first anti-tankThe EAT-17 (level 3, 3,000 Requisition): two launchers per call, back every 70 seconds, no backpack. Every diver should carry it or something better from difficulty 4.
- Reusable anti-tank and real crowd controlThe GR-8 Recoilless Rifle (level 5, 6,000); for crowds the GL-21 Grenade Launcher (level 5, 6,000), the Eagle Napalm Airstrike (level 5, 5,000) and the A/G-16 Gatling Sentry (level 5, 4,000).
- The all-rounderThe AC-8 Autocannon (level 10, 7,000) closes holes and fabricators and handles Devastators, Gunship engines, Harvester shields and Crusher helmets. Around the same levels come the Orbital Smoke Strike (level 8), the LIFT-850 Jump Pack (level 8), the FLAM-40 Flamethrower (level 10) and the Guard Dog (level 10), and weapon attachments unlock at level 10.
- The endgame setThe Eagle 500kg Bomb (level 15, 10,000), the Orbital Laser (level 15, 10,000) and the LAS-99 Quasar Cannon (level 18, 7,500); then the Orbital Railcannon Strike, FAF-14 Spear, RS-422 Railgun and SH-32 Shield Generator Pack (level 20 each). Most difficulty 8-10 builds are made of these.
Unlock levels follow helldivers.wiki.gg. The Fandom wiki puts eight of the level-1 items (the Stalwart, Gatling Barrage, Gas Strike, Strafing Run, Airstrike, Anti-Personnel Minefield, Supply Pack and MG Sentry) at level 2, so expect a level of drift approx.
3.3Spend your first Medals on Helldivers Mobilize!
The free warbond sells the passives, boosters and primaries a beginner needs. Buy the loadout items below as their pages open (a page opens once you have spent enough Medals in that warbond; the ranked purchase order has the Medal-by-Medal path, Super Credit stacks included). Medals cap at 250, so spend them as they come.
- Armor passives: FS-05 Marksman, heavy armor with Fortified for the bot front (6 Medals, page 2); CE-35 Trench Engineer, Engineering Kit (10, page 3); CM-09 Bonesnapper, Med-Kit (15, page 4); DP-40 Hero of the Federation, Democracy Protects (25, page 5).
- Boosters: Hellpod Space Optimization (15, page 3), Vitality Enhancement (20, page 4), Stamina Enhancement (75, page 7).
- Primaries: SG-8 Punisher for bugs (4, page 1), R-63 Diligence for bots (8, page 2), SG-225 Breaker (20, page 4); later the Medium-penetration AR-23P Liberator Penetrator (40, page 6) and R-63CS Diligence Counter Sniper (40, page 7), and the PLAS-1 Scorcher (75, page 10), which u.gg rates S on every front community-tested.
- Sidearm and grenades: P-19 Redeemer (5, page 2); G-6 Frag (2, page 1) and G-16 Impact (20, page 5).
3.4Terminids on the free route
Punisher, Stalwart, EAT
- Guns: SG-8 Punisher, P-19 Redeemer, G-12 High Explosive
- Armor: Med-Kit (CM-09 Bonesnapper)
- Stratagems: EAT-17 Expendable Anti-Tank (level 3); M-105 Stalwart; Eagle Airstrike; Orbital Precision Strike
- Booster: Hellpod Space Optimization
Every Punisher pellet staggers Hunters, Warriors and Stalkers; the Stalwart's long belt holds a breach and reloads on the move; a G-12 dropped into a hole closes it; the EAT-17 and the Precision Strike cover the Charger Behemoth that Eliminate missions bring at difficulty 3.
Breaker and Recoilless
- Guns: SG-225 Breaker, P-19 Redeemer, G-12 High Explosive
- Armor: Med-Kit
- Stratagems: GR-8 Recoilless Rifle (level 5) or EAT-17; Eagle Airstrike; Orbital Precision Strike; A/MG-43 Machine Gun Sentry
- Booster: Vitality Enhancement
Chargers join the fight at difficulty 4 and Bile Titans soon after: one Recoilless or EAT hit to the head kills either. The Breaker's shells shred Hunter packs, the MG Sentry watches your back, and Vitality trims the damage the whole squad takes.
Penetrator and Stalwart
- Guns: AR-23P Liberator Penetrator, P-19 Redeemer, G-12 High Explosive
- Armor: Engineering Kit (CE-35 Trench Engineer)
- Stratagems: M-105 Stalwart; Eagle Cluster Bomb (level 3) or Eagle Napalm Airstrike (level 5); Orbital Gatling Barrage; A/G-16 Gatling Sentry (level 5)
- Booster: Hellpod Space Optimization
The Penetrator's Medium penetration kills the Hive Guard heads that Light rifles bounce off; Engineering Kit adds grenades for holes; the Gatling Barrage and a Cluster or Napalm Eagle break breaches. It carries no launcher, so pair it with an anti-tank squadmate.
Scorcher, Quasar, Railcannon
- Guns: PLAS-1 Scorcher, P-19 Redeemer, G-12 High Explosive
- Armor: Med-Kit
- Stratagems: LAS-99 Quasar Cannon (level 18) or GR-8 Recoilless Rifle; Eagle 500kg Bomb (level 15); Orbital Railcannon Strike (level 20); EAT-17
- Booster: Stamina Enhancement
In this band Impalers join regular fights, Bile Titans come in breaches and the Rupture Strain appears: one Quasar or Recoilless hit kills a Charger, an Impaler or a Bile Titan through the head, the Railcannon one-shots a Bile Titan since 6.3.0, and the 500kg and a spare EAT cover the rest. Stamina keeps you ahead of the swarm.
Super Helldive, no premium gear
- Guns: SG-8 Punisher, P-19 Redeemer, G-12 High Explosive
- Armor: Med-Kit
- Stratagems: AC-8 Autocannon; Orbital Laser; Eagle 500kg Bomb; A/MG-43 Machine Gun Sentry
- Booster: Hellpod Space Optimization
u.gg's no-premium bug build community-tested: the Autocannon closes holes from range, kills Hive Guards and chips Chargers; the Orbital Laser clears a heavy nest; the 500kg kills Chargers and Titans; the MG Sentry holds breaches.
3.5Automatons on the free route
Diligence and Fortified
- Guns: R-63 Diligence, P-2 Peacemaker, G-12 High Explosive
- Armor: Fortified (FS-05 Marksman)
- Stratagems: EAT-17 Expendable Anti-Tank; Eagle Airstrike; Orbital Precision Strike; A/MG-43 Machine Gun Sentry
- Booster: Hellpod Space Optimization
The Diligence kills a Devastator with one head shot and every Trooper at range; the FS-05 is heavy armor whose Fortified passive blunts rockets and cannon fire; a G-12 into a fabricator vent destroys it; the EAT-17 covers the first tanks and Scout Striders.
Counter Sniper and Recoilless
- Guns: R-63CS Diligence Counter Sniper, P-19 Redeemer, G-12 High Explosive
- Armor: Fortified
- Stratagems: GR-8 Recoilless Rifle; Eagle 500kg Bomb or Eagle Airstrike; Orbital Precision Strike; A/MLS-4X Rocket Sentry (level 15)
- Booster: Hellpod Space Optimization
Hulk Bruisers and regular tanks join the fight at difficulty 4: one Recoilless hit kills a Hulk anywhere or a tank through its turret. The Counter Sniper's Medium penetration goes through Devastator torsos and Scout Strider waists; the Rocket Sentry (level 15) shoots heavies first.
Scorcher and Autocannon
- Guns: PLAS-1 Scorcher, P-19 Redeemer, G-12 High Explosive
- Armor: Engineering Kit (CE-35 Trench Engineer)
- Stratagems: AC-8 Autocannon (level 10); EAT-17; Orbital Smoke Strike (level 8) or Eagle Smoke Strike; Orbital Precision Strike
- Booster: Hellpod Space Optimization
The Autocannon kills Devastators and Scout Striders, drops a Gunship with two shells per engine, and shuts fabricators through the vent; smoke breaks line of sight, which bots cannot shoot through; the EAT covers Hulks; Engineering Kit steadies your aim when you crouch.
Quasar under a shield
- Guns: PLAS-1 Scorcher, P-19 Redeemer, G-12 High Explosive
- Armor: Fortified (FS-23 Battle Master)
- Stratagems: LAS-99 Quasar Cannon; SH-32 Shield Generator Pack; Orbital Railcannon Strike; Eagle 500kg Bomb
- Booster: Hellpod Space Optimization
War Striders arrive at difficulty 6; Factory Striders are Eliminate targets from 4 and regular from 6 or 7, where the wiki disagrees with itself unverified. The Quasar kills a Hulk or a War Strider hip in one shot without a backpack, so the slot goes to the Shield Generator Pack; the Railcannon kills tanks and Hulks; the 500kg kills War Striders.
Super Helldive, no premium gear
- Guns: R-63 Diligence, P-2 Peacemaker, G-12 High Explosive
- Armor: Fortified
- Stratagems: GR-8 Recoilless Rifle; A/AC-8 Autocannon Sentry; Orbital Laser; Eagle Airstrike
- Booster: Hellpod Space Optimization
u.gg's no-premium bot build community-tested: the Diligence handles infantry at range, the Recoilless everything heavy, the Autocannon Sentry Devastators and Hulks, the Orbital Laser outposts. It predates 6.3.0, which doubled sentry health.
3.6Illuminate on the free route
Liberator and MG-43
- Guns: AR-23 Liberator, P-19 Redeemer, G-6 Frag
- Armor: Med-Kit
- Stratagems: MG-43 Machine Gun; Eagle Strafing Run; Orbital Precision Strike; A/MG-43 Machine Gun Sentry
- Booster: Hellpod Space Optimization
Voteless die to any gun; the MG-43's Medium penetration reaches an Overseer's head and drops a Watcher in a short burst; the Strafing Run lands many small hits that drain shields; the Precision Strike destroys a Grounded Warp Ship from outside. Kill Watchers first: they alone call reinforcements.
Scorcher and Stalwart
- Guns: PLAS-1 Scorcher, P-19 Redeemer, G-16 Impact
- Armor: Med-Kit
- Stratagems: M-105 Stalwart; Eagle Strafing Run; Orbital Gatling Barrage; A/G-16 Gatling Sentry
- Booster: Stamina Enhancement
The Scorcher's explosive bolts reach an Overseer through its shield; the Stalwart reloads on the move among Voteless, which cannot leap; the Gatling Barrage and Gatling Sentry thin the horde; Stamina keeps you ahead of it. It carries no anti-tank weapon, so pair it with the Autocannon heavy-support kit or another anti-tank squadmate.
Autocannon for Harvesters
- Guns: AR-23P Liberator Penetrator, P-19 Redeemer, G-12 High Explosive
- Armor: Democracy Protects (DP-40 Hero of the Federation)
- Stratagems: AC-8 Autocannon; EAT-17; Eagle Strafing Run; Orbital Precision Strike
- Booster: Hellpod Space Optimization
Harvesters and Stingrays join regular fights at difficulty 4. Autocannon flak strips a Harvester's shield, four armor-piercing shells kill a hip joint and three kill a strafing Stingray approx, and one EAT to a joint after the shield drops is fatal. Democracy Protects is the forgiving free passive.
Super Helldive, no premium gear
- Guns: PLAS-1 Scorcher, P-19 Redeemer, G-16 Impact
- Armor: Med-Kit
- Stratagems: StA-X3 W.A.S.P. Launcher; Orbital Laser; A/MG-43 Machine Gun Sentry; Eagle Strafing Run
- Booster: Hellpod Space Optimization
u.gg's no-premium squid build community-tested: the W.A.S.P. (level 20) locks on to Stingrays and kills a Fleshmob with four missiles. It predates the Vote Snatchers (7.0.0): on their planets add a Crusher answer (subfaction adjustments).
The dated consensus first buy is Democratic Detonation (S tier on GamesRadar's warbond list, August 13, 2026, and S+ in the u.gg-based Steam guide, August 19, 2026) community-tested. Its G-123 Thermite (15 Medals, page 1) gives every diver an anti-tank grenade, and its GP-31 Grenade Pistol closes holes from the sidearm slot, which frees the grenade slot for Thermite. The PLAS-101 Purifier (Polar Patriots) then upgrades the primary on every front, and the AR-2 Coyote (Dust Devils) against bugs and squids. The full ranking: ranked purchase order.
By front and difficulty
The dated community picks keep returning to a short list that works on every front: the PLAS-101 Purifier and the GP-31 Grenade Pistol (S or better on all three fronts in both u.gg's and GamesRadar's lists), the G-123 Thermite (u.gg's only S+ throwable on all three) and the Orbital Laser (in 12 of the 15 dated u.gg builds). Past that, build for the front: the next three chapters give each front's picks, its difficulty bands and every loadout with the reason it works.
4.1What the dated builds converge on
Counted across the 15 u.gg builds dated November 2025 to May 2026 community-tested:
The Orbital Laser (3 per mission) is in 12 of the 15; Hellpod Space Optimization is the booster in 9; Fortified is the passive in 6 of the 7 bot builds (the seventh is a stealth build); the G-123 Thermite and GP-20 Ultimatum appear in 5 each, and the Recoilless Rifle in 4 (all four are bot builds). The three "Standard D10" builds, one per front, use no premium warbond items at all, which is why they anchor the beginner loadouts.
4.2Where two independent lists agree
Items rated S or better by both u.gg and GamesRadar (August 2026) community-tested:
- Terminids: primaries PLAS-101 Purifier and AR-2 Coyote; secondaries GP-31 Grenade Pistol and GP-20 Ultimatum; support weapons LAS-99 Quasar Cannon, S-11 Speargun and B/FLAM-80 Cremator.
- Automatons: primaries Purifier, R-36 Eruptor, PLAS-1 Scorcher and R-72 Censor; secondaries Grenade Pistol, Ultimatum, LAS-58 Talon and P-4 Senator; support weapons GR-8 Recoilless, EAT-17, EAT-411 Leveller, B/MD C4 Pack, 40-K Meltagun, MLS-4X Commando, RS-422 Railgun and S-11 Speargun, the most agreed-on front.
- Illuminate: primaries Purifier, Coyote and SMG/FLAM-34 Stoker; secondaries Grenade Pistol and PLAS-15 Loyalist; no support weapon: the two lists share no S-tier pick on this front.
4.3Where they disagree
- The AC-8 Autocannon: u.gg rates it S+ on all three fronts, GamesRadar B, B and C (bugs, bots, squids). The mechanics favor it against Devastators, Gunship engines, fabricators, Harvester shields and Crusher helmets, less against Hulks and tanks.
- Dedicated anti-tank against the Illuminate: u.gg rates the EAT-17, Recoilless, Quasar and Railgun C there; GamesRadar rates the EAT, Quasar, Commando, Railgun and Leveller A. Both have a point: shields waste single big shots, yet one anti-tank hit is the clean kill on a Harvester's hip joint, a Gatekeeper or a Leviathan turret, which is why the Illuminate squad template carries both kinds.
- Also split (bugs, bots, squids): the MS-11 Solo Silo (u.gg S, S, A; GamesRadar D, A, D), the W.A.S.P. (u.gg B, B, S+; GamesRadar D, B, B) and the RL-77 Airburst (u.gg B, A, S+; GamesRadar B, C, C).
4.4The sources and their dates
- u.gg builds (Outplayed Inc.): 27 build pages. The 15 dated November 6, 2025 to May 13, 2026 are used here; the older ones predate the 4.1.0 balance pass, and only two of them (boss builds for the Hive Lord and the Dragonroach) are cited, as corroboration.
- u.gg tier lists: the primary list is "updated for 7.1.1", the support list is stamped 7.0.2, and the secondary and throwable lists carry no date (all read September 26, 2026).
- The Steam guide "Helldivers 2 Tier Lists" (The Pelvic Girdle, updated August 19, 2026): per-front tiers for passives, backpacks, boosters, Eagles and sentries. It is built from u.gg data, so it is not a second opinion.
- GamesRadar tier lists, the independent second opinion: primaries, secondaries and support weapons (all August 14, 2026); stratagems (January 9, 2026, overall rather than per front).
- GameRant's bug builds (February 25, 2026), its Cyberstan builds (February 11, 2026) and TheGamer on Crushers and Wretches (August 12, 2026).
Most sources predate something. Apart from u.gg's primary list (updated for 7.1.1), nothing dated here saw 7.1.0 (Ironclad Democracy, the faster Precision Strike); the u.gg builds also predate 6.3.0 (stronger orbitals and Railcannon, sturdier sentries, more grenades) and the Vote Snatchers of 7.0.0. Where it matters, a loadout's Why names what its build missed. Tier lists from before October 23, 2025 (patch 4.1.0) describe a different weapon balance: skip them.
4.5Loadouts for any front
Four kits are built for no front in particular: what you own after basic training (the only row a primary source confirms outright), your first purchases, a solo kit, and u.gg's Grenadier (November 14, 2025), written before 6.3.0 raised the Railcannon's damage and grenade refills.
| Front | Difficulty | Role | Primary | Secondary | Throwable | Stratagems | Booster | Why | Source |
|---|---|---|---|---|---|---|---|---|---|
| All | D1-10 | solo | PLAS-1 Scorcher | GP-31 Grenade Pistol or P-19 Redeemer | G-12 High Explosive | LAS-99 Quasar Cannon; AX/AR-23 Guard Dog; A/MG-43 Machine Gun Sentry; Eagle Airstrike | Flexible Reinforcement Budget | GamesRadar's solo advice (2026-08-14): cover every enemy type yourself, lean on sentries and Guard Dogs, move fast in light armor, avoid fights, use an SOS Beacon if you want help. The Quasar needs no backpack or ammo; Flexible Reinforcement Budget cuts the post-budget wait from 120 to 90 s, which matters most when you are the whole squad. Heavy SEAF Presence squadmates are unavailable since 2026-09-21 (wiki). | gamesradar.com |
| All | D1-3 | all-rounder (first purchases) | AR-23 Liberator | P-19 Redeemer | G-12 High Explosive | EAT-17 Expendable Anti-Tank (level 3); Eagle Airstrike; Orbital Precision Strike; MG-43 Machine Gun or Orbital Gatling Barrage | Hellpod Space Optimization | The first Requisition buys (Eagle Airstrike 4,000 at level 1, EAT-17 3,000 at level 3) plus the cheapest Mobilize items (Redeemer 5, Hellpod Space Optimization 15, DP-40 25 Medals). Two EATs every 70 s give anti-tank from level 3; the Airstrike clears patrols and closes holes and fabricators; Democracy Protects survives half of all killing hits. | wiki |
| All | D1-3 | starter | AR-23 Liberator | P-2 Peacemaker | G-12 High Explosive | MG-43 Machine Gun; Orbital Precision Strike (the two slots you own at level 1) | -- | What every diver owns after basic training, plus about 1,000 Requisition. Liberator (90 damage, AP2) for chaff; MG-43 (AP3) for medium armor; G-12 (demolition 30) closes bug holes and fabricator vents when thrown inside; Orbital Precision Strike (4,000 AP8, demolition 50, 80 s since 7.1.0) kills a stationary heavy or a structure; B-01 is medium armor rated 150 through Extra Padding. | wiki |
| All | D8-10 | grenadier (u.gg, all fronts) | AR-2 Coyote | GP-20 Ultimatum | G-142 Pyrotech | GL-21 Grenade Launcher; B-1 Supply Pack; Orbital Railcannon Strike; Eagle 500kg Bomb | Hellpod Space Optimization | u.gg Grenadier Build (2025-11-14, level 20, rated for all three fronts): explosive splash everywhere, the Supply Pack feeds the launcher and grenades, Integrated Explosives adds 2 throwables. GameRant's Terminid Grenadier (2026-02-25) makes almost the same picks. Written before 6.1.0 (GL-21 back to Medium penetration) and 6.3.0 (Railcannon 10,000, more grenades per refill). | u.gg |
Terminid loadouts
Against bugs, bring speed, stagger and fire for the swarm, and give every diver a head-shot anti-tank answer from difficulty 4. The common shape: an explosive or fire primary, a sidearm that closes holes or kills a heavy, Thermite or an incendiary grenade, Med-Kit, Hellpod Space Optimization, a one-shot anti-tank support weapon, the Eagle 500kg and the Orbital Laser.
That shape is what u.gg's bug builds (April to May 2026) and GameRant's (February 25, 2026) share community-tested. Unit by unit: the Terminid heavies and playbook.
5.1What decides the bug loadout
- Breach callers. Almost every small and medium bug can call a breach, and each breach brings more callers: carry a fast close-range primary and a crowd tool (Stalwart, MG-43, Breaker, Gatling Barrage, Napalm or Cluster), and shoot the bug in the calling stance first.
- Hunters and Pouncers. Fast flankers that pounce and slow you: answer with volume and stagger (every Punisher pellet staggers them), fire and sentries, and stay grouped.
- Medium armor. Hive Guard heads, Rupture Strain heads and the Bile Spewers of difficulty 6 and up bounce Light rifles: carry a Medium primary (Liberator Penetrator, Coyote, Purifier) or fire, or flank to the softer body.
- Chargers (from difficulty 4): one EAT-17, Quasar or Recoilless hit to the head kills every Charger variant; so do Thermite, the Railcannon, the 500kg and the Precision Strike, and since 6.3.0 the Eagle 110mm Rocket Pods. Dodge sideways, then shoot the exposed rear.
- Bile Titans: the Recoilless or Spear kills one with a head hit, Spore Burst Titan included; the EAT or Quasar needs one hit on a Bile Titan and two on the Spore Burst Titan; the Railcannon and 500kg kill it too, and popping its bile sacs stops the spew.
- Impalers (Eliminate targets from difficulty 5, regular from 6): an anti-tank hit into the exposed head; stagger weapons interrupt the tentacles; throw strikes early.
- Stalkers: close the lair; stagger or stun them, then shoot the head; fire stops them regenerating.
- Holes and nests: an explosive with demolition 20 into the hole, or 40 from the rim; Bile Titan holes (from difficulty 6) need 40 whichever way: the Ultimatum, Dynamite, Leveller, Spear, 500kg, Airstrike or Precision Strike (nests and holes).
5.2Core picks by slot
Tiers are dated opinions community-tested: u.gg's per-front lists (read September 26, 2026), GamesRadar (August 14, 2026) and the u.gg-based Steam guide (August 19, 2026); see the sources and their dates.
- Primary: AR-2 Coyote and PLAS-101 Purifier (u.gg S+, GamesRadar S); R-36 Eruptor and CB-9 Exploding Crossbow (u.gg S+). On the free route: SG-8 Punisher and SG-225 Breaker (u.gg A), PLAS-1 Scorcher (u.gg S).
- Secondary: GP-31 Grenade Pistol and GP-20 Ultimatum (u.gg S+, GamesRadar S); P-34 Breacher (u.gg S+, too new for GamesRadar). Free: P-19 Redeemer. The Grenade Pistol closes holes, which frees your grenade for Thermite; the Ultimatum kills a heavy and closes a Bile Titan hole from outside.
- Throwable: G-123 Thermite, G-10 Incendiary and G-13 Incendiary Impact (u.gg S+). Free: G-12 High Explosive, G-16 Impact.
- Support weapon: EAT-17 and GR-8 Recoilless (u.gg S+, GamesRadar A), LAS-99 Quasar (S at both), B/FLAM-80 Cremator (S+, S), AC-8 Autocannon (u.gg S+, GamesRadar B), 40-K Meltagun, S-11 Speargun.
- Strikes: the Eagle 500kg and Airstrike (Steam guide S+), the Orbital Laser, Railcannon and Gatling Barrage, the Eagle Napalm. Eagles cycle freely here: the bugs have no anti-air.
- Sentries: the MG and Autocannon sentries, the Tesla Tower and the HMG Emplacement (Steam guide S+); the Tesla also zaps divers who are not prone.
- Backpack: Supply Pack, Warp Pack, Hot Dog (Steam guide S+); Jump Pack, Hover Pack, Rover, Shield Generator Pack (S). Mobility beats armor against melee swarms.
- Armor: light or medium with Med-Kit, Acclimated, Desert Stormer, Inflammable or True Grit (Steam guide S+); Fortified rates only C against bugs.
- Booster: Stamina Enhancement, Hellpod Space Optimization, Experimental Infusion (Steam guide S+); Muscle Enhancement on snow, swamp and acid planets.
5.3By difficulty band
- Difficulty 1-3: a fast primary, a grenade or Eagle that closes holes, and one EAT per diver from level 3.
- Difficulty 4-5: a head-shot anti-tank weapon per diver for the Chargers; a Medium primary or fire for Hive Guards; a breach answer.
- Difficulty 6-7: two or more reusable anti-tank weapons in the squad; demolition 40 for Bile Titan holes; fire or gas for breaches; a plan for Rupture ambushes and Impalers.
- Difficulty 8-10: anti-tank that kills a Spore Burst Titan in one head hit (Recoilless, Spear); dedicated crowd control; a support diver; four different boosters.
5.4Every bug loadout
From the free kits to the dated community builds and the strain and Hive World specialists, sorted by difficulty band. The Why column names the threat each pick answers and, for many community builds, the patch it predates; the subfaction rows are explained in subfaction adjustments.
| Front | Difficulty | Role | Primary | Secondary | Throwable | Stratagems | Booster | Why | Source |
|---|---|---|---|---|---|---|---|---|---|
| Terminids | D1-3 | all-rounder (free) | SG-8 Punisher | P-19 Redeemer | G-12 High Explosive | EAT-17 Expendable Anti-Tank (level 3); M-105 Stalwart; Eagle Airstrike; Orbital Precision Strike | Hellpod Space Optimization | Free, Requisition and Mobilize pages 1-4 only (Punisher 4, Redeemer 5, HSO 15, CM-09 15 Medals). Every Punisher pellet staggers (35 force against Hunter 15, Warrior 20, Stalker 30 thresholds); the Stalwart's 250-round belt reloads on the move for breaches; G-12 into a hole closes it; EAT and the Precision Strike cover the D3 Charger Behemoth (Eliminate missions only). | wiki |
| Terminids | D1-7 | spray and pray (GameRant) | AR-23 Liberator | P-2 Peacemaker | G-12 High Explosive | M-105 Stalwart; A/MG-43 Machine Gun Sentry; AX/AR-23 Guard Dog; Eagle 500kg Bomb | Hellpod Space Optimization | GameRant The Spray and Pray (2026-02-25): three machine guns at once for breaches, nearly all free or Requisition (Peak Physique, +30 ergonomics, comes from Viper Commandos or the Superstore). It has no anti-tank support weapon, so pair it with an anti-tank squadmate from D4. | gamerant.com |
| Terminids (Predator Strain) | D4-10 | crowd control | SG-451 Cookout | P-19 Redeemer | G-10 Incendiary | FLAM-40 Flamethrower or M-105 Stalwart; A/MG-43 Machine Gun Sentry; A/FLAM-40 Flame Sentry; Eagle Napalm Airstrike | Vitality Enhancement | Predator Hunters cloak and Predator Stalkers come without a lair: stay grouped, stagger them (every Cookout shell staggers 35 and ignites), reveal and scatter them with fire or gas, and let sentries with a view do the killing. | wiki |
| Terminids (Spore Burst Strain) | D4-10 | crowd control (lasers and gas; u.gg user build) | LAS-5 Scythe | LAS-7 Dagger | G-4 Gas | GL-21 Grenade Launcher; Orbital Gas Strike; Eagle 500kg Bomb; AX/TX-13 Dog Breath | Experimental Infusion | u.gg Toxic Terminid Slayer (2026-05-13, user-recommended, level 15): ammo-free lasers and gas. The wiki's Spore Burst advice matches: kill with fire and lasers (no burst chain), crowd control, never melee. Advanced Filtration (80% gas resistance) lets you stand in your own clouds; pop a Spore Burst Titan's sacs to stop its speed buff. | u.gg |
| Terminids | D4-10 | pyromaniac (GameRant) | SG-225IE Breaker Incendiary | GP-20 Ultimatum | G-12 High Explosive | LIFT-860 Hover Pack; FLAM-40 Flamethrower; Orbital Napalm Barrage; MD-8 Gas Mines | Vitality Enhancement | GameRant The Pyromaniac (2026-02-25): everything burns, Inflammable protects you from your own fire, Vitality softens burning, gas mines slow the swarm into the flames. Since 6.1.0 flamed bugs also panic. | gamerant.com |
| Terminids (Hive Worlds) | D4-10 | support (caves and Gloom) | LAS-16 Sickle | LAS-58 Talon | G-12 High Explosive | B-1 Supply Pack; LAS-99 Quasar Cannon; Eagle Airstrike; A/MG-43 Machine Gun Sentry | Hellpod Space Optimization | Gloom Source worlds cut ammo pickups 50% and reinforcements 20% and slow Eagle rearm 30%; inside caves only roof openings let stratagems through and the Orbital Laser ignores cave enemies (6.1.0). Heat-sink lasers and the Quasar never need ammo, and the Supply Pack keeps the squad fed. | wiki |
| Terminids | D4-5 | all-rounder | AR-2 Coyote | GP-31 Grenade Pistol | G-123 Thermite | EAT-17 or LAS-99 Quasar Cannon; Eagle 500kg Bomb or Eagle Airstrike; Orbital Precision Strike; A/MG-43 Machine Gun Sentry | Stamina Enhancement | The Coyote (AP3 plus fire) is u.gg S+ and GamesRadar S against bugs (2026-08); the Grenade Pistol closes holes, which frees the grenade slot for Thermite (2,000 AP7, sticks: kills a Charger); two EATs every 70 s cover the rest. | u.gg |
| Terminids | D4-5 | anti-tank (free) | SG-225 Breaker | P-19 Redeemer | G-12 High Explosive | GR-8 Recoilless Rifle (level 5) or EAT-17; Eagle Airstrike; Orbital Precision Strike; A/MG-43 Machine Gun Sentry | Vitality Enhancement | Chargers join the pool at D4 and Bile Titans at D5-6: one Recoilless (3,200 AP6) or EAT (2,000) hit to the head kills a Charger (1,200-HP head) or a Bile Titan (1,500). The Breaker (Mobilize p4) empties 16 shells into Hunter packs; Vitality (p4, 20 Medals) cuts incoming damage about 10%. | wiki |
| Terminids | D4-5 | crowd control (free) | AR-23P Liberator Penetrator | P-19 Redeemer | G-12 High Explosive | M-105 Stalwart; Eagle Cluster Bomb (level 3) or Eagle Napalm Airstrike (level 5); Orbital Gatling Barrage; A/G-16 Gatling Sentry (level 5) | Hellpod Space Optimization | The Penetrator (AP3, Mobilize p6) kills Hive Guard heads (AV3 since 6.2.3) that Light rifles bounce off; Engineering Kit adds 2 grenades for holes; the Gatling Barrage (70 s) and a Cluster or Napalm Eagle answer breaches; the Gatling Sentry holds objectives. | wiki |
| Terminids (Hive Worlds) | D5-10 | anti-tank (Dragonroach) | AR-2 Coyote | GP-20 Ultimatum | G-23 Stun | EAT-17 or LAS-99 Quasar Cannon; Orbital Railcannon Strike; A/MG-43 Machine Gun Sentry; LIFT-182 Warp Pack | Vitality Enhancement | The Dragonroach (Gloom planets, D5+; 6,500 HP, head 1,500 AV4) dies to one EAT, Quasar or Recoilless head hit, the Railcannon, or a homing Spear or W.A.S.P.; the Ultimatum one-shots it on a body hit; sentries count as its targets. Inflammable against the fire breath; go prone when hit. Same picks as u.gg's Dragonroach Slayer (2025-09-09, before 4.1.0 cut its spawns and set its wings to 4,000). | wiki |
| Terminids (Rupture Strain) | D6-10 | all-rounder | PLAS-101 Purifier | GP-31 Grenade Pistol | G-4 Gas | EAT-17; MD-8 Gas Mines; Orbital Gas Strike; SH-32 Shield Generator Pack | Hellpod Space Optimization | Rupture Warriors and Spewers have Medium (AV3) heads and the Rupture Charger an AV5 head that Heavy AP bounces off, so bring an AP3+ primary and true anti-tank (EAT). Explosives force burrowers up; gas, fire and explosions hurt them underground; the wiki suggests heavy armor, Feet First or a Shield Generator Pack against their eruption hits. | wiki |
| Terminids | D6-10 | grenadier (GameRant) | AR-2 Coyote | GP-20 Ultimatum | G-123 Thermite | GL-21 Grenade Launcher; B-1 Supply Pack; Orbital Laser; Eagle 500kg Bomb | Hellpod Space Optimization | GameRant The Grenadier (Jake Fillery, 2026-02-25): explosive synergy for nests, breaches and heavies. Correction: GameRant says the GL-21 was buffed to Heavy penetration; that 6.0.1 change was reverted to Medium in 6.1.0 (2026-03-17). | gamerant.com |
| Terminids | D6-10 | speedrunner (GameRant) | CB-9 Exploding Crossbow | LAS-58 Talon | G-123 Thermite | LIFT-850 Jump Pack; LAS-99 Quasar Cannon; Eagle 500kg Bomb; Orbital Railcannon Strike | Stamina Enhancement | GameRant The Speedrunner (2026-02-25): the one-handed explosive Crossbow closes nests on the move; the Talon and Quasar need no ammo; the Jump Pack and Stamina keep you moving; the Railcannon auto-targets the biggest bug. The picks match u.gg's bug tiers (Crossbow S+, Quasar S). | gamerant.com |
| Terminids | D6-7 | anti-tank | PLAS-101 Purifier | GP-20 Ultimatum | G-123 Thermite | GR-8 Recoilless Rifle; Eagle 500kg Bomb; Orbital Railcannon Strike; A/MG-43 Machine Gun Sentry | Experimental Infusion | Recoilless head shots one-shot every Charger variant, the Bile Titan, the Spore Burst Titan (2,500-HP head) and the Dragonroach; the Ultimatum (AP6, demolition 40) is an emergency heavy kill that also closes Bile Titan holes from outside; Railcannon and 500kg are the strike answers. Team reload with a squadmate (either backpack since 7.0.0). | wiki |
| Terminids | D6-7 | anti-tank (free) | PLAS-1 Scorcher | P-19 Redeemer | G-12 High Explosive | LAS-99 Quasar Cannon (level 18) or GR-8 Recoilless Rifle; Eagle 500kg Bomb (level 15); Orbital Railcannon Strike (level 20); EAT-17 | Stamina Enhancement | Impalers, Bile Titans in breaches and the Rupture Strain arrive at D6: every heavy head dies to one Quasar or Recoilless hit and the Railcannon (10,000 since 6.3.0) one-shots a Titan. The Scorcher (Mobilize p10) is u.gg S on all fronts; Stamina (p7) keeps you ahead of swarms. All free, Requisition or Mobilize. | wiki |
| Terminids | D6-7 | crowd control | AR-2 Coyote | P-72 Crisper | G-10 Incendiary | B/FLAM-80 Cremator or FLAM-40 Flamethrower; Eagle Napalm Airstrike; Orbital Gas Strike; A/G-16 Gatling Sentry | Vitality Enhancement | Fire is the bug front's crowd tool: burn hits Main at AP4 and, since 6.1.0, flamed bugs panic; the Cremator is S+ (u.gg) and S (GamesRadar) against bugs; Inflammable (75% fire resistance) lets you work inside your own napalm; gas (25% slow since 6.2.2) holds breaches. | Steam |
| Terminids | D6-7 | flex (nests and objectives) | R-36 Eruptor | GP-31 Grenade Pistol | TED-63 Dynamite | AC-8 Autocannon; Orbital Laser; Eagle Airstrike; EAT-17 | Hellpod Space Optimization | The objectives diver: Eruptor, Grenade Pistol, Autocannon and Dynamite (demolition 40, works from the rim) all close holes; the Orbital Laser clears a heavy nest in one use; EAT backs up the anti-tank divers. Engineering Kit adds 2 throwables. | wiki |
| Terminids (Hive Worlds) | D7-10 | boss hunter (Hive Lord) | AR-61 Tenderizer | GP-20 Ultimatum | G-12 High Explosive | FAF-14 Spear or GR-8 Recoilless Rifle; Eagle Strafing Run; Orbital Gatling Barrage; EXO-45 Patriot Exosuit | Experimental Infusion | The Hive Lord (150,000 HP; AV5 plates of about 50,000 effective each) needs Anti-Tank I or better in volume: Strafing Run and Gatling Barrage hit many plates at once, Recoilless or Spear break plates between cooldowns, a Patriot's rockets strip a plate; then pour high-rate fire (Tenderizer) into the AV2 flesh, never explosives (it is explosion-immune). Its bile is mostly explosive, so Fortified helps. u.gg's Hive Lord Slayer (2025-09-12, before 4.1.0) chose Spear, Emancipator, Strafing Run and an MG Sentry. | wiki |
| Terminids | D8-10 | all-rounder (u.gg Standard D10) | SG-8 Punisher | P-19 Redeemer | G-12 High Explosive | AC-8 Autocannon; Orbital Laser; Eagle 500kg Bomb; A/MG-43 Machine Gun Sentry | Hellpod Space Optimization | u.gg Standard D10 Terminid (2026-04-29, level 15; listed among its leveling builds): Super Helldive with no premium gear. The Autocannon (AP4, 325/260) closes holes from range, kills Hive Guards and chips Chargers; the Orbital Laser clears a heavy nest; the 500kg kills Chargers and Titans. The Steam guide (from u.gg) rates the Autocannon, 500kg and MG Sentry S+ against bugs. | u.gg |
| Terminids | D8-10 | anti-tank | CB-9 Exploding Crossbow | GP-20 Ultimatum | G-123 Thermite | FAF-14 Spear or GR-8 Recoilless Rifle; Orbital Railcannon Strike; Eagle 500kg Bomb; EAT-17 | Experimental Infusion | At D10 Behemoths and Spore Chargers replace Chargers and Spore Burst Titans (2,500-HP head) appear on their planets: only the Recoilless and Spear one-shot that head, EAT and Quasar need two, so carry two anti-tank tools. The one-handed Crossbow (u.gg S+ against bugs) closes holes on the move. | wiki |
| Terminids | D8-10 | anti-tank (u.gg Blitzer, user build) | ARC-12 Blitzer | GP-31 Grenade Pistol | G-10 Incendiary | LAS-99 Quasar Cannon; AX/AR-23 Guard Dog; Orbital Gatling Barrage; Orbital Laser | Hellpod Space Optimization | u.gg Blitzer Bug Build (2026-04-14, user-recommended, level 15): Quasar for heavies, Grenade Pistol for holes, incendiary grenades for chaff; the Blitzer (arc, no ammo; u.gg S, GamesRadar B against bugs) stun-locks Hive Guards and Stalkers. | u.gg |
| Terminids | D8-10 | crowd control (gas and stun) | AR-2 Coyote | P-72 Crisper | G-4 Gas | M-105 Stalwart or MGX-42 Bullet Storm; Orbital Gas Strike; A/M-23 EMS Mortar Sentry; Eagle Napalm Airstrike | Vitality Enhancement | D10 breaches come fast and big: gas confuses and slows 25%, EMS mortars pin waves for the killers, napalm denies the eruption point; Acclimated halves acid, fire, gas and arc damage (SG S+ against bugs). Bile Titans and the Hive Lord are never confused, so the anti-tank divers still own them. | wiki |
| Terminids | D8-10 | flex (u.gg Expendable) | CB-9 Exploding Crossbow | GP-20 Ultimatum | G-13 Incendiary Impact | MGX-42 Bullet Storm; EAT-17; SH-32 Shield Generator Pack; Orbital Napalm Barrage | Hellpod Space Optimization | u.gg Expendable Terminid (2026-05-03, level 18): two expendables on 70 s cooldowns (two Bullet Storms and two EATs per call) keep the backpack slot free for the Shield Generator Pack; the Napalm Barrage covers breaches. | u.gg |
| Terminids | D8-10 | support | ARC-12 Blitzer | P-11 Stim Pistol | G-23 Stun | LAS-99 Quasar Cannon; B-1 Supply Pack; Orbital Laser; A/M-23 EMS Mortar Sentry | Experimental Infusion | The ammo-free support diver: the Blitzer (arc, no ammo; u.gg S against bugs) and the Quasar never draw on resupply, the Supply Pack feeds everyone else, the Stim Pistol heals at range (heal doubled in 6.1.0) and each stim also triggers Experimental Infusion (+10% speed and damage resistance). Stun and EMS protect revives. | wiki |
Automaton loadouts
Against bots, bring Medium penetration or explosives for Devastators, explosive resistance for yourself, and an anti-tank answer to Hulks and tanks for every diver from difficulty 4. Fight from cover, and bring an orbital wherever anti-air sites ground the Eagles.
The bot front is where the dated lists agree most: both rate eight anti-armor support weapons S or better here community-tested. Unit by unit: the Automaton heavies and playbook.
6.1What decides the bot loadout
- Rockets, cannons and ranged fire. Most bot damage is explosive: Fortified or a Concussive Padding resists it, heavy armor soaks the rest, and a Shield Generator Pack or Relay, smoke (bots cannot see through it) and going prone (which cuts the damage from a blast's outer radius by 90%) keep you standing.
- Flare callers. Every Trooper, raider, Commissar and Brawler can call a bot drop: kill them during the long flare draw with a precise primary.
- Devastators. Their torsos are Medium armor: carry a Medium primary (Counter Sniper, Adjudicator, Purifier), aim for the head (the Diligence kills with one head shot), or stagger and blast them.
- Berserkers. Chainsaw packs that force you out of cover: high rate of fire at the glowing stomach, stagger, or a G-23 Stun to freeze the pack.
- Hulks (Bruisers from difficulty 4): one Recoilless, EAT, Quasar or Spear hit anywhere; one Thermite; the AMR, Railgun or Speargun into the eye; or flank to the back heatsink.
- Tanks: one Recoilless hit to the turret, or two EAT or Quasar hits; three Autocannon or Eruptor shots into the turret heatsink from the side approx; Thermite; the Railcannon. Patch 6.2.2 made tank hulls tougher, so older "shoot the hull" advice is stale.
- Striders: a War Strider dies to one EAT, Quasar or Recoilless hit on a hip; a Factory Strider loses its chin guns to the Autocannon or AMR, then takes a Recoilless in the eye, and the Leveller or Solo Silo kills it in one hit.
- Gunships (from difficulty 5 as a modifier; Gunship Facilities from 6): two Autocannon or AMR shots per engine, or a Spear or W.A.S.P. lock-on. A Gunship Facility needs demolition 60: the mission Hellbomb, a B-100 Portable Hellbomb or a SEAF Artillery mini-nuke.
- Fabricators and anti-air: an explosive into the vent closes a fabricator; Anti-Air Emplacements ground Eagles within 150 m, so carry an orbital where they stand (fabricators and structures).
6.2Core picks by slot
Dated opinions community-tested, from the same three sources as the bug picks.
- Primary: R-36 Eruptor and PLAS-101 Purifier (u.gg S+, GamesRadar S); PLAS-1 Scorcher and R-72 Censor (S at both); CB-9 Exploding Crossbow and SG-8P Punisher Plasma (u.gg S+). On the free route: R-63 Diligence (u.gg S), R-63CS Diligence Counter Sniper (A), Scorcher.
- Secondary: GP-20 Ultimatum (u.gg S+, GamesRadar S), P-34 Breacher (u.gg S+, new), and the P-4 Senator, LAS-58 Talon and GP-31 Grenade Pistol (S at both). The Ultimatum and Breacher put a Hulk or tank kill in your pocket, and the Senator kills a Hulk through the eye.
- Throwable: G-123 Thermite and G/40-K Melta Mine (u.gg S+); TED-63 Dynamite, G-23 Stun and G-60 Anti-Tank Seeker (S). Free: G-12 High Explosive.
- Support weapon: GR-8 Recoilless, EAT-411 Leveller, B/MD C4 Pack and 40-K Meltagun (u.gg S+, GamesRadar S); EAT-17, MLS-4X Commando and RS-422 Railgun (S at both); FAF-14 Spear (u.gg S, GamesRadar A); AC-8 Autocannon (u.gg S+, GamesRadar B).
- Strikes: the Eagle 500kg, Airstrike and Strafing Run (Steam guide S+), the Orbital Laser, Railcannon and Precision Strike: orbitals where anti-air sites ground the Eagles.
- Sentries: the Autocannon and Rocket sentries and the AT and HMG emplacements (Steam guide S+); the Rocket Sentry shoots heavies first.
- Backpack: Supply Pack, Portable Hellbomb, Warp Pack, Hot Dog (S+); Shield Generator Pack and Jump Pack (S). The shield pack stops projectiles from every side, though not fire, gas or War Strider grenades.
- Armor: heavy with Fortified or one of the three Concussive Paddings (Steam guide S+); Reduced Signature for stealth; Med-Kit and True Grit also rate S+.
- Booster: Experimental Infusion, Hellpod Space Optimization, Stamina Enhancement (Steam guide S+).
6.3By difficulty band
- Difficulty 1-3: head-shot primaries; an explosive for fabricator vents; an EAT from level 3 for the first tanks and Scout Striders.
- Difficulty 4-5: anti-tank for every diver (Hulks, regular tanks); Medium penetration for Devastators; a Gunship answer from difficulty 5.
- Difficulty 6-7: two or more reusable anti-tank weapons for the striders and Gunship Facilities; shields or smoke; a Vox Engine plan on Cyborg Legion planets.
- Difficulty 8-10: Reinforced Scout Striders fire rocket salvos (dive, and wear Fortified); 6.0.1 raised the pressure from difficulty 9 most on this front; full anti-tank, anti-air and a support diver.
6.4Every bot loadout
The free kits, the dated community builds and the subfaction, Megafactory and Commando specialists, sorted by difficulty band. Two rows carry the unverified tag: the Ironclad Democracy kit (items released September 22, 2026, not yet in any dated build) and u.gg's Bastion tank crew (no second source since 6.3.0 reworked vehicles). The Cyberstan Saboteur brings two backpacks on purpose: wear the C4 and call the Portable Hellbomb in at the target.
| Front | Difficulty | Role | Primary | Secondary | Throwable | Stratagems | Booster | Why | Source |
|---|---|---|---|---|---|---|---|---|---|
| Automatons | D1-3 | all-rounder (free) | R-63 Diligence | P-2 Peacemaker | G-12 High Explosive | EAT-17 Expendable Anti-Tank; Eagle Airstrike; Orbital Precision Strike; A/MG-43 Machine Gun Sentry | Hellpod Space Optimization | The Diligence (Mobilize p2, 8 Medals; 165 damage) one-shots a Devastator head (110 HP, AV1) and every Trooper; FS-05 (p2, 6 Medals) is heavy armor with Fortified, which halves explosive damage again; G-12 into a fabricator vent destroys it; EAT covers the first tanks and Scout Striders (D3). | wiki |
| Automatons (Jet Brigade) | D4-10 | all-rounder | SG-8P Punisher Plasma | P-4 Senator | G-23 Stun | GR-8 Recoilless Rifle or EAT-17; Eagle Airstrike; Orbital Precision Strike; A/MLS-4X Rocket Sentry | Experimental Infusion | Jump packs explode when shot: explosive primaries (Punisher Plasma, Purifier, Eruptor) pop them at range, and explosive fire into a Jet Brigade Hulk's AV3 pack kills it from the front; the units leap out of strikes, so stun them first. | wiki |
| Automatons (Incineration Corps) | D4-10 | all-rounder | PLAS-101 Purifier | P-4 Senator | G-123 Thermite | GR-8 Recoilless Rifle; Eagle Airstrike; Orbital Precision Strike; A/MLS-4X Rocket Sentry | Integrated Extinguishers | Incineration Corps planets swap Heavy Devastators for Conflagration and Incendiary MG Devastators and Hulk Bruisers for Firebombers, and drop Berserkers and Rocket Raiders: fire replaces rockets as the main killer, so Inflammable (75% fire resistance) beats Fortified. Kill at range; dive or go prone the moment you burn. Integrated Extinguishers (7.1.0) puts a burning diver out faster (exact time unverified). | wiki |
| Automatons (Megafactory) | D4-10 | flex (anti-air-heavy maps) | R-36 Eruptor | GP-31 Grenade Pistol | G-4 Gas | MLS-4X Commando; GR-8 Recoilless Rifle; Orbital Precision Strike; Orbital Laser | Hellpod Space Optimization | GamesRadar Cyberstan (2026-02-19): a medium-pen or explosive primary, the Grenade Pistol, Thermite or Gas, anti-tank for every diver, and something that downs Gunships (Commando, Spear); anti-air emplacements block Eagles within 150 m on these maps, so both strikes are orbitals. The Commando's four laser-guided rockets also take out turrets from range. | gamesradar.com |
| Automatons | D4-10 | stealth (Commando missions) | AR-59 Suppressor | P-35 Re-Educator | TED-63 Dynamite | LAS-99 Quasar Cannon or RS-422 Railgun; B-1 Supply Pack; MLS-4X Commando; Orbital Laser | Concealed Insertion | GamesRadar Commando missions (2026-01-23): stealth first with suppressed Redacted Regiment gear, backpack-free anti-tank (AMR, Railgun, Quasar), explosives for fabricators, support-type stratagems you call in the one-minute Destroyer windows and keep (Supply Pack, Commando), plus one big strike (Orbital Laser); kill flare-calling Troopers first. Concealed Insertion (Redacted Regiment) smokes every hellpod. | gamesradar.com |
| Automatons | D4-5 | all-rounder | R-36 Eruptor | P-4 Senator | G-123 Thermite | EAT-17 or LAS-99 Quasar Cannon; Eagle 500kg Bomb; Orbital Precision Strike; SH-32 Shield Generator Pack | Experimental Infusion | The Eruptor (AP4 explosive; u.gg S+, GamesRadar S against bots) kills Devastators with body shots, Scout Strider legs, and a Hulk with two eye shots; the Senator needs three eye shots; Thermite kills a Hulk or a tank anywhere; the shield pack eats the ranged chip damage. | wiki |
| Automatons | D4-5 | anti-tank (free) | R-63CS Diligence Counter Sniper | P-19 Redeemer | G-12 High Explosive | GR-8 Recoilless Rifle; Eagle 500kg Bomb or Eagle Airstrike; Orbital Precision Strike; A/MLS-4X Rocket Sentry (level 15) | Hellpod Space Optimization | Hulks and regular tanks arrive at D4: one Recoilless hit kills a Hulk anywhere or a tank turret (3,200 vs 2,100). The Counter Sniper (AP3, Mobilize p7) kills Devastators through the torso and Scout Strider waists; the Rocket Sentry goes for heavies first. | wiki |
| Automatons | D4-5 | line holder (free) | PLAS-1 Scorcher | P-19 Redeemer | G-12 High Explosive | AC-8 Autocannon (level 10); EAT-17; Orbital Smoke Strike (level 8) or Eagle Smoke Strike; Orbital Precision Strike | Hellpod Space Optimization | The Autocannon kills Devastators, Scout Striders, Gunship thrusters (2 shots) and fabricators through the vent; smoke breaks bot line of sight (bots cannot see through it since 1.001.104); EAT covers Hulks; Engineering Kit cuts recoil 30% crouched or prone. | wiki |
| Automatons unverified | D6-10 | anti-tank (Ironclad Democracy, untested) | AR-11 Arbitrator | P-34 Breacher | G-60 Anti-Tank Seeker | EAT-17; Orbital Railcannon Strike; Eagle 500kg Bomb; A/MLS-4X Rocket Sentry | Surplus EAT Allocation | The newest warbond (2026-09-22) puts backpack-free anti-tank in every slot: the Breacher's AP7 charge one-shots Hulks and Cannon Turrets (u.gg S+ against bots), the AT Seeker homes onto one Hulk per grenade, and Surplus EAT Allocation adds two free EAT calls for the squad. Power Up Gaming (2026-09-24) ranked the AT Seeker and Breacher its top two; no dated loadout has tested them yet. | Steam |
| Automatons | D6-7 | anti-tank | R-36 Eruptor | GP-20 Ultimatum | G-123 Thermite | GR-8 Recoilless Rifle; Orbital Railcannon Strike; Eagle 500kg Bomb; A/MLS-4X Rocket Sentry | Experimental Infusion | Recoilless: any Hulk, a tank turret, a War Strider hip or crotch, a Factory Strider eye; the Ultimatum (AP6, 2,000 blast) as the emergency heavy kill and outpost opener; the Railcannon (10,000 since 6.3.0) one-shots tanks, Hulks and War Striders but not a Factory Strider. | wiki |
| Automatons | D6-7 | anti-tank (free) | PLAS-1 Scorcher | P-19 Redeemer | G-12 High Explosive | LAS-99 Quasar Cannon; SH-32 Shield Generator Pack; Orbital Railcannon Strike; Eagle 500kg Bomb | Hellpod Space Optimization | War Striders arrive at D6 and Factory Striders are regular from D6 or D7 (the wiki disagrees; an Eliminate target from D4): the Quasar (no backpack) kills a Hulk or a War Strider hip in one shot and leaves the backpack slot for the Shield Generator Pack (a 360-degree bubble against bot fire); the Railcannon kills tanks and Hulks; the 500kg kills War Striders. All Requisition or Mobilize (level 20). | wiki |
| Automatons | D6-7 | line holder (anti-air) | PLAS-101 Purifier | LAS-58 Talon | G-23 Stun | AC-8 Autocannon; EAT-17; Orbital Smoke Strike; Eagle Airstrike | Hellpod Space Optimization | Gunship Facilities appear at D6: two Autocannon shells per Gunship thruster; two charged Purifier shots also drop a thruster; G-23 Stun freezes a Berserker pack or a Hulk for a follow-up; smoke to cross open ground; EAT as backup anti-tank. The Talon never needs ammo. | wiki |
| Automatons | D6-7 | support (shield) | SG-8P Punisher Plasma | P-4 Senator | G-123 Thermite | LAS-99 Quasar Cannon; SH-32 Shield Generator Pack; FX-12 Shield Generator Relay; Orbital Laser | Vitality Enhancement | The Punisher Plasma (u.gg S+ against bots) staggers Devastator and Berserker groups; the Shield Generator Pack and Relay stop bot projectiles (not fire, gas or War Strider grenades, and Radical kicks break a Relay); the Quasar keeps anti-tank without a backpack. | wiki |
| Automatons (Cyborg Legion) | D7-10 | anti-tank (Vox Engine) | JAR-5 Dominator | GP-20 Ultimatum | G-123 Thermite | FAF-14 Spear or EAT-411 Leveller; Orbital Railcannon Strike; Orbital Laser; A/MLS-4X Rocket Sentry | Experimental Infusion | Vox Engines (D7+ on Cyborg planets; 9,000 HP since 6.3.0, at most 3 alive): the Railcannon one-shots one, the Leveller kills on a body hit, each Spear missile kills a cannon (both cannons dead = kill), or break three of its six AV1 vents and throw any grenade into the hatch. Kill Agitators first (their death stuns their squad); the Dominator breaks helmets and heads; Rock Solid stops Radical kick ragdolls. Orbitals rather than Eagles on anti-air-heavy Megafactory maps. | wiki |
| Automatons | D8-10 | all-rounder (u.gg Standard D10) | R-63 Diligence | P-2 Peacemaker | G-12 High Explosive | GR-8 Recoilless Rifle; A/AC-8 Autocannon Sentry; Orbital Laser; Eagle Airstrike | Hellpod Space Optimization | u.gg Standard D10 Automatons (2026-05-05, level 18): Super Helldive with no premium gear. The Diligence handles infantry at range, the Recoilless everything heavy, the Autocannon Sentry (AP5 rounds) Devastators and Hulks, the Orbital Laser outposts. Predates 6.3.0's doubled sentry health. | u.gg |
| Automatons | D8-10 | all-rounder (u.gg Super Helldive) | PLAS-101 Purifier | GP-20 Ultimatum | G-123 Thermite | GR-8 Recoilless Rifle; Eagle Airstrike; Orbital Laser; Eagle 500kg Bomb | Experimental Infusion | u.gg Super Helldive Automaton Build (2025-12-04, level 18): Purifier for Troopers, Scout Striders, Devastators and Berserkers; Ultimatum, Thermite and Recoilless for everything heavy; two Eagles share one Eagle (2 + 1 charges per 150 s rearm). Fine on open maps; swap an Eagle for an orbital where anti-air sites stand. | u.gg |
| Automatons | D8-10 | anti-air and support | R-72 Censor | LAS-58 Talon | G-12 High Explosive | FAF-14 Spear; Orbital Precision Strike; Orbital Smoke Strike; A/MLS-4X Rocket Sentry | Stamina Enhancement | The Spear (4,000 AP7) locks on to Gunships, Anti-Air Emplacements (since 4.1.0), tanks and Factory Strider parts at range; the Censor (u.gg S, GamesRadar S against bots) picks off flare-callers quietly; smoke covers the squad's movement between cover. | wiki |
| Automatons | D8-10 | anti-tank (heavy, no launcher backpack) | CB-9 Exploding Crossbow | GP-20 Ultimatum | G/40-K Melta Mine | EAT-411 Leveller; Orbital Railcannon Strike; Eagle 500kg Bomb; SH-32 Shield Generator Pack | Experimental Infusion | Built from the u.gg S+ bot picks (Crossbow, Leveller, Melta Mine, Concussive Padding): the Leveller (AP6, 2,500 blast, demolition 40) kills a Factory Strider or Vox Engine on any hit and cleaves dropships; Melta Mines (AP7) kill Hulks that walk over them; the Grenadier passive adds 2 mines and halves explosive damage. | wiki |
| Automatons | D8-10 | anti-tank (u.gg Bot Slayer) | R-36 Eruptor | GP-20 Ultimatum | G-123 Thermite | GR-8 Recoilless Rifle; Orbital Laser; Eagle Cluster Bomb; A/AC-8 Autocannon Sentry | Experimental Infusion | u.gg Super Helldive Bot Slayer (2026-02-11, level 25): Eruptor for Devastators, Reinforced Scout Strider legs and Hulk eyes; Ultimatum and Thermite for Hulks, War and Factory Striders; Cluster Bomb for chaff. GamesRadar (2026-08-14) also rates the Recoilless S against bots. Predates 6.3.0. | u.gg |
| Automatons | D8-10 | ballistic shield (u.gg) | PLAS-101 Purifier | LAS-58 Talon | G-123 Thermite | SH-20 Ballistic Shield Backpack; LAS-99 Quasar Cannon; Eagle 500kg Bomb; Orbital Laser | Hellpod Space Optimization | u.gg Ballistic Shield Build (2025-11-06, level 18): the shield blocks MG Raiders, Heavy Devastators, Hulk autocannon rounds and melee but not rockets; the one-handed Talon fires from behind it; the Quasar needs no backpack. Since then 6.2.2 raised the shield to 1,000 HP and 6.0.1 cut its cooldown to 240 s. | u.gg |
| Automatons | D8-10 | defense (u.gg Rapid Acquisition) | R-36 Eruptor | GP-20 Ultimatum | G-4 Gas | GR-8 Recoilless Rifle; Eagle Smoke Strike; Orbital Laser; A/M-23 EMS Mortar Sentry | Increased Reinforcement Budget | u.gg Rapid Acquisition Build (2025-12-06, level 20) for the platinum-haul mission under constant heavy attack: smoke hides the loaders (bots cannot see through it), EMS mortars slow Hulks and War Striders, the Recoilless kills everything heavy, gas confuses whole patrols. | u.gg |
| Automatons (Cyborg Legion) | D8-10 | stealth demolitions (u.gg Cyberstan Saboteur) | R-72 Censor | P-4 Senator | TED-63 Dynamite | B/MD C4 Pack; B-100 Portable Hellbomb; Orbital Laser; Eagle 500kg Bomb | Hellpod Space Optimization | u.gg Cyberstan Saboteur (2026-02-11, level 15): C4 (six 2,000 AP7 charges; two under a Vox Engine) and the Portable Hellbomb (demolition 60; with the mission Hellbomb and SEAF Artillery's mini-nuke, the only answers to Gunship Facilities) with Reduced Signature (-50% noise, -40% detection). Both are backpacks: carry the C4 and call the Hellbomb in at the target (drop one pack, carry the other). GamesRadar (2026-02-19) and GameRant (2026-02-11) warn that anti-air emplacements often ground Eagles on Megafactory maps, so the 500kg may idle. | u.gg |
| Automatons unverified | D8-10 | vehicle crew (u.gg Bastion Tank Crew) | LAS-17 Double-Edge Sickle | LAS-58 Talon | G-123 Thermite | TD-220 Bastion MK XVI; LAS-99 Quasar Cannon; SH-32 Shield Generator Pack; Orbital Laser | Vitality Enhancement | u.gg Bastion Tank Crew (2026-02-09, level 30): ammo-free weapons so passengers can stay aboard and cover the flanks, several Bastions in the squad so a lost tank is replaced. Written before 6.3.0 gave about 28 bot attacks one more armor-penetration step against vehicles, and before 7.1.0 made enemies ignore empty vehicles; no second dated source. | u.gg |
Illuminate loadouts
Against the Illuminate, bring damage per second before penetration (volume, fire, gas, arcs and explosions), one Heavy or anti-tank tool for Harvesters and armored helmets, and a diver who kills Watchers on sight. Shields cancel overkill, so a single huge shot is often wasted here.
Unit by unit: the Illuminate heavies and playbook; the fleets change the roster, so read subfaction adjustments before you drop.
7.1What decides the squid loadout
- Low armor, lots of health. Light and Medium penetration kill almost everything, so spend your slots on volume, fire, arcs and explosions (the wiki's own advice for the faction).
- Shields cancel overkill. Overseer shields, the Harvester's shield (it absorbs any one hit, then regenerates) and Warp Ship shields all punish single big shots: wear the shield down with sustained fire, then land the big hit.
- Explosions reach Overseers through their shields, which makes explosive primaries (Scorcher, Purifier, Punisher Plasma, Eruptor) efficient against every Overseer type.
- Only Watchers call reinforcements. An AMR or Railgun body shot kills one, and an arc weapon stuns it mid-call: a precise, fast-tracking weapon is worth a slot.
- Explosions and arcs hit you. Fortified or a Concussive Padding against Overseer, Obtruder and Gatekeeper plasma; Electrical Conduit against Harvester arcs and Lightning Spires.
- Voteless cannot leap and move slower than small bugs, so light, fast divers outrun them; Stamina Enhancement and mobility packs pay off.
- Harvesters (regular from difficulty 4; in Destroy Harvesters missions from 3): strip the shield with shrapnel or sustained fire, then land one EAT, Quasar, Recoilless or Commando hit on a hip joint. The 500kg is a poor answer: the wiki calls Harvesters highly resistant to it, and a 500kg, Railcannon or Precision Strike kills one only while its shield is down.
7.2Light rifles cannot touch the armored parts
The computed shots-to-kill in the Illuminate research make the point approx: Light rifles and the M-105 Stalwart (it fires the Liberator's round) cannot hurt an Overseer's head, a Harvester's hip joint, a Stingray or a Crusher's helmet at all. Pair volume weapons with at least one Heavy or anti-tank tool; a Heavy sidearm (P-4 Senator or P/40-K Bolt Pistol) is the cheapest way for a crowd-control diver to cover Overseer heads and Crusher helmets. A Crusher's helmet breaks to two Autocannon shells, one Railgun shot in safe mode, two Bolt Pistol shots or three Senator shots; its head then dies to anything. The full grid: penetration ladder.
7.3Core picks by slot
Dated opinions community-tested, from the same three sources as the bug picks.
- Primary: PLAS-101 Purifier and AR-2 Coyote (u.gg S+, GamesRadar S); SMG/FLAM-34 Stoker (S at both); SG-8P Punisher Plasma and R-36 Eruptor (u.gg S+); FLAM-66 Torcher (u.gg S). On the free route: PLAS-1 Scorcher (u.gg S), Liberator, Breaker.
- Secondary: GP-31 Grenade Pistol and PLAS-15 Loyalist (u.gg S+, GamesRadar S); LAS-58 Talon and P-72 Crisper (u.gg S+); P-92 Warrant (u.gg S). The Grenade Pistol closes Warp Ship doors, the Talon is ammo-free Medium penetration, and the Warrant tracks Watchers.
- Throwable: G-10 Incendiary, G-123 Thermite, G-13 Incendiary Impact, G-4 Gas (u.gg S+). Free: G-16 Impact, G-12, G-6 Frag. One Thermite kills a Crusher, and one destroys a Grounded Warp Ship even through its shield.
- Support weapon: M-105 Stalwart, FLAM-40, AC-8 Autocannon, RL-77 Airburst, W.A.S.P., B/FLAM-80 Cremator and MGX-42 Bullet Storm (u.gg S+); GL-52 De-Escalator (GamesRadar S); MG-43 (u.gg S, GamesRadar A).
- Strikes: the Eagle Strafing Run and Napalm (Steam guide S), the Orbital Laser, the Precision Strike for Warp Ships, the Orbital Gas Strike. Many small hits beat shields; the 500kg rates only B here.
- Sentries: the Autocannon, Gatling and MG sentries, the Tesla Tower and the HMG Emplacement (Steam guide S+). Voteless walk into sentries; Wretches go for sentries first.
- Backpack: Supply Pack, Warp Pack, Hot Dog (S+); Guard Dog, Jump Pack, Shield Generator Pack (S). The Guard Dog tracks Obtruders and Elevated Overseers well.
- Armor: medium with Med-Kit or True Grit (Steam guide S+); Electrical Conduit for Harvesters and Lightning Spires; Fortified against the Appropriators.
- Booster: Stamina Enhancement and Experimental Infusion (S+); Hellpod Space Optimization and Vitality (S).
7.4By difficulty band
- Difficulty 1-3: volume for Voteless, something for Watchers, and an explosive for Warp Ship doors.
- Difficulty 4-5: a Harvester plan (strip the shield, then one anti-tank hit on a hip joint) and a Stingray answer; the fleets' own heavies (Veracitors, Gatekeepers, Crushers) show up on their planets.
- Difficulty 6-7: bigger groups: two Harvester answers per squad, fire or gas for the hordes.
- Difficulty 8-10: Leviathans over city maps (a beam turret dies to one Quasar or EAT hit); four different boosters.
7.5Every squid loadout
The free kits, the dated community builds, the fleet specialists (Mindless Masses, Appropriators, Vote Snatchers) and the city anti-air kit, sorted by difficulty band. Builds dated before 2026 predate the Appropriators, and every u.gg build predates the Vote Snatchers.
| Front | Difficulty | Role | Primary | Secondary | Throwable | Stratagems | Booster | Why | Source |
|---|---|---|---|---|---|---|---|---|---|
| Illuminate | D1-3 | all-rounder (free) | AR-23 Liberator | P-19 Redeemer | G-6 Frag | MG-43 Machine Gun; Eagle Strafing Run; Orbital Precision Strike; A/MG-43 Machine Gun Sentry | Hellpod Space Optimization | Voteless (100-160 HP, AV1 heads) die to any gun; the MG-43 (AP3: three shots to an Overseer's AV3 head, five to a Watcher's body) is u.gg S and GamesRadar A against the Illuminate; the Strafing Run (level 1, 1,500 Req) is many hits in a line, which drains shields; the Precision Strike (demolition 50) kills a Grounded Warp Ship from outside. Frag (Mobilize p1, 2 Medals) carries 6. Kill Watchers first: they alone call reinforcements. | wiki |
| Illuminate (Appropriators) | D4-10 | anti-armor (u.gg Appropriators) | PLAS-101 Purifier | LAS-58 Talon | G-123 Thermite | B/FLAM-80 Cremator; A/MG-43 Machine Gun Sentry; A/AC-8 Autocannon Sentry; Orbital Laser | Experimental Infusion | u.gg Illuminate Appropriators (2026-04-14, level 15; excellent on Exospire missions with the double sentry setup). Fire bypasses a construct pilot's shield (GamesRadar 2026-03-20; the wiki says flamers make quick work of the mechs); Veracitor limbs are AV3; a Gatekeeper dies to one anti-tank hit to the cockpit stump; Obtruders swarm. The wiki recommends explosive resistance (Fortified, CPR-80 Bulwark) because Overseer, Obtruder and Gatekeeper plasma is explosive. | u.gg |
| Illuminate (Mindless Masses) | D4-10 | crowd control | FLAM-66 Torcher | P-19 Redeemer | G-4 Gas | M-105 Stalwart; Eagle Napalm Airstrike; A/ARC-3 Tesla Tower; Orbital Gatling Barrage | Stamina Enhancement | The wiki's Mindless Masses page: huge Voteless and Fleshmob hordes, fewer Overseers, no Elevated Overseers or Stingrays; sheer damage beats penetration; the Stalwart stays mobile while reloading; flame weapons (the Torcher is u.gg S against the Illuminate) burn crowds and the ground; one-handed guns let you shoot while backing away. Keep some armor-piercing for Harvesters at high difficulty. | wiki |
| Illuminate (Vote Snatchers) | D4-10 | crowd control | AR-2 Coyote | P/40-K Bolt Pistol | G-123 Thermite | MGX-42 Bullet Storm; B/FLAM-80 Cremator; Eagle Napalm Airstrike; Orbital Gas Strike | Vitality Enhancement | Vote Snatchers replace every Overseer, Harvester, Watcher and Stingray with Wretches and Crushers (plus Voteless and Fleshmobs per the Vote Snatchers page, which the Voteless and Fleshmob pages dispute) and, with no Watchers, come as patrols and guards in larger numbers (wiki). Wretches (450 HP, fire x1.5): cut claws and legs, not the head. Crushers (6,000 HP, regenerate 30 per second 0.5 s after damage stops): keep damage on them, break the AV4 helmet (two Bolt Pistol shots) and shoot the AV1 head, or stick one Thermite. GamesRadar (2026-08-17) and TheGamer (2026-08-12) agree on fire, gas and high-rate guns. | wiki |
| Illuminate | D4-5 | all-rounder | PLAS-101 Purifier | LAS-58 Talon | G-4 Gas | MG-43 Machine Gun; Eagle Strafing Run; Orbital Precision Strike; A/G-16 Gatling Sentry | Stamina Enhancement | The Purifier is the only primary rated S or better on all three fronts by both u.gg and GamesRadar; the Talon (u.gg S+ against the Illuminate) is an ammo-free AP3 sidearm that one-shots Voteless and two-shots an Overseer head; gas (u.gg S+) confuses Voteless and Fleshmobs and kills Voteless in 4-7 s. | u.gg |
| Illuminate | D4-5 | crowd control (free) | PLAS-1 Scorcher | P-19 Redeemer | G-16 Impact | M-105 Stalwart; Eagle Strafing Run; Orbital Gatling Barrage; A/G-16 Gatling Sentry | Stamina Enhancement | The Scorcher's explosive bolts reach an Overseer's main health through its shield (wiki); the Stalwart (u.gg S+ against the Illuminate) reloads on the move among Voteless, which cannot leap; the Gatling Sentry is S+ against the Illuminate in the u.gg-based guide; Stamina keeps you ahead of hordes. | wiki |
| Illuminate | D4-5 | heavy support (free) | AR-23P Liberator Penetrator | P-19 Redeemer | G-12 High Explosive | AC-8 Autocannon; EAT-17; Eagle Strafing Run; Orbital Precision Strike | Hellpod Space Optimization | Harvesters (3,000 HP, regenerating shield) and Stingrays arrive at D4: Autocannon flak strips a Harvester shield in one or two shots, four APHET shells kill a hip joint, three kill a strafing Stingray, and one EAT to a joint after the shield drops is fatal. The Penetrator (AP3) kills an Overseer's AV3 head in four shots. Democracy Protects (50% chance to survive a killing hit) is the safe free passive. | wiki |
| Illuminate (Vote Snatchers) | D6-10 | anti-armor (Crushers) | PLAS-1 Scorcher | P-4 Senator | G-123 Thermite | AC-8 Autocannon or RS-422 Railgun; A/AC-8 Autocannon Sentry; Eagle Strafing Run; Orbital Laser | Experimental Infusion | A Crusher's helmet (300 HP, AV4) breaks to 2 Autocannon shells, 1 safe Railgun shot or 3 Senator shots; the head (300, AV1) then dies to anything. A single anti-tank shot is a waste: a Crusher survives a Recoilless or Meltagun hit (wiki). The Autocannon also staggers a Crusher out of its slam. The Scorcher is GamesRadar's pick against Wretches. | wiki |
| Illuminate | D6-7 | crowd control | AR-2 Coyote | P-72 Crisper | G-10 Incendiary | B/FLAM-80 Cremator; Eagle Napalm Airstrike; A/ARC-3 Tesla Tower; Orbital Gas Strike | Vitality Enhancement | Fleshmobs take 1.8x fire and 1.8x arc damage and Voteless die to one ignition; the Cremator, Crisper and Coyote are u.gg S+ against the Illuminate; the Tesla Tower (S+ against the Illuminate in the u.gg-based guide) chains through Voteless crowds (stay prone near it). | wiki |
| Illuminate | D6-7 | heavy support | SG-8P Punisher Plasma | PLAS-15 Loyalist | G-13 Incendiary Impact | StA-X3 W.A.S.P. Launcher or AC-8 Autocannon; Eagle Strafing Run; Orbital Laser; Orbital Precision Strike | Hellpod Space Optimization | Harvesters, Stingrays and Grounded Warp Ships: the W.A.S.P. locks on to Stingrays and Harvesters at range, the Autocannon strips shields; Electrical Conduit (95% arc resistance) turns the Harvester's arc and Lightning Spire bolts into chip damage (wiki); the Punisher Plasma and Loyalist are u.gg S+ against the Illuminate. | wiki |
| Illuminate | D8-10 | all-rounder (u.gg Standard D10) | PLAS-1 Scorcher | P-19 Redeemer | G-16 Impact | StA-X3 W.A.S.P. Launcher; Orbital Laser; A/MG-43 Machine Gun Sentry; Eagle Strafing Run | Hellpod Space Optimization | u.gg Standard D10 Illuminate (2026-04-14, level 15; also listed among its leveling builds): base game only. The W.A.S.P. (level 20) locks on to Stingrays and mediums up to 300 m and kills a Fleshmob with four missiles (wiki); u.gg rates it S+ against the Illuminate, GamesRadar B. Predates Vote Snatchers (7.0.0). | u.gg |
| Illuminate | D8-10 | all-rounder (u.gg Super Helldive) | R-36 Eruptor | LAS-58 Talon | G-4 Gas | M-105 Stalwart; AX/AR-23 Guard Dog; A/G-16 Gatling Sentry; Orbital Laser | Hellpod Space Optimization | u.gg Super Helldive Illuminate Build (2025-11-30, level 18; excels on Blitz missions): the Eruptor handles Overseers (one or two shots) and Fleshmobs and can close Grounded Warp Ships; Talon and gas for Voteless and Watchers; Stalwart, Guard Dog and Gatling Sentry for volume. Written before the Appropriators (2026-03) and Vote Snatchers (2026-08). | u.gg |
| Illuminate (cities) | D8-10 | anti-air (Leviathans, Stingrays) | PLAS-101 Purifier | P-92 Warrant | G-50 Seeker | LAS-99 Quasar Cannon; LAS-98 Laser Cannon or Eagle Strafing Run; Orbital Smoke Strike; SH-32 Shield Generator Pack | Hellpod Space Optimization | Leviathans fly only over city maps from D8 (15,000 HP; four AV4 beam turrets at 400 damage per second): one Quasar or EAT hit destroys a turret, a well-placed Strafing Run can kill one (a wiki claim research/07 could not reproduce), and smoke blocks its targeting before a beam locks on; stay off exosuits and FRVs. Stingrays: shoot them during the strafe or track them in flight with the hitscan Laser Cannon; the Warrant and Seeker grenade chase fliers; a shield pack or going prone survives the explosive strafe. | wiki |
| Illuminate | D8-10 | anti-tank (heavy) | R-36 Eruptor | GP-31 Grenade Pistol | G-123 Thermite | LAS-99 Quasar Cannon or EAT-17; LIFT-182 Warp Pack; Orbital Laser; Orbital Precision Strike | Experimental Infusion | The Eruptor's shrapnel strips Harvester shields cheaply and kills Overseers in one or two shots; one Quasar or EAT hit to a Harvester hip joint kills it; on city maps from D8 each Leviathan turret dies to one Quasar or EAT hit; a Gatekeeper dies to one anti-tank hit to the cockpit stump (wiki). The Grenade Pistol closes Warp Ship doors once the shield is down; one Thermite destroys a Grounded Warp Ship even through its shield and kills a Crusher outright (wiki). | wiki |
| Illuminate | D8-10 | crowd control | SMG/FLAM-34 Stoker | P-72 Crisper | G-10 Incendiary | MGX-42 Bullet Storm; A/G-16 Gatling Sentry; Eagle Napalm Airstrike; Orbital Napalm Barrage | Stamina Enhancement | The Stoker (S against the Illuminate at both u.gg and GamesRadar; one-handed, with an underbarrel flamethrower that reaches AP4) plus the Bullet Storm (two guns every 70 s; u.gg S+ against the Illuminate) keep hordes off the squad; napalm denies the Warp Ship landing zones. | u.gg |
| Illuminate | D8-10 | support | LAS-16 Sickle | P-11 Stim Pistol | G-4 Gas | B-1 Supply Pack; MG-43 Machine Gun; Orbital Laser; A/MG-43 Machine Gun Sentry | Experimental Infusion | The Sickle and the MG-43 drain Grounded Warp Ship shields without reloading (wiki); the Supply Pack keeps the volume weapons fed; the Stim Pistol heals teammates at range and, since 7.0.0, SEAF soldiers (per the wiki's P-11 page; the patch notes do not say so); every stim also triggers Experimental Infusion. | wiki |
Subfaction adjustments
Check the planet's subfaction on the galaxy map before you drop and make one swap for it: fire and lasers for the Spore Burst Strain, Inflammable for the Incineration Corps, a Vox Engine answer for the Cyborg Legion, a helmet-breaker for the Vote Snatchers' Crushers.
Arrowhead means it that way: its creative director wrote that there should be no one-size-fits-all loadout for any faction, and that the Illuminate fleets exist partly to give you more to consider when you choose one (Devoid of Liberty look-back, September 25, 2026). The subfaction loadouts sit in each front's table above, named in the Front column.
8.1Terminid strains and Hive Worlds
The strains are the Predator Strain, Spore Burst Strain and Rupture Strain; more in strains and Hive Worlds and the Gloom.
- Predator Strain: cloaking Predator Hunters and lair-less Predator Stalkers. Stay grouped; bring stagger (Punisher, Cookout, Blitzer), fire or gas to reveal and scatter them, and sentries with a clear view.
- Spore Burst Strain: bugs burst on death and speed up the rest, and the Spore Burst Bile Titan's head survives one EAT or Quasar hit. Kill with fire and lasers, keep crowd control up (gas mines, EMS, the Tesla Tower), never melee, and bring a Recoilless or Spear for the Titan; Rock Solid stops its spore ragdoll.
- Rupture Strain (difficulty 6 and up): burrowers with Medium-armored heads, and a Rupture Charger whose head bounces Heavy weapons. Carry a Medium primary and true anti-tank (AP5 or more); explosives force burrowers up; the wiki suggests Feet First, heavy armor or a Shield Generator Pack against their eruptions.
- Gloom planets and Hive Worlds: a Gloom Source means reinforcements -20%, Eagle rearm +30% and ammunition from pickups -50%; caves block stratagems except through roof openings, and the Orbital Laser ignores enemies in caves. Bring ammo-free weapons (heat-sink lasers, the Quasar), a Supply Pack and fewer Eagles.
- Dragonroach (Gloom planets): one EAT, Quasar or Recoilless hit to the head, a homing Spear or W.A.S.P., or the Railcannon; Inflammable, Acclimated or Desert Stormer against its fire breath; go prone when it hits you.
- Hive Lord (Hive Worlds): anti-tank in volume to break its armor plates (the Strafing Run and Gatling Barrage hit many plates at once; the Recoilless, the Spear and a Patriot exosuit's rockets break more), then high-rate fire into the exposed flesh, never explosives, which the flesh ignores. Spread out; Fortified helps against its mostly explosive bile.
8.2Automaton subfactions and factory maps
The subfactions are the Jet Brigade, Incineration Corps and Cyborg Legion; more in subfactions and the Cyborg Legion.
- Jet Brigade: jump-packing Troopers, Devastators and Hulks whose packs explode when hit. Explosive primaries (Purifier, Punisher Plasma, Eruptor) pop them at range, and explosive fire into a Jet Brigade Hulk's pack kills it from the front; they leap out of strikes, so stun or pin them first.
- Incineration Corps: flamethrower and incendiary units, and no Berserkers or Rocket Raiders, so fire replaces rockets as the killer. Inflammable (75% fire damage resistance) or Acclimated beats Fortified; kill at range; dive or go prone the moment you burn; the Integrated Extinguishers booster puts burning divers out sooner.
- Cyborg Legion: Radicals and Agitators replace Scout Striders, and Vox Engines replace Factory Striders from difficulty 7 (at most three alive since 6.3.0). Bring precision and explosive primaries, kill Agitators first (their death stuns their squad), wear Rock Solid against Radical kicks, and give one diver the Vox Engines: the Railcannon kills one outright, a Leveller or Solo Silo body hit kills it, each Spear missile kills a cannon, or break three vents and throw a grenade into the hatch. EAT and Quasar need four hits.
- Megafactory and city maps: dense Anti-Air Emplacements ground Eagles within 150 m, so take orbitals over Eagles, something that downs Gunships (Commando, Spear, Autocannon) and a Portable Hellbomb for the Gunship Facilities (GamesRadar, February 19, 2026; GameRant, February 11, 2026).
8.3Illuminate fleets
The fleets are the Invasion Fleet, Mindless Masses, Appropriators and Vote Snatchers; more in fleets.
- Invasion Fleet and the standard roster: an all-rounder mix of volume for Voteless, explosives or Medium penetration for Overseers, a Harvester plan and a Stingray answer. The wiki advises putting the anti-tank and the chaff-clearing support weapons on different divers when an Invasion Fleet is present.
- Mindless Masses: dozens of Voteless and Fleshmobs per patrol even on low difficulties, with few Overseers. Sheer damage beats penetration: the Stalwart, GL-21, flame weapons and the Airburst, plus one-handed guns to fire while backing away. Keep one armor-piercing tool, because Harvesters come back at high difficulty.
- Appropriators: only Illuminate and their machines (Overseers, Watchers, Harvesters, Obtruder swarms, Veracitors and Gatekeepers). Bring flamethrowers for construct pilots (fire gets through their shields), an Autocannon or AMR for Gatekeeper horns, anti-tank for cockpits and Harvesters, one high-output weapon for Obtruders, and explosive resistance; do not melee.
- Vote Snatchers: Wretches and Crushers replace every Overseer, Harvester, Watcher and Stingray. With no Watchers nothing calls reinforcements, but the patrols are bigger. Bring high rate of fire for Wretch legs (MG-43, Bullet Storm, Stalwart), fire and gas, and a Crusher answer: a Heavy helmet-breaker (Autocannon, Railgun, Bolt Pistol, Senator), Thermite, or nonstop fire, because a Crusher regenerates and survives a Recoilless hit, so one anti-tank shot is wasted. Whether Voteless and Fleshmobs also spawn there is disputed between wiki pages unverified.
- City maps (difficulty 8 and up): Leviathans overhead. One Quasar or EAT hit destroys a beam turret, smoke blocks its targeting, and it wrecks exosuits and FRVs, so fight on foot there and stay off emplacements.
- Exostorms and the Void: keep moving and plan for mobility; neither changes which weapons work. On an Exostorm that reaches Class 3 (Class 2 and Class 3 arrive after about 72 and 120 hours respectively), the wiki says constant lightning is deadly to light and medium armor, so heavy armor may be worth it there unverified.
Squad compositions
Split a full squad into anti-tank, crowd control, flex and support, and bring 4 different boosters. Every role still carries the per-diver floor from the principles, so nobody is helpless when a heavy picks them.
This split is this manual's synthesis of the game's mechanics and of the roles the dated builds imply; no source measures results by composition. GamesRadar makes the same point in plain words: one fire build helps a squad, four flamethrowers would be miserable for everyone (best builds, updated September 3, 2025, a pre-4.1.0 page cited only for this advice). How to join and talk to a squad: roles and loadout coordination.
9.1The four roles
Anti-tank
Takes the heavies the others call out. Carries a reusable launcher (Recoilless, Quasar or Spear) plus an expendable, or the Leveller; the Railcannon or the 500kg; Thermite. Claims Hellpod Space Optimization.
Crowd control
Keeps chaff off the anti-tank diver. Carries the Stalwart, MG-43, Bullet Storm, Cremator, Flamethrower or GL-21; the Napalm, Cluster or Gatling Barrage; a chaff sentry. Claims Vitality Enhancement.
Flex or line holder
Closes spawners, handles mediums and fliers, and backs up the anti-tank diver. Carries the Autocannon, W.A.S.P. or Spear; the Grenade Pistol or an explosive primary; the Orbital Laser or Precision Strike. Claims Experimental Infusion.
Support
Keeps the squad supplied, healed, shielded and moving, and revives. Carries the Supply Pack, Stim Pistol, a Shield Generator Relay or Pack, EMS or smoke, and a Quasar or EAT for itself. Claims Stamina Enhancement.
9.2The mechanics the plan rests on
- Boosters apply to the whole squad, one per diver; 4 different ones is the most a full squad can run, and the loadout screen shows who brought which.
- Assisted reload: backpack team weapons (Recoilless, Autocannon, Spear, Airburst, W.A.S.P., Belt-Fed GL, Maxigun) reload much faster with a helper, and since 7.0.0 either of you may carry the backpack.
- Resupply: one pod of 4 boxes for the whole squad every 180 seconds, on a shared cooldown; a Supply Pack diver carries more between drops.
- Reinforcements: 5 per diver in one shared pool (20 in a full squad), then one every 120 seconds.
- Eagles are per diver: two divers with Eagles double the squad's Eagle charges.
- Spawns balance per diver since 7.1.0, so splitting up is fairer than it was, but the melee fronts still overwhelm a lone diver: move in pairs.
- Friendly fire: every strike, sentry, arc and hellpod hurts divers, and flame and arc weapons chain into teammates.
9.3Four-diver templates by front (difficulty 6-10)
Terminids
- Anti-tank: GR-8 Recoilless (team reload), Eagle 500kg, Orbital Railcannon, A/MG-43 Sentry; Hellpod Space Optimization.
- Crowd control: B/FLAM-80 Cremator or FLAM-40, Eagle Napalm, Orbital Gas Strike, A/G-16 Gatling Sentry; Vitality Enhancement.
- Flex: AC-8 Autocannon, Orbital Laser, Eagle Airstrike, EAT-17; Experimental Infusion.
- Support: LAS-99 Quasar, B-1 Supply Pack, Orbital Precision Strike, A/M-23 EMS Mortar; Stamina Enhancement (Muscle Enhancement on snow, swamp and acid planets).
Automatons
- Anti-tank: GR-8 Recoilless, Orbital Railcannon, Eagle 500kg, A/MLS-4X Rocket Sentry; Hellpod Space Optimization.
- Crowd control: AC-8 Autocannon (Devastators, Gunships, fabricators), EAT-17, Eagle Airstrike, Orbital Smoke; Vitality Enhancement.
- Flex: FAF-14 Spear (Gunships, anti-air sites, tanks), Orbital Precision Strike, Eagle Strafing Run, A/AC-8 Sentry; Experimental Infusion.
- Support: LAS-99 Quasar, SH-32 Shield Generator Pack, FX-12 Shield Generator Relay, Orbital Laser; Stamina Enhancement.
Illuminate
- Anti-tank: EAT-17 or Quasar (Harvester joints, Leviathan turrets, Gatekeepers), LIFT-182 Warp Pack, Orbital Precision Strike, Orbital Laser; Hellpod Space Optimization.
- Crowd control: M-105 Stalwart or MGX-42 Bullet Storm, Eagle Strafing Run, A/G-16 Gatling Sentry, A/ARC-3 Tesla Tower; Stamina Enhancement.
- Flex: AC-8 Autocannon or W.A.S.P. (shields, Stingrays, Fleshmobs), Eagle Napalm, Orbital Gas Strike, A/MG-43 Sentry; Experimental Infusion.
- Support: MG-43, B-1 Supply Pack, Orbital Precision Strike, A/AC-8 Sentry; Vitality Enhancement.
The Illuminate research proposes swapping the flex role for a dedicated Watcher hunter (JAR-5 Dominator, R-63CS Diligence Counter Sniper, AMR or Railgun) beside horde control, a heavy killer and support, and either split works on the standard roster. What matters is that someone kills Watchers on sight.
Subfaction swaps: against the Vote Snatchers the anti-tank diver trades the launcher for an Autocannon or Railgun and everyone brings fire; against the Appropriators the crowd-control diver takes a flamethrower and the flex diver Autocannon flak; on Cyborg Legion factory maps orbitals replace Eagles and one diver owns the Vox Engines; against the Incineration Corps everyone wears Inflammable and someone brings Integrated Extinguishers; against the Spore Burst Strain it is fire and lasers, and nobody melees.
9.4Smaller squads and solo
- Three divers: drop the dedicated support role; the flex diver takes the Supply Pack or a Quasar, and two divers carry reusable anti-tank.
- Two divers: both carry anti-tank and a crowd tool; bring sentries, which draw fire and hold ground; Flexible Reinforcement Budget matters more as the squad shrinks.
- Solo: GamesRadar's advice (updated August 14, 2026): cover every enemy type yourself, lean on sentries and Guard Dogs, move fast in light armor, avoid fights, and call an SOS Beacon if you want help. A kit that follows it: PLAS-1 Scorcher, GP-31 Grenade Pistol or P-19 Redeemer, G-12 High Explosive; Scout (SC-30 Trailblazer Scout) or Reduced Signature; LAS-99 Quasar Cannon; AX/AR-23 Guard Dog; A/MG-43 Machine Gun Sentry; Eagle Airstrike; booster Flexible Reinforcement Budget, which shortens the wait for a free reinforcement once the pool is empty (normally 120 seconds).
- SEAF squadmates: Heavy SEAF Presence, the planet modifier that sent AI squads to short-handed divers: unavailable since September 21, 2026, per the wiki.
9.5Lobby habits that make the plan work
- Read the loadout screenBefore you ready up, note the boosters already taken and pick a different one.
- Say your roleOne word in chat is enough: "AT", "chaff" or "support".
- Cover the gapIf nobody brought anti-tank, take Surplus EAT Allocation (free EAT-17 calls for the whole squad) or an EAT-17 yourself.
- Pair the team weaponPair a backpack weapon with a squadmate who stays near you; either of you can carry the ammo.
- Throw ahead, call it outThrow Eagles and orbitals ahead of the fight, never into a tangle of divers, and say so when you throw. The rest of the etiquette: etiquette, kicking and leaving.
Missions and modifiers that change the loadout
Read the mission and its modifiers before you lock in: defense missions want sentries, Commando missions want stealth and anti-tank without a backpack, anti-air maps want orbitals, and Gloom planets want weapons that need no ammunition.
- Defend and hold objectives (Evacuate High-Value Assets got harder in 7.1.0, with more waves and shorter gaps): two sentries or a sentry and an emplacement, a Shield Generator Relay against ranged fronts, and the Orbital EMS or Gas Strike to freeze a wave.
- Commando missions: the Super Destroyer supports you for 60 seconds after the drop (each diver can call it back once), reinforcements come only from pod sites (12 in all), and every enemy reinforcement call raises the threat level. Go stealthy (Reduced Signature or Scout, suppressed weapons), carry anti-tank without a backpack (Quasar, Railgun, AMR), bring explosives for fabricators, and take stratagems you keep, such as the Supply Pack and Commando, plus one big strike like the Orbital Laser (GamesRadar, January 23, 2026).
- Hive World caves and Gloom planets: ammo-free weapons, a Supply Pack and fewer Eagles (subfaction adjustments).
- Anti-air and jammers: Anti-Air Emplacements ground Eagles and Stratagem Jammers block every stratagem within 150 m. Favor orbitals, bring a Heavy support weapon or the Spear (it locks on to the emplacement since 4.1.0), and carry weapons that work without stratagems.
- Operation modifiers (one from difficulty 5, two from difficulty 8): under Complex Stratagem Plotting (+50% call-in time), call support weapons and sentries before the fight; under Orbital Fluctuations (+25% stratagem cooldowns), lean on what you carry; Gunship Patrols want an anti-air answer, Roving Shriekers flak or lasers. The full list: modifiers and hazards.
- Night and stealth: suppressed weapons (about half as loud since 5.0.2), Reduced Signature or Scout, and no strikes that wake the whole area.
- Hot, cold and hazardous planets: "dress for the occasion", as the official boot-camp tips put it (Xbox Wire): Muscle Enhancement in snow and swamp, and remember that heat slows laser cooling.
- Blitz missions (12-minute timer): speed first, with Stamina Enhancement, the Oxygenator passive and a mobility pack.
- Rapid Acquisition (the bot platinum haul under constant heavy attack): smoke over the loaders, EMS mortars for Hulks and War Striders, a Recoilless (u.gg's Rapid Acquisition build, December 6, 2025).
Mission types, side objectives and extraction: mission types and operations and Commando missions.
Common loadout mistakes
Most failed loadouts miss one of the three jobs or fight the front. Each mistake below comes with its fix.
- No anti-tank from difficulty 4. Chargers, Hulks and Harvesters arrive there, and primaries stop at Medium penetration (Heavy for three). Fix: every diver carries one heavy answer: an EAT, Quasar, Recoilless, Thermite, Ultimatum or a heavy-killing strike.
- No spawner closer. Holes, fabricators and Warp Ships keep feeding the fight, and bullets and lasers never close them. Fix: an explosive grenade, the Grenade Pistol, an explosive primary, the Autocannon or the GL-21.
- Two backpacks. A backpack weapon and a backpack stratagem exclude each other. Fix: pair a backpack stratagem with an expendable or the Quasar.
- Four divers, one role. Four flamethrowers or four Recoilless Rifles leave gaps. Fix: split anti-tank, crowd control, flex and support (squad compositions).
- Duplicate boosters. Only 4 different boosters can run, and a duplicate does nothing. Fix: check the loadout screen before you ready up.
- Fire against bots. Small bots take half damage from fire and robots ignite slowly. Fix: explosives and Medium penetration on the bot front.
- One anti-tank shot as the Crusher answer. A Crusher survives a Recoilless or Meltagun hit and regenerates. Fix: Heavy penetration on the helmet, Thermite, or sustained fire.
- The 500kg against Harvesters. The shield eats one hit, and the wiki calls Harvesters highly resistant to the bomb. Fix: strip the shield, then one anti-tank hit on a hip joint.
- Eagles on Megafactory maps. Anti-air emplacements ground them. Fix: orbitals, or destroy the anti-air site first.
- Light rifles against Hive Guards and Overseer helmets. Medium armor bounces Light rounds. Fix: a Medium primary or a Heavy sidearm.
- Trusting old guides. Patch 4.1.0 (October 23, 2025) reshaped light and medium penetration and buffed most primaries, and 6.3.0 changed orbitals, grenades and vehicles. Fix: use sources dated after 4.1.0 and check what has changed since (patch history).
Field guide13
Missions, Objectives & Difficulty
Which difficulty to play and what it changes, every mission type and objective per front, side objectives and points of interest, modifiers and hazards, and extraction.
On this page7 chapters
Which difficulty to play, and what it pays
Learn a front at Medium or Challenging (3 or 4). After that, play the highest difficulty your squad finishes every time, and play whole operations: that is where the Medals, the samples and the war impact are. Drop to Trivial through Medium when you want Super Credits and Medal cases, and climb to Extreme (6) or higher only when you need super samples.
1.1Pick by what you want
A new front or mission: Medium to Challenging
Most of the mission roster is open by Medium. Challenging adds rare samples and brings in Chargers, Stalkers and Hulks, while operations still roll no random modifiers (one from difficulty 5, two from difficulty 8). In a pickup squad, stay below Challenging until you carry an anti-tank weapon; the EAT-17 unlocks at level 3.
The highest level you always finish
A whole operation pays 1, 2, 6, 8, 18, 21, 24, 29, 33 and 36 Medals at difficulties 1 to 10, and one failed mission fails the rest of its operation. A level you clear every time beats a harder one you lose half the time, and the war counts an operation's final mission four times community-tested (How the war works).
Extreme and up
Super samples start at difficulty 6, where every map has one guaranteed super-sample rock. The rock holds 2-3 at Extreme and about 7 at Super Helldive unverified; colony and city points of interest add more (Points of interest).
Trivial to Medium, and not Eradicate
Below Challenging no rare samples take the special-loot slots, so more of them hold Super Credits and Medal cases; Eradicate maps have no points of interest at all. Each find goes at once to every diver present: 10 Super Credits a stack (rarely 100), 1 to 3 Medals a case, 100 Requisition a slip. The full route is in Earning fast.
1.2How difficulty scales
The 10 levels are Trivial, Easy, Medium, Challenging, Hard, Extreme, Suicide Mission, Impossible, Helldive and Super Helldive. The unlock rule: complete an operation at your highest unlocked difficulty to open the next one. Four things scale directly with the level:
- Missions per operation: 1 at difficulties 1-2, 2 at 3-4 and 3 from 5.
- Medals for a whole operation at difficulties 1 to 10: 1, 2, 6, 8, 18, 21, 24, 29, 33 and 36.
- XP and Requisition bonus at difficulties 1 to 10: 0, 0, 25, 50, 75, 100, 150, 200, 250 and 300 percent.
- Operation modifiers: one from difficulty 5, two from difficulty 8 (Modifiers and hazards).
What each level adds to the map, from the wiki's Difficulty table (revised August 20, 2026):
- Trivial (1). One main objective on a small map (250 m radius); no tactical objectives and no outposts.
- Easy (2). A 300 m map with one to three main objectives, one tactical objective and four light outposts.
- Medium (3). A 350 m map, two tactical objectives and up to nine outposts, medium ones included; one timed or neutral tactical objective shows on the map from the start.
- Challenging and Hard (4-5). The full 400 m map, two or three tactical objectives, heavy outposts, enemies guarding points of interest, and unmarked damaged Hellbombs.
- Extreme (6). Two or three main objectives, three or four tactical objectives, Gunship Facilities and Bile Titan holes.
- Suicide Mission (7). Three main objectives; most points of interest turn enemy-themed (turret towers, fences and mines on the Automaton front); the Destroy High-Value Target and Intercept Convoy objectives appear.
- Impossible to Super Helldive (8-10). Three or four main objectives and up to five tactical objectives. No new unit arrives after Impossible, only more and heavier spawns; patch 6.0.1 raised the intensity from Helldive up, most on the Automaton front. Super Helldive adds giant outposts (the Mega Nest and the Fortress) with high-value pickups, and its maps hold about 40 common, 35 to 41 rare and 7 super unverified.
1.3When the heavies arrive
Each unit below appears first at the difficulty shown. Several show up a level or two early as the target of an Eliminate mission, before they join the regular spawns. From Challenging on, every front fields enemies that small arms cannot kill, so carry an anti-tank answer; which weapons answer each heavy is in Heavy-killers by slot.
- Terminids: Chargers from D4 and Stalkers from D4; a Bile Titan from D4 as the Eliminate Bile Titans target, in regular spawns from Hard; the Impaler from D5 in Eliminate Impaler, regular from Extreme; the Charger Behemoth as the Eliminate Chargers target from D3, regular from Suicide Mission; Spore Chargers from D7; the Hive Lord, on Hive Worlds, from D7; Alpha Commanders from D8 unverified.
- Automatons: Annihilator Tanks from D3, Shredder Tanks from D3 and Scout Striders from D3; the Hulk Obliterator as the Eliminate Automaton Hulks target from D3 and the other Hulks from D4; a Factory Strider from D4 in its Eliminate mission, regular from Extreme; Gunships from D5 with the Gunship Patrols modifier and from Extreme at Gunship Facilities; War Striders from D6; Barrager Tanks from D7 and, on Cyborg worlds, Vox Engines from D7; the Reinforced Scout Strider from D8.
- Illuminate: Fleshmobs from D1; Harvesters from D3 as the Destroy Harvesters target, in regular spawns from Challenging; Stingrays from D4; the Appropriators' Veracitor from D4 and Gatekeeper from D4; the Vote Snatchers' Crusher from D4; the Leviathan, over Illuminate-held cities, from D8.
1.4What a mission pays, and what it costs you
- Objectives. A main objective pays 500 Requisition and 100 XP and a tactical objective 200 Requisition and 50 XP, before the difficulty bonus, whether or not you extract. The exceptions end with extracting an item: Retrieve Mutant Larva, and on Hive Worlds Recover SSSD and Recover Scientific Specimen.
- Eradicate and Blitz. An Eradicate main objective pays 100 Requisition and 20 XP per difficulty level instead. A Blitz pays 375 to 1,250 Requisition and 75 to 250 XP from Medium to Super Helldive (125 and 25 per level); the wiki gives no figure for an Easy blitz.
- Outposts. 50, 100, 150 and 200 Requisition with 5, 10, 20 and 40 XP for a light, medium, heavy and giant outpost.
- Samples count only if their carrier boards the shuttle (Extraction).
- Friendly kills. Every civilian or SEAF soldier a diver kills costs 25 Requisition before the difficulty multiplier, and after 9 such kills the diver's own Super Destroyer shells them.
- A wipe. If the whole squad dies with no reinforcements left before the main objective is done, the mission and the rest of its operation fail. Once the main objective is done, a wipe still counts as a success.
The end screen also rates each mission in stars: one for the main objective, one for completing all the tactical objectives (from Easy), one for destroying some of the outposts (from Medium) and one for destroying most of them (from Hard). A fifth star from Suicide Mission has no documented condition, and the wiki calls its record of the rating incomplete unverified.
Mission types, front by front
Read the mission type before you pick a loadout, because each family asks for something different: blitzes want speed and weapons that close spawners, eradicates want crowd control and sentries, eliminate missions want anti-tank, and defenses want sentries, mines and emplacements. Every front now runs a 12-minute Blitz, a 15-minute Eradicate and a set of 40-minute missions.
When the timer runs out, the Super Destroyer leaves orbit: no more stratagems, no more reinforcements, and an emergency shuttle heads for the extraction zone. Defense missions run 20 minutes. Commando missions keep the 40-minute timer, but the Destroyer stays overhead for only 60 seconds (Operations and Commando missions). The wiki records 72 main mission types from launch to today, the tutorial included; retired and event missions account for many of them.
2.1Mission families: what each one asks of a squad
The failure notes in these cards come from the tactical sections of the wiki's mission pages (revised April to September 2026), written by players community-tested.
Blitz
Search and Destroy (bugs and bots), Destroy Bio-Processors, Destroy Illuminate Warp Ships. Win with speed and structure-killers: explosives that close holes, Eagle strikes, anti-tank shots into fabricator vents from range.
Goes wrong when the squad stops to fight patrols. Atmospheric Spores hides the nest markers.
Eradicate
Hold a small arena until the kill quota is met. Win with crowd control, sentries, heavy armor, and against bots a way to kill dropships early.
Goes wrong in the small space: orbital barrages and 500kg bombs land on your own squad.
Eliminate
Brood Commanders, Chargers, Bile Titans, the Impaler, Devastators, Automaton Hulks, a Factory Strider, Harvesters. Bring anti-tank for the target and search the red zones inside the marked circle. They run only at difficulties 1 to 6, several at a single level: a safe first meeting with a heavy.
Goes wrong when the target wanders off with its escorts.
Defense and escort
Evacuate High-Value Assets, Repel Invasion Fleet, Activate TCS+ Station, Emergency Evacuation and Evacuate Colonists, the Nuke Nursery drills. Win with sentries, emplacements, mines and choke points.
Goes wrong when Chargers collapse gates, Harvesters or downed dropships wreck the generators, or stray fire kills civilians (25 Requisition each).
Retrieve and recover
Retrieve Valuable Data, Retrieve Recon Craft Intel, the Commando carries, Recover SSSD, the Mutant Larva, the high-value pickups. One carrier with a one-handed weapon, one escort.
Goes wrong because carrying blocks stratagem calls and two-handed weapons, and the item drops when its carrier dies.
Surveys, pumps and launches
Conduct Geological Survey, Annex Untapped Mineral Sites, Launch ICBM, Take Down Overship, the oil and fuel pump missions, Extract E-711, Sabotage Orgo-Plasma Synthesis, Seize Industrial Complex. One diver on the terminal, three defending; read the code aloud or ping it.
Goes wrong by design: each probe login and drill sample triggers a bug breach or a bot drop.
Demolition missions
Neutralize Ground-to-Orbit Defenses, Destroy Command Bunkers, Cleanse Infested District, Free Colony and Democratize the Void (Monoliths), Destroy Gazer Spire, Sabotage Supply Bases, Destroy Spore Lung. Clear the site, call the NUX-223 Hellbomb (↓ ↑ ← ↓ ↑ → ↓ ↑), arm it and get well clear. Monoliths and Gazer Spires need demolition 60, which only the Hellbomb, the B-100 Portable Hellbomb and the SEAF Artillery Mini-Nuke reach.
Goes wrong when arming stalls under fire, or someone stays inside the blast.
Spread Democracy and its cousins
Spread Democracy, Free Colony, Democratize the Void, the quarries of Seize Industrial Complex, Extract E-711. Stay in the circle until the flag is up, then kill the enemies left at it (not needed on the Illuminate front). Saluting may speed the raise, per a developer comment the wiki cites unverified.
Goes wrong when everyone leaves the circle: the flag lowers again.
GATER missions
Conduct Mobile E-711 Extraction and Extract Anomalous Material. One driver, one gunner, two outriders; drive into bug holes to close them.
Goes wrong when a surfacing Hive Lord throws the rig off the map, which fails the mission.
Commando
Acquire Evidence, Extract Intel, Secure Black Box, on Automaton worlds only. Play for stealth: avoid patrols, kill the flare-calling Troopers and Commissars first, and link the Reinforcement Pods early.
Goes wrong with every enemy reinforcement call, which raises the operation's threat level.
2.2Missions on every front
These run on the bug and bot fronts, and most of them on the Illuminate front too. The Illuminate front runs Free Colony instead of Spread Democracy and Evacuate Colonists instead of Emergency Evacuation, and the first three missions below have no Illuminate-specific record unverified. Evacuate High-Value Assets, the defense mission, is covered in Operations.
- Terminate Illegal Broadcast. Find the broadcast tower, log in and raise the signal to 100% to shut it down; any hit with demolition force 30 or more (most grenades, AC-8 Autocannon, R-36 Eruptor, a vehicle ram) destroys the tower and completes it instantly. Main objective at D1-2 only (40 min); a tactical objective at D2-10; 7.1.0 gave broadcasts sound.
- Upload Escape Pod Data. Reach the crashed escape pod, call the Upload Data stratagem within 30 m and keep the uploader alive and in range for the 40-second upload. Main objective at D1-2 (40 min); tactical objective at D3-10; enemies never spawn at the pod, so it is a safe drop point.
- Start Fuel Pumps. Clear the fueling station, log in, solve the pipe route from local storage to the missile silo, turn the three marked valves and activate the pumps. D1-2 only (40 min); formerly Pump Fuel To ICBM; the same station returns as a Launch ICBM sub-objective at D8+ (D7+ per Fandom); patrols keep arriving until it is done.
- Spread Democracy (bugs and bots). Call the Super Earth Flag stratagem at each marked site and hold within 25 m for the 1:40 raise while bug breaches or bot drops arrive; kill the enemies left at the flag to finish. Flag sites: 1 at D1-3, 2 at D4-7, 3 at D8-10. D1-10 (40 min); if every diver leaves the circle the flag lowers again.
- Conduct Geological Survey. Deploy the Seismic Probe at the marked sub-objective(s) and run its terminal (5 s login, coordinate match, 15 s prime), then drop the Prospecting Drill at the ore vein and pull three 25-second samples before uploading them. Sub-objective: Verify Ore Vein Location with a Seismic Probe: 1 site, 2 sites at D6+. D2-10, some sources D3 (40 min); each probe login and each drill sample triggers breaches or drops; also a tactical objective (D3-10) on Gloom planets.
- Retrieve Recon Craft Intel. Find the downed SEAF recon aircraft, carry its black box (one-handed) to the interplanetary uplink and run the upload; you may leave once the upload starts. D1-10 (40 min); an Illuminate mission since 1.002.001 (2024-12); the original home of this mission; city variant recovers the aircraft's drives. Patch 7.1.0 brought it to the bug and bot fronts.
- Launch ICBM. Enter the launch code, release the four silo hatch locks, raise the missile (60 s), lock the target grid, fuel it (30 s) and launch on a 10-second countdown; stand clear of the silo. Sub-objectives: Retrieve Launch Codes (always); Reactivate Power Generator (D5+); Start Fuel Pumps (D8+, D7+ per Fandom; sometimes replacing the generator; all three at D9+). D3-10 (40 min); also a launch-only tactical objective on Gloom planets (D3-10).
- Retrieve Valuable Data. Download the research database (20 s), eject and carry the SSSD drive(s) one-handed to the relay, raise the satellite tower (25 s), realign the dish by hand, upload (40 s) and wipe the data with an 11-input code. Sub-objectives: Collect Encrypted Hard Drive (one or more); Reactivate Power Generator (D7+). D3-10 (40 min); the relay reports No Power until every sub-objective is done.
- Emergency Evacuation (bugs and bots). Reach the evacuation port, open the shuttle bay (7-input login, coordinate match) and escort civilians from the bunker doors into the bay until the quota boards. Sub-objective: Establish Communication Uplink (SSSD Delivery into the tower hatch, signal alignment): 1 tower, 2 at D6+. D3-10 (40 min); about three citizens per 33 s; each civilian a diver kills costs the squad 25 Requisition before multipliers and 9 kills brands a diver a traitor; fire tornados kill civilians.
- Retrieve Essential Personnel. Retired: a 15-minute defense-event mission disabled in 1.000.400 (2024-06-13) as not fun enough; D1-9.
2.3Terminid missions
Ten bug missions are in the regular rotation. The eliminate missions run at one or two difficulties each and make a good first meeting with a Charger, a Bile Titan or the Impaler. Nests, holes and breaches are covered in Nests and holes.
- Eliminate Brood Commanders. Find and kill the marked Brood Commander(s); unmarked Brood Commanders do not count. D1-2 only (40 min).
- Activate Oil Pumps. Log in (7 inputs), route the oil from local storage to the transfer station in the pipe puzzle, open the three valves scattered around the site (shoot the Terminid gunk off first) and restart the pumps (10 s). D2-3 (40 min); formerly Activate E-710 Pumps; stand clear when shooting gunk off a valve.
- Blitz: Search and Destroy. Close a set number of Terminid holes (regular nests, Shrieker Nests and Stalker Lairs count) before the short timer runs out, then extract. D2-10, 12 min; Atmospheric Spores hides the nest markers; base reward 375-1,250 Req and 75-250 XP at D3-10 (125 Req and 25 XP per level; not stated for D2).
- Eradicate Terminid Swarm. Hold a small arena and kill the required number of Terminids (shown as a percentage); spawns stop once the quota is met. D2-10, 15 min; base reward 20 XP and 100 Req per difficulty level; 4.1.0 enlarged non-city layouts; city variant exists.
- Purge Hatcheries. Destroy most of the eggs in the marked hatchery nests before the Terminids react. D2-10 (40 min); explosives, flamethrowers, a Portable Hellbomb or a 500kg bomb clear a nest; also a tactical objective (D3-10) on Gloom planets.
- Eliminate Chargers. Find and kill the marked Charger in the search circle; the target is always a Charger Behemoth. D3 only (40 min).
- Eliminate Bile Titans. Find and kill the marked Bile Titan in the search circle. D4-5 (40 min); a Bile Titan appears here before it joins the regular D5 spawn pool.
- Enable Oil Extraction. Reactivate the oil pumps, then run the fuel facility that loads oil into hovering transport shuttles while bugs attack the site. Sub-objective: Activate Oil Pumps. D4-10 (40 min); formerly Enable E-710 Extraction.
- Nuke Nursery. Locate each nursery chamber drill point, call the Hive Breaker Drill, defend it while it bores, then deploy the nuclear payload and clear out within 10 s. 2-3 nursery chambers. D4-10 (40 min); a failed drill resets but can keep up to half its progress; the blast leaves a lethal crater; Orbital EMS Strike protects the drill well; a cave variant runs on Hive Worlds.
- Eliminate Impaler. Find and kill the marked Impaler. D5 only (40 min).
Seven more run only in special places: two in Terminid-held Mega City regions, four on Hive Worlds (caves, the Gloom Source effect; see Hive Worlds and the Gloom) and one on TCS+ planets.
- Restore Air Quality (Mega Cities). Destroy every Spore Spewer in the city district (2,500 HP, armor 2, demolition 50); locations are shown only as circles until spotted. Mega City (Terminid city region) only, D1-10 (40 min); bug holes near the spewers are optional.
- Cleanse Infested District (Mega Cities). Destroy the marked Shrieker-infested skyscrapers, normally with a Hellbomb at the base (tower 15,000 HP, armor 2, demolition 50). Mega City only, D4-10 (40 min); the Bastion tank, exosuits or an M-1000 Maxigun also bring towers down; watch the Hellbomb pod on the overhang.
- Extract E-711 (Hive Worlds). Start the Rapid Modular Drilling Platform, turn the one valve out in the infested zone, then lock and release the fuel hose for two shuttle transfers (about 33 s arrival plus 15 s transfer each). Spread Democracy flag: 1 at D1+, 2 at D6+. Hive World only, D1-10 (40 min); added 1.004.000 (2025-09-02) as Extract Mysterious Substance, renamed in 1.004.001.
- Conduct Mobile E-711 Extraction (Hive Worlds). Board the GATER mobile oil rig, drive it to each extraction site and call the Activate Drill stratagem, then hold for about 35 s per site; the rig self-destructs like a Hellbomb at the end. Extraction sites: 2 at D1-3, 3 at D4-7, 4 at D8-10. Hive World only, D1-10 (40 min); a surfacing Hive Lord can fling the GATER off the map and fail the mission; two divers can crew it (driver and autocannon gunner); 7.0.0 gave it a faster engine.
- Restart Pumps (Hive Worlds). At each decades-old pump, destroy the 8 or 10 clumps of Terminid matter (6 melee hits each) and turn the valve. Pumps: 2 at D1+, 3 at D4+, 4 at D8+; Exterminate Terminids underground (a kill percentage in a cave) at D3+. Hive World only, D1-10 (40 min); Stalkers and Bile Spewers fill the cave quota fastest.
- Destroy Spore Lung (Hive Worlds). Go down into the hive, call the mission-provided B-100 Portable Hellbomb and detonate it at the Spore Lung (or shoot it down: 5,000 HP since 7.1.0, was 30,000, an undocumented change per the wiki). Sub-objectives: Destroy Eggs; Exterminate Terminids underground; Seal Bug Holes. Hive World only, D3-10 (40 min); stratagems only land through cave-roof openings; Emancipator and Breakthrough exosuits make short work of the Lung.
- Activate TCS+ Station (TCS+ planets). Raise the central TCS+ tower, then activate and defend three battery silos in turn (damage too high stops a silo) and finish at the activation terminal (7 inputs, 3 switches). 3 battery silos. TCS+ planets (Activate TCS+ operations), D1-10, 20 min; added 1.006.301 (2026-07); extraction is called the moment it completes; per-silo 313 Req and 63 XP, final 1,250 Req and 250 XP before multipliers.
These ran only during story events and are gone from the game.
- Activate Terminid Control System. Activate the Termicide dispersion tower in the region (a 3,000 HP tower). Retired event mission: Operation Valiant Enclosure phase 3, 2024-03-12 to 03-16 (1.000.102), D2-9.
- Deactivate Terminid Control System. Shut down three corrupted battery silos (constant breaches start) and destroy 17 mutated eggs, in either order. Retired event mission (2024-05, Umlaut sector barrier planets), 12 min, D1-9; Arc weapons could not break the eggs.
- Deploy Dark Fluid. Carry a Dark Fluid Vessel backpack to each payload site, drop a Tectonic Drill, insert the vessel and defend the drill for one minute; three sites, then escape endless Shriekers. Retired: Meridia only, Operation Enduring Peace (added 1.000.304, 2024-05-30); D1-9; ended with Meridia becoming a black hole.
- Blitz: Secure Research Site. Close a set number of bug holes on a Gloom planet so science teams can land. Retired Gloom Research Expedition mission (Fori Prime 2025-02, Nivel 43 2025-04), 12 min, D1-10.
- Chart Terminid Tunnels. Deploy Seismic Probes to scan the tunnel networks, then raise the relay tower and upload the data. Retired Gloom expedition mission, D3-10 (40 min); built from Geological Survey and Retrieve Valuable Data steps without the drive carry.
- Collect Gloom Spore Readings. Activate one or more LiDAR stations and a generator, then run the relay upload. Retired Gloom expedition mission, D1-10 (40 min).
- Collect Meteorological Data. Recover a weather aircraft's black box, carry it to the relay and upload it. Retired Gloom expedition mission, D1-10 (40 min); the same steps as Retrieve Recon Craft Intel.
- Extract Research Probe Data. Find the research probes and run an Upload Data upload at each (40 s, uploader alive and in range). Retired Gloom expedition mission, D1-10 (40 min).
- Collect Gloom-Infused Oil. Reactivate E-710 pumps and a generator, then restart the main pump and fill two containers of Gloom-infused oil. Retired Gloom expedition mission, D1-10 (40 min).
2.4Automaton missions
The bot front has the widest roster: sixteen missions in the regular rotation, the Magma-planet missions among them (Rapid Acquisition, Confiscate Assets, Annex Untapped Mineral Sites, Seize Industrial Complex, Sabotage Orgo-Plasma Synthesis, Blitz: Destroy Bio-Processors) since patch 6.0.1. Halt Cyborg Production runs only on Megafactory worlds, and the three Commando missions only in Commando operations. Fabricators and the other bot structures are in Fabricators and structures. The table lists every Automaton mission on record, the missions shared with other fronts included; where the two wikis disagree on a difficulty range, the row is graded likely. Read the Notes column for each mission's difficulty range and timer, and often for what kills its targets.
| Mission | Objective | Side objectives | Notes | Source |
|---|---|---|---|---|
| Annex Untapped Mineral Sites | Take the ore-vein coordinates from Automaton camps, then run the Prospecting Drill soil scan (three 25-second samples) at each site | Obtain Coordinates (one or more); Acquire Soil Scan Data (one or more) | D1-10 (40 min); added 1.005.000 (2025-12); counts scale with difficulty (re-scaled in 7.0.0, undocumented) | wiki |
| Blitz: Destroy Bio-Processors | Destroy a set number of Bio-Processors (5,000 HP, armor 1, demolition 40) and extract before the Destroyer must leave | none built in | D5-10, 12 min; added 1.005.000 (2025-12); one GP-20 Ultimatum shot, one TED-63 Dynamite or a Hellpod dropped between the two halves kills one | wiki |
| Blitz: Search and Destroy | Destroy a set number of Automaton Fabricators before the short timer runs out, then extract | none built in | D3-10, 12 min; base reward 375-1,250 Req and 75-250 XP; recoilless and Quasar shots or Eagle strikes kill fabricators from range | wiki |
| Commando: Acquire Evidence | Collect the Tactical Video Camera from its pre-dropped Hellpod (it takes the support-weapon slot), film the marked parts of Automaton outposts (recording takes time since 7.0.0) and extract with the camera | Document Evidence sites: 1 at D1-3, 2 at D4-7, 3 at D8+ | Commando operations only, D1-10 (40 min); added 1.005.002 (2026-01-22); leaving without the camera fails the mission; plan one diver without a support weapon | wiki |
| Commando: Extract Intel | Search outposts for the keycard(s), open the secure container in the main base, take the intel package (one-handed) and extract with it | Retrieve Keycard: 1 at D1-3, 2 at D4-7, 3 at D8+ | Commando operations only, D1-10 (40 min); lifting the package sounds a base-wide alarm unless its antenna is destroyed first, but destroying the antenna early wrecks the container | wiki |
| Commando: Secure Black Box | Find the downed SEAF recon aircraft, take the black box (one-handed) and extract with it | Destroy Automaton Anti-Air Emplacements: 2 at D1-5, 3 at D6+ | Commando operations only, D1-10 (40 min) | wiki |
| Conduct Geological Survey | Deploy the Seismic Probe at the marked sub-objective(s) and run its terminal (5 s login, coordinate match, 15 s prime), then drop the Prospecting Drill at the ore vein and pull three 25-second samples before uploading them | Verify Ore Vein Location with a Seismic Probe: 1 site, 2 sites at D6+ | D2-10, some sources D3 (40 min); each probe login and each drill sample triggers breaches or drops; also a tactical objective (D3-10) on Gloom planets | wiki |
| Confiscate Assets | Call the Cargo Container at each cache and load fusion batteries (they explode if damaged) and platinum bars, difficulty level plus one of each, until the Pelicans take them | Seize Fusion Batteries; Seize High-Grade Platinum | D1-10 (40 min); added 1.005.000 (2025-12); 7.0.0 re-scaled the objective count by difficulty (undocumented) | wiki |
| Destroy Command Bunkers | Destroy each heavily guarded Command Bunker, usually with a called-in Hellbomb; the bunker (armor 6) also falls to anti-tank fire | several bunkers (fewer at lower difficulty since 7.0.0) | D5-10 (40 min); EAT-411 Leveller, FAF-14 Spear, MS-11 Solo Silo or the Bastion main gun kill a bunker in one shot, EAT-17, Quasar, Ultimatum or recoilless in two; its fusion turrets are disabled by Compromise Automaton Defenses | wiki |
| Destroy Transmission Network | Destroy the antenna transmitter plates on the transmission tower (small arms work; explosives or demolition bring the whole tower down) | none built in | Main objective at D2-3 (40 min); tactical objective at D3-10 | wiki |
| Eliminate Automaton Factory Strider | Find and destroy the marked Factory Strider | none built in | D4-6 (40 min); also a tactical objective (D5-6) in Commando operations | wiki |
| Eliminate Automaton Hulks | Find and destroy the marked Hulk (always a Hulk Obliterator); a Hellbomb becomes available once it is found | none built in | D3 only (40 min); also a tactical objective in Disrupt Socialist Industries and Commando operations | wiki |
| Eliminate Devastators | Destroy the marked Devastator(s), 1 or 2 | none built in | D1-2 (40 min); Rocket and Heavy Devastators first appear here | wiki |
| Emergency Evacuation | Reach the evacuation port, open the shuttle bay (7-input login, coordinate match) and escort civilians from the bunker doors into the bay until the quota boards | Establish Communication Uplink (SSSD Delivery into the tower hatch, signal alignment): 1 tower, 2 at D6+ | D3-10 (40 min); about three citizens per 33 s; each civilian a diver kills costs the squad 25 Requisition before multipliers and 9 kills brands a diver a traitor; fire tornados kill civilians | wiki |
| Eradicate Automaton Forces | Hold the arena and destroy the required number of Automatons before the timer ends; shot-down dropships do not count, but the troops inside do | none built in | D2-10, 15 min; base reward 20 XP and 100 Req per difficulty level; city and Megafactory variants | wiki |
| Evacuate High-Value Assets | Defend two generators inside a walled compound while 8 evacuation rockets launch one every 1:45; you get 90 s to prepare (or start early at the terminal) | none built in; gates can be closed; HMG emplacements, supplies and support weapons sit on site | Defense campaigns only, D5-10 (20 min timer; ends about 15:30 after drop); 7.1.0 made it harder: more waves, shorter gaps (60->42 s at start, 40->28 s at end), more enemies per wave and per extra diver, SEAF can appear, common samples added; an anti-tank emplacement or two divers on a team-reloaded recoilless rifle can down dropships before they unload; Gunships only with Gunship Patrols | wiki |
| Halt Cyborg Production | Overload the hydrogen feed (valves into the red, cooling tower destroyed with demolition 50), then run the Cyborg Assembly Unit terminal, tighten the exhaust clamps, overload the engine in the control chamber, force-start and run: it blows 30 s later | 2-3 sub-objectives mixing Flood Hydrogen Pipeline (2-3 valves) and Destroy Cooling Tower | Automaton Megafactories only (Cyberstan and other Cyborg worlds), D4-10 (40 min); added 1.006.003 (2026-02-10); overloaded pipes set divers on fire; the unit has one exit | wiki |
| Launch ICBM | Enter the launch code, release the four silo hatch locks, raise the missile (60 s), lock the target grid, fuel it (30 s) and launch on a 10-second countdown; stand clear of the silo | Retrieve Launch Codes (always); Reactivate Power Generator (D5+); Start Fuel Pumps (D8+, D7+ per Fandom; sometimes replacing the generator; all three at D9+) | D3-10 (40 min); also a launch-only tactical objective on Gloom planets (D3-10) | wiki |
| Neutralize Ground-to-Orbit Defenses | Destroy each orbital cannon with a called-in Hellbomb (only Hellbombs, Portable Hellbombs or SEAF Mini-Nukes work) | 2-3 orbital cannons | D4-10 (40 min); cannons sit among fabricators, MG emplacements and sometimes cannon turrets; one layout has a lethal burning pit under a bridge | wiki |
| Rapid Acquisition | Call the Cargo Container and fill it with platinum bars (3 x the difficulty level) from a heavily defended cache while reinforcements pour in; a Pelican takes the container when it is full or time runs out | none built in | D3-10, 15 min; added with the Magma planets (1.005.000, 2025-12), regular Automaton roster since 6.0.1; bars can be thrown a short distance; smoke and gas cover the carriers | wiki |
| Retrieve Essential Personnel | Unlock the research station bunker doors and defend the staff as they walk to the evacuation shuttle | none built in | Retired: a 15-minute defense-event mission disabled in 1.000.400 (2024-06-13) as not fun enough; D1-9 | wiki |
| Retrieve Recon Craft Intel | Find the downed SEAF recon aircraft, carry its black box (one-handed) to the interplanetary uplink and run the upload; you may leave once the upload starts | Secure Black Box (the carry leg) | D1-10 (40 min); an Illuminate mission since 1.002.001 (2024-12); enabled on the Automaton front in 7.1.0 (2026-09-22) | wiki |
| Retrieve Valuable Data | Download the research database (20 s), eject and carry the SSSD drive(s) one-handed to the relay, raise the satellite tower (25 s), realign the dish by hand, upload (40 s) and wipe the data with an 11-input code | Collect Encrypted Hard Drive (one or more); Reactivate Power Generator (D7+) | D3-10 (40 min); the relay reports No Power until every sub-objective is done | wiki |
| Sabotage Air Base | Destroy the grounded dropships (1,000 HP, armor 5) and, from D5, sabotage the Air Base Control Tower: SSSD Delivery into its port, solve the Automaton-letter terminal puzzle, flip three switches and clear the 10-second Hellbomb-sized blast | Destroy Dropships; Air Base Control Tower from D5; two towers and one dropship group at D7+; two air bases and two groups at D9+ (cities: one tower and two groups at D7+) | D3-10 (40 min); conventional attacks cannot destroy the tower; Eagle strikes and any anti-tank hit kill parked dropships | wiki |
| Sabotage Orgo-Plasma Synthesis | Destroy the Bio-Processors (up to 5 per site), then run the plasma station: open the valve, lock the Pelican hose to the pump, transfer for 15 s, release, and repeat once | Destroy Bio-Processors; Extract Organic Plasma (two Pelican transfers) | D1-10 (40 min); added 1.005.000 (2025-12), regular roster since 6.0.1 | wiki |
| Sabotage Supply Bases | Destroy the stockpiled ammunition (ignite it; it chain-explodes) and the fuel reserves (demolition 60 only: Hellbomb, Portable Hellbomb or SEAF Mini-Nuke) | Destroy Stockpiled Ammunition; Destroy Fuel Reserves | D1-10 (40 min); before 7.0.0 regular operations offered it only up to D5, city operations up to D10 with fewer objectives; city and Megafactory variants; both targets also run as single tactical objectives in Disrupt Socialist Industries and Commando operations | wiki |
| Seize Industrial Complex | Appropriate the platinum refinery (SSSD Delivery, Automaton-letter terminal puzzle, three switches, 45-second transfer, rootkit, 5-input override); at higher difficulty also raise flags at the quarries | Appropriate Refinery; Annex Quarry (Super Earth Flag) at higher difficulty | D1-10 (40 min); added 1.005.000 (2025-12); the refinery crusher kills any diver who enters it | wiki |
| Spread Democracy | Call the Super Earth Flag stratagem at each marked site and hold within 25 m for the 1:40 raise while bug breaches or bot drops arrive; kill the enemies left at the flag to finish | Flag sites: 1 at D1-3, 2 at D4-7, 3 at D8-10 | D1-10 (40 min); if every diver leaves the circle the flag lowers again; a Megafactory variant runs on Cyberstan | wiki |
| Start Fuel Pumps | Clear the fueling station, log in, solve the pipe route from local storage to the missile silo, turn the three marked valves and activate the pumps | none built in | D1-2 only (40 min); formerly Pump Fuel To ICBM; the same station returns as a Launch ICBM sub-objective at D8+ (D7+ per Fandom); patrols keep arriving until it is done | wiki |
| Terminate Illegal Broadcast | Find the broadcast tower, log in and raise the signal to 100% to shut it down; any hit with demolition force 30 or more (most grenades, AC-8 Autocannon, R-36 Eruptor, a vehicle ram) destroys the tower and completes it instantly | none built in | Main objective at D1-2 only (40 min); a tactical objective at D2-10; 7.1.0 gave broadcasts sound | wiki |
| Upload Escape Pod Data | Reach the crashed escape pod, call the Upload Data stratagem within 30 m and keep the uploader alive and in range for the 40-second upload | none built in | Main objective at D1-2 (40 min); tactical objective at D3-10; enemies never spawn at the pod, so it is a safe drop point | wiki |
2.5Illuminate missions
Five missions are in the regular rotation, three more need a city region, a defense or an Exostorm, and six run only on Void planets. Warp Ships, Monoliths and the other Illuminate structures are in Structures and objectives.
- Free Colony. Destroy the Illuminate Monolith (demolition 60: Hellbomb, Portable Hellbomb or SEAF Mini-Nuke) and raise the Super Earth flag at each site (1:40); unlike other fronts you need not clear the flag afterward. 1 Monolith always; 1 flag at D1-5, a second flag at D6+. D1-10 (40 min); called Free the City on Metropolis maps; added 1.002.001 (2024-12-13).
- Evacuate Colonists. Open the shuttle bay and escort surviving colonists from the shelters into it; identical to Emergency Evacuation. Sub-objective: Establish Communication Uplink: 1 tower, 2 at D6+. D1-10 (40 min); called Evacuate Citizens in cities; civilian deaths cost 25 Req each and 9 make a traitor; 7.1.0 fixed citizens getting lost.
- Destroy Harvesters. Search the marked area (check the red encampments) and destroy the Harvester(s). D3 only (40 min); added 1.002.001 (2024-12).
- Blitz: Destroy Illuminate Warp Ships. Destroy a set number of grounded Warp Ships: break the shield, then put an explosive through the open door (or hit them with a strong stratagem). D3-10, 12 min (D1-2 only in Avert Void operations); base reward 375-1,250 Req and 75-250 XP at D3-10 (125 Req and 25 XP per level); Orbital Precision Strike, Railcannon, Laser, Gas and 500kg kill ships through the shield.
- Eradicate Illuminate Forces. Hold the arena (often Illuminate ruins) and kill the required number of Illuminate before time runs out. D3-10, 15 min; added 1.007.000 (2026-08-12), completing an eradicate mission on all three fronts; subfaction decides the loadout (anti-tank optional against most fleets).
- Take Down Overship (Illuminate-held city regions and Exostorm planets). Find the access codes in the emergency bunkers, open and raise the Planetary Defense Cannon (60 s), aim it at the Overship's nearest vent and fire; two shots (shield, then hull) usually finish it. Sub-objective: Retrieve Access Codes. Only the Planetary Defense Cannon can destroy an Overship, and a hit makes it drop Warp Ships on you.
- Repel Invasion Fleet (defense campaigns in city regions). Destroy landed Warp Ships as the fleet descends on a city district until the reserve count hits zero; if too many land, Super Earth control drains to zero and the mission fails. Defense campaigns (city regions), D3-10, 20 min; added 1.003.002 (2025-05-20); called Prevent Invasion Foothold in 1.003.101 notes; landing ships are enemies, so sentries shoot them.
- Destroy Exospire (Exostorm planets). Disrupt the shield generator site(s) (break the device's shield, destroy it, then defend a Data Jack), then enter the Exospire core chamber and destroy at least 148 Dark Fluid cells. Sub-objective: Disrupt Shield Generator: 1-3 by difficulty. Planets with an active Exostorm, D3-10 (40 min); added 6.1.0 (content live 2026-03-20); destroying the Exospire calms most storm effects for the rest of that mission.
The Void missions run only on Void planets, so whether any is on the map depends on the war; check the live war maps. What the Void does to a planet is in Where you fight them.
- Democratize the Void. Topple the Monoliths and raise Super Earth flags across the map; the Void version of Free Colony without colony maps.
- Infiltrate Illuminate Lair. Complete a randomized set of lair objectives: Cleanse Foul Shrine (Aquifer Drill), Condemn Illicit Experiments (film with the Tactical Video Camera, upload through a Portable Comms Relay), Destroy Gazer Spire (Hellbomb) and Eradicate Void Blossoms.
- Destroy Gazer Spire. Destroy each Gazer Spire with a called-in Hellbomb (demolition 60: Hellbomb, Portable Hellbomb or SEAF Mini-Nuke); its laser engages anything in sight within about 250 m and Warp Gateways around it keep spawning enemies.
- Extract Anomalous Material. Board the pre-deployed GATER and drive it to each anomalous-material site to extract; a Pelican collects the tanks and the rig self-destructs.
- Blitz: Suppress Toxic Pollination. Destroy every Void Blossom in the area (shoot the armor-1 corona to kill one outright); the burst leaves a 5 m cloud that reverses left-right controls for about 12 s.
- Blitz: Destroy Illuminate Warp Gateways. Destroy a set number of Warp Gateways (Thermite grenades, strafing runs or anti-tank shots).
Side objectives, outposts and points of interest
Take down the side objectives that fight back first: a Stratagem Jammer, an Anti-Air Emplacement, a Detector Tower, a Gunship Facility, a Shrieker Nest or a Cognitive Disruptor makes every minute near it harder until it falls. Always take SEAF Artillery when you pass it: five free shells for every diver. Clear the outposts on your route rather than every outpost on the map, and check every point of interest on easy maps for Super Credits and Medals.
There are 38 tactical (optional) objective types. A map holds none at Trivial, one at Easy and up to five at the top difficulties, and each pays 200 Requisition and 50 XP before the difficulty bonus. Many change the fight while they stand, which is the real reason to do them.
3.1Objectives that fight back: do these first
Stratagem Jammer
No stratagems within 150 m, Reinforce included; only SEAF Artillery still fires. Disable it at its terminal, then destroy it (demolition 50). SEAF shells and the Portable Hellbomb destroy it without the terminal step.
Anti-Air Emplacement
No Eagle strikes within 150 m. Any anti-tank shot destroys a battery, and each battery's rear heatsink is softer than its front.
Detector Tower
A red vision cone that calls a bot drop on any diver it sees within 150 m; a prone diver is invisible to it. Bring it down with demolition 50: a 500kg bomb, an Orbital Precision Strike or SEAF shells. A Hellbomb is offered nearby, except inside Fortresses.
Gunship Facility
Launches up to two Gunships every 60 seconds, at most four per tower, while a diver is within 150 m. Only demolition 60 kills it: a Hellbomb, a Portable Hellbomb or a SEAF Mini-Nuke; Eagles and orbitals cannot.
Mortar Emplacement
Shells divers it spots up to 150 m away; it cannot fire at close range, though the wikis disagree whether the gap is 20 m or 50 m unverified. Any anti-tank shot kills a mortar.
Shrieker Nest and Stalker Lair
A Shrieker Nest sends Shriekers at any diver it detects within about 130 m until its two or three towers fall. A Stalker Lair keeps sending Stalkers after you until you drop an explosive into each of its one or two holes.
Spore Spewer
Fills the area with dense spore fog. One Orbital Precision Strike or 500kg bomb, or one or two anti-tank shots, kills it, and the fog lifts at once.
Cognitive Disruptor
Within 200 m it hides stratagem names and scrambles their inputs. Destroy the power units on the generators beside it.
How much each structure can take, and what penetration it needs, is in Spawners and structures.
3.2Objectives that help you
- SEAF Artillery (every front, from Easy). Activate it, hand-load five of the up to seven shells, and raise the signal: every diver can then fire the five shells (→ ↑ ↑ ↓) in loading order. Stratagem Jammers and Ion Storms do not block it, and it still fires after the mission timer ends.
- SEAF SAM Site (bots and squids, from Easy). Raise the launcher and switch on its systems; it shoots down Dropships, Gunships, Stingrays, Warp Ships and Leviathans within 300 m. Do not stand behind it.
- LiDAR Station (every front) and Mobile Radar (Hive World caves). Both reveal outposts, objectives and points of interest on the map, which makes them the start of any loot run; the LiDAR works even under Atmospheric Spores.
- Compromise Automaton Defenses (from D4). Every Cannon Turret, Bunker Turret, mortar and anti-air battery on the map malfunctions, the Command Bunkers' turrets included.
- Secondary Extraction Zone. Destroy the enemy structures around a second landing pad to open a second extraction point. The wiki records it on Void planets from 7.0.0 and on Automaton maps from 7.1.0, the latter an undocumented change.
- Reinforcement Pods (Commando operations). Linking a set adds three reinforcements (Commando missions).
3.3The rest: quick Requisition and big targets
- Quick jobs. Terminate Illegal Broadcast (log in, or hit the tower with demolition 30), Upload Escape Pod Data (enemies never spawn at the pod), Destroy Rogue Research Station, Enemy Bio-Processors, Destroy Transmission Network, and on Megafactory worlds Raze Strategic Infrastructure and Erase Terrorist Memorials. They change nothing but your Requisition.
- Eliminate Overseers (Illuminate) counts everyone's Overseer kills from the start of the mission. A known issue puts it on Vote Snatcher planets, which spawn no Overseers.
- Supply targets. Destroy Stockpiled Ammunition and Destroy Fuel Reserves, the two halves of Sabotage Supply Bases, also run on their own in Magma-planet and Commando operations; the fuel needs a Hellbomb, a Portable Hellbomb or a SEAF Mini-Nuke.
- Big targets. Intercept Convoy (bots, from D7): destroy all five Factory Striders, or five Vox Engines on Cyborg worlds, before the first leaves the map, about 11 minutes 40 seconds in (10 minutes for Vox Engines). One Strider carries a stratagem scrambler, and a Strider you shoot calls reinforcements onto you. Destroy High-Value Target (bugs, from D7): kill the Hive Lord for XP only, no Requisition. Commando operations add a marked Factory Strider or Hulk Obliterator as an extra objective.
- Carry to extraction. Retrieve Mutant Larva (bugs; the carrier draws bugs), and on Hive Worlds Recover Scientific Specimen and Recover SSSD, pay only if the item reaches the shuttle. The Hive World specimen case and drive are one-handed, and the specimen case also rides in vehicles and exosuits.
3.4Enemy outposts
Outposts are the red zones on the map. Clearing one pays 50, 100, 150 and 200 Requisition with 5, 10, 20 and 40 XP (light, medium, heavy, giant), counts toward the mission's outpost stars and removes a source of spawns. How to close each kind:
- Bug Nests (light, medium, heavy, and at Super Helldive the Mega Nest): an explosive into each hole (demolition 20), or demolition 40 from the rim; the Orbital Laser and the 500kg bomb take out several holes at once. More in Nests and holes.
- Automaton Outposts (one fabricator in a small base, up to six in a Super Helldive Fortress): an explosive into each fabricator's vent (demolition 20), or a heavy hit on the building from an Eagle Airstrike, an Orbital Precision Strike, a Recoilless Rifle or a Commando rocket. Fortresses add Bunker and Cannon Turrets.
- Illuminate Encampments (up to heavy): break a grounded Warp Ship's shield, then put an explosive through its door (demolition 20), or kill it through the shield with an Orbital Precision Strike, a Railcannon, an Orbital Laser, a gas strike or a 500kg bomb. Watch for Lightning Spires and Gazers.
The wiki's Bug Nest and Automaton Outpost pages (revised May 6 and September 17, 2026) note that destroying half of a map's outposts raises the patrol spawn rate. At high difficulty, clear the outposts in your way rather than all of them community-tested. Since patch 1.003.101, Terminid spawners (bug holes, Shrieker Nests and Stalker Lairs) and the spawners of flying enemies, such as Gunship Facilities, wake only after an enemy has spotted you, so a quiet squad can reach a nest before it wakes.
The Mega Nest can hold a Mutated Egg and the Fortress holds Confidential Data. Carry it one-handed to the shuttle: extracting with it pays the squad 4 rare and 2 super samples.
3.5Points of interest and their loot
Minor points of interest (the wiki's Minor Places of Interest) are the "?" on your compass within about 60 m and the gem icons on the map, on randomly generated maps only (never the fixed Eradicate or defense maps); the icon changes once every sample there is taken. Besides ammunition, stims, grenades and support weapons, most hold one special-loot container:
- Rescue pod: one item of special loot. Interact for about a second, or salute it from within 5 m; a closed pod shows a beam and pulses audibly from about 65 m.
- Cargo container: two items. Blow it open with demolition 20: most grenades, explosive primaries and sidearms, nearly any explosive support weapon, a vehicle ram or any hellpod.
- Bunker: three items, often with supplies. Two divers press the door buttons together.
Special loot is a support weapon, a Super Credit stack (10, rarely 100), a Requisition slip (100), a Medal case (1 to 3) or a single rare sample on top of the map's normal count. Super Credits, Medals and Requisition go to every diver in the mission the moment one picks them up. From Challenging, enemies can guard most points of interest, and from Suicide Mission many turn enemy-themed.
- Anywhere: Damaged Hellbombs (they explode when shot: a free bomb for a horde), graves and burial grounds with common samples, houses, farms and greenhouses with containers or a mine of rare samples, crashed ships, junkyards, seven bunker layouts, caches, the rare Crashed SEAF Bomber, and the super-sample rock.
- Hive Worlds: bone pillars, overgrown Pelicans and ribcages, cave outposts: rich in Super Credits, Medals and Requisition but short on supplies, and the bigger ones are always guarded.
- Colonies (city blocks on regular planets): checkpoints with an EAT-17 or MG-43, supply pods, alleyways with 4-5 rare samples, and the super-sample sites: a Burning Convoy (3-4) and a crashed Pelican (6). Colony points show on the map only when they hold special loot or samples.
- Mega Cities: City Memorials (up to 4 super samples, several per map), the Urban Automaton Flag (3) in bot-held cities and the Illuminate Fortification (5, with an EAT-17) in Illuminate-held ones; patch 7.1.0 improved the Mega City reward caches.
Beyond the Requisition support weapons, maps rarely hold the SG-225IE Breaker Incendiary and LAS-5 Scythe primaries and a break-action shotgun. Backpack weapons lie on the map without their backpack. The Sample Scanner booster helps a loot run: 15% chance to double the samples from a pickup (all rarities).
3.6Where the super samples are
From Extreme every map has one super-sample rock (the wiki's Uranium Rock); it holds 2-3 at Extreme, 3-4 at Suicide Mission, 5 at Impossible, 6 at Helldive and about 7 at Super Helldive unverified. The colony and city sites above add more, and a Super Helldive high-value pickup adds 2. Samples count only when their carrier boards the shuttle; a dead diver drops them for a teammate to carry (Samples, reinforcements and friendly fire).
Modifiers, planet forces and hazards
Before you drop, open the planet on the war table and read three things: the operation's modifiers, the enemy forces, and the weather. They change the right loadout more than the mission does. A modifier holds for every mission of the operation and shows before you commit, so plan for it: longer call-ins, longer cooldowns, hidden objectives, or extra Gunships or Shriekers overhead.
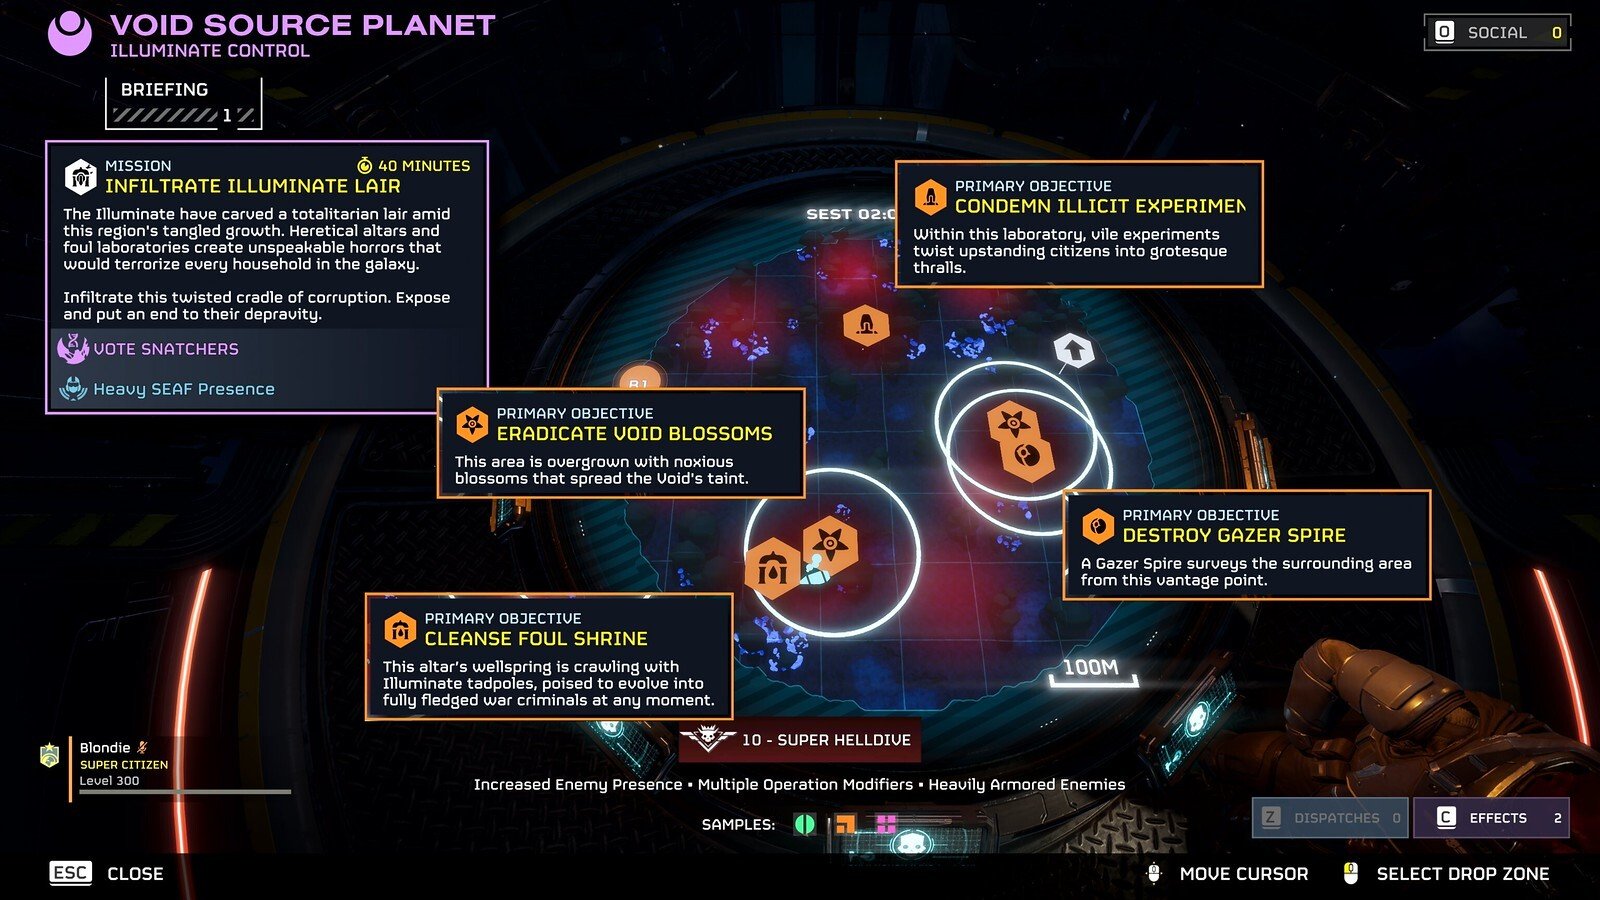
4.1Operation modifiers
Operations roll random modifiers, one from difficulty 5, two from difficulty 8, on liberation campaigns. Defense operations roll none, though a Mega City defense always carries Civilians and SEAF in Area. The wiki's Effects page keeps the full list.
- Complex Stratagem Plotting. Stratagem call-in time +50%, the extraction shuttle included. Throw early and lead your targets.
- Orbital Fluctuations. Stratagem cooldowns +25%, applied after your ship upgrades.
- Poor Intel. Objectives show only as search circles; ping one to reveal it.
- Atmospheric Spores (bugs). No enemy blips and no nest heat-zones on the minimap. A LiDAR Station still reveals points of interest; leave the UAV Recon Booster at home (Radar range about +50% for all divers (also widens Scout and Unflinching marker scans); no effect under Atmospheric Spores).
- Roving Shriekers (bugs). Flying Shrieker swarms cross the map; they are always present on Hive Worlds from Hard.
- Gunship Patrols (bots). Gunships patrol the map; bring something that hits air (Air and bot drops).
- Leviathan Blockade (Illuminate). Leviathan warships patrol overhead; it rolls on Illuminate-held city regions from Impossible.
- Civilians and SEAF in Area (Mega Cities, at every difficulty). SEAF squads and civilians share the map during defense campaigns, only SEAF during liberations and in eradicate and defense missions. Every one a diver kills costs 25 Requisition.
- Removed: AA Defenses (one fewer stratagem slot; removed in 1.000.400), Atmospheric Interference (scattered orbitals; removed in 1.001.002) and Electronic Countermeasures (scrambled codes; removed in March 2024). Older guides still mention them.
During some events and Major Orders an extra effect covers every planet at every difficulty: Orbital Fluctuations on orbital stratagems only, Medical Supply Strain (one fewer stim at deployment), Pilot Shortage (extraction +30 s) or Slower Eagle Rearm (+25%). High Command also hands out help: a free stratagem that takes no slot for a day or an operation, or the Democracy Space Station's effects on the planet it orbits (Major Orders and Campaigns).
4.2Who you fight: planet forces
The planet panel names the enemy forces present. A subfaction changes the loadout more than any modifier; Subfaction adjustments has the swaps.
- Terminids: the Predator Strain, Spore Burst Strain and Rupture Strain; the Dragonroach label (it replaces the Bile Titans) and the Hive Lords label. Unit by unit in Strains.
- Automatons: the Jet Brigade, Incineration Corps and Cyborg Legion, and the Hulk, Heavy Armor and Devastator Surges (more Hulks; more tanks and Striders; more Devastators). Unit by unit in Subfactions.
- Illuminate: the Invasion Fleet, Mindless Masses, Appropriators and Vote Snatchers. Unit by unit in Fleets.
- Older labels in the game's effect list, none active on September 26, 2026: Factory Strider Surge, Charger Rampage, Impaler Rampage and Spore Burst Scavenger Rampage.
- Heavy SEAF Presence (friendly, since 7.0.0): Pelicans drop SEAF squads of six (a leader, two riflemen, two specialists and a medic) on divers facing heavy fighting, aimed at solo divers and short squads. Status: unavailable since September 21, 2026. Mega City maps still start with SEAF you can recruit.
4.3Weather
Environmental conditions come with the planet, mostly through its biome, and do not change with difficulty. What each does, and what to do about it:
- Acid Storms. Armor value -1 for divers and enemies while the storm lasts.
- Blizzards and Sandstorms. Nothing past about 25 m is visible, enemy detection and auto-targeting ranges drop about 60%, and walking slows; lock-on ranges are unaffected. A stealth window: energy shields block the storm, and the Muscle Enhancement booster eases the slow. Its effect: Less slowdown in snow, mud, water, foliage, barbed wire, blizzards, sandstorms and acid (not slopes or tremors).
- Extreme Cold. Rate of fire about -10%; the Quasar Cannon reloads 2.5 s faster. A creator's test says heat weapons also cool faster once overheated unverified.
- Intense Heat. Maximum stamina halved (regeneration unchanged); the Quasar Cannon reloads 2.5 s slower, and by the same test heat weapons cool slower unverified. A stamina booster helps.
- Fire Tornados. Wandering tornadoes leave burning trails; touching one sets you alight, so dive to put yourself out. They follow patrol paths, so high rocks and city rooftops are safe, and enemies see less during the storm.
- Ion Storms. While one is active nobody can call a stratagem, Reinforce included, and the minimap goes dark. SEAF Artillery still fires. If every diver is dead during a storm, the mission is lost: stay alive until it passes.
- Meteor Storms. Blue glows mark the impact points; a hit kills even through a personal shield, and impacts can destroy objectives far from you.
- Rainstorms and Thick Fog. Visibility about 35 m in rain and about 50 m in fog, where enemy detection also drops from 50 m to 30 m.
- Tremors. Drain stamina, stun creatures and only slow divers, in an area around a random diver.
- Volcanic Activity. Glowing marks (red by day, white at night) show where burning rocks will land and leave fire.
4.4The Gloom and the Exostorms
- The Gloom (Terminid space). Light, Moderate and Heavy Gloom add 20, 30 and 40 seconds to the extraction wait; Moderate and Heavy Gloom also slow the Eagle's rearm, and Heavy Gloom halves the ammunition from pickups. A Gloom Source (a Hive World) means reinforcements -20%, Eagle rearm +30% and ammunition from pickups -50%, and Roving Shriekers from Hard.
- Exostorms (Illuminate planets with active Exospires). At Class 1 the biome's weather runs nonstop with rare lightning strikes. After about 72 and 120 hours respectively, a storm typically reaches Class 2 (more lightning, tornadoes that lift and kill whatever they catch) and Class 3, whose constant lightning kills divers in light and medium armor: wear heavy armor there. Destroying the Exospire in Destroy Exospire calms most storm effects for the rest of that mission.
4.5Terrain and structure hazards
- Plants. Bug Mines burst into slowing acid; Ice Plants release a stasis cloud; Moor Mushrooms throw a smokescreen and a shockwave that launches divers; Spike Plants slow, drain stamina and can kill even heavy armor at point blank; Volcano Plants vent gas that ignites when shot. Shrubs and ferns slow you, but crouching or lying in one hides you from enemy eyes.
- Lava. Lava keeps setting you alight, lava geysers erupt about every 20 seconds, and lava pits kill instantly and destroy dropped gear.
- Things that explode. Damaged Hellbombs (25 m blast when shot; unmarked from Challenging, on Deadlands at every difficulty), exploding barrels near buildings and terminals, forklifts, cars, and the Automatons' contact mines and barrels. Use them on the enemy.
- Automaton ground. Barbed wire slows and cuts; contact mines guard outposts and, at high difficulty, open ground.
- Caves (Hive Worlds). Stratagems land only through openings in the roof, and Reinforce drops you at the nearest entrance.
- Your own Super Destroyer. Leave the mission area, or kill 9 civilians or SEAF soldiers, and it shells you with its 380 mm guns until you die.
4.6Biomes
Every planet has one biome, and the biome sets its weather: desert worlds bring heat, sandstorms, tremors or acid storms; Moon worlds cold and meteors; jungles rain, volcanoes or Ion Storms; arctic worlds blizzards and cold; moors rain, fire tornadoes or Ion Storms; swamps fog or rain, and their tall trees can block aerial stratagems; the Deciduous and Autumn forests have no weather at all. The special worlds add their own: the Hive Worlds (caves and the Gloom Source), the Magma Desert (heat and lava), the Cyberstan Megafactory (cold) and the Void worlds. Colonies, Mega Cities and Megafactories sit on top of a planet's biome and keep its weather; among their tall buildings the Super Destroyer repositions so orbitals can reach the target, and Eagles adjust their runs.
Extraction
Call extraction only when the squad is ready to hold the pad for 120 seconds. Keep at least one diver within 50 m of the beacon, and board last: the shuttle lifts off 20 seconds after the first diver boards, and reinforcements stop the moment anyone does.
- Finish every main objectiveExtraction unlocks only then.
- Go to the extraction zone and set upThere is one per map, plus a second if your squad cleared a Secondary Extraction Zone. Once the main objective is done, the patrol surge concentrates around the extraction zone (patch 1.001.104), so expect it to be the hottest spot on the map: resupply, and place sentries and mines on the approaches before you call.
- Activate the terminalA short directional code calls the shuttle.
- Hold for 120 secondsAt least one diver must stay within 50 m; if everyone leaves, the call aborts after 20 seconds outside the circle. Complex Stratagem Plotting makes the wait longer, as do the Gloom (20, 30 and 40 seconds by level) and a Pilot Shortage (+30 s). The Expert Extraction Pilot booster shortens it: Extraction shuttle arrives 30% faster (2:00 -> 1:24).
- Clear the padThe Pelican lands only when the pad is clear of enemies, firing its cannon on the way down; with nobody at the pad it circles and keeps shooting. Hellpods within 10 m of the pad retract when it lands, and supply pods spill their contents first.
- Board lastOnce the first diver boards, or the mission timer hits zero, a 20-second countdown starts and no one can be reinforced. A badly damaged shuttle leaves as soon as one diver boards, without waiting.
Only what boards the shuttle counts. Divers left behind lose the samples they carry, while samples brought aboard are safe even if their carrier dies afterward. Requisition and XP for completed objectives are paid either way, except for the carry objectives that end with extracting the item.
The steps follow the wiki's Extraction page (revised September 24, 2026).
5.1When the timer runs out
The Super Destroyer leaves orbit: stratagems and reinforcements stop, and an emergency shuttle comes to the extraction zone on its own, so nobody needs to call or hold it. You still have to reach it alive, with no Resupply, no Reinforce and no Eagle.
5.2Special cases
- Eradicate missions and Evacuate High-Value Assets use fixed pads where the shuttle lands almost as soon as the objective is complete.
- Activate TCS+ Station calls the shuttle automatically when it completes.
- Hive Worlds can put the extraction inside a cave, and it is always guarded.
- A squad wipe after the main objective still counts as a success, but the samples everyone carried are lost.
Operations and Commando missions
Plan for the whole operation, not one mission. Its modifiers hold for every mission, one failed mission fails the rest, the Medals rise with each mission, and the war counts the final mission four times community-tested. Commando operations on Automaton worlds play differently: stealth, a Destroyer that leaves after 60 seconds, and reinforcements from pods you have to find.
6.1How an operation works
An operation is a chain of missions on one planet (1 at difficulties 1-2, 2 at 3-4 and 3 from 5). Finish them all for the operation's full Medals (1, 2, 6, 8, 18, 21, 24, 29, 33 and 36 at difficulties 1 to 10); fail one and the rest of the operation fails with it. The operation type depends on the planet and the campaign:
- Peacekeeping Operation (any enemy planet under liberation): the regular chain, with random operation modifiers.
- Defend Planet (a Super Earth planet under attack): defense-only missions such as Evacuate High-Value Assets, and Repel Invasion Fleet in Illuminate city regions, beside eradicate and regular missions. No random modifiers.
- City Operation (Mega City regions): city layouts and city-only missions, SEAF and civilians on the map, and Leviathan Blockades over Illuminate-held cities from Impossible.
- Commando Operation (any Automaton planet under liberation, since patch 6.0.1): the Commando missions below.
- Megafactory Operation (Automaton Megafactory regions, Cyberstan included): Halt Cyborg Production, with Raze Strategic Infrastructure and Erase Terrorist Memorials as tactical objectives.
- Disrupt Socialist Industries (the Magma planets): the platinum and organic-plasma missions, with Destroy Transmission Network, Eliminate Automaton Hulks and the Supply Base targets as possible tactical objectives.
- Automaton Data Center (special planets): severely limited Destroyer support, as in Commando operations.
- Liberate Hive World (Terminid Hive Worlds): caves, the Gloom Source effect and the Hive World missions.
- Activate TCS+ (TCS+ planets): Activate TCS+ Station.
- Quell Exostorm and Avert Void (Illuminate planets with an Exostorm): Destroy Exospire; in Avert Void, Warp Ship blitzes run even at Trivial and Easy.
- Void operations (Void planets, when the war has them): several randomized primary objectives per operation, secondary extraction zones and SEAF squads.
6.2Defense: Evacuate High-Value Assets
The defense mission you will meet most got much harder in patch 7.1.0 (the 7.1.0 notes). Defend two generators inside a walled compound while 8 evacuation rockets launch one every 1:45; you get 90 s to prepare (or start early at the terminal). Use the preparation time: close the gates, place sentries, mines and the site's HMG emplacements on the approach lanes, and keep one anti-tank shot ready for whatever reaches the walls. Turret and mortar sentries have 400 health since 6.3.0 doubled it.
The rules, with the bug front's specifics at the end: Defense campaigns only, D5-10 (20 min timer; ends about 15:30 after drop); 7.1.0 made it harder: more waves, shorter gaps (60->42 s at start, 40->28 s at end), more enemies per wave and per extra diver, SEAF can appear, common samples added; Chargers collapse gates; Stalkers only with the Predator Strain; since 7.1.0 Shriekers can spawn without Roving Shriekers.
- Automatons: an anti-tank emplacement, or two divers on a team-reloaded Recoilless Rifle, can down dropships before they unload; Gunships come only with the Gunship Patrols modifier.
- Illuminate: the mission is titled Defend Evacuation Site and also runs in Illuminate-held city regions. Harvesters and Stingrays are the generator killers, and Elevated Overseers fly over the walls.
6.3Commando missions
Commando operations put a squad behind Automaton lines with almost no support. The rules, from the wiki's Commando Missions page and the patch notes:
- The Super Destroyer stays 60 seconds after the first drop, then leaves. Each diver's Call In Super Destroyer (↑ ↑ ↓ ↓ ← → ← →) brings it back once per mission for another 60 seconds, so a full squad has four returns: stagger them for when you need stratagems most.
- Reinforcements: the squad starts with none and gets 12 in all, whatever its size, from four Reinforcement Pod sites of three each. Link them to the Destroyer early; the reinforcement boosters are unavailable here.
- Threat level: every time the bots call reinforcements, the operation's threat rises and patrols grow larger and heavier. Kill the flare-carrying Troopers and Commissars before they fire (Infantry) and avoid patrols. Night and fog help: the wiki's Stealth page records shorter enemy sight in both.
- An extra objective joins from Medium, from a marked Hulk to an Intercept Convoy.
- Acquire Evidence hands you a Tactical Video Camera that takes the support-weapon slot, so one diver drops without a support weapon; leaving without the camera fails the mission. Extract Intel: lifting the intel package sounds a base-wide alarm unless its antenna is down, but destroying the antenna early wrecks the container. Secure Black Box: find the downed SEAF recon craft and extract with its black box. Steps and difficulty ranges are in the Automaton table (Mission types).
6.4Mission stratagems
Most objectives hand you the stratagem they need when you reach them: the Super Earth Flag, the Seismic Probe and Prospecting Drill, SSSD Delivery, Upload Data, the Hive Breaker Drill, the Cargo Container, the Tactical Video Camera, the Portable Comms Relay, the Aquifer Drill, the E-711 extraction drill, SEAF Artillery, the Reinforcement Pods link, Call In Super Destroyer and the NUX-223 Hellbomb. None takes a slot, and neither do Reinforce, Resupply, the SOS Beacon and Eagle Rearm, which every diver always has. Their codes are in Mission stratagems.
Drop checklist
Run through this at the war table before every operation.
- Pick the difficulty for your goal: learning at Medium or Challenging, Medals at the highest level you always finish, super samples from Extreme, Super Credits and Medal cases at Trivial to Medium (Difficulty and rewards).
- Read the planet: the modifiers, the enemy forces and the weather (Modifiers and hazards).
- Match the loadout to the mission family: spawner-closers for blitzes and outposts, anti-tank for eliminate missions and anything from Challenging up, sentries and emplacements for defenses, a one-handed sidearm for carries (Loadout principles).
- Bring a booster nobody else in the squad has: duplicates do not stack (Boosters in a squad).
- On the ground, route through the side objectives that fight back, take SEAF Artillery and every point of interest you pass, and clear only the outposts in your way.
- Watch the mission timer: when it hits zero, the Destroyer leaves and takes your stratagems with it.
- At extraction, set up before you call, keep one diver inside 50 m, pick up the samples of anyone who fell, and board last.
Briefing14
The Galactic War & Major Orders
How liberation, defense, Major Orders and Campaigns work, what taking part earns you, and the story so far with its spoilers sealed.
On this page6 chapters
How the war works
Your part is simple: fight on the planets the current Major Order names, or on the defense under way, at the highest difficulty your squad finishes, and complete whole operations. Every successful mission chips away at a planet's health, the last mission of a completed operation counts the most, and a failed mission counts for nothing. Everyone on every platform fights the same war, and a Game Master at Arrowhead steers it.
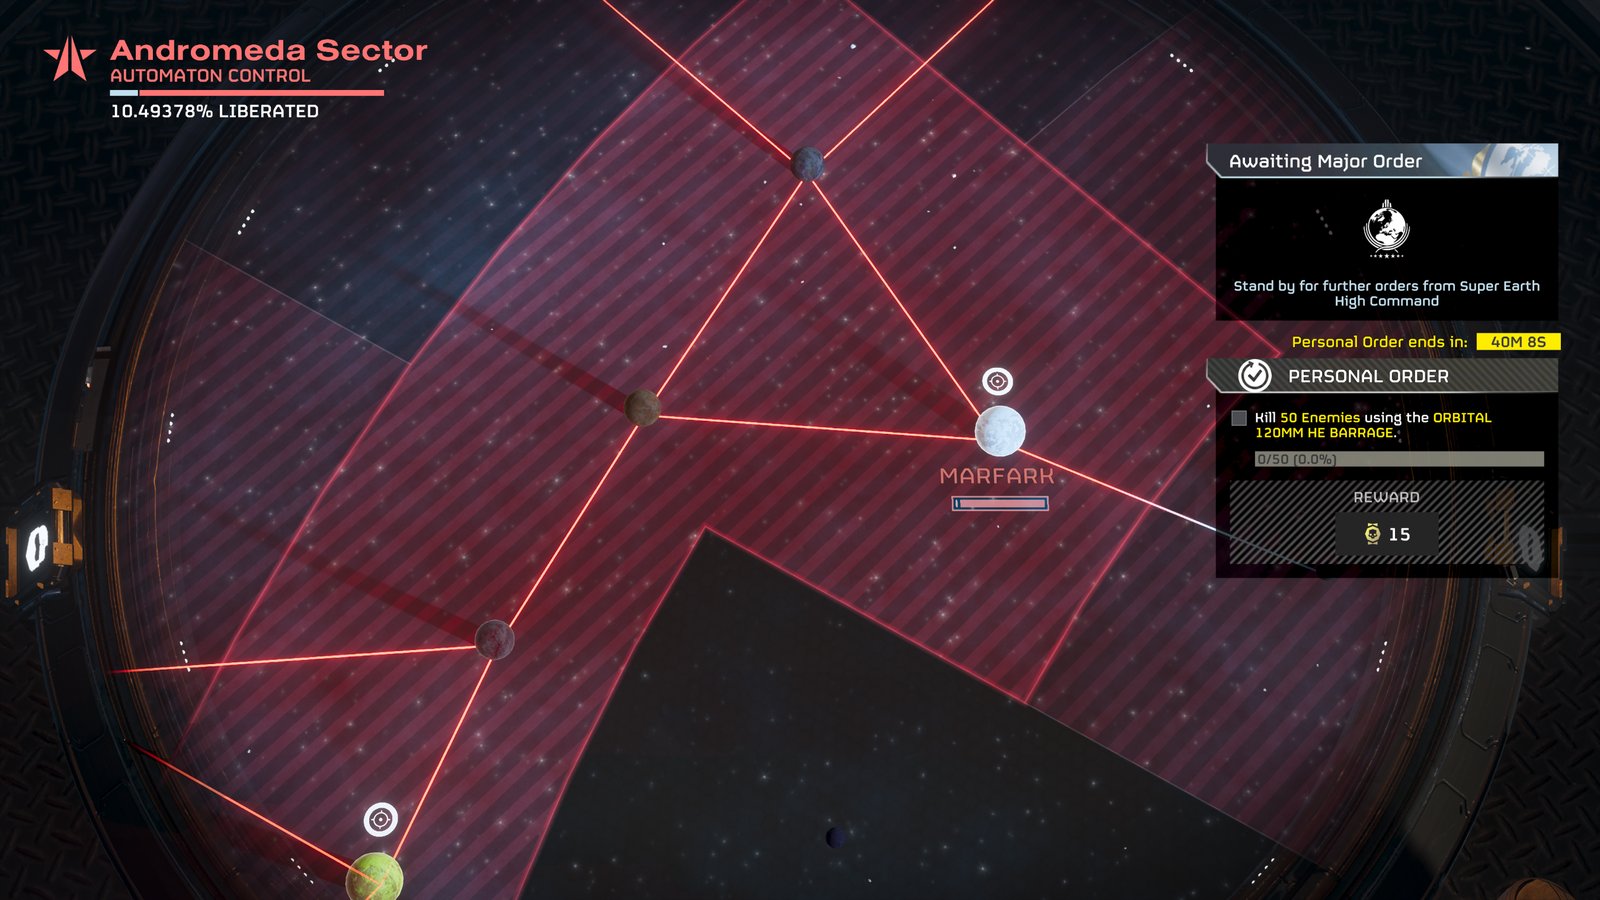
1.1One war, one map
The Galactic War never resets. The galaxy map groups planets into sectors joined by supply lines (warp links), shown on the map with the attack origins since mid-2024. A planet can be fought over only while it has an active campaign, and a liberation campaign needs a supply line back to at least one Super Earth planet: cut every link and the campaign fails. Territory is split among 3 enemy factions: the Terminids in the east, the Automatons in the west, and the Illuminate. Each planet shows its biome, weather, operation modifiers, the enemy forces present, its regions and its liberation or defense progress; how those change a mission is in Modifiers and hazards.
1.2Campaign types
- Liberation. Super Earth attacks an enemy planet it is linked to. Drive the planet's health to zero against its hourly Enemy Resistance; there is no time limit, but the campaign fails if every supply line is cut.
- Defense. An enemy attack on a Super Earth planet, shown as an arrow from the attacking planet. Deplete the attack's own health pool before the deadline: 24 hours by default, 48 with a Mega City or Megafactory unless the Jet Brigade leads the attack, and always 48 on Magma, forest and oasis worlds. Defenses have no Enemy Resistance and no random operation modifiers, and a planet that falls restarts at 0% liberation.
- Gambit (a community term). Liberate the planet an attack comes from, and the linked defense ends in Super Earth's favor at once. It is often impractical when that planet has high health or resistance.
- Urgent Liberation. A timed liberation, a defense in reverse; it has been used for Exostorm planets.
- Siege. An enemy planet surrounded by Super Earth planets: its resistance turns negative and it slowly liberates itself.
- Regions. Settlements, Towns, Cities and Mega Cities (and Automaton Megafactories) on a planet, each with its own health (100,000, 200,000, 400,000 and 600,000 by size; a few story regions are larger) and resistance. Freeing a region deals 1.5 times its health to the planet, and more regions open as a liberation advances or a defense drags on.
- High-Priority and Recon. Story campaigns with their own missions follow the Major Order, and their very high resistance falls as story milestones are met. Recon planets stay open while their sector is active but cannot be liberated.
1.3Planet health and Enemy Resistance
A planet without regions has 1,000,000 health, and each region adds its own on top: a planet with a Settlement, a Town and a City has 1,700,000. Special worlds are bigger; on September 26, 2026 the Hive World Omicron had 3,000,000 and several Magma and new-biome worlds 2,000,000. Enemy Resistance, which the community calls decay, is a fixed regeneration: about 10,000 health an hour (1%) on many ordinary planets and about 100,000 an hour on Omicron, while a besieged planet regenerates in reverse. Resistance does not change what you meet on the ground, which Arrowhead support has confirmed. The liberation percentage on the war table is simply 100% minus the share of health the planet has left.
1.4How your missions count
Every successful mission deals influence by its difficulty, and only the main objective matters. The last mission of a completed operation deals four times its influence, so failing it throws away the biggest share. The sum is multiplied by the Galactic Impact Modifier, which falls as more missions are completed across the whole galaxy, and taken off the planet's health (or the attack's). These rules are the community's reconstruction on the wiki's Second Galactic War Mechanics page (revised August 13, 2026), backed by quoted staff messages rather than patch notes community-tested.
- Harder is worth more. A completed Super Helldive operation deals about 4.5 times the influence of a Trivial one (612 against 136). Farming Trivial missions barely moves the war; the wiki cites Arrowhead staff on that.
- One impact per mission, not per diver. Only the host's mission counts, so a squad of four deals one mission's impact, the same as a diver playing alone.
- Every mission counts. Since a backend change in May 2025, each successful mission deals its impact at once and the finished operation adds its bonus; before that, impact landed only when a whole operation finished.
- The modifier moves. The official war status read 0.0115 at 14:38 UTC on September 26, 2026, and 0.0112 at 15:23 approx. The formula behind it is not public unverified.
- Liberation lags. Progress moves only as missions finish, so a planet the community has just moved to shows little change for the first hours.
What an operation is, and why finishing it matters, is in Operations and Commando missions.
1.5Other war systems
- A shared pool of lives. A story battle can add a community-wide reinforcement counter: every Helldiver death on the contested planet draws from one shared budget, which orders can top up, and the battle is lost if it runs out.
- Regions as targets. Major Orders often name a city or a Megafactory; freeing one gives its planet a big one-time jump in liberation.
- A map that changes. The war has changed the map itself for good; the sealed boxes in The story so far say how.
Major Orders and Campaigns
Check the Major Order every time you log in, and play its planets: when the community wins it, it pays Medals (usually 35 to 55 an order in 2026). Since June 2026 Major Orders come grouped in Galactic War Campaigns of about three orders over two weeks, and when the community wins a majority of the campaign's Major Orders, everyone who took part gets the campaign's reward. Do your daily Personal Order on the way.
2.1The kinds of orders
Major Order
One at a time as a rule, usually three to seven days in 2026. Typical tasks: liberate or hold named planets, defend against a number of attacks, kill a number of enemies (sometimes a named unit, or with a named weapon), extract samples, complete operations or missions on a planet, or liberate more planets than are lost. A win pays Medals, sometimes also an item, a stratagem or a cape.
Minor Orders and Strategic Opportunities, Threats and Imperatives
A day or two beside a Major Order, often on another front: a quick liberation, defense or kill count. They usually pay an effect instead of Medals: a temporary stratagem for everyone, an easier Major Order, or a debuff lifted. Ignore a Strategic Threat and its war-wide debuff can stay in place.
Galactic War Campaign
About two weeks and normally three Major Orders telling one story arc (since patch 6.3.0). If the community wins a majority of the campaign's Major Orders, every diver who took part gets one reward: a vehicle, a weapon, a piece of armor, a stratagem or a cape.
Personal Order
Your own daily task (kills, samples, extractions) for 15 Medals, and your squadmates' progress counts toward it. It resets at 09:00 UTC, according to a single wiki sentence unverified. More in Orders and their rewards.
The community also votes: every 4 hours on where the Democracy Space Station goes next, and sometimes on a story choice, such as which planet to liberate or raze. The result shapes the next orders. Orders often hand every diver a temporary extra stratagem that takes no slot, for a day or an operation (the Jump Pack for 24 hours in January 2026, for example).
2.2Campaigns and the Control Center
The Control Center terminal, opposite the Armory on your Super Destroyer, shows the current and past campaigns with their dispatches, orders, results and rewards. It shows the community's result, not whether you personally qualified. Arrowhead's creative director wrote on September 25, 2026 that campaign length and phases are being reworked for the next big update, so that community choices shape the endings more (A Look Back). What a campaign pays is in Rewards for taking part.
2.3The Democracy Space Station
The Democracy Space Station (DSS) is the community's own warship. The community votes on its next planet every 4 hours, and the winner gets the station when the vote ends (sooner if its current campaign ends). While it orbits a planet it gives that planet a small liberation boost and cuts Patriot and Emancipator exosuit cooldowns there by 35%. Divers fund one Tactical Action at a time, each diver donating up to 75 common samples, 50 rare samples and 50,000 Requisition every 24 hours:
- Eagle Storm (6,480,000 common samples; 24 hours; a 4-day cooldown): Eagle strafing runs across the planet's missions, except while a diver is inside an objective zone, and a paused defense timer.
- Orbital Blockade (4,320,000,000 Requisition; 24 hours; a 2-day cooldown): no new attacks can start from the planet (one already running continues), and every diver there gets the Hellpod Space Optimization booster's effect.
- Heavy Ordnance Distribution (4,320,000 rare samples; 24 hours; a 5-day or 6-day cooldown, depending on the wiki unverified): an extra Orbital 380mm HE Barrage for every diver, and faster liberation.
Its in-mission actions fire less often the higher the difficulty. The costs and cooldowns come from the wikis only (the wiki's DSS page), and on September 26, 2026 the station was not in orbit anywhere. If your ship modules are finished and your samples sit at the cap, donating them costs you nothing.
Rewards for taking part
Log in at least once during every campaign whose reward you want; playing a mission is the safe habit. A campaign's reward goes to every diver who logged in during its window, but only if the community wins a majority of the campaign's Major Orders, and Arrowhead support does not hand out rewards you missed.
- Major Order Medals (usually 35 to 55 an order in 2026) when the community wins; the 2026 orders offered 2,135 Medals from January through September. No Arrowhead source says who qualifies for Major Order Medals, so play during the order to be safe unverified. Medals cap at 250: spend down before a big order pays out.
- Campaign rewards: one item per campaign for everyone who took part (below).
- Personal Orders: 15 Medals a day, whatever the war does.
- Temporary stratagems from orders, which take no slot while they last.
3.1Campaign rewards so far
The campaigns since patch 6.3.0 and the reward each one offered, oldest first. Whether each was won is a story beat, sealed below.
- Census Thunder: the M-103 Supply FRV, which becomes a Requisition purchase for everyone in October 2026.
- Celestial Fence: the R-4 Hyena primary.
- Lightning Intercept: the KDM-500 Outrider helmet.
- Permanent Enclosure: the KDM-500 Outrider armor.
- Void Piercer: the IX-Voidwalker helmet.
- Counterdissident Hammer: the Eagle Gas Airstrike.
- Blazing Electorate: the Message of Morale cape.
- Armored Eagle (running since September 22, 2026): the TD-110 Maelstrom tank according to the wiki; the Control Center card shows only "1 stratagem".
Rewards arrive in the stratagem or armory menus, and a stratagem reward appears only when you pick your mission loadout. Arrowhead's support article lists the exact windows of the first six (I didn't get a campaign reward, updated September 25, 2026). The warbond guide lists these among the free gear (Superstore and free gear).
Six of the first seven campaigns were won, each by winning at least two of its three orders. Blazing Electorate lost two of its three orders and became the first failed campaign, so the Message of Morale cape was never issued. Armored Eagle's first order was won on September 26, 2026.
The fronts
New to squads? Drop where the divers are: Quickplay fills fastest on the busiest front, which on September 26, 2026 was the Terminid front by a wide margin. The fronts shift every day, so check a live war map before you pick a planet; each enemy tab covers what its front throws at you.
Terminids
Bugs farmed for the fuel Element 710. Subfactions: the Predator Strain, Spore Burst Strain and Rupture Strain. Their hardest ground is the Hive Worlds inside the Gloom, fought partly in caves. The front today
Automatons
Machines descended from the old Cyborg enemy. Subfactions: the Jet Brigade, Incineration Corps and Cyborg Legion. Their hardest ground is the Megafactory worlds and the Magma planets. The front today
Illuminate
Supposedly wiped out a century ago. Fleets: the Invasion Fleet, Mindless Masses, Appropriators and Vote Snatchers. Their hardest ground is the Mega Cities, the Exostorm planets and, when the war has them, Void planets. The front today
4.1The war on September 26, 2026
A snapshot of the official war status at 14:38 UTC; it is out of date by the time you read it approx.
- 40 campaigns, all liberations; no defense was running.
- Terminids: 9 campaign planets and about 62,500 divers, 63% of those on campaign planets. The busiest planet was Luxuriant, with about 21,300.
- Automatons: 12 planets and about 27,200 divers (27%); the busiest was Matar Bay, with about 13,900.
- Illuminate: 19 planets and about 10,300 divers (10%); the busiest was Alaraph, with about 5,100.
- In all, about 100,000 divers on campaign planets and 105,500 in the war. The shares moved during the day: the bug front held 66% at 12:00 UTC and 61% at 15:23.
- Between orders: no Major Order was active, the Democracy Space Station was not in orbit, and Pandion-XXIV was under siege, liberating itself.
4.2The war in numbers
Since launch, the official war statistics count about 1.05 billion missions won against 102 million lost (91% success); 224.6 billion Terminids, 119.0 billion Automatons and 76.8 billion Illuminate killed; and about 9.0 billion Helldiver deaths, about 11.6% of them by friendly fire (September 26, 2026).
The story so far
The war tells a story through Major Orders, dispatches and what the community wins or loses. The setup and the public milestones below spoil nothing; every later turn sits in a sealed box, so open only what you want to know. Search never reads the sealed boxes.
5.1The setup
A century after the First Galactic War, the Federation of Super Earth lives under "Managed Democracy". Then the Terminids, bugs farmed for the fuel Element 710, break out in the east, and the Automatons, machines descended from the old Cyborg enemy, rise in the west. Super Earth thaws its Helldivers and drops them planet by planet. The Illuminate, supposedly wiped out a century ago, are the third enemy. The whole community fights one war together, and many story beats turn on what the players achieve or fail. The game's calendar runs 160 years ahead of ours, so 2026 is 2186.
5.2Public milestones
The named updates so far: Escalation of Freedom (August 6, 2024), Omens of Tyranny (December 13, 2024), Heart of Democracy (May 20, 2025), Into the Unjust (September 2, 2025), Machinery of Oppression (February 10, 2026) and Devoid of Liberty (August 12, 2026).
5.3The story, sealed by year
- March: Operation Valiant Enclosure switches on a Terminid Control System across the bug front's barrier planets.
- April: Malevelon Creek, a notorious bot planet, is liberated, and Operation Swift Disassembly pushes the Automatons off the map, only for them to strike back within days.
- April to June: a Terminid Supercolony forms on Meridia. Super Earth answers with an experimental substance, Dark Fluid, which leaves a black hole where the planet was.
- August: a vast spore cloud, the Gloom, begins to spread through Terminid space.
- December 13: Omens of Tyranny. The Illuminate return and raid Super Earth's colonies.
- February to April: the Meridia black hole drifts toward Super Earth and destroys planets before it is stopped, while expeditions into the Gloom meet new Terminid strains.
- May: Heart of Democracy. The Illuminate's Great Host invades Super Earth itself, and a ten-day battle is fought through its cities.
- June to August: Super Earth rebuilds, a new law expands the Super Destroyer fleet (timed with the Xbox launch on August 26, 2025), and the Jet Brigade returns with jetpack Devastators and Hulks.
- September to November: Into the Unjust. A forward base inside the Gloom leads Super Earth to the first Hive World, fought over in its caves.
- December into January 2026: Operation Free Space. The Magma planets fuel a DSS superweapon, the Star of Peace, which is fired once.
- February: Machinery of Oppression. Operation Valid Pretext marches on Cyberstan, the Automaton homeworld, and its Cyborg Legion, with a shared reinforcement budget for the whole community (200 million reinforcements at the start, topped up by orders). The operation fails, and Cyberstan stays in Automaton hands.
- March to May: Illuminate Exospires spawn Exostorms, the Appropriators arrive, and the first planet vanishes into the Void.
- June to August: the first Galactic War Campaigns (Census Thunder, Celestial Fence, Lightning Intercept, Permanent Enclosure) build a new Termicide wall and fight an Automaton orbital superweapon.
- August 12 to 23: Devoid of Liberty. In the Void Piercer campaign, Helldivers and SEAF squads enter the Void to find its source. By then 15 planets had fallen into the Void; Hort and Rirga Bay were saved in time. The Void dissolved on August 23, 2026, when its Source Planet was liberated.
- August 25 to September 21: Counterdissident Hammer (sabotage against the Termicide wall) and Blazing Electorate (a Cyborg plot against Super Earth's Quarter-Term elections). Blazing Electorate becomes the first failed campaign, and SEAF battalions are recalled from the front to guard the re-vote.
Meridia became a black hole in 2024 and Penta in 2026. In 2025 the moving black hole destroyed Angel's Venture, Moradesh and Ivis, which the war map now marks as fractured planets.
- Arrowhead's creative director says the Void "isn't finished with us", and its Vote Snatchers remain in the Illuminate roster.
- The new Termicide wall keeps being sabotaged: a wall planet, Fronteria, fell back to the Terminids during Armored Eagle's first order.
- Cyberstan is still Automaton territory.
- The SEAF squadmates remain recalled after the failed election campaign (per the wiki).
Live war maps
This manual never shows the live war: the numbers on this tab are one dated snapshot. For today's front, open the war table on your Super Destroyer, or one of the trackers below, which read the official war feed.
- In the game. The Galactic War table shows every planet's progress and the current orders, and the Control Center shows the campaign.
- Helldivers Companion. War progress and planet liberation; it installs as a web app on a phone.
- Helldivers Training Manual. Planet-by-planet live status and ownership history; its stratagem and enemy pages stop at late-2024 content.
- divers.gg Liberation Map. A live war map unverified.
- helldivers-history. Graphs of the war over time.
- Galactic Wide Web. A Discord bot that keeps a war dashboard in your own server and posts new Major Orders, dispatches and DSS moves.
- The records. The wiki's Major Orders and Campaigns pages log every order and campaign with its result, spoilers included.
helldivers.io, the live map most 2024 guides link, now redirects to an error page, and helldivers.news still shows a 2024 patch and an old Major Order. Use the trackers above.
More tools, and the community war API for builders: Tools and wikis.
Directory15
Community, Tools & Patch History
The wikis, war maps and calculators worth bookmarking, the communities and creators to follow, the known bugs, and every patch from launch to today.
On this page6 chapters
Tools and wikis
Four bookmarks cover almost everything: the Helldivers Wiki for numbers, a live war map for where the fighting is, the Steam news hub for patch notes, and Arrowhead's Known Issues list before you report a bug. Add the official Discord when you start looking for squads, and a code trainer if calling stratagems slows you down. The sites on this tab were checked on September 26, 2026; fan sites come and go, so the dead ones are listed too.
The Helldivers Wiki
helldivers.wiki.gg has every weapon, enemy anatomy table, warbond and patch, with per-item change histories that list the changes patch notes left out. This manual's weapon and stratagem numbers come from its datamine modules (revised September 25, 2026).
Helldivers Companion
helldiverscompanion.com tracks planet liberation and the war's progress, and installs as a web app on your phone. In the game, the Control Center terminal on your Super Destroyer shows the current Campaign and its Major Orders.
The Steam news hub
Arrowhead posts full patch notes on the Steam news hub first, with warbond reveals and developer posts. The patch history on this tab summarizes every build.
The Known Issues list
Arrowhead keeps the confirmed bugs it plans to fix on one support page. Check it before you file a ticket; Known bugs explains the ones that change how you play.
The official Discord
The official HELLDIVERS Discord (about 1.32 million members approx) has #lfg-general for finding a squad and #troubleshooting for help. Friendlier, smaller servers are in Communities and creators.
Stratagem Hero Online
A browser copy of the ship's stratagem-code minigame at combustibletoast.github.io, keyboard only, which the official account shared in February 2024. Learn the codes here before a mission asks for them in a hurry.
1.1Wikis and databases
Start with helldivers.wiki.gg: it is by far the most active wiki. Many of its pages show a "Last Updated" marker with the patch they were checked against, so compare that with the patches since before you trust a number. The rest are for a cross-check or one specific job.
| Resource | Best for | Check before you trust it |
|---|---|---|
| Helldivers Wiki (wiki.gg) | Every item, enemy (armor by body part), warbond and patch; change histories that record datamined "Undocumented Changes"; troubleshooting pages | The active one: 158 editors in the last 30 days and 18,109 pages (September 26, 2026). Check each page's "Last Updated" patch |
| Helldivers Wiki (Fandom) | A second opinion | 22 active editors; some pages are flagged out of date |
| PCGamingWiki | PC settings, config file locations, field of view, the anti-cheat (nProtect GameGuard) and matchmaking middleware | Community-kept; it also notes that the game is always online |
| Helldivers Training Manual | Live war status, planet ownership history and stratagem-code practice | Its stratagem and enemy pages stop at late-2024 content (the Illuminate list ends at the Warp Ship) |
| divers.gg | A fan database and a live war map | A single fan source whose data were not audited unverified. Its Superstore tracker matters less while every set stays on sale (rotation: none since April 28, 2026) |
| u.gg (Helldivers 2) | Editorial tier lists and builds per front | Opinions, updated for the newest patch when checked community-tested; see the weapons tab's dated tiers |
| Steam Community guides | Long player-written guides | Quality varies: one tier-list guide says it is sourced from u.gg and mixes up some warbond items; check the date against the patch history |
1.2War maps, apps and bots
This manual never shows the live war, because it changes by the hour. For where the fighting is, open the Control Center in the game or one of these maps; the war tab explains what the maps show.
| Tool | Best for | Status (September 26, 2026) |
|---|---|---|
| The Control Center (in game) | The current Campaign, its Major Orders and reward, and an archive of past Campaigns | On your Super Destroyer, across from the armory, since 6.3.0 |
| Helldivers Companion | War progress and planet liberation; installs as a web app on a phone | Live; linked from the wiki's main page |
| Training Manual: Live War Status | Planet-by-planet status and ownership history | Live; its war-status feed answered |
| divers.gg Liberation Map | A live war map | Live unverified |
| Democracy Hub | A galactic map plus a loadout builder, a randomizer and an enemy simulator | Live unverified |
| PropBuilds Major Order tracker | Major Order progress with an "on pace" check, and the fronts with player counts | Live; a page on a merchandise store unverified |
| HD2 Galactic War Monitor | War updates, stratagems and a bestiary on an Android phone | Updated September 26, 2026; 10,000+ installs, 4.3 stars |
| helldivers-history | Graphs of the war over time, from the community war API | Updated September 26, 2026 |
| Galactic Wide Web (Discord bot) | A self-updating war dashboard in your own Discord server, with alerts for new Major Orders, dispatches, Democracy Space Station moves and Steam patch notes | Code updated September 24, 2026 |
| Democracy Bot (Discord bot) | Planet, Major Order and dispatch stats on demand | Code updated August 14, 2026 unverified |
| Major Orders record | A full record of past Major Orders | Updated August 20, 2026 unverified |
1.3Calculators and loadout builders
A damage calculator answers "how many shots does this part take" better than any video, but only for the patch its data comes from: find the data date first. For whether a weapon can hurt a unit at all, this manual's penetration ladder and weapon comparator use data checked against 7.1.1, and the loadout coverage check tests a whole loadout.
| Tool | Best for | Caveat |
|---|---|---|
| Managed Ballistics | Shots to kill per body part, any weapon against any enemy | Built from the wiki plus a datamine; check its data date |
| SuperCalc | Damage calculation | Stale: its enemy data stops at 6.2.3 (1.006.203), before 6.3.0 changed several enemies |
| Helldivers 2 Damage Calculator | Damage calculation | Does not say where its data comes from unverified |
| Democracy Hub loadout builder | Loadouts filtered by the warbonds you own, with an auto-optimizer | Its "optimal" picks come from its own model unverified |
| Helldivers Hub | Loadout templates to share with your squad before a mission | A fan tool unverified |
| Helldivers 2 Challenges | Create, save and share loadouts | A fan tool unverified |
1.4Stratagem code practice
Drill the codes for your four stratagems until you stop looking at them; Calling stratagems on the Getting Started tab covers the controls.
- Stratagem Hero Online: a browser copy of the minigame, keyboard only; the official account shared it in February 2024.
- Stratagem Trainer: code practice in the browser unverified.
- Training Manual: Interactive Practice: practice one stratagem at a time; its list stops at late-2024 stratagems.
- Stratagem Hero in the game: the arcade machine is on every Super Destroyer but only works on a ship whose owner has the Super Citizen Edition. Since 7.1.0 each Destroyer keeps its own leaderboard.
1.5Official channels
Patch notes reach the Steam news hub first; a small hotfix sometimes appears only in the official Discord's #patch-notes-updates channel, as 5.0.1 did. Known bugs live on one support article, not in the notes. Feedback goes to the weekly player surveys linked on Reddit and Discord, or to /feedback in any channel of the official Discord; Arrowhead asks for feedback on the current game rather than feature requests (support: submitting feedback).
| Channel | Best for | Notes (September 26, 2026) |
|---|---|---|
| Steam news hub | Full patch notes, warbond reveals, developer blogs | 162 posts since September 2023 |
| Arrowhead support site | The Known Issues list, the FAQ, fixes for error codes, refunds, bug tickets | The Known Issues list was updated that morning |
| Official HELLDIVERS Discord | Announcements first; #patch-notes-updates, #lfg-general, #troubleshooting, /feedback | about 1.32 million members approx |
| HELLDIVERS 2 on YouTube | Trailers, patch-note videos and in-universe news bulletins | 282K subscribers; last upload September 22, 2026 |
| Arrowhead on YouTube | Developer conversations and older patch-note videos | Last upload October 30, 2025 |
| @helldivers2 on X | Short announcements and Major Order posts | Not checked here (X blocks automated reading); the wiki links it |
| PlayStation Blog | Major updates and PlayStation Plus news | Live |
| Xbox Wire | Xbox news | Live |
| PlayStation.com news | An official digest of warbonds and events | Live |
| Arrowhead's website | Studio news and jobs | Live |
1.6For tool builders: the data behind the maps
Every war map above reads the same live feed. If you build your own tool, use the community API and respect its limits rather than loading Arrowhead's servers directly.
| Source | Best for | Rules |
|---|---|---|
| Community API | Planets, Campaigns, Major Orders and dispatches at api.helldivers2.dev, plus raw mirrors of the official feed | No key; 5 requests per 10 seconds; send the X-Super-Client header (becoming mandatory) and X-Super-Contact; API docs |
| Official war API | The raw live war state at api.live.prod.thehelldiversgame.com | Unofficial use; the community API asks builders to use its raw endpoints instead |
| helldivers-2/json | Static planets, sectors and factions | Updated August 16, 2026 |
| wiki.gg API | Item and enemy numbers, and the wiki's datamine modules | Public; no key needed |
| Steam news API | The full text of every patch note | Public |
| HelldiversData | Datamined text assets | Updated September 23, 2026 |
1.7Skip these: dead, stale or unchecked
These still turn up in search results and old posts, so none is linked here.
| Site | Status (September 26, 2026) | Use instead |
|---|---|---|
| helldivers.io | The 2024 war map now redirects to a PlayStation error page | Helldivers Companion or the Training Manual |
| diveharder.com | The name no longer resolves | Helldivers Companion or the Training Manual |
| hellhub-collective.com | The name no longer resolves | Helldivers Companion or the Training Manual |
| helldivers.news | Stuck at patch 1.001.103 (October 2024) and an old Major Order | The Control Center or Helldivers Companion |
| Helldive Helper | Listed on the wiki, but a secure connection failed when checked unverified | Nothing until someone verifies it |
| The Fextralife wiki | Could not be reached; not assessed unverified | helldivers.wiki.gg |
| HellCom (Discord bot) | Last code change June 8, 2025; maintenance uncertain | Galactic Wide Web |
| drizzer14's stratagem-hero | Last changed April 2024 | Stratagem Hero Online |
| Game8's tier list | Last updated March 12, 2024 | The dated lists on the weapons tab |
| "Tier list 2026" pages | SEO pages that cite patches that do not exist | The dated lists on the weapons tab |
| Guide videos from before September 17, 2024 | They describe the armor system before the overhaul | This tab's patch history |
Communities and creators
For your first squads, post in the official Discord's #lfg-general, or join a server built for players who want teamwork over chaos: Kai's Commandos or Low Sodium Helldivers. Watch creators for first looks at new weapons and warbonds, and read their rankings as dated opinions. How to behave once you are in a squad is on the multiplayer tab.
2.1Discord servers for finding a squad
Start with the first three. Member counts are Discord's own approximate figures on September 26, 2026, and they move daily approx.
| Server | Members | Best for |
|---|---|---|
| HELLDIVERS Official | about 1.32 million | The biggest pool of players: #lfg-general for squads, patch notes first, volunteer help in #troubleshooting, feedback surveys |
| Kai's Commandos | about 53,000 | CommissarKai's server for "teamplay, coordination and friendship", aimed at players tired of toxic lobbies: a good first squad |
| Low Sodium Helldivers | about 11,000 | "The chill place to find squadmates": an active LFG, community events and role-play |
| International Helldiver Coalition | about 2,500 | Veterans and rookies of every play style |
| The Helldivers Archive | about 19,000 | Game information, data and assets from both Helldivers games |
| Helldivers Wiki Discord | about 2,100 | Talking to the wiki's editors about data |
| Freedom Alliance | 50,000+ active members across its Discord and site (Arrowhead, July 2026) | Community-wide events, such as the yearly HEROES charity drive for Save the Children, and WFAR 437.7, a 24/7 in-world radio station. The 1.001.201 patch notes wrote the Freedom Alliance itself into the lore, awarding its members a Patriotic Medal |
| HD2 Clans | a clan directory | Clans recruiting now, cross-clan orders and a "Fleet Conquest" game unverified |
2.2Subreddits
News and clips spread fastest on Reddit; check any number you read there against the wiki.
- r/Helldivers: the main subreddit (the wiki links it as the official Reddit), with news, clips, discussion and the links to Arrowhead's weekly surveys.
- r/Helldivers2: a second large general subreddit.
- r/LowSodiumHellDivers: deliberately positive and low-drama; its Discord, Low Sodium Helldivers, runs the active LFG listed above.
Their sizes could not be checked, because Reddit blocks automated reading, and third-party counts disagree: r/Helldivers had 1.2 million members according to Aftermath (September 12, 2025) and 2.3 million according to GummySearch (undated) unverified.
2.3Creators worth watching
Pick creators by the job. The first three suit a new player learning the game; the next four test weapons and warbonds; the next four keep up with patches and the studio; the last three have paused or moved on. Their tier lists and "best loadout" picks are opinions community-tested, so read each upload's date against the patch history. Subscriber counts are YouTube's rounded figures, read on September 26, 2026 approx.
| Creator | Watch for | Subscribers | Latest upload |
|---|---|---|---|
| Fallout Plays | Beginner-friendly guides: the best loadout per front, every armor passive tested, a beginner's guide (the channel covers many games) | 665K | September 24, 2026 |
| CommissarKai | Gameplay, loadout-rating streams with viewers, and squad play such as team reloading; runs Kai's Commandos, and Arrowhead named him a Propaganda Commander (July 2026) | 201K | September 25, 2026 |
| Claysthetics | Warbond testing, loadouts per front and enemy strategy guides | 43.7K | September 24, 2026 |
| OhDough | Solo high-difficulty play and head-to-head weapon and vehicle tests per front | 229K | September 26, 2026 |
| SwanyPlaysGames | Quick max-level reviews of each new weapon, and news | 265K | September 25, 2026 |
| takibo | Solo max-difficulty loadouts, "tested and ranked everything" warbond reviews and tip compilations | 91.4K | September 24, 2026 |
| TheGundamBoi | Weapon, exosuit and warbond guides | 72.2K | September 24, 2026 |
| DjChats | One short video per patch change | 14.5K | September 23, 2026 |
| ThiccFilA | Commentary on patches, the studio and the community, and "is it worth your Super Credits" reviews | 68.6K | September 25, 2026 |
| LtBuzzLitebeer | News and commentary on the game, the studio and Sony (the channel covers several games) | 487K | September 26, 2026 |
| Cloud Plays | Daily news commentary, with sensational titles | 178K | September 26, 2026 |
| Eravin | Stealth guides and warbond testing, but no uploads since March | 77.5K | March 18, 2026 |
| Ryken XIV | History only: stat-heavy weapon tests from 2024, before the armor overhaul; the channel has moved to another game | 27.2K | Not Helldivers 2 |
| MarkPoint | History only: a 100+ tips video; the channel has moved to another game | 58.1K | Not Helldivers 2 |
Arrowhead's creator program is the Propaganda Commanders: an official Discord channel of that name, whose members tag their videos #propagandacommanders. There is no public roster, and Arrowhead plans closed beta tests that include their feedback.
2.4How to read a guide, a video or a tier list
- Check the date against the landmarksThe patch history opens with three dates that each make a class of older advice wrong; the armor overhaul of September 17, 2024 is the big one.
- Name the source and the dateA tier list is one person's or one site's opinion on one patch. This manual dates every ranking it quotes (weapons, warbonds), and SEO sites have been caught citing patches that do not exist.
- Remember that patch notes are incompleteArrowhead admitted on May 8, 2026 that some updates carried changes the notes did not mention, and promised clearer notes. The wiki's per-item change histories list them as "Undocumented Changes"; check a surprising number there.
- Take current numbers from the wiki's datamineA video freezes the numbers of the week it was recorded; the wiki's datamine modules follow the patches.
Arrowhead: promises and flashpoints
Expect the next big update to rework Campaigns: their length, their phases and how much room the Game Masters have to shape them (Arrowhead's look-back of September 25, 2026). Of the other open promises, only one has a firm month: the Supply FRV goes on sale for Requisition in October 2026. Treat the rest as plans, not schedules, even the two that Arrowhead aims to deliver in 2026.
3.1Promised but not shipped
Most of these come from the game director's "Progressing Progression" post of June 4, 2026; status as of September 26, 2026.
| Promise | First said | Status |
|---|---|---|
| A ship-module overhaul and new ships, each with its own progression and customization | June 4, 2026 | A dedicated ship team is on it; no date |
| Personal Campaign Progression: a personal reward track in each Campaign, replacing Personal Orders | June 4, 2026 ("this year"); repeated August 6 | Not live; Personal Orders still run |
| Planet Warfronts: Defend, Frontline War and Behind Enemy Lines missions on one planet | June 4, 2026 | In development |
| A fix for stratagem beacons bouncing off cliffs and odd spots | June 4, 2026 | Open; a task force hopes to fix it by the end of 2026 |
| Hellpod steering, and slowdowns in grass and vegetation | June 4, 2026 | Open; 6.3.0 stopped foliage from interrupting sprint |
| Warbond and Superstore menus that are easier to navigate | June 4, 2026 | Not yet |
| Closed beta tests with creators, and more public testing | August 13, 2024; May 8 and June 4, 2026 | Closed playtests run; no public beta so far |
| The M-103 Supply FRV for Requisition, for divers who missed the Campaign that awarded it | July 23, 2026 | Due in October 2026; price not announced |
3.2Flashpoints that shaped today's game
Several of today's rules came out of community pushback: the Superstore catalog, the Warbond Token, the armor system and the promise of clearer patch notes all trace back to a row below.
| When | What happened | What changed |
|---|---|---|
| February 2024 | Launch overload: logins throttled, rewards not granted, 12 builds in three weeks; Steam's all-time peak of 458,208 players came that month (SteamCharts) | Login and player caps raised, then raised again; stability patches and a promised increased-reward event |
| May 2024 | Sony announced mandatory PlayStation Network account linking for Steam players, then withdrew it three days later | Linking stayed optional; an in-game option to link arrived in 1.000.304 |
| August to October 2024 | Escalation of Freedom's balance changes drew heavy criticism, and the game director posted a 60-day plan ("balance should be fun") | 1.001.100 and 1.001.104 reworked armor and penetration and retuned more than 70 weapons and stratagems |
| December 2024 | The first crossover, Killzone 2 items in the Superstore, was criticized for its price and short rotation | The second wave was gifted to everyone and the rotation stretched to 10 days; a year later the items returned as a legendary warbond, free for earlier buyers |
| May 2025 | Survey feedback on the Superstore | Older sets stayed buyable in a permanent catalog beside a 48-hour rotating page; rotation today: none since April 28, 2026 |
| July 2025 | Players could buy Steeled Veterans twice, in the game and in the Super Citizen upgrade | Since August 26, 2025 the Super Citizen Edition grants a Warbond Token instead (premium warbonds only) |
| September 2025 | "State of the Game #1": Arrowhead admitted performance, stability and audio problems, and that "our silence hasn't helped" | 4.1.0 with more than 200 fixes, and engine tech blogs |
| October 2025 | A dispute over the Propaganda Commanders creator program: one creator was removed after refusing an edit request and another said he was kept out; the CEO said a partner runs the program (GamesRadar+, October 17, 2025) | Nothing announced |
| October 2025 to March 2026 | The PC install had grown to about 154 GB | With Nixxes, a slim build (about 23 GB): a beta on December 2, 2025, the default from January 22, 2026, and the only build since March 17, 2026 |
| May 2026 | Criticism of undocumented changes, and of exosuits sold in a paid warbond (Exo Experts) | Arrowhead promised clearer notes, Campaigns, more testing, and vehicles earned through play |
| July 2026 | Cheaters and exploiters farming Super Credits | An earn-rate limit on Super Credits since July 9, 2026, to be extended to Medals, samples and Requisition; normal play never meets it |
| September 2026 | The Steam store stopped selling the game to new buyers in the UK | Still unavailable to new buyers in the UK since September 16, 2026; owners can still play, and Sony says it is working with Valve |
| September 25, 2026 | The creative director's look-back called the Devoid of Liberty launch "too patchy" | Campaigns are being reworked for the next big update, and stability stays the priority between updates |
Known bugs
Nine known bugs change how you should play today, and the checklist below works around them. Arrowhead's Known Issues list holds 20 items, last edited on the day 7.1.0 shipped; the oldest open one, Microsoft IME chat input, dates from November 2024.
- Throw red-beacon strikes at the ground. A strike does not follow a beacon that sticks to a moving enemy or vehicle.
- Throw beacons onto flat, open ground. They still bounce off cliffs and odd spots; Arrowhead hopes to fix it by the end of 2026.
- Read the briefing before you drop. The game can generate a different mission type from the one you picked.
- Do not steer your hellpod onto an Automaton Fabricator on a laggy connection. High latency can kill you on landing.
- Aim your drop away from objectives and structures. The zones where hellpods cannot land do not match what you see.
- Let R-4 Hyena reloads finish. An interrupted reload can lose magazines.
- Keep your distance from big explosions, even behind cover. Terrain between you and the blast may not stop the ragdoll.
- Trust the arrival, not the label. Some stratagem weapons show the wrong call-in time; the real time is unaffected.
- Do not build your demolition plan on the Eagle Gas Airstrike. Its demolition force (50) is higher than intended, so expect it to lose the ability to break some structures.
4.1Arrowhead's Known Issues list
The list holds confirmed bugs that are due to be fixed. It leaves out design choices and most crash, performance and connection problems, which Arrowhead treats as ongoing. Every item below was open at 7.1.1; the ones that affect play come first. "Listed since" is the first archived copy of the page that shows the item, and the archive has gaps, so an item can be a few weeks older.
| Issue | Listed since | What you can do |
|---|---|---|
| Red-beacon stratagems do not follow a beacon that moves | May 2026 | Throw at the ground, not at moving enemies or vehicles |
| A different mission type may be generated than the one you selected | July 2026 | Check the briefing before you drop |
| A diver may die landing on an Automaton Fabricator when latency is high | July 2026 | Do not steer onto Fabricators on a laggy connection |
| Hellpod no-landing zones do not match what you see | May 2026 | Aim away from objectives and structures; part of the hellpod-steering work Arrowhead named on June 4, 2026 |
| The R-4 Hyena may lose magazines if its reload is interrupted | August 2026 | Let reloads finish |
| Explosions can ragdoll divers hidden behind terrain | November 2024 | Keep your distance from big blasts, even behind cover |
| Some stratagem weapons show the wrong call-in time on the ship and in missions | June 2026 | The real time is unaffected |
| The Eagle Gas Airstrike's demolition force is higher than intended | August or September 2026 | Do not rely on it for demolition; expect a correction |
| The AR-59 Suppressor's short magazines did not get 7.0.0's buff | August 2026 | They keep their pre-7.0.0 values |
| The EXO-51 Lumberer exosuit's flamethrower may not apply damage correctly | August or September 2026 | A close-range version of this was fixed in 6.3.0 |
| New Illuminate enemies clip through the ground and obstacles in Evacuate High-Value Assets missions | August 2026 | 7.1.0 fixed Wretches and Crushers falling through some floors |
| Some attachments' stats do not change in the preview until bought and equipped | December 2025 | Judge an attachment after equipping it |
| Melee kills are not counted in end-of-mission or career stats | March 2026 | Nothing yet; 7.1.0 fixed kills by mines, vehicles, drones and backpacks, not melee |
| Players using Microsoft IME cannot type Korean, Japanese or Chinese characters in chat | November 2024 (the oldest open item) | Use voice chat or the ping and comms wheels |
| A Chinese or Japanese IME stops movement and controls in the game | May 2026 | Switch the IME off while you play. The 7.1.0 notes call it fixed, yet it is still listed unverified |
| The Campaigns menu is slightly cut off at some resolutions | July 2026 | Cosmetic |
| Oil, dirt, blood and similar effects can stain armor or helmets jet black | May 2026 | Cosmetic |
| The "Operated By" line under your Destroyer's name does not show your nickname | May 2026 | Cosmetic |
| The MGX-42 Bullet Storm's muzzle flash can be misaligned | May 2026 | Cosmetic |
| The IX-Voidwalker helmet disappears at some camera angles during certain actions | August or September 2026 | Cosmetic |
4.2Fixed during the Devoid of Liberty patches
These were fixed, or left the list, between 7.0.0 and 7.1.1. A guide from August 2026 that warns about them is out of date.
| Issue | Fixed in |
|---|---|
| Crashes when alt-tabbing or opening the Democracy terminal (the list advised not to alt-tab) | Most likely 7.0.1 and 7.1.1, whose notes fix crashes when opening terminals in fullscreen and with superwide windows |
| Enemies targeting empty FRVs | 7.1.0: enemies ignore empty vehicles |
| Extra recoil on the LAS-13 Trident | 7.1.0: climb recoil cut |
| Citizens losing their way in city Evacuate Citizens missions | 7.1.0 |
| Ice flowers ragdolling divers | 7.1.0: the Ice Plant hazard staggers less |
| Points of interest not graying out on the minimap in colonies | 7.1.0 |
| Trees rendered in low quality on Xbox | 7.1.0 |
| Divers who could not be reinforced after a teammate threw Reinforce on a poor connection (never on the list) | 7.1.0 |
| Weapon customization showing the wrong sway and reload stats | 7.0.0: the stats now show decimals |
| SEAF Artillery shells soft-locking under network desync | 7.0.0 |
| Enemy corpses colliding inconsistently under network desync | 7.0.0 |
| Gaps in the Breakthrough exosuit's shield hitbox | 7.0.0 |
| The MLS-4X Commando's unguided mode not working | Gone from the list by 7.1.0 with no patch note unverified |
| Particle effects visible through walls on PS5 Pro | Gone from the list by mid-August 2026 with no patch note unverified |
4.3Long-standing problems Arrowhead is working on
- Stratagem beacons bouncing off cliffs and odd spots. On the patch notes' known-issue lists from September 2024 to March 2025, then dropped without a fix. The game director named it again on June 4, 2026, with a task force and the hope of a fix by the end of 2026.
- Hellpod steering near objects. Steering was switched off over too large an area in March 2024 and the area reduced in 1.000.200; the mismatched no-landing zones are still on the list.
- Traversal. Collisions and slowdowns in grass and vegetation; partly fixed, since 6.3.0 stopped foliage from interrupting sprint.
- Ragdolling. Tuned again and again: smaller rocket and tentacle blasts (1.001.004), staying prone after a ragdoll (1.002.001), control back in half a second (1.003.200), stun blasts that no longer ragdoll divers (1.004.000) and shorter heavy landings (7.0.0). It is still on the list.
- Crashes, performance and connection problems. Kept off the list as "ongoing"; 6.0.1 added PC hang detection, and 6.2.5 and 6.2.6 brought the upscaling and video-memory work done with Nixxes.
- Launch stability. The creative director's look-back of September 25, 2026 calls the Devoid of Liberty launch "too patchy" and says stability stays the priority between updates.
4.4Changes that did not go live as written
Patch notes describe what Arrowhead intended. Where the game differs, the game wins, and this manual's data follows the game.
- AR-59 Suppressor: 7.0.0's extra spares for short magazines did not apply (on the Known Issues list).
- Eagle Gas Airstrike: its demolition force is higher than intended (on the list); expect a correction.
- Exosuit cooldown: the 6.3.0 notes say 8 minutes, but the game data says 420 seconds, and the wiki records the notes as wrong.
- Hive Guard: after an accidental change to its legs and claws, the 6.2.3 hotfix restored the body, head and front-leg armor but left the claws softer than they were before 6.1.0, according to the wiki. The notes blame a "6.2.1" that was never released. Current values are on the Terminids tab.
- 1.002.201 reverted Liberator Concussive and Breaker magazine changes that slipped into 1.002.200 by mistake.
- 1.000.102 disclosed two changes that 1.000.100 had not mentioned: better off-angle penetration for the EAT-17 and Recoilless Rifle, and the removal of the Electronic Countermeasures modifier.
- 1.002.101 fixed a December 2024 bug that made hits below an enemy's armor deal 1 damage instead of none.
- Siege-Ready was meant to add ammunition to primaries only. Arrowhead kept the "bug" as a feature in 1.002.101, so every magazine weapon benefits, and fixed its rounding for the Veto pistol in 7.0.0.
- Hidden changes: Arrowhead admitted on May 8, 2026 that some updates carried weapon or enemy changes the notes did not mention; the wiki's change histories list them as "Undocumented Changes".
4.5Why older videos look different: bugs since fixed
If a video shows something the game no longer does, one of these is usually why.
| Bug | Seen | Fixed |
|---|---|---|
| Armor ratings did not reduce damage as intended | From launch | 1.000.100 (2024-03-06) |
| Only the host could apply damage-over-time effects | Until May 2024 | 1.000.302 (2024-05-07) |
| Most weapons shot below the crosshair when aiming down sights | May to September 2024 | 1.001.100 (2024-09-17); a new misalignment was fixed in 1.002.103 (2025-02-11) |
| Bile Titan heads sometimes took no damage | June to September 2024 | 1.001.100 (2024-09-17) |
| Automatons shot through walls and smoke | Until October 2024 | 1.001.104 (2024-10-15) |
| Charger corpses launched divers into the air; the social menu stuck on "Please Wait Democratically" | 2024 | 1.001.201 (2024-10-29) |
| Cross-platform friend requests not arriving | March to November 2024 | Off the list after November 26, 2024 |
| A beacon stuck to an enemy, but the strike landed where it was thrown | March 2024 to January 2025 | Off the list after January 27, 2025, but the same symptom has been back on it for red-beacon strikes since May 2026 (see Arrowhead's Known Issues list) |
| Enemies that bled out did not count for orders or Eradicate missions | April 2024 to March 2025 | Off the list after March 17, 2025 |
| Clients dealt less damage than the host | Until February 2026 | 6.0.1 (2026-02-03) |
| Divers who could not be reinforced on a poor connection | Until September 2026 | 7.1.0 (2026-09-22) |
Crashes, errors and bug reports
Match your symptom to Arrowhead's official fix below before you reinstall anything. If nothing works, check the Known Issues list, then file a ticket with a video, the steps that cause the problem and your in-game Account ID. Connection trouble in a squad has its own section on the multiplayer tab, and settings worth changing are under PC settings and controls.
5.1Official fixes for PC problems
Every fix below is Arrowhead's own, from its support site or its patch notes (read September 26, 2026); a linked symptom opens its support article.
| Symptom | Official fix |
|---|---|
| Black screen at start while the intro audio plays | In %appdata%\Arrowhead\Helldivers2\user_settings.config, flip adapter_index (1 to 0, or 0 to 1) |
| Error 0x44415441 | Out-of-date files, usually mods broken by an update: remove the mods, delete the game's data folder, then verify the files in Steam |
| Error 114 at launch | A GameGuard problem: run bin\helldivers2 as administrator (on Windows 11, also in Windows 8 compatibility mode); reinstall GameGuard with tools\gguninst, then GGSetup, both as administrator; close utility programs; add antivirus and firewall exceptions, Windows Defender included |
| A few files always "fail to validate" in Steam | Normal: they are authentication files. With 10 or more, update your drivers, reinstall, and clear the %appdata% folder (it resets your settings) |
| The game freezes for about 20 seconds, then closes | Hang detection (since 6.0.1) closes a hung game on purpose to write a crash dump: wait at least 40 seconds before restarting, and send the report |
| A Bluetooth headset sounds bad or the microphone misbehaves | Disable the headset's Hands-free Telephony service and the Bluetooth Audio Gateway service; set the headset's Game device as the default device and its Chat device as the default communications device |
| Upscaler artifacts or dynamic-resolution glitches | 6.2.6 improved upscaler image quality, fixed Intel XeSS crashes and turned dynamic resolution off by default; 6.2.5 had added DLSS 4.5, FSR 3.1.5 and 4.0.3, and XeSS 3.0 |
| Crash when alt-tabbing or opening a terminal in fullscreen | The list advised avoiding alt-tab in August 2026; the terminal crashes were fixed again in 7.1.1 |
| The game would not launch on Steam Deck or Linux (May and June 2026) | Force Steam's "Proton Hotfix" compatibility tool; the problem was resolved by mid-June |
| Anything else | Update all drivers, verify the files, clear %appdata%\Arrowhead, try toggling Async Compute, reinstall; then file a ticket |
The PC install has been about 23 GB since the slim build became the only build; the system requirements on Steam still list the old, larger size.
5.2Account and reward surprises
These look like bugs, but most are how the game or the platform works, and support already has a written answer for each.
| What you see | What is happening |
|---|---|
| Warbond items or Super Credits vanished after Steam Family Sharing ended | Borrowed DLC (a warbond, the Super Citizen items) is revoked when sharing stops; buy the warbond or the DLC to get it back |
| Negative Super Credits, or a balance "in the billions" | Refunding the Super Citizen Edition, or losing shared access, removes Steeled Veterans and the Super Credits claimed from it; the billions figure is a display bug. Buying or unlocking Steeled Veterans again restores the balance |
| A Campaign reward never arrived | Only divers who logged in during the Campaign window get it, and support will not grant it later. Some rewards come back: the Supply FRV goes on sale for Requisition in October 2026. See Rewards for taking part |
| "My account is banned" | Sony handles terms-of-service bans (the PlayStation Network suspensions page), not Arrowhead |
| Cosmetic mods | Not supported: Arrowhead says you mod the game at your own risk (Tech Blog #2). Updates break mods (error 0x44415441), and GameGuard runs on PC |
5.3How to report a bug
- Check the Known Issues listIf your bug is on the list, Arrowhead already knows about it.
- File a ticket with evidenceOpen a request with a video or screenshots, the steps that reproduce the bug and your in-game Account ID (what support asks for).
- Ask players, and give feedback where it is readPlayers help each other in the official Discord's #troubleshooting channel. Opinions on the game go to the weekly surveys (linked on Reddit and Discord) or to
/feedbackin the official Discord.
Patch history
Before you trust a guide, a video or a tier list, check its date. Anything older than September 17, 2024 describes a different armor system; anything older than October 23, 2025 is out of date for primaries and sidearms; anything older than June 16, 2026 (6.3.0) is out of date for vehicles, sentries, grenades and orbitals. The game is on 7.1.1 (1.007.101), released September 24, 2026.
By year, through 7.1.1: 46 public builds in 2024, 32 in 2025 and 18 in 2026, of which 19, 17 and 9 carried documented balance changes.
6.1What the newest patches changed for you
The newest patch when this tab was checked, 7.1.1, only fixes two PC crashes. The patch before it, 7.1.0, changed how squads play: enemy spawns are balanced per diver, and distant enemies despawn when a diver's area is over budget, so a squad that splits up gets fairer fights. 7.1.0 also made Evacuate High-Value Assets harder, stopped enemies from targeting empty vehicles, fixed divers who could not be reinforced, and cut the Orbital Precision Strike's cooldown to 80 seconds. Before that, Devoid of Liberty (7.0.0, August 12, 2026) raised the level cap to 300, doubled the emote wheel to 8 slots, made assisted reloads work when either diver carries the backpack, and gave several weapons' short magazines more spares. Every value change is in the timeline below, as the notes state it.
6.2How versions are named
Search for a patch by both of its names. The wiki and this manual's data use the game's build number, 1.00X.YYY. Arrowhead's Steam posts said "PATCH 01.00X.YYY" until 4.1.0, and since then read "update name: X.Y.Z". The two do not map mechanically: 4.1.0 is build 1.004.100, but 6.2.5 is 1.006.250. Four February 2024 builds carry two-digit endings (1.000.10 to 1.000.13) and sit between 1.000.009 and 1.000.100. Four builds have no Steam notes at all: the launch build, a launch-day PS5 update, 5.0.1 (announced on Discord) and 6.1.2 (a console patch). A few titles are simply wrong:
| Title as published | Where | The real build |
|---|---|---|
| "HOT FIX 01.001.001" | Steam, 2024-09-18 | 1.001.101 |
| "PATCH 01.002.203" | Steam, 2024-12-18 | 1.002.003 (the real 1.002.203 came on 2025-04-04) |
| "Patch 01.400.002" | Steam, 2025-09-16 | 1.004.002 |
| "PATCH 01.001.00" | Arrowhead's support site | 1.001.100 |
| "PATCH 01.003.100" | Arrowhead's support site | 1.003.101 |
| "Patch 1.003.102" | The wiki's page for 1.003.103 | 1.003.103 |
| "6.2.1" | Blamed in the 6.2.3 notes for the Hive Guard change | Never released |
6.3The six named updates
After launch, the builds fall into series, one per named update: Escalation of Freedom (August 6, 2024), Omens of Tyranny (December 13, 2024), Heart of Democracy (May 20, 2025), Into the Unjust (September 2, 2025), Machinery of Oppression (February 10, 2026) and Devoid of Liberty (August 12, 2026). Arrowhead's Steam posts carry the update's name only from 4.1.0 on; earlier posts are titled by build number (see how versions are named). The timelines below follow those series, newest first. Each entry gives the build's release date, its version (the Steam number with the build number beside it), what the notes added or fixed and, under Balance, the value changes they document; changes the notes left out are not included (see changes that did not go live as written). "Landmark" marks a build that makes older guides wrong. Dates follow the Steam posts; the wiki dates 1.003.201 a day later, and 5.0.1, which has no Steam post, is dated by Arrowhead's Discord notice.

6.4Devoid of Liberty: 7.0.0 to today
The update in force since August 12, 2026: the Void, the Wretch and the Crusher, SEAF squadmates as a planet modifier (now unavailable since September 21, 2026) and a level cap of 300. The game joined the PlayStation Plus catalog the same day (August 12, 2026), so expect new PS5 players in public lobbies. Two crash hotfixes followed, then 7.1.0 with the spawn balancing and the Ironclad Democracy warbond, then a last crash hotfix.
6.5Machinery of Oppression: 6.0.3 to 6.3.1
The Automatons' Cyborg Legion, the Illuminate Appropriators and Exostorms, the exosuit overhaul, the PC tech update with Nixxes, and Galactic War Campaigns with the Control Center. 6.3.0 is the last big balance pass before today's game.
6.6Into the Unjust: 1.004.000 to 6.0.1
Hive Worlds and their caves, the Rupture Strain, the Dragonroach and the Hive Lord; then 4.1.0's feel-better pass, which made light and medium penetration distinct; quieter suppressors and Commando missions; the slim PC build; and the TD-220 Bastion tank. Arrowhead titled these builds "Into the Unjust: X.Y.Z" from 4.1.0 through 6.0.1.
6.7Heart of Democracy: 1.003.000 to 1.003.303
Weapon customization (a week before the update itself), Mega City missions with SEAF squads, the stealth rework, and the Xbox launch with crossplay on all three platforms.
6.8Omens of Tyranny: 1.002.001 to 1.002.203
The Illuminate became the third enemy faction, with colony city missions and the FRV; early 2025 brought reworked mines and drones, matchmaking that prefers nearby regions, and the March primary-weapon buffs.
6.9Escalation of Freedom: 1.001.002 to 1.001.203
Difficulty 10 and new heavies arrived here, and the backlash to the update's balance changes produced the 60-day plan: 1.001.100's armor overhaul is the line between old and current guides.
6.10Launch year: 1.000.000 to 1.000.405
Server overload came first, with 12 builds in three weeks. Then the first balance passes: armor started working as intended (1.000.100), the level cap rose (1.000.200) and bug breaches lost heavies (1.000.400).